To avoid these ads, REGISTER NOW!

My 1975 Chevy Dually Build

OP
7

75Dually

Well-known member
Joined
Dec 5, 2013
Messages
444
Location
Lubbock, TX
I'm gone for three days, and you almost have the truck done. WOW When's the show?

See what you miss... The show starts this coming Saturday, but we are heading down there on Thursday this week to get setup and see friends.

I know for sure that I'll never match this thread, but you've been a great inspiration for my '78 Dually thread.

Great work, on a great truck!

Never say never! I'm sure that yours has to be more interesting then the big blue smurf! LOL!!

OK, we want a link.

OH yeah we want a link!!
 
To avoid these ads, REGISTER NOW!
OP
7

75Dually

Well-known member
Joined
Dec 5, 2013
Messages
444
Location
Lubbock, TX
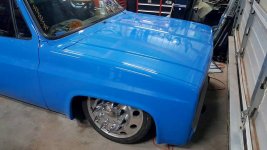
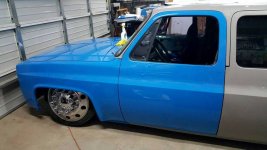
So more pics of the big super smurf! Got the front end done today, for the most part. Still have to do the lower front cross bar and the part under the cowl. Oh yeah speaking of the cowl... I still have to finish that too... Yeah!:lol:

At least I made some good progress today. Both front fenders, and the drivers door.

Only 3 more days before we haul down south.

Stay tuned!
 

Attachments

  • 16830910_1352338034826710_4878325464383702785_n.jpg
    16830910_1352338034826710_4878325464383702785_n.jpg
    48.9 KB · Views: 95
  • 16807218_1352338051493375_6890153392043620921_n.jpg
    16807218_1352338051493375_6890153392043620921_n.jpg
    35.8 KB · Views: 74
  • 16832102_1352338078160039_2784171224542118869_n.jpg
    16832102_1352338078160039_2784171224542118869_n.jpg
    44 KB · Views: 83
OP
7

75Dually

Well-known member
Joined
Dec 5, 2013
Messages
444
Location
Lubbock, TX
Well I'm bummed... Not going to be able to go to LST this year. The truck as you see was just about ready to roll except for some minor items to install. That show will be there next year and there are other shows I want to attend this year too. I hope all my friends have a blast there and are safe coming home.
 

Attachments

  • 16826172_1356084227785424_7174929802603925788_o.jpg
    16826172_1356084227785424_7174929802603925788_o.jpg
    72.3 KB · Views: 100

nine4gmc

Well-known member
Joined
Mar 24, 2012
Messages
14,357
Location
Dallas
How do you do the inner doors and door jams? Also things like the inner cowl area, inner fender areas that are visible through gaps etc?

Looks good, my first lowrider mini truck was a Nissan Hardbody, I shaved everything myself and had it painted GEO tracker blue(almost the same color as your truck). I got married in that truck, we went to a truck show for the honeymoon. My (ex)wife got a 1st place participation trophy and I got a 1st place best of show and our picture in a magazine. That was early 90's, those were the days...

LST is pretty awesome, only been once but it was a blast. Like you said, it'll be there next year so don't sweat it. Have you ever been to Scrapin the Coast? We used to go to Showfest in Greenville too but it started getting out of hand and by the last one, it was wild wild west ****.
 
OP
7

75Dually

Well-known member
Joined
Dec 5, 2013
Messages
444
Location
Lubbock, TX
How do you do the inner doors and door jams? Also things like the inner cowl area, inner fender areas that are visible through gaps etc?

Looks good, my first lowrider mini truck was a Nissan Hardbody, I shaved everything myself and had it painted GEO tracker blue(almost the same color as your truck). I got married in that truck, we went to a truck show for the honeymoon. My (ex)wife got a 1st place participation trophy and I got a 1st place best of show and our picture in a magazine. That was early 90's, those were the days...

LST is pretty awesome, only been once but it was a blast. Like you said, it'll be there next year so don't sweat it. Have you ever been to Scrapin the Coast? We used to go to Showfest in Greenville too but it started getting out of hand and by the last one, it was wild wild west ****.

The jambs are no fun, but you simply cut out the shape, or shapes, and work it like the rest of the vehicle. You just have to be very patient with this portion of the wrap.

Yeah this was the first year we missed in the past 5 years at LST, so it was a big deal, but that's the breaks life goes on...
 
OP
7

75Dually

Well-known member
Joined
Dec 5, 2013
Messages
444
Location
Lubbock, TX
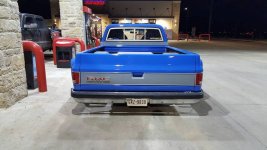
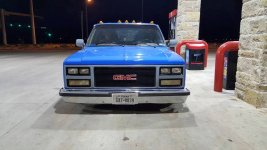
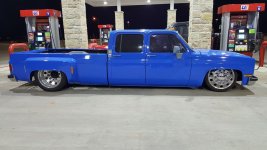
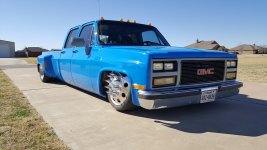
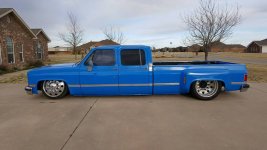
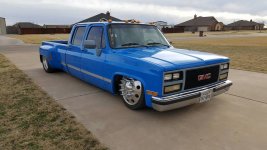
No LST for me, but I did get it put back together tonight then the wife and I went to the store and I had to take the gas station shot while we were out
 

Attachments

  • 16939513_1357165707677276_1564963676087313688_n.jpg
    16939513_1357165707677276_1564963676087313688_n.jpg
    49.5 KB · Views: 131
  • 16865220_1357165741010606_8487131231035531351_n.jpg
    16865220_1357165741010606_8487131231035531351_n.jpg
    47.2 KB · Views: 137
  • 16865008_1357165647677282_4610593758854491453_n.jpg
    16865008_1357165647677282_4610593758854491453_n.jpg
    45.8 KB · Views: 158
  • 16864968_1357165681010612_9166093082736047327_n.jpg
    16864968_1357165681010612_9166093082736047327_n.jpg
    50.8 KB · Views: 153
OP
7

75Dually

Well-known member
Joined
Dec 5, 2013
Messages
444
Location
Lubbock, TX
Very nice!

How did the seams with the knifeless tape work out for you?

You know what they were some of the best parts. They are hard to notice unless you have them pointed out to you. Not perfect but one heck of an easy tool to use. You really need to get some samples and try this stuff out.

That turned out great !!!

Thank you sir! I really dig it. Wait until you see what I got done today. Pics tomorrow...


Thanks man!
 
OP
7

75Dually

Well-known member
Joined
Dec 5, 2013
Messages
444
Location
Lubbock, TX
Took the truck out front today and washed all that Lubbock dust off it. I did this so I could apply the vinyl spray that Vvivid vinyl recommends you apply after installation. I also had another reason...

I did the factory chrome trim around the entire truck. I think it came out nice, but it got dark before I could take it out and snap any pics.

Tomorrow I will take some pics and post them. Some are going to like and some not. I felt the truck was a bit to mono chromatic for my tastes, even with the accent color. But I will let you be the judge.
 

Attachments

  • Dually 55.jpg
    Dually 55.jpg
    62 KB · Views: 105
  • Dually 56.jpg
    Dually 56.jpg
    127.8 KB · Views: 106

shedfullatools

Well-known member
Joined
Apr 10, 2016
Messages
834
Location
Nova Scotia
Ill admit it I've never been one for lowering trucks. But Ill be damned if yours isnt one of the finest exceptions I've ever come across :bowdown: That beast is such subtly pure badassery :rocker:
 
OP
7

75Dually

Well-known member
Joined
Dec 5, 2013
Messages
444
Location
Lubbock, TX
So here is tonight's update. I got the factory trim put on yesterday. Some will like it, some not, but such is the internet today. Oh well I dig it and that's what counts! I like the way it breaks up the slabbed sided nature of a square body.

Now onto the interior and the bed, but I'm taken some days off...

Stay tuned!
 

Attachments

  • Dually 57.jpg
    Dually 57.jpg
    42.6 KB · Views: 114
  • Dually 58.jpg
    Dually 58.jpg
    49.3 KB · Views: 99
To avoid these ads, REGISTER NOW!

musgofasta

Well-known member
Joined
Aug 28, 2006
Messages
802
Location
Corona CA
It looks awesome !

Forgive my ignorance - do you wash/dry vinyl like a normal paint job?

Do you want wash and wax it like normal paint?
 

Yarz

Well-known member
Joined
Sep 11, 2013
Messages
121
Location
Tarentum PA
Definitely looks better with it! It adds just the right amount of accent to break up the blue.
 
OP
7

75Dually

Well-known member
Joined
Dec 5, 2013
Messages
444
Location
Lubbock, TX
Fantastic build. Thanks for posting all the detail.

Yes sir! I enjoy sharing the detail work because it helps others do their builds, and in turn when I run into an issue they have helped me work it out. There is a lot of talent around and they just need a positive arena to bring out their skills.
 
OP
7

75Dually

Well-known member
Joined
Dec 5, 2013
Messages
444
Location
Lubbock, TX
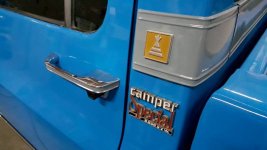
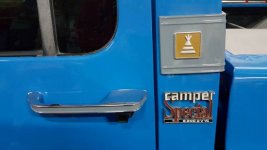
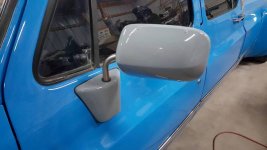
I thought I would share some of the accent details. The color is Nardo grey from Vvivid vinyl, the same company that made the blue that I purchased. I think it works really well with the overall scheme. Basically I like it...

Still no where done with this truck. I have the interior to complete and I need to finish the bed sheet metal.
 

Attachments

  • 17103620_1363157777078069_249577044135902729_n.jpg
    17103620_1363157777078069_249577044135902729_n.jpg
    19.1 KB · Views: 96
  • 17021771_1363157903744723_7953663150595366635_n.jpg
    17021771_1363157903744723_7953663150595366635_n.jpg
    35.2 KB · Views: 106
  • 17098205_1363157843744729_1134788805826296903_n.jpg
    17098205_1363157843744729_1134788805826296903_n.jpg
    41.3 KB · Views: 108
  • 16864305_1363157803744733_5151650189569513685_n.jpg
    16864305_1363157803744733_5151650189569513685_n.jpg
    29.2 KB · Views: 103
  • 16938972_1363157753744738_5776726415082816454_n.jpg
    16938972_1363157753744738_5776726415082816454_n.jpg
    34.4 KB · Views: 103
OP
7

75Dually

Well-known member
Joined
Dec 5, 2013
Messages
444
Location
Lubbock, TX
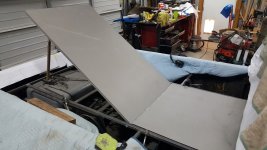
So we move on to phase 2 of the bed. I cut down the center section to allow if I want the sleeper attached for the center section to lift fully. I then started on the new side pieces which has an integrated wheel tub. I will make a hatch on the unfinished end to access the air ride valve and ECU. I still need to make an end plate for the wheel tub, but that's tomorrows job.

I like that these are going to be a one piece design. I did not want to weld in the wheel tubs. I want as little seams as possible. Less to seal up in the end.

Oh well at least I got a good start today.

Stay tuned! :thumbup:
 

Attachments

  • Bed 49.jpg
    Bed 49.jpg
    128.9 KB · Views: 88
  • Bed 50.jpg
    Bed 50.jpg
    59.6 KB · Views: 91
  • Bed 51.jpg
    Bed 51.jpg
    105.1 KB · Views: 86
  • Bed 52.jpg
    Bed 52.jpg
    114.4 KB · Views: 88
OP
7

75Dually

Well-known member
Joined
Dec 5, 2013
Messages
444
Location
Lubbock, TX
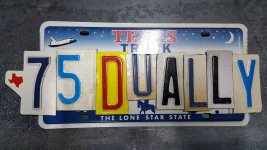
I knew I saved all those old rusty license plates for a good reason! A little art work before the serious work begins today.
 

Attachments

  • Plate.jpg
    Plate.jpg
    88.9 KB · Views: 27
OP
7

75Dually

Well-known member
Joined
Dec 5, 2013
Messages
444
Location
Lubbock, TX
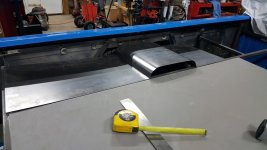
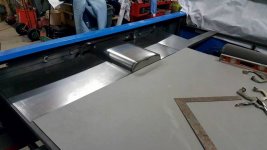
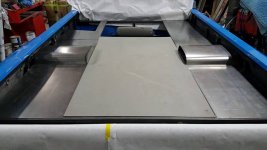
So on to the serious work. I helped my neighbor shoot some paint today, but before I went and helped him I got some work done on the Dually. I mainly got some additional support bars welded in and then worked on the end plate for the wheel tub. If you notice the piece that I warped when joining the wheel tub to the rest of the sheet metal, that is going away and I going to tear that out and redo that whole panel. 2 Steps forward and 1 step back! :lol:

Not really that much, some days you have take little steps, and take what you get...

Stay tuned...
 

Attachments

  • Bed 56.jpg
    Bed 56.jpg
    39.7 KB · Views: 48
  • Bed 55.jpg
    Bed 55.jpg
    26.1 KB · Views: 47
  • Bed 54.jpg
    Bed 54.jpg
    37.2 KB · Views: 47
  • Bed 53.jpg
    Bed 53.jpg
    44.7 KB · Views: 54
OP
7

75Dually

Well-known member
Joined
Dec 5, 2013
Messages
444
Location
Lubbock, TX
Something amazing happened last night. A very nice young man I sold some parts to earlier in the year sent me a message last night and asked if I knew anyone who had a dually rear end. YES I DO! Just so happens I still had the old rear end out of my truck, and had mounted it under the donor suburban. So the old rusty donor truck was dragged out of it home today and off it went to service another project. Talk about recycling!

Plus there will be another dually hot rod running around town soon.

Life is good some days... I got rid of something I was going to have to haul off, and it made another person very happy to have the parts he was looking for. Can't beat that! :beer:
 

Attachments

  • Donor Suburban gone today 1.jpg
    Donor Suburban gone today 1.jpg
    76.5 KB · Views: 105
OP
7

75Dually

Well-known member
Joined
Dec 5, 2013
Messages
444
Location
Lubbock, TX
More bed work tonight. I got the passenger side roughed out. Still needs some work on the form, but it is really close, and the best part it is all one piece! Kind of like holding a slinky moving it around the shop!

Tomorrow night I will work on the end cap. I also have to make a new mount for the Accuair ECU. I want it all moved back to where I can service it and work on it in one particular area. Most folks place there air ride stuff where it looks good, or where it is convenient, which can be OK, but I know eventually you have to work on all this stuff so I wanted mine placed with that in mind first.

With that being said the bed is coming along fairly well. I still need to figure out the door to the air ride stuff. but that will have to be tomorrows problem.

Stay tuned!;)
 

Attachments

  • Bed 57.jpg
    Bed 57.jpg
    38.8 KB · Views: 47
  • Bed 58.jpg
    Bed 58.jpg
    34.3 KB · Views: 44
OP
7

75Dually

Well-known member
Joined
Dec 5, 2013
Messages
444
Location
Lubbock, TX
Just a quick update. Yes I have been working on the bed some, but today I finished up replacing the York 210. Yes I killed the first one... How?!?! Helps if you don't run them out of oil, it does not help the bearings very much... So out with the old and in with the new!:thumbup: :lol_hitti

I also relocated the Accuair ECU and the balance of the wiring harness back to the bed area near the airbaggit valve. I want everything in one place so it can be worked on easily. Drilled some holes and tapped them for screws to hold down the ECU. Then I spent some time cleaning up the harnesses and wiring tying them neatly up and securing them to the bed frame work.

I am thinking about adding a electric air pump as a backup to the York just in case... Not sure when this will happen, but maybe late in the summer or fall. Any thoughts or suggestions you might have would be appreciated.

Stay tuned!
 
OP
7

75Dually

Well-known member
Joined
Dec 5, 2013
Messages
444
Location
Lubbock, TX
More sheet metal bed shots... Yeah I know it's like watching paint dry, but there you have it!

I worked on the back panels tonight. I got 2 of them mocked up. Either tomorrow or Thursday night I will get the passenger side done. Lots of bending and cutting to get them to lay just right. At least they clear the gas filler tube and assembly.

Stay tuned!;)
 

Attachments

  • Bed 59.jpg
    Bed 59.jpg
    54.9 KB · Views: 46
OP
7

75Dually

Well-known member
Joined
Dec 5, 2013
Messages
444
Location
Lubbock, TX
So I got the rear portions completed tonight and got two of them welded together. Please don't mind the wrap on the back side of the tailgate, I never got to go back over it waiting for the bed to be finished before I took that final step.

As you can see in the corner of the pic there is the filler piece for the passenger side wheel tub. I duplicated the drivers side. Hopefully tomorrow I will be able to find some time to throw it on the bench and get it welded up.

Stay tuned! ;)
 

Attachments

  • Bed 60.jpg
    Bed 60.jpg
    47.1 KB · Views: 43
To avoid these ads, REGISTER NOW!
Top Bottom