To avoid these ads, REGISTER NOW!

20" Rockwell Bandsaw Restoration

Cahark

Well-known member
Joined
Sep 28, 2016
Messages
340
Location
Dayton,Oh
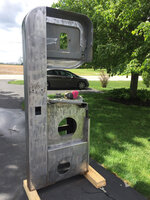
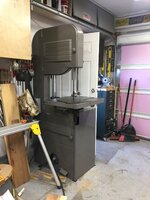
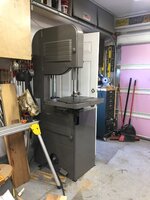
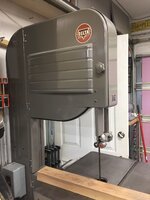
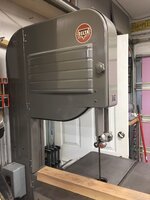
Earlier this week I spotted a delta Rockwell variable speed 20" bandsaw on Craigslist. They were asking $700. It looked to be in relatively decent shape, but the motor and variable speed drive had been removed and was sitting in a pile. After I got done dragging my feet I decided that I may be interested in it after all, but to my surprise it had sold.

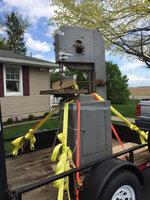
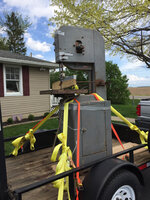
Out of frustration I was speaking with a friend about how maybe I should have bought the machine. A few mins later, he scanned the Facebook market place and found yet another 20" Rockwell. This one was unfortunately not a variable speed, missing a few minor parts, and was not as clean, but the cost was considerably less than the previous saw at 250!!!

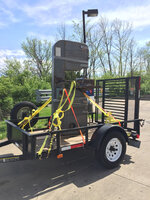
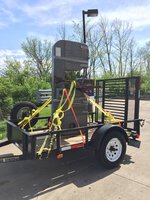
My friend and I jumped in the truck and bought the saw immediately. It was considerably heavier than we expected, but even still the process went somewhat smoothly. The man who sold it to me explained that the saw came out of a paper company that he retired from and it was used to cut paper its whole life. He was a very nice man and threw in 4 blades about 3/4 wide.

We got the saw home this evening, but I need to wait until Monday for a few buddies to give me a hand getting it safely off the trailer. I threw a tarp on it and its ready to go.

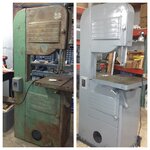
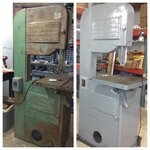
At the moment, my plans are to completely paint the entire saw, replace all bearings, repair or replace all broken parts, and convert the saw to a variable speed.

I have not decided yet how I will go through with the variable speed. I cut a lot of metal and wood so the option is a necessity. My options as I see them are step pulleys, or a VFD. If I choose to go with the vfd, this will be a new adventure for me. I have never messed with them at all.

Anyways, here's to another successful restoration.
3301f35e71dabd0088abaa68aeed227d.jpg
7e5b27f774a1c78e38e8b3108f230fa6.jpg
5586530389ca84d4aeb224df3708cc34.jpg
5d0a89f26e4f3925cb31436c6916f1ba.jpg


Sent from my iPhone using Tapatalk
 

Attachments

  • 5d0a89f26e4f3925cb31436c6916f1ba.jpg
    5d0a89f26e4f3925cb31436c6916f1ba.jpg
    688.6 KB · Views: 1
  • 5586530389ca84d4aeb224df3708cc34.jpg
    5586530389ca84d4aeb224df3708cc34.jpg
    996.5 KB · Views: 1
  • 7e5b27f774a1c78e38e8b3108f230fa6.jpg
    7e5b27f774a1c78e38e8b3108f230fa6.jpg
    1,011.9 KB · Views: 3
  • 3301f35e71dabd0088abaa68aeed227d.jpg
    3301f35e71dabd0088abaa68aeed227d.jpg
    1,012.8 KB · Views: 12
To avoid these ads, REGISTER NOW!

OccupantRJ

Well-known member
Joined
May 15, 2009
Messages
11,190
Location
Eastern North Carolina
Excellent! I have two of those saws, one a single speed wood saw, and one with the variable speed hi -lo gearbox. I saw you got the foot brake on that one too. Here is a pic of mine in process of restoration. The original 3 phase 2 hp motor in one of mine included an air pump mounted to the end of the motor shaft to supply air to keep the cut line clean.
 

Attachments

  • IMG_0466.jpg
    IMG_0466.jpg
    140.9 KB · Views: 134

nine4gmc

Well-known member
Joined
Mar 24, 2012
Messages
14,357
Location
Dallas
I literally just finished a rattle can resto on one of mine. I went with the VFD on this one, with the 1140 rpm motor, it should get down to about 2k sfpm but not slow enough for thick metal. There was a huge discussion in my projects thread about a year ago when I got mine about the choices of slowing it down. The VFD will not work alone if you do thick metal.

980821e5a116fe5b597e855a4114b9e2.jpg
 
OP
C

Cahark

Well-known member
Joined
Sep 28, 2016
Messages
340
Location
Dayton,Oh
I literally just finished a rattle can resto on one of mine. I went with the VFD on this one, with the 1140 rpm motor, it should get down to about 2k sfpm but not slow enough for thick metal. There was a huge discussion in my projects thread about a year ago when I got mine about the choices of slowing it down. The VFD will not work alone if you do thick metal.

980821e5a116fe5b597e855a4114b9e2.jpg


I will check out your thread. I'm almost thinking a combination of the two. VFD and Step pulley.
Thanks for letting me know, I love looking through your projects. The only problem I see, is that we have the same tastes, and you keep buying up the goodies!


Sent from my iPhone using Tapatalk
 

Attachments

  • 980821e5a116fe5b597e855a4114b9e2.jpg
    980821e5a116fe5b597e855a4114b9e2.jpg
    50.4 KB · Views: 10
OP
C

Cahark

Well-known member
Joined
Sep 28, 2016
Messages
340
Location
Dayton,Oh
Excellent! I have two of those saws, one a single speed wood saw, and one with the variable speed hi -lo gearbox. I saw you got the foot brake on that one too. Here is a pic of mine in process of restoration. The original 3 phase 2 hp motor in one of mine included an air pump mounted to the end of the motor shaft to supply air to keep the cut line clean.


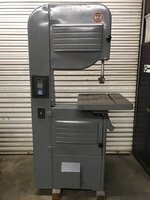
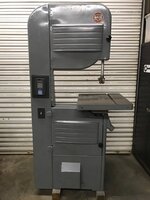
Those both look like great saws. Am I correct in my observation of what looks to be a Reeves drive on your variable speed?


Sent from my iPhone using Tapatalk
 

OccupantRJ

Well-known member
Joined
May 15, 2009
Messages
11,190
Location
Eastern North Carolina
Go with step pulleys AND a vfd. This will get you what you need speed and power wise. A TECO one horsepower vfd can be had for $125, and used 3 phase motors are relatively inexpensive.
 

OccupantRJ

Well-known member
Joined
May 15, 2009
Messages
11,190
Location
Eastern North Carolina
Those both look like great saws. Am I correct in my observation of what looks to be a Reeves drive on your variable speed?


Sent from my iPhone using Tapatalk

Yes, Reeves drive, along with a two speed gear box. Speeds from 50 to 4500 feet per minute. I can get more pics for you.
 
OP
C

Cahark

Well-known member
Joined
Sep 28, 2016
Messages
340
Location
Dayton,Oh
Yes, Reeves drive, along with a two speed gear box. Speeds from 50 to 4500 feet per minute. I can get more pics for you.


Wow! Now that's some range. I work in a machine shop with top of the line equipment. I want to make sure I do this right, so it can live up to what I'm used to.


Sent from my iPhone using Tapatalk
 

OccupantRJ

Well-known member
Joined
May 15, 2009
Messages
11,190
Location
Eastern North Carolina
On my first one, I got it at a school auction for $30. It had no drive system. I used a right angle reduction motor/gear box and number 50'roller chain to drive the saw at 200 feet per minute constant. I still have the mounting bracket and drive motor system stored after I converted the saw to direct drive after acquiring the second one. I have another old school DeWalt 20" that runs 4300 fpm.
 
Last edited:
OP
C

Cahark

Well-known member
Joined
Sep 28, 2016
Messages
340
Location
Dayton,Oh
I would love to find a deal like. 30 bucks is a steal


Sent from my iPhone using Tapatalk
 
OP
C

Cahark

Well-known member
Joined
Sep 28, 2016
Messages
340
Location
Dayton,Oh
813f8d45dc24d4433314c9ec63ab1657.jpg


Sent from my iPhone using Tapatalk
 

Attachments

  • 813f8d45dc24d4433314c9ec63ab1657.jpg
    813f8d45dc24d4433314c9ec63ab1657.jpg
    345.9 KB · Views: 15

slodat

ALLIANCE MEMBER
Joined
Feb 6, 2010
Messages
3,682
Location
Central-ish, WA
I paid $350 for mine. It was all there, a little rough. Once it was painted and all new bearings I fought the motor that came with it for a while. Finally ended up scrapping the motor and bought a new Leeson 2hp. I only use it for wood. I'm very happy with the saw. It sits on Grizzly's large mobile base.

4773f5538736bc4927fb988d6fdf3d71.jpg

e14c257e9b137a836051be70eaec7eee.jpg

47bf25823d895f88367d3a7c9c2c2ffc.jpg
 

Attachments

  • 4773f5538736bc4927fb988d6fdf3d71.jpg
    4773f5538736bc4927fb988d6fdf3d71.jpg
    864.3 KB · Views: 6
  • e14c257e9b137a836051be70eaec7eee.jpg
    e14c257e9b137a836051be70eaec7eee.jpg
    600.5 KB · Views: 5
  • 47bf25823d895f88367d3a7c9c2c2ffc.jpg
    47bf25823d895f88367d3a7c9c2c2ffc.jpg
    543.3 KB · Views: 5

toolmiser

Well-known member
Joined
Sep 1, 2009
Messages
1,657
Location
La Crosse, WI
I also have one like that. Mine came with non original 1 1/2hp 3 phase motor. I found a 3 hp single phase on craig's list. It will really cut, I have never used it a lot, but when I need it, it always steps up to the plate.
 
OP
C

Cahark

Well-known member
Joined
Sep 28, 2016
Messages
340
Location
Dayton,Oh
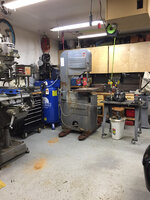
It took every bit of four guys to get it down the ramp of the trailer today, but we made it. We were able to type it up on my pallet jack for the moment so I'm able to move it around the garage and start on the restoration.

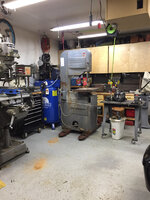
I did not get it in its permanent location yet however I did find the perfect spot behind the side door to the garage.

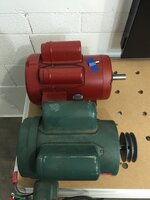
The owner of the saw originally told me that it was a 110 motor. At that point I thought it was a replacement motor and checked it out. Much to my surprise the motor said Rockwell on it so I knew it was original equipment. This seemed to surprise me though. I didn't know of Rockwell making a motor so large in a 110 V configuration. When we got the machine home I realized that it was a three phase motor. I have a phase converter so it's not that big of a deal however I did hope that it was a single phase 220v. I have a disc sander project coming up and I was hoping to use it for that.

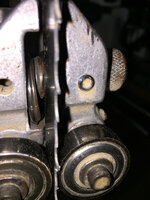
I was also able to get a good look at the guides today. The bearing behind the blade had been split in two from the thrust of the blade. I've never seen guide bearings in this bad of condition. Luckily none of the equipment itself was destroyed, I will just need replacement bearings as expected.

dfd4ec3f530f5bef222dcefc0e760460.jpg

I also looked up the serial number on this machine. It turns out that it's a 1956. That makes this bandsaw six years older than my father. That's pretty cool. I really enjoy owning equipment that was built during a time when people still had pride.

As for tonight, I'm finished. I'm hoping I can get the table surface ground sometime within the next week or so.

b3ebed14ba42c08e5a8a83eb7d5dd0cc.jpg
02807cabb882db396dcca68e0608c3af.jpg
627c896c58c3266e36a4f719a47a9a6e.jpg


Sent from my iPhone using Tapatalk
 

Attachments

  • 02807cabb882db396dcca68e0608c3af.jpg
    02807cabb882db396dcca68e0608c3af.jpg
    1.1 MB · Views: 5
  • dfd4ec3f530f5bef222dcefc0e760460.jpg
    dfd4ec3f530f5bef222dcefc0e760460.jpg
    761.3 KB · Views: 2
  • 627c896c58c3266e36a4f719a47a9a6e.jpg
    627c896c58c3266e36a4f719a47a9a6e.jpg
    816.1 KB · Views: 1
  • b3ebed14ba42c08e5a8a83eb7d5dd0cc.jpg
    b3ebed14ba42c08e5a8a83eb7d5dd0cc.jpg
    705.4 KB · Views: 2
OP
C

Cahark

Well-known member
Joined
Sep 28, 2016
Messages
340
Location
Dayton,Oh
I bought the exact original bearings for mine from a company on Amazon for about $40


I will keep that in mind. We have a very good bearing distributor here in Dayton that I've been using for a few years. They almost always have Nachi bearings in stock for almost everything I need.

BDI in moraine ohio kick some serious ****!


Sent from my iPhone using Tapatalk
 
OP
C

Cahark

Well-known member
Joined
Sep 28, 2016
Messages
340
Location
Dayton,Oh
I paid $350 for mine. It was all there, a little rough. Once it was painted and all new bearings I fought the motor that came with it for a while. Finally ended up scrapping the motor and bought a new Leeson 2hp. I only use it for wood. I'm very happy with the saw. It sits on Grizzly's large mobile base.

4773f5538736bc4927fb988d6fdf3d71.jpg

e14c257e9b137a836051be70eaec7eee.jpg

47bf25823d895f88367d3a7c9c2c2ffc.jpg


I may look into the same mobile base. I don't always need to move the saw, but it sure is convenient being able to clean behind it and rearrange whenever I want to. There's also the possibility of making one out of some angle iron. I will have to think that one over.


Sent from my iPhone using Tapatalk
 

Attachments

  • 47bf25823d895f88367d3a7c9c2c2ffc.jpg
    47bf25823d895f88367d3a7c9c2c2ffc.jpg
    92.4 KB · Views: 3
  • e14c257e9b137a836051be70eaec7eee.jpg
    e14c257e9b137a836051be70eaec7eee.jpg
    108.2 KB · Views: 4
  • 4773f5538736bc4927fb988d6fdf3d71.jpg
    4773f5538736bc4927fb988d6fdf3d71.jpg
    163.8 KB · Views: 4

slodat

ALLIANCE MEMBER
Joined
Feb 6, 2010
Messages
3,682
Location
Central-ish, WA
I may look into the same mobile base. I don't always need to move the saw, but it sure is convenient being able to clean behind it and rearrange whenever I want to. There's also the possibility of making one out of some angle iron. I will have to think that one over.


I have a few of these Grizzly bases. I like them well enough.
 
OP
C

Cahark

Well-known member
Joined
Sep 28, 2016
Messages
340
Location
Dayton,Oh
I also have one like that. Mine came with non original 1 1/2hp 3 phase motor. I found a 3 hp single phase on craig's list. It will really cut, I have never used it a lot, but when I need it, it always steps up to the plate.


Truthfully I didn't need one this big either, but I have a soft spot for neglected abused tools. I just want to give them all a nice clean home to live in with good owner to take care of them......sounds like my wife with pets lol


Sent from my iPhone using Tapatalk
 
To avoid these ads, REGISTER NOW!

OccupantRJ

Well-known member
Joined
May 15, 2009
Messages
11,190
Location
Eastern North Carolina
You mentioned having the table surface ground. You may be surprised what a random orbit sander will do for it. That is what I surface tables with, and they turn out great.
 
OP
C

Cahark

Well-known member
Joined
Sep 28, 2016
Messages
340
Location
Dayton,Oh
You mentioned having the table surface ground. You may be surprised what a random orbit sander will do for it. That is what I surface tables with, and they turn out great.


I have used that exact method in the past. It may work well. I'll probably try that first, then move on to grinding.


Sent from my iPhone using Tapatalk
 
OP
C

Cahark

Well-known member
Joined
Sep 28, 2016
Messages
340
Location
Dayton,Oh
Good evening All,

It's been a pretty busy 2 weeks, so the time that I have put into the machine has been limited, but luckily I have been able to get started on a few things

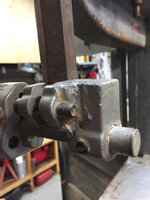
First, I started disassembly of the machine. This went fairly smooth, however I did find a few problems of the past that seemed to be repaired relatively well. One of which was the upper guide. Someone cranked on the bolt that attached the guide to the height adjustment rail, and ended up cracking it. The weld seems to be ugly, but looks like it will hold.
24444b3172b2790b1c9c09e05375491c.jpg
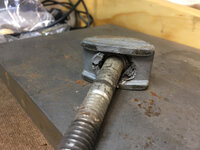
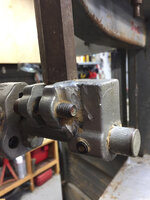
The next problem that i found was in the angle adjustment for the table. Through the years, someone too strong for their own good was allowed to run this machine. Unfortunately this pulled the head of the bolt through the pot metal clamp. At this point I'm planning to machine a couple new ones out of some steel as a replacement.
c70ba9ad980a5c247b3bc9ad6c1448c4.jpg
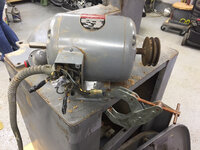
The next problem that I found involved the motor. I removed the motor and set it on the empty base of the machine. At this point I C clamped it solidly so it would not move when I tried to test the motor. I proceeded to wire up a temporary plug so I could test run the motor off of my phase converter. As I went to start everything up, I decided that it would be a good idea to use my noncontact voltage detector to make sure that there was no issues in wiring. As I moved it closer to the frame of the machine, the meter beeped loudly indicating that the entire frame of the machine was electrified. I quickly disconnected power and started to look into the motor.
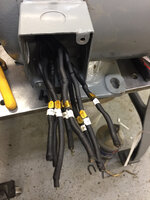
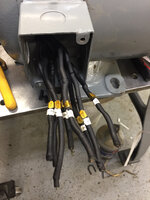
As I opened the wire box my problem greeted me. Nearly all of the wire connections were cloth covered and cracking extensively. I assume that they were coming in contact with the frame of the motor or the side of the electrical box.
da4f05a71e8b2b71dbebfd181f83b3d4.jpg
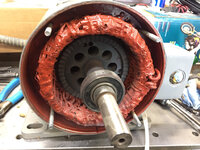
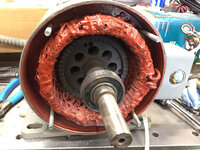
At this point I decided that it would probably be a good idea to take the motor apart and look for possible issues. Upon further inspection I started to realize that this motor of been rebuilt somewhat recently by a professional outfit. I am no motor expert, but it looks like the windings have been dipped in some sort of coating and the bearings have been replaced. Also, The outside of the motor had been quickly painted. All of these details are very hard to see because the motor was absolutely packed with paper dust. As I mentioned in the past post this so I was only used to cut paper at a large Papermill.
2db62851d21a68c0852cbb85b8cdfca9.jpg
21184b111f91e7e2f8998d4219ad2aed.jpg
At this point I put everything back together and started to re label and re-insulate the motor leads. I took off the brass numbers carefully so they could be reused. I then used heat shrink tubing over the original insulation to hopefully protect the wiring and me. After I got done I reinstalled the brass clips. now the motor looks good as new.
c9557f319e5b80afdf84666ce72ed710.jpg
I forgot to mention earlier that I was able to find some time through the week to start stripping the machine of its original paint. I was able to spend about an hour and got the overall frame about half done. I should be able to find some more time this week to finish the job.
107806fe1ef653cb01424bab2da0b962.jpg
Another quick update, after thinking about changing the saw to variable speed model, I have determined that I am going to leave that option out of the equation for now. I'm just going to go ahead with a restoration and leave the speed as is. I have another band saw that can be used as a vertical if need be and I really don't feel that it's necessary at the moment to have a variable speed option.

I was also pleased to find that many of the bearings have been replaced fairly recently and this machine. Upon further inspection they seem to have minimal wear and almost zero noise in the major bearings. This will cut down my cost considerablly
135aaa8cc23da4016bd2bf31c7bfbbb3.jpg


Sent from my iPhone using Tapatalk
 

Attachments

  • 135aaa8cc23da4016bd2bf31c7bfbbb3.jpg
    135aaa8cc23da4016bd2bf31c7bfbbb3.jpg
    704.9 KB · Views: 5
  • 107806fe1ef653cb01424bab2da0b962.jpg
    107806fe1ef653cb01424bab2da0b962.jpg
    778.7 KB · Views: 2
  • c9557f319e5b80afdf84666ce72ed710.jpg
    c9557f319e5b80afdf84666ce72ed710.jpg
    676.1 KB · Views: 3
  • 21184b111f91e7e2f8998d4219ad2aed.jpg
    21184b111f91e7e2f8998d4219ad2aed.jpg
    881.7 KB · Views: 2
  • 2db62851d21a68c0852cbb85b8cdfca9.jpg
    2db62851d21a68c0852cbb85b8cdfca9.jpg
    872.6 KB · Views: 2
  • da4f05a71e8b2b71dbebfd181f83b3d4.jpg
    da4f05a71e8b2b71dbebfd181f83b3d4.jpg
    775.7 KB · Views: 3
  • c70ba9ad980a5c247b3bc9ad6c1448c4.jpg
    c70ba9ad980a5c247b3bc9ad6c1448c4.jpg
    715.9 KB · Views: 2
  • 24444b3172b2790b1c9c09e05375491c.jpg
    24444b3172b2790b1c9c09e05375491c.jpg
    695.5 KB · Views: 6
OP
C

Cahark

Well-known member
Joined
Sep 28, 2016
Messages
340
Location
Dayton,Oh
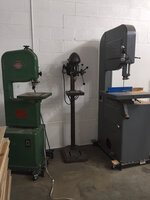
I figured it would be a good time for a quick little update. It's been raining here most of the last week. I like to do my grinding outside so the wind takes most of the dirt and debris away, and keeps my garage clean simultaneously. It finally cleared up a little bit today and my new stripping wheels came in. They have been making quick work of stripping rest of the machine. I'm pretty much down to the nooks and crannies and the individual pieces that came out of the cabinet.

b84fe13039dc96bb7453df0f25cc344b.jpg


Sent from my iPhone using Tapatalk
 

Attachments

  • b84fe13039dc96bb7453df0f25cc344b.jpg
    b84fe13039dc96bb7453df0f25cc344b.jpg
    910.7 KB · Views: 4

Locker537

Well-known member
Joined
Sep 25, 2016
Messages
488
Location
Massachusetts
Very cool thread.

Does anyone have a good Delta bandsaw resource guide? I've been reading old manuals on vintage machinery to try and get up to speed.
 

Locker537

Well-known member
Joined
Sep 25, 2016
Messages
488
Location
Massachusetts
Bob Vaughn on OWWM.org is about as good as it gets. Post your questions there.

Thanks for the reference! I'll have to check it out!

To start, does anyone have a good guide to proper setup? Simple stuff - getting the blade running true with proper tension, adjusting the guides, etc?

I should start a thread if we don't have one.
 
OP
C

Cahark

Well-known member
Joined
Sep 28, 2016
Messages
340
Location
Dayton,Oh
Nice. Which type of stripper discs are you using?


Wow, I can't believe I missed this. Didn't mean to put you off.

I'm using the 3M rust and paint remover stripping disks. They are 4 1/2 inches and fit on my angle grinder quite well. I went through about two discs to strip the entire thing. The small parts I sandblasted.


Sent from my iPhone using Tapatalk
 
OP
C

Cahark

Well-known member
Joined
Sep 28, 2016
Messages
340
Location
Dayton,Oh
I have truly been slacking on this build. With summer around I have plenty of other projects outdoors and indoors combined. I have however been making a little bit of progress as the days go on.

First off, I was able to get all of the painting done on the saw. Luckily with some nice weather I was able to do this outside. A paint booth will be on the list for my big shop someday
65c0d4ce255432b6e25d37b40a57bc19.jpg
5cd9e9a0f3df4dec12a4f128481523e6.jpg
0713d16202f6679abe788899db1e2857.jpg
I went with ford gray. It turned out to be darker than I had really hoped for, but at this point I'm going to deal with it.

Next up was repairing all of the neglect and abuse. Some of the hand wheels were missing on the shafts. As a result, a bunch of idiots decided to use vice grips on them for probably a period of 20 years. This left mangled shafts that needed a lot of repair. On most of them, I put them in the lathe and turned off the neglect. I'm planning to make some custom hand wheels in the next few days. I also cleaned up all of the round fittings in the lathe.
e7e350365bab18c5cd53ee4dfeb672d6.jpg
f8d18d71793273f0d8cb162ac46660b9.jpg
I also found the drive pulley on the motor to have an excessive amount of wear and run out. I decided to set it up in the lathe also and remachine all of the surfaces so they had a total indicator reading of about .001"
Afterwards I sprayed on a quick coat of gray paint so it wouldn't rust.
53bbcf5f793f5601f6caecf1b8fbd2a2.jpg
23f1203c610a6961bdb796ea8415463e.jpg
When I was going through the top wheel, I found there to be a missing jam nut on the back of the bearing housing that established preload on the bearings. Turns out that the nut is "special" at .596" major diameter and a 24 tpi. I tried to buy this with no luck, so I ended up making one on the lathe by opening up an exiting nut and chasing the threads. I then turned down the thickness to that of a jam nut.
df5379653bdbfd3a78ed4e2496005e2b.jpg
Unfortunately this missing nut caused the relatively new bearings to be ruined.
4488d2f6c8d622c245c8aa12008e27e7.jpg
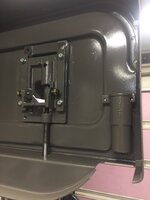
Next up was working on the motor and starter. I hooked everything up to my phase converter and the motor immediately got warm and only ran at about 20 rpm. I knew that I was missing a leg of power. As it turns out, the switch was absolutely packed with sawdust and didn't allow the contacts to touch each other. Once I fixed this, the motor ran very quietly.

After that, I installed new tires on the wheels. I was able to purchase these through Carter Tools. They had the best price and customer service. It cost around 60 for the tires and inserts which is far better than I was able to find anywhere else
f7cc6242f45e0923c92f51e2ad40c49a.jpg
I'm now beginning to assemble the major components. While doing so, I'm finding more missing parts. Luckily they aren't very complicated, and I am able to make or adapt other parts to work.
50ac8430b6e1dc0521c5ffbaed3d8978.jpg
7034992032bcaaf50d02873e11445939.jpg
More updates soon, I'm hoping to have it in place Tuesday.


Sent from my iPhone using Tapatalk
 

Attachments

  • 65c0d4ce255432b6e25d37b40a57bc19.jpg
    65c0d4ce255432b6e25d37b40a57bc19.jpg
    771.8 KB · Views: 3
  • 5cd9e9a0f3df4dec12a4f128481523e6.jpg
    5cd9e9a0f3df4dec12a4f128481523e6.jpg
    432.9 KB · Views: 2
  • 7034992032bcaaf50d02873e11445939.jpg
    7034992032bcaaf50d02873e11445939.jpg
    443.3 KB · Views: 3
  • f7cc6242f45e0923c92f51e2ad40c49a.jpg
    f7cc6242f45e0923c92f51e2ad40c49a.jpg
    667.1 KB · Views: 3
  • 50ac8430b6e1dc0521c5ffbaed3d8978.jpg
    50ac8430b6e1dc0521c5ffbaed3d8978.jpg
    364.5 KB · Views: 3
  • 4488d2f6c8d622c245c8aa12008e27e7.jpg
    4488d2f6c8d622c245c8aa12008e27e7.jpg
    450.2 KB · Views: 3
  • df5379653bdbfd3a78ed4e2496005e2b.jpg
    df5379653bdbfd3a78ed4e2496005e2b.jpg
    286.8 KB · Views: 3
  • 23f1203c610a6961bdb796ea8415463e.jpg
    23f1203c610a6961bdb796ea8415463e.jpg
    353.1 KB · Views: 3
  • 53bbcf5f793f5601f6caecf1b8fbd2a2.jpg
    53bbcf5f793f5601f6caecf1b8fbd2a2.jpg
    353.3 KB · Views: 2
  • f8d18d71793273f0d8cb162ac46660b9.jpg
    f8d18d71793273f0d8cb162ac46660b9.jpg
    606.3 KB · Views: 3
  • e7e350365bab18c5cd53ee4dfeb672d6.jpg
    e7e350365bab18c5cd53ee4dfeb672d6.jpg
    604.9 KB · Views: 2
  • 0713d16202f6679abe788899db1e2857.jpg
    0713d16202f6679abe788899db1e2857.jpg
    118.5 KB · Views: 3
OP
C

Cahark

Well-known member
Joined
Sep 28, 2016
Messages
340
Location
Dayton,Oh
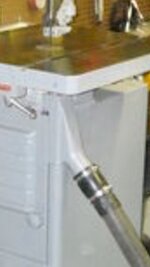
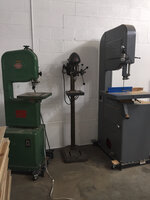
If anyone has one, I could really use a dust shroud for this saw. I need the one that goes over the blade, directly under the table.
b42a5f7eebb623eb72160da66aa97093.jpg
If I can't find one, I'll just have to make it.


Sent from my iPhone using Tapatalk
 

Attachments

  • b42a5f7eebb623eb72160da66aa97093.jpg
    b42a5f7eebb623eb72160da66aa97093.jpg
    44.7 KB · Views: 2
OP
C

Cahark

Well-known member
Joined
Sep 28, 2016
Messages
340
Location
Dayton,Oh
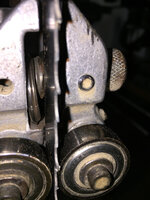
I was thinking about the handles that I need to make that were missing on the machine when I received it. Suddenly I remembered a few handles that I have laying around any junk drawer from an old fixture that I took off a machine. They aren't pretty, but I think with a little bit of paint and some machining, these will do just fine. I will probably touch up the knurl, Cut off the thread, bore a hole to match the shaft, then cross drill a hole for a roll pin.
068ba1b0827901f6d79526ecca219f33.jpg


Sent from my iPhone using Tapatalk
 

Attachments

  • 068ba1b0827901f6d79526ecca219f33.jpg
    068ba1b0827901f6d79526ecca219f33.jpg
    365 KB · Views: 2
OP
C

Cahark

Well-known member
Joined
Sep 28, 2016
Messages
340
Location
Dayton,Oh
Got a little bit more done on the saw the last week or so. I was able to finish getting all of the major components installed, and moved the machine to its new home. It's not completed, but it's only missing the final details.
I found that the upper guide block had some weld repair done on it. It wasn't the best repair, but it seemed to be holding up. Unfortunately the weld was not allowing the block to seat on the height adjustment rod. At this point I decided to set it up in the mill and re-bore the radius on the block. This allowed everything to be properly aligned and spread the load evenly through the surface of the material. Probably overkill, but that's kinda my thing. Haha
6e2752e4088a6034543f91e977088438.jpg
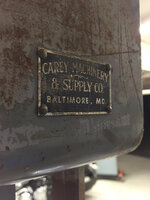
At that point I installed new guide bearings, the magnetic starter, and shoved the saw into location. Now all that's left is a bit of cleanup and installing the badges.
7b6f09f917f3f0a5822df5670dadeaee.jpg


Sent from my iPhone using Tapatalk
 

Attachments

  • 7b6f09f917f3f0a5822df5670dadeaee.jpg
    7b6f09f917f3f0a5822df5670dadeaee.jpg
    486.6 KB · Views: 2
  • 6e2752e4088a6034543f91e977088438.jpg
    6e2752e4088a6034543f91e977088438.jpg
    378.7 KB · Views: 4
OP
C

Cahark

Well-known member
Joined
Sep 28, 2016
Messages
340
Location
Dayton,Oh
I have been running the saw for a couple weeks now. I have kind of dropped the ball on installing the badges. Saturday, I decided to finally get this done. I read on the forums somewhere around here that if I used some cleaner wax it may help me remove residue and overspray from the badges. I couldn't believe how well this method worked. The badges are still not perfect condition but they looked practically brand new compared to what I started with
fb7af8b92ce8bb3b194a9fe8dcb6c109.jpg
1b740fffe38ecd2ceef01a681ff69b36.jpg

I also ordered a few new blades from the local sharpening shop. They were much cheaper than expected. I ordered blades from a range of 3/16 all the way up to 1 inch wide varying in pitches. He was able to sell me the blades for $18 each. This is much cheaper than the big box stores and most places online.

More to come, I still need to make a dust chute


Sent from my iPhone using Tapatalk
 

Attachments

  • fb7af8b92ce8bb3b194a9fe8dcb6c109.jpg
    fb7af8b92ce8bb3b194a9fe8dcb6c109.jpg
    435.1 KB · Views: 3
  • 1b740fffe38ecd2ceef01a681ff69b36.jpg
    1b740fffe38ecd2ceef01a681ff69b36.jpg
    431.5 KB · Views: 4
To avoid these ads, REGISTER NOW!
Top Bottom