To avoid these ads, REGISTER NOW!

My BendPak HD-9 is here...

andgott

Well-known member
Joined
Feb 23, 2013
Messages
193
Location
Athens, TN
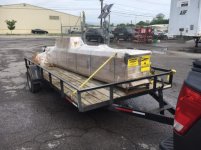
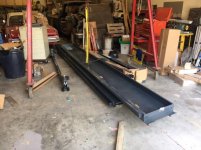
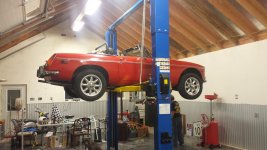
My lift arrived at the freight terminal yesterday morning- So I drove down to pick it up today. The closest terminal to me is in Chattanooga, about an hour away.

I was told by the freight company that they could load it any time before 11 or after 2- They had no one to load deliveries during the middle of the day. I got there at 10 am, and everyone was on lunch break, so I had to wait a while. They finally got it loaded-

attachment.php


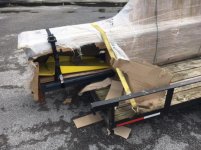
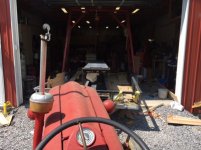
They used a tiny forklift- A bit too small for this load... The wheels kept lifting off the pavement every time he hit a bump. It was actually a little scary. But- They got it on with minimal issues.

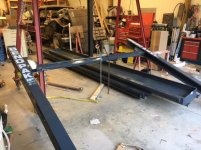
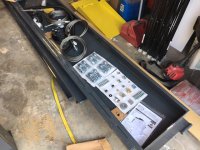
The side was open, and some pieces inside were scuffed/scratched a bit, but nothing too bad-

attachment.php


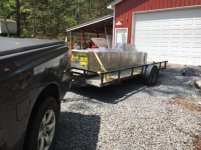
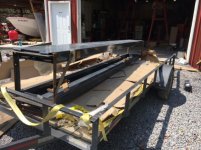
So, I headed home. A nice uneventful drive.

attachment.php


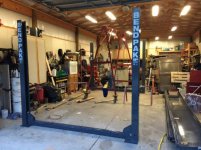
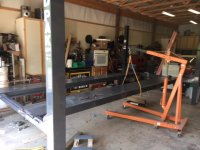
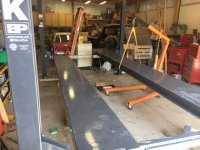
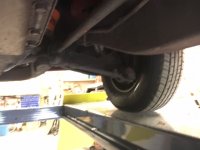
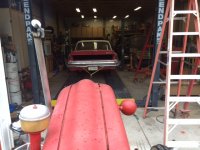
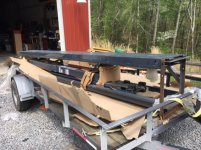
Now for the fun part- Getting it off the trailer!
 

Attachments

  • 0419Aterm.jpg
    0419Aterm.jpg
    50.8 KB · Views: 1,415
  • 0419Bdam.jpg
    0419Bdam.jpg
    54.7 KB · Views: 1,406
  • 0419Chome.jpg
    0419Chome.jpg
    62.5 KB · Views: 1,415
To avoid these ads, REGISTER NOW!
OP
A

andgott

Well-known member
Joined
Feb 23, 2013
Messages
193
Location
Athens, TN
The hydraulic unit and jack tray were strapped to the top. Once all the shrink wrap and packaging are removed, you are left with this-

attachment.php


Everything is neatly stacked inside, using the runways as a 'crate'.

Everything is HEAVY, too... The more people you can bribe to help you the better. I was alone- Everyone I know works during the week, so no help available. The posts are manageable by one person without too much difficulty.

The cross tubes are another story- One person can JUST manage to manhandle them around a bit, but not really move them safely. Two could probably do it OK. I used my A-Frame to lift them from overhead.

attachment.php


After everything else is removed, you've just got the runways left... But they are the heaviest part by far. If you plan to lift them with people power, I'd suggest 4... Especially on the power side ramp (which is on top)

attachment.php


I didn't have assistance, so I fired up the 'Ol workmaster to help. Originally, I was going to use the boom pole to lift them, but decided it would be easier to just drive the trailer into the shop, under the A frame

attachment.php


Then, once I had the runway lifted, I backed the trailer out

attachment.php


And lowered it... I put the first one on movers dollies so I can move it around while assembling if I need to.

attachment.php


Everything looks to be in great shape- A few minor scuffs and scratches here and there from shipping. The worst of it is a ramp that's scuffed up from the fork truck-

attachment.php


But that isn't BendPak's fault- The shipper did that loading it onto my trailer. They are superficial scratches anyway, not even down to the metal.

There is certainly no rust... As I assemble it, I'll get a closer look at the assembly but my first impression of everything is that it is a pretty well built unit.

Now- For the assembly. This may take a while, Because my time is limited.
 

Attachments

  • 0419Junloaded.jpg
    0419Junloaded.jpg
    50.5 KB · Views: 1,389
  • 0419Idamage.jpg
    0419Idamage.jpg
    46.3 KB · Views: 1,383
  • 0419Htrac2.jpg
    0419Htrac2.jpg
    48.3 KB · Views: 1,388
  • 0419GTrac1.jpg
    0419GTrac1.jpg
    48.3 KB · Views: 1,390
  • 0419Funload2.jpg
    0419Funload2.jpg
    57.2 KB · Views: 1,386
  • 0419Eunload.jpg
    0419Eunload.jpg
    136.2 KB · Views: 1,394
  • 0419Dunpak.jpg
    0419Dunpak.jpg
    63 KB · Views: 1,387

Sarki

Well-known member
Joined
Mar 2, 2010
Messages
225
Location
NY-Lower Hudson Valley
Congrats and best of luck with the install. Keep us posted on the progress. I'll be watching as I plan on making final decision on a 4 post over the next day or so.
Always planned on Bendpak HD-9 but hesitating based on some of the more recent postings by fellow GJ members.
Looks like you got yourself a good one there��
 

Automobilist

Well-known member
Joined
May 3, 2014
Messages
112
Location
Snohomish County, WA
Fun!
When I bought my Direct Lift two post, they offered to deliver & install it for $520. Watching how much work it was, and how heavy the pieces are, best $520 I've spent in a long time...
 

Attachments

  • 20150225_195759.jpg
    20150225_195759.jpg
    145.7 KB · Views: 151
OP
A

andgott

Well-known member
Joined
Feb 23, 2013
Messages
193
Location
Athens, TN
I got some work done tonight... The posts are up and cross tubes on. No small feat when working alone!

You are SUPPOSED to lift them from above with a crane or hoist and drop them on to the posts, but my A frame isn't QUITE tall enough to get above them with the chain fall. In one of the YouTube videos I watched, the guy assembled them on the floor and then lifted them into position, so I tried a similar method that worked well-

attachment.php


I supported the ends of the posts with sawhorses, then lifted the cross tube into place with the chain fall, and slid it on to the posts. Once it was on the posts, the low center of gravity made it very easy to lift the posts up.

It was pretty quick once I had it figured out-

attachment.php


All four posts are up... It was a lot of work :)

You should REALLY get a crew together to help with this- If I were more patient, I probably would. But, I've got some time off now, and have to work this weekend when everyone that I know who could help would be free. Having 2-3 strong helpers would make this all a LOT easier!
 

Attachments

  • 0419Kassemble1.jpg
    0419Kassemble1.jpg
    55.1 KB · Views: 1,322
  • 0419Lpostsup.jpg
    0419Lpostsup.jpg
    53.6 KB · Views: 1,319

rburke65

Well-known member
Joined
Nov 10, 2007
Messages
12,349
Location
Canfield, Ohio
As with anything, you're going o love it when ya get it done. Just be safe, keep pecking away.....you'll get there.
 
OP
A

andgott

Well-known member
Joined
Feb 23, 2013
Messages
193
Location
Athens, TN
A busy morning. I got a lot of the major assembly done.

All the parts were packed well, and organized-

attachment.php


attachment.php


It was easy to find the part you needed when you needed it- I hate it when all the parts are just in a bag...

I installed the safety ladders in the columns, then I raised the cross tubes so I could run the cables... The A-Frame made quick work of it, even without help. They are HEAVY- Two strong people could probably do it.

attachment.php


The engine hoist wouldn't be of much use here, since the legs out in front get in the way.

Once the cross tubes were in position, I hoisted the ramps into place. They are the heaviest single part, and required some maneuvering to get them in place and in the proper orientation. The 'power side' went on first, that's the heaviest one, with the hydraulic ram under it.

attachment.php


Then, I lifted the other on into place-

attachment.php


And finally bolted in place-

attachment.php


It doesn't seem like all that much got done, but it was a good solid 4 hours or work.

Up next- running the cables.
 

Attachments

  • 0420Frunway2.jpg
    0420Frunway2.jpg
    110.2 KB · Views: 1,244
  • 0420Erunway2.jpg
    0420Erunway2.jpg
    124.3 KB · Views: 1,250
  • 0420Drunway1.JPG
    0420Drunway1.JPG
    131.8 KB · Views: 1,245
  • 0420Clifted.jpg
    0420Clifted.jpg
    132.7 KB · Views: 1,253
  • 0420Bparts.JPG
    0420Bparts.JPG
    143.5 KB · Views: 1,248
  • 0420Apartsbox.jpg
    0420Apartsbox.jpg
    130.9 KB · Views: 1,250

holdover

Well-known member
Joined
Feb 15, 2011
Messages
750
Location
VA
brings back memories of doing both of mine, one man show also. I too did the cross pieces while the posts were laying down, I feel they are wrong telling you to do them standing up, much safer while down. I also used a my engine lift to place the runways, while I had the cross pieces jacked up about two feet and locked into the safety stops, then I used jack stands to act as extra safety's while I hooked up the cables. Went real easy and took about 2 hours for the first one which was a HD9, the second one was a HD12 which is the same just everything is a bit heavier. It went together in less than an hour. Have fun with yours, you'll wonder how you lived without one
 

excavator

Well-known member
Joined
May 12, 2013
Messages
167
going great and love pics in progress :)

I added a safety switch to mine just incase the raise switch ever stuck. Sometimes when I raise my sons jeep I stand on ladder to watch the roof and if switch ever stuck on it could be a disaster. This switch will work on both 110 or 220. I have my HD-9 lift wired for 220

Woodstock D4151 - Paddle Switch 120/230V

https://d27ewrs9ow50op.cloudfront.net/manuals/d4151_m.pdf

This switch also can accept a lock if you have children that like to push buttons
H88tI_s9UC9jjFnkdAIS0suioNzmsx63z2E5h14mTJzOr50dVEC0zzoycyzW5R3s-t2OHljCErvp0lbC3_OCwDQ7lEGgs95BBMhRXUzB-1jI1Z-enW13Xjm6-0MUV9eak-BF2zVAfiFWuQg8TMwdAk1-YDJZCjbF0QGzL96HH9OBjrnFeLmJRmtA0-lF7DnPxzZyJhqIrUMaBbBoM19-xL1ppir_WS7e_JltrFnEgWpdZakaGD3CpSWtUHA3GnAIHnleH686wKFo6UAZHnlmz-A5BWZ46eDeJ1pCsr9LbbyeRKaPBIWXrRkUQJs91HTELHjOzQFvTYo0kMFZjQr17MKfg2jtiT4mC-Go4wGC-4Jz49Rn0JLjo2r7lYUbdwFW_Xuhh2oBWNoKJd4HBSD51SY4Iq_uD7zZUTnxclnX4abF65CFHNbY-1Rj20izY4VqsnEeyXyaOHIRhaDw6WDmb4vMtcy0joVGo1e5o41LBQRJRni3SPN6hoP7QU_UXY7uk224FdWIoryBy5xgMO0fGmKDFamFRe6hZvrdndWZ3xzWazfl-CZIWcwvGRP3Ck4GfyhOHrls9Dp8-fCcvNbQFIO7zYpI_YNHV4Igo8u9BRkVHw-3HkWS=w359-h638-no
 
Last edited:
OP
A

andgott

Well-known member
Joined
Feb 23, 2013
Messages
193
Location
Athens, TN
Progress was stopped for a bit... An unexpected delay. I had a couple of stents put in last week, then had to take a break to go visit my grandmother for her 100th birthday!

I'm hoping to get back at it tomorrow, though- Get the cables run and pump mounted.
 

Sarki

Well-known member
Joined
Mar 2, 2010
Messages
225
Location
NY-Lower Hudson Valley
Progress was stopped for a bit... An unexpected delay. I had a couple of stents put in last week, then had to take a break to go visit my grandmother for her 100th birthday!

I'm hoping to get back at it tomorrow, though- Get the cables run and pump mounted.

Oh man sorry to hear of the health issues.
Take it slow and easy, the lift can wait. Get better and then move forward.
 
OP
A

andgott

Well-known member
Joined
Feb 23, 2013
Messages
193
Location
Athens, TN
Couple of stints?! Dude hope you're ok! Get well soon...

Yeah, nothing big... I discovered that I had some heart issues a few years back, and needed bypass surgery to fix some blockages. I was only 35 at the time, and otherwise in excellent shape, so it was a little shocking. I was having some small issues occasionally, and they wanted to go back in to make sure there were no problems with the grafts. They were all A-OK, but they stented some of the arteries that they decided not to bypass as they had worsened a little.

I do tell people not to ignore things like this- As young as I was, I had NEVER had any issues, I had a physical every 6 months complete with full blood work and never had a problem. Had the issue not been caught when it was, It would have killed me. I had over 95% blockage in my left main coronary artery.
 
OP
A

andgott

Well-known member
Joined
Feb 23, 2013
Messages
193
Location
Athens, TN
Finally got some work done today!

First, I ran all the cables. They are all labeled for length-

attachment.php


Once you figure out which one goes where, you just route them following the diagram, and reinstall the sheaves. It took me about an hour or so of casual work to get them all run.

Then, I installed the power unit. The instructions aren't too clear about a few points here and there- One of them was exactly which ports to use on the power unit. It was easy to tell one of them- it had a plastic shipping plug in it. The other one there was no real way to tell for sure, the instructions just said it was on the left side, or COULD be on the right side, depending on the model.

There were four ports, none labeled, so I made a quick call to BendPak just to be sure. The guy I talked to was very knowledgable about the lifts, and told me which one to use.

It isn't really clear sometimes which fitting goes where- but if you lay it all out and figure out what goes where it isn't too tough.

attachment.php


The push button for the safety releases goes on next to the power unit-

attachment.php


Then, you route all the hydraulic and air lines-

attachment.php


attachment.php


There were a few points where the instructions could have been a bit more clear, but overall everything went pretty well.

I will be working nights for the next few days- So I'm not going to have much time to 'play'... I need to finish up the wiring and get some oil in it so I can do a test run!
 

Attachments

  • 0502Lifts.jpg
    0502Lifts.jpg
    124.6 KB · Views: 830
  • 0502Cables1.jpg
    0502Cables1.jpg
    72 KB · Views: 820
  • 0502Cables2.jpg
    0502Cables2.jpg
    80.9 KB · Views: 819
  • 0502Button.JPG
    0502Button.JPG
    87.1 KB · Views: 823
  • 0502cables.jpg
    0502cables.jpg
    54.4 KB · Views: 824
To avoid these ads, REGISTER NOW!
OP
A

andgott

Well-known member
Joined
Feb 23, 2013
Messages
193
Location
Athens, TN
Sad that the new owner has to do the "refinements" in order to have the new lift work easier....

So far I have not run across anything during the assembly that required anything out of the ordinary. Sure, there might be some 'tweaks' here and there that would make the lift operate better, but that can be said for any piece of equipment.
 

Sarki

Well-known member
Joined
Mar 2, 2010
Messages
225
Location
NY-Lower Hudson Valley
So far I have not run across anything during the assembly that required anything out of the ordinary. Sure, there might be some 'tweaks' here and there that would make the lift operate better, but that can be said for any piece of equipment.

Well said, exactly what many of us do to our cars when we make mods to well designed equipment. Personalize it and make improvements to an already great piece of machinery/equipment.
Keep those install pictures and comments coming as many who intend to or already have a lift certainly learn from it.
 
OP
A

andgott

Well-known member
Joined
Feb 23, 2013
Messages
193
Location
Athens, TN
I got the wiring and air lines done, and filled 'er up with ATF-

attachment.php


Checked, the DOUBLE CHECKED, (then triple checked, just in case!) all the cable routing.

The first lift was successful-
attachment.php


I still have some adjustments to do still. I'll be putting a vehicle on tomorrow- I just have to decided which one gets to be the lucky first.
 

Attachments

  • 0506Lifted2.jpg
    0506Lifted2.jpg
    123.7 KB · Views: 488
  • 0506Lifted1.JPG
    0506Lifted1.JPG
    141.8 KB · Views: 40
  • 0506Fluid.jpg
    0506Fluid.jpg
    114.2 KB · Views: 494
OP
A

andgott

Well-known member
Joined
Feb 23, 2013
Messages
193
Location
Athens, TN
I got the last couple of 'tweaks' done... So it's time to give it a test run. Time to load up the 'ol Valiant...

It was BEHIND the lift in the shop, so I switched the ramps to the back side of the lift and loaded it up. She's not running at the moment (Radiatior off for repairs), so I used a little 'help' to pull her on-

attachment.php


On, ready to go... Yeah, I now, she needs a bath- BAD. She's been in storage all winter.

attachment.php


attachment.php


And, Up she goes-

attachment.php


That is about as high as I can go with the garage door open, which is fine since it's actually a little higher than I would want it to be comfortable working underneath.

As for clearance and access to the 'stuff' I want to work on, it's great... There is really nothing out of reach-

attachment.php


attachment.php


Of course, I'll have to jack it up and put it on stands from time to time, but it's still a LOT easier than crawling under.

This will make working on the cars SO much more enjoyable!

-Andrew
 

Attachments

  • 0506Undercar.jpg
    0506Undercar.jpg
    74.5 KB · Views: 479
  • 0506liftd.jpg
    0506liftd.jpg
    130.7 KB · Views: 479
  • 0506Lifted2.jpg
    0506Lifted2.jpg
    123.7 KB · Views: 37
  • 0506BackOnLift.jpg
    0506BackOnLift.jpg
    128.4 KB · Views: 489
  • 0506OnLift.jpg
    0506OnLift.jpg
    123.3 KB · Views: 480
  • 0506Tractor.jpg
    0506Tractor.jpg
    115.9 KB · Views: 481
  • 0506undercar2.jpg
    0506undercar2.jpg
    128 KB · Views: 479
OP
A

andgott

Well-known member
Joined
Feb 23, 2013
Messages
193
Location
Athens, TN
Pretty much all the final adjustments are done- and everything is working as it should. A few notes/observations about the lift.

I see a lot of people asking about how difficult the installation is, and if they should attempt it on their own or pay to have it done. I decided to tackle it all by myself- There is nothing overly difficult about the install, though at times the directions are a little vague.

The various parts of the lift are HEAVY- Far more than one person can manage- so you WILL need some help for a few of the steps, wether that help is a couple of strong people OR some sort of device (loader, A-frame, etc). Between my A-Frame with a chain hoist, the boom pole on my tractor, and my engine hoist I was able to do ALMOST everything alone. There were a few steps that required an extra hand, especially raising the columns once I had the cross beams on. I 'bribed' the wife in to helping.

I have read some negative comments on various posts about Bend-Pak customer service. I have dealt with them a few times, and never a problem. The first time was talking to a salesman, who was very knowledgeable about the products and was able to answer all my questions easily.

The other calls were to support when I was trying to figure out some of the details of the installation. Again, the tech support seemed to know the lifts well, and were able to easily describe what I needed to do and how to do it.

I have seen a few lifts that others have received that have had some issues, both mechanical and cosmetic. The ONLY cosmetic issue on mine is that one of the ramps was scuffed up by the forklift that loaded it on to my trailer at the freight terminal. There was one TINY part missing- a small plastic ferrule from one of the air lines on the safety lock... Something I was able to get a replacement for at the local Ace store for $0.09. Otherwise, everything was well organized, labelled, and easy to find.

I've yet to do much work on the lift since I just got it, but so far I am super pleased with everything about it. I still have to pinch myself when I go in my shop :)
 
OP
A

andgott

Well-known member
Joined
Feb 23, 2013
Messages
193
Location
Athens, TN
Chock those wheels, man.

They are! You can just make out the black rubber chock on the drivers rear in the photo if you look REALLY close. I'm a bit paranoid when it comes to any kind of load that I'm crawling under, not worth short cuts...
 

dun

Member
Joined
May 7, 2017
Messages
23
Location
Orange County, CA
I'm absolutely amazed! Nice work! Nice addition to the shop!

I think you have taken self-sufficiency to a whole new level.
 

excavator

Well-known member
Joined
May 12, 2013
Messages
167
No need to anchor to floor. I installed my HD9 few years ago and love it.
Nice job on the install andgott. Now work on the safety switch if you did not get too it yet.
The lift although made in China is still great product from American company
 
OP
A

andgott

Well-known member
Joined
Feb 23, 2013
Messages
193
Location
Athens, TN
I lifted my Titan today to do an oil change- Not sure why the forum rotates my pics-

attachment.php


It JUST fits on the ramps in the 'standard' configuration. Lifted it with no difficulty at all. It's about 2x what my little plymouth weighs!

It was nice to change the oil standing up :)
 

Attachments

  • 0517titan.jpg
    0517titan.jpg
    111.3 KB · Views: 240
OP
A

andgott

Well-known member
Joined
Feb 23, 2013
Messages
193
Location
Athens, TN
The caster kit got here... It's nice to be able to move the lift-

attachment.php


It works pretty well, I can move it with relative ease alone.

The kit weighed 135 Lbs- I think the FedEx guy hates me now.

Now all I have to do is get my shop cleaned up so I have somewhere to move the lift to!
 

Attachments

  • 0525Wheels.jpg
    0525Wheels.jpg
    130.1 KB · Views: 172

James E

Well-known member
Joined
Jun 21, 2010
Messages
16,507
Location
Raleigh, NC
They are! You can just make out the black rubber chock on the drivers rear in the photo if you look REALLY close. I'm a bit paranoid when it comes to any kind of load that I'm crawling under, not worth short cuts...

Cool. Sorry I didn't see them in the pics.

Every once in awhile, I will lower my HD-9 and one of the safety locks is hung up. The rails will start to tilt. You gotta watch it when it goes down.

This happens, by the way, when you don't lift the rails up sufficiently before you release the safety locks. Not Bend-Pak's fault--always mine. Keep an eye out for that when you're wrapping up a job and in a hurry to lower the car and go on to the next job.
 
To avoid these ads, REGISTER NOW!
Top Bottom