To avoid these ads, REGISTER NOW!

1966 F100 EcoBoost Engine Swap (EcoBoosted)

Status
Not open for further replies.
To avoid these ads, REGISTER NOW!
OP
T

TimeWarpF100

Well-known member
Joined
Aug 21, 2010
Messages
6,784
Location
not here
Now that Eco1 is back in just drive it mode I switched it back to 91 octane fuel in prep for the trip to Knott's Ford Show. Still a lot to do on it mostly with front clip inner structure prior to trip but for now will use it as my daily driver while I make another feeble attempt to get Eco2 for a possible trip to Knott's too.

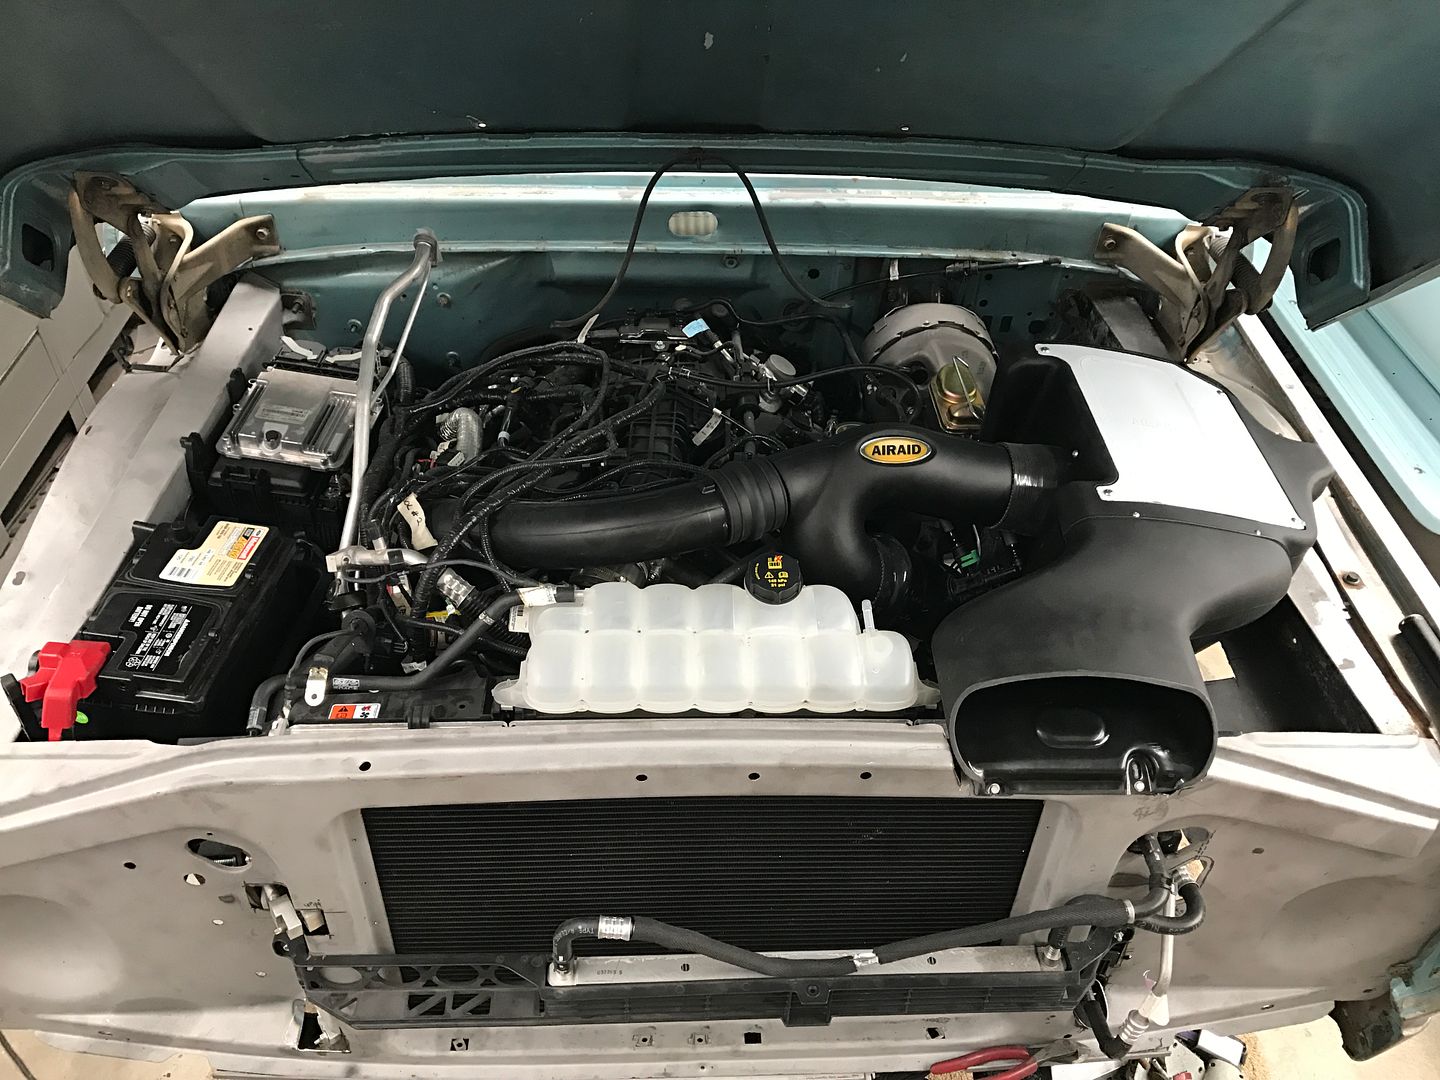
Eco2 as it sits now:

31D47A3E-BB99-42AD-9240-347C8AAF4A69.jpg

Some basic minimal hardware to hold front clip stuff together a WHOPPING 108.** $$

CE6C21AE-B0E5-4DD6-9444-DF9672FF0A39.jpg

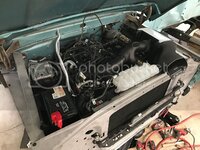
Engine bay starting to get a bit full!

AB62D71F-920E-4E68-8137-8B9716B3B7AF.jpg

96BB2593-D6DA-422C-84F6-70E52EDC4CE6.jpg

0ECF6AA5-DAD8-405F-BCC5-9AA4E8B85A79.jpg

96A7A084-A40B-4E1E-81E0-7D8D99E6D21A.jpg

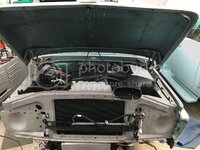
Notch nearly done for the RamAir in core support. Had to drop the inlet a bunch to get it to clear hood.

7857DC4F-17DF-48B6-B9A5-88C41830ED08.jpg

Notch for AirBox on apron. A lot of fiddling for proper clearance . .

8923D51D-C43A-44B8-A282-E605F1DB5D0C.jpg

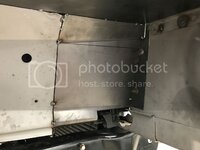
Right inner apron tacked in place. Kind of some tricky bends.

Might need a minor notch for A/C Line.

338E453F-C325-4A17-A5F2-03410EE22DF7.jpg

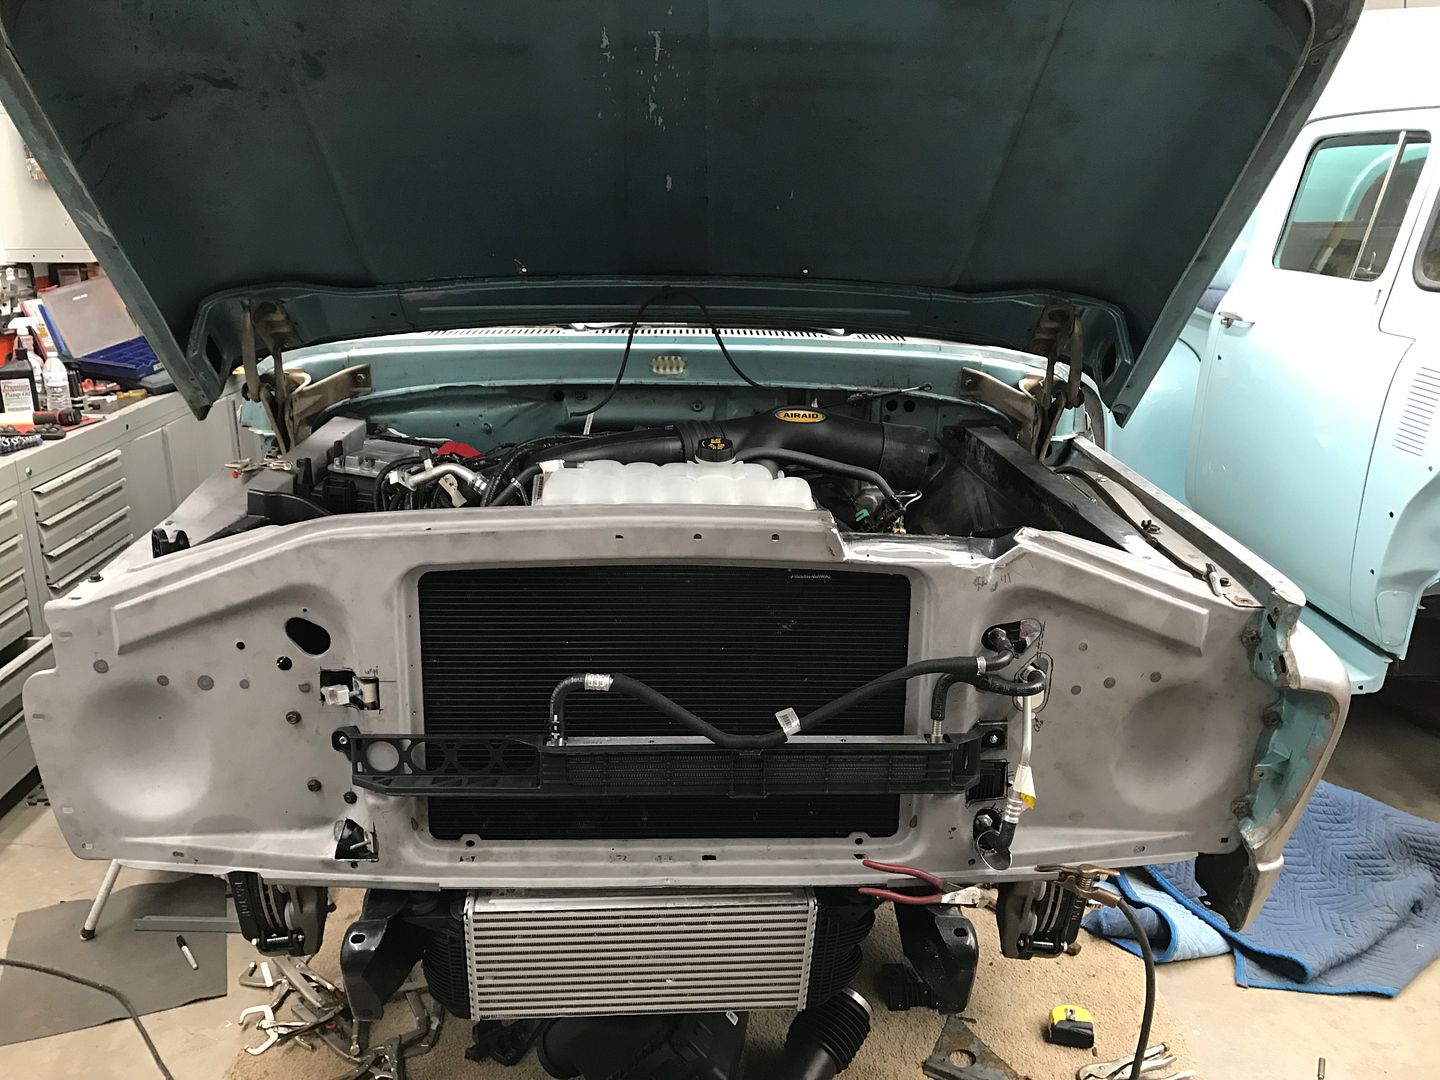
Core support and inner fenders pretty much figured out now. All tacked together just a bit more final welding and grinding. Batt Box fits now too with a bit of massaging.

CEBC2568-BD66-4FC3-B952-178385C98777.jpg

With AirBox in place. Still need the AirBox mounting points but it fits and clears the hood by a hair . .

6F8CD277-26E4-4F5A-8F48-42AE717FD6BE.jpg
 
OP
T

TimeWarpF100

Well-known member
Joined
Aug 21, 2010
Messages
6,784
Location
not here
Did you race a horse?

Not a fair race. He would win unless he took a long nap

Edit add: See, I was napping once again. Took a while to understand what you meant. In the other lane was a . . . . . . . MAGNUM Wagon set on kill . . LOL It had a HEMI!

So now I can honestly say if asked. "But, Have you ever raced a HEMI in the 1/4 mile?"

Oh YEAH! beat it by 17.410 seconds!
 
Last edited:
OP
T

TimeWarpF100

Well-known member
Joined
Aug 21, 2010
Messages
6,784
Location
not here
And, In the "OTHER" other lane were a pair of GSX's. Always had a soft spot for those cars but to see a pair running together was cool . .

CA962B35-484E-4C79-A16D-3E5D4046CD32.jpg

E6FD2AAE-B819-432F-894C-2C7BD6BD1417.jpg

044AE258-32D4-4DC7-942B-FBE06F56098D.jpg

4A86A051-ABB2-41D2-9AE6-49DC27A5D6B5.jpg
 
OP
T

TimeWarpF100

Well-known member
Joined
Aug 21, 2010
Messages
6,784
Location
not here
if Eco1 has a traction issue I can only imagine what Eco2 will do. For starters will need a large sticky tire.

Local craigs list had a offering for 2016 Dodge Ram 2500 wheels at a decent price (new for sure not in budget) Even tho they will not look '66 I can use these when the time arises.

EACA1A6B-6E41-4A4D-8E53-B24D29718EE3.jpg

157515FF-F291-4F8C-A846-59397A892D1E.jpg

EE8296CF-AD82-483A-B0AE-867338339C57.jpg

027EAF46-4016-4B48-A74F-BD42C7F96D73.jpg


Wheels are 18 x 8 with a 6 3/4" backspace. Still not sure if back's will fit but checking now.

I may have to enlist in some help from the G-J machinist crowd for a proper center cap. If anyone can help let me know.
 

titanjeep

Active member
Joined
Jul 25, 2015
Messages
25
Facebook friend does the conversion. I paid extra to have bezel sent out for new chrome

I wish I had friends like that... I would love to get something like that done to the stereo in mynWagoneer project.

Eco2 as it sits now:

31D47A3E-BB99-42AD-9240-347C8AAF4A69.jpg


Some basic minimal hardware to hold front clip stuff together a WHOPPING 108.** $$

CE6C21AE-B0E5-4DD6-9444-DF9672FF0A39.jpg


Engine bay starting to get a bit full!

AB62D71F-920E-4E68-8137-8B9716B3B7AF.jpg


96BB2593-D6DA-422C-84F6-70E52EDC4CE6.jpg


0ECF6AA5-DAD8-405F-BCC5-9AA4E8B85A79.jpg


96A7A084-A40B-4E1E-81E0-7D8D99E6D21A.jpg


Notch nearly done for the RamAir in core support. Had to drop the inlet a bunch to get it to clear hood.

7857DC4F-17DF-48B6-B9A5-88C41830ED08.jpg


Notch for AirBox on apron. A lot of fiddling for proper clearance . .

8923D51D-C43A-44B8-A282-E605F1DB5D0C.jpg


Right inner apron tacked in place. Kind of some tricky bends.

Might need a minor notch for A/C Line.

338E453F-C325-4A17-A5F2-03410EE22DF7.jpg


Core support and inner fenders pretty much figured out now. All tacked together just a bit more final welding and grinding. Batt Box fits now too with a bit of massaging.
CEBC2568-BD66-4FC3-B952-178385C98777.jpg


With AirBox in place. Still need the AirBox mounting points but it fits and clears the hood by a hair . .

6F8CD277-26E4-4F5A-8F48-42AE717FD6BE.jpg

And I can see why Eco 2 will be the last vehicle you part ways with. The fabrication is incredible... it looks those components were meant to be there. :thumbup:
 
OP
T

TimeWarpF100

Well-known member
Joined
Aug 21, 2010
Messages
6,784
Location
not here
I wish I had friends like that... I would love to get something like that done to the stereo in mynWagoneer project.


And I can see why Eco 2 will be the last vehicle you part ways with. The fabrication is incredible... it looks those components were meant to be there. :thumbup:
Thanks!
I just gotta finish it . . . Very, Very slow going. So much else to do.
 
OP
T

TimeWarpF100

Well-known member
Joined
Aug 21, 2010
Messages
6,784
Location
not here
Did my best with the Dodge wheels on Eco2 but simply too costly to make work and of course they were "Dodge" wheels. Me being a cheapskate had to find a better way at less cost.

I had gone as far as figuring out which ford center caps would fit the dodge wheels! But it was not to be.

7D29007B-90E1-433F-8210-8A433804B641.jpg

Unreal how much time was spent on "researching" possible wheel combo's but at least having the Dodge wheel on hand I got a ton more measurements and a lot more understanding of what needed to be done. Dodge wheels had a 6 3/4" backspacing.
Part of deal with buying them was if I paid full price he would refund my $$ if I could not get them to work. He was a man of his word and gave me my $$ back.

Turns out he owns a absolutely Stunning 1967 Ford F250 Crew Cab with a few upgrades but stock appearing.

6BC971E9-DC78-47CA-B95D-F771DDD7E32A.jpg
957296D2-0C3B-45F7-9B1E-BDCBC153D06E.jpg
055BB4B5-A821-465D-B768-B2887CD71D87.jpg
 
OP
T

TimeWarpF100

Well-known member
Joined
Aug 21, 2010
Messages
6,784
Location
not here
Eco2: I will eventually put tires on a set of stock white painted wheels with stock hubcaps and they will be used when I want it "Total Stock Appearing". Now I only have 2 of the proper wheels in 16".

A59413A9-AE8F-4F7C-912B-1B4A9D8B1035.jpg


So what I came up with was a set of new take~off wheels from a 2017 F250 Super Duty. A bit flashy but the cheapskate in me bit because the price was CHEAP! I picked up the complete set then promptly sold the tires to get 70% of the total cost back. Leaving me Wheels, Hubcaps & Lugnuts for well under 300.00. Total cost for the entire package new from ford was around 5800.00.

Wheels were 980.52 Ea
Caps were 140.00 ea
lug nuts were 8-12.00 ea
So for less than the cost of a couple hubcaps I now have the entire package.

But the new tires being 33.5" tall it was just too much.

E6C692F1-4DCF-4207-9FCF-E35B682FAD12.jpg

D5BCEFF8-487E-49CF-881C-0D78DEA6D523.jpg

1089E74B-6F2A-4364-B2A0-019ED8218E22.jpg

5641C64C-D4D9-4F5C-8A34-59EB150B404A.jpg


So just like Eco1 let the battle begin on getting them to work! LOL

Eco1 has the cone shaped lug nut where the new wheels have a flat serrated washer and are not hubcentric.

61FC5900-3B6E-476A-A426-3C1C382E7D6B.jpg

3D46418A-B7F2-48C6-AA2F-944F05D3F35C.jpg


Also have the issue with bolt circle which the '66-98 is 8 x 6.5 (165.1 mm) while the new truck is 8 x 170. Also backspace issue.

And just now typing this I realized I have another MAJOR issue. Go Figure!

Anyway, these are wheels I am hoping to use because mostly of $$ and although too modern they look good.

BD7A0799-A3C7-4878-866E-94693C4E5337.jpg

B490C94F-2C07-41DB-B18A-143EEA8014CF.jpg
 

jayz66ragtop

Well-known member
Joined
Sep 11, 2009
Messages
1,540
Location
SoCal
Hope all is going well and your just too busy to post.

Seven days until FFF, hope your still able to make it.
 
OP
T

TimeWarpF100

Well-known member
Joined
Aug 21, 2010
Messages
6,784
Location
not here
Hope all is going well and your just too busy to post.

Seven days until FFF, hope your still able to make it.

Still floating around . .

Takes so much time to upload pics, then try to proper sort within photobucket where as my facebook page I can just click n send. LazyItis sets in. :lol_hitti

Eco1 was used last Saturday for a drive-away vehicle in a wedding. Still waiting on some better pics.

87C3E46A-582D-4C01-8411-56731096C63F.jpg

C78EF48C-3037-4903-8E47-95222E55369D.jpg
 
OP
T

TimeWarpF100

Well-known member
Joined
Aug 21, 2010
Messages
6,784
Location
not here
Its been a year since Eco2 chassis was done. Seems so little progress since then. So much for that 60 day max to have it on road.

D340EF85-4D07-49F0-8876-9384BC33C4A2.png

EE6E75F1-1521-4CB5-AB05-F26441149EC8.png


Since the FFF show is this Sunday have been spending time on Eco1 to make it a bit more road worth for a double 400 mile trip. Decided to raise the front 1/2" for additional clearance for a few different reasons. Its a finger pincher trying to do this with no help.

a few miles of 5000 shy since on the road and always knew the front inner structure needed help. A "Temporary Permanent" front clip was held on by only a few self taping screws. I figured it was high time to tie the front inner structure into the cab and this would be the best time to do it while apart. Also time to clean up the bare metal a bit as starting to show signs of "Use" a few million bugs decided to attach themselves to the cooler and condenser.

0DB9B9EF-4238-4B2A-9026-403C5D197C88.jpg


7752575E-E5F5-4586-ADFF-6D4B19962334.jpg


These Bell Tech struts/shocks are a TOTAL PAIN in changing ride height. One gets a handful of spacers and you have to adjust. Every .315 gives you a 1/2" change in ride height. If not right guess again. They say 3rd time is the charm . .The entire front has to be torn apart to remove shock/strut then it has to be taken apart to change spacers.
Next time it will be adjustable coil overs or nothing.


It started to go back together then . . .

4F5F5540-B94C-46F1-9B89-E3C72E140BDB.jpg


8C3EF5DD-FBCC-456D-91F6-4C736FBB6547.jpg


My to do list just for this trip is nearing 2 pages. I think for every 10 things done I add 12 more to page.

F94ACDBF-513F-4B01-B983-B134B572A07E.jpg


Here is how I decided to tie in the front inner structure to cab in a very very time limited deal . . It should really stiffen things up. Both sides now done and time to move on to next projects

A1946409-422C-4B52-AF92-3452B633D329.jpg
 
OP
T

TimeWarpF100

Well-known member
Joined
Aug 21, 2010
Messages
6,784
Location
not here
Eco2 will simply not make the show this year. Just too much time on the details and many other things going on.

I do have it figured out for how to install 2017 F250 wheels on rear but now trying to find a solution on how to do the front. Appears with the addition of the disc brakes it moved the wheel out a BUNCH! Hoping my idea how to do that will work and the '17 wheels will be a bolt on.

The rears are now centered pretty much perfect. A 18 x 8 wheel being used. It looks like I could go as wide as a 10" wheel but trying to keep it looking a little less "Hot Rod".

The '17 wheels were cheaper than a stock steel wheel. ALso wanted to make people do a double take on how was it done as should be obvious its a new wheel.

Using a Non HubCentric wheel and changing bolt pattern and still trying to get proper backspacing. (easier than Eco1 wheels!) I ordered the proper "Ford" countersink for a 60 deg seat for Ford Tapered type lug nuts & will use 4 of each to mount wheel. This will allow me to use the stock '17 hubcaps front and rear. Turns out Ford changed the lug thread from 2011 to 2015 which thru me yet another curve . .

I just killed a hour and 40 minutes just to upload pics and do this post . . No time for that better get busy, time is running out FAST. HA

68804B75-B3AF-4305-ABCE-A55C71AB3D2B.jpg

7CD6EEEF-3AB6-49BF-8726-D9B8E7FB2921.jpg

9D182CE2-984E-493E-86FD-90233AFBDA77.jpg

99090E23-3352-4914-AE2C-5711069B97F0.jpg
 

HD FLHX

Well-known member
Joined
Jul 10, 2011
Messages
1,100
Location
Central Iowa
If you take pics with your phone, photobucket has an app you can use to upload your pics. Its done in a matter of seconds...no different than uploading to facebook or instagram. Then just grab the img code paste it here when posting.
 

jayz66ragtop

Well-known member
Joined
Sep 11, 2009
Messages
1,540
Location
SoCal
Re: 1966 F100 EcoBoost Engine Swap & 1966 427 Project

Was great to see you made it to the show! I hung out for about 10 minutes hoping you would come back but didn't see you. My niece was confused how an old truck had the same dash as my truck. I snapped a couple of pictures but haven't uploaded them.

Sent from my SM-G935V using Tapatalk
 
OP
T

TimeWarpF100

Well-known member
Joined
Aug 21, 2010
Messages
6,784
Location
not here
Re: 1966 F100 EcoBoost Engine Swap & 1966 427 Project

Was great to see you made it to the show! I hung out for about 10 minutes hoping you would come back but didn't see you. My niece was confused how an old truck had the same dash as my truck. I snapped a couple of pictures but haven't uploaded them.

Sent from my SM-G935V using Tapatalk

Hmmm, I only left one time for more than 5 minutes. That was right at 10 am when I walked the show looking. Was not gone very long. Left 2 other times for a quick potty stop. If you stopped by after about 10:30-10:45 I was sitting in a chair behind truck. Would have been great to meet you.

Truck drove flawlessly both ways. Let 'er rip on way home and made the 390 miles in 5.5 hours inc a 1/2 gas~food stop.

What I found unreal is how smooth the truck was above 80mph. The windnoise quieted a bunch above 80 and got 19.5 mpg @ 85 mph. The last minute work done before I left made a amazing difference. (Tied in the front inner structure to cab by welding) Added more hardware to fenders and core support mounting. Re~aligned the front end as I raised the front an additional 1/2".

Even @ 85 mph I could probably do 500 miles on a tank of fuel.

We filled up @ AZ/CA border on way there and drove the rest of way to show and back to AZ before needing fuel. Still had approx 6 gallons left.
 
Last edited:

jayz66ragtop

Well-known member
Joined
Sep 11, 2009
Messages
1,540
Location
SoCal
Re: 1966 F100 EcoBoost Engine Swap & 1966 427 Project

Hmmm, I only left one time for more than 5 minutes. That was right at 10 am when I walked the show looking. Was not gone very long. Left 2 other times for a quick potty stop. If you stopped by after about 10:30-10:45 I was sitting in a chair behind truck. Would have been great to meet you.

Truck drove flawlessly both ways. Let 'er rip on way home and made the 390 miles in 5.5 hours inc a 1/2 gas~food stop.
Must have just missed you, we were by right after 10am. They let a white lightning in that parked over in the area you were in and someone commented on why they let him in since it was after the 10am cut off.

Saw the blue chairs but they were empty.

Glad it went smooth for you both directions.

Sent from my SM-G935V using Tapatalk
 

kbs2244

Well-known member
Joined
Nov 11, 2006
Messages
14,065
I have a "why" question'
Other than personal satisfaction, and the internet, is there any judging group involved?
You are doing a fantastic job, but I wonder what drives you?
 
OP
T

TimeWarpF100

Well-known member
Joined
Aug 21, 2010
Messages
6,784
Location
not here
Re: 1966 F100 EcoBoost Engine Swap & 1966 427 Project

Was great to see you made it to the show! I hung out for about 10 minutes hoping you would come back but didn't see you. My niece was confused how an old truck had the same dash as my truck. I snapped a couple of pictures but haven't uploaded them.

Sent from my SM-G935V using Tapatalk
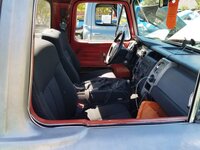
Curious if the truck was what you envisioned it to be?

For sure had a lot of lookers. A few media type stopped by.
 

jayz66ragtop

Well-known member
Joined
Sep 11, 2009
Messages
1,540
Location
SoCal
Re: 1966 F100 EcoBoost Engine Swap & 1966 427 Project

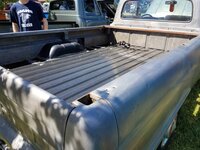
Was more! You can tell some things were unfinished but the amount of effort that went into making it "work" is beyond my ability that's for sure.


We have so many custom cars/trucks in SoCal and when I saw it from a distance I almost kept walking because it looks so stock. I looked at the front bumper and thought nope, that's Randy's truck for sure.

I vote you clean up some of the body issues and clear it just like it is. I'm not one for the patina look but something about the way it is screams keep it this way.


On edit: One thing that is so awesome about your work is the dash. Could not get over how it looked like it came that way form the factory. There was another older Ford down about six cars that was somewhat like what you did but they used a lightning as the donor. Your dash looked 1000Xs better.


Sent from my SM-G935V using Tapatalk
 
Last edited:
To avoid these ads, REGISTER NOW!

jayz66ragtop

Well-known member
Joined
Sep 11, 2009
Messages
1,540
Location
SoCal
Re: 1966 F100 EcoBoost Engine Swap & 1966 427 Project

A few pics that I snapped and no none of my family members are in these photos.


So the timestamp on the photos say 10:33 and 10:34.

11531d866cfa69ac6137da4fd64e8a57.jpg207a0118e39ca3bbac02e123488261e1.jpgd15b648fde15de214947df81565bb2ba.jpgfdf8d0f70d49d45d9e03ae3e7aa801b2.jpgfb1aa2340c455d41055fb0f81ae2ff53.jpg


That was one weird truck on your passengers side BTW

Sent from my SM-G935V using Tapatalk
 

Attachments

  • 11531d866cfa69ac6137da4fd64e8a57.jpg
    11531d866cfa69ac6137da4fd64e8a57.jpg
    156.8 KB · Views: 0
  • fb1aa2340c455d41055fb0f81ae2ff53.jpg
    fb1aa2340c455d41055fb0f81ae2ff53.jpg
    203.2 KB · Views: 0
  • fdf8d0f70d49d45d9e03ae3e7aa801b2.jpg
    fdf8d0f70d49d45d9e03ae3e7aa801b2.jpg
    97.5 KB · Views: 0
  • d15b648fde15de214947df81565bb2ba.jpg
    d15b648fde15de214947df81565bb2ba.jpg
    92.1 KB · Views: 0
  • 207a0118e39ca3bbac02e123488261e1.jpg
    207a0118e39ca3bbac02e123488261e1.jpg
    126.4 KB · Views: 0
Last edited:
OP
T

TimeWarpF100

Well-known member
Joined
Aug 21, 2010
Messages
6,784
Location
not here
I have a "why" question'
Other than personal satisfaction, and the internet, is there any judging group involved?
You are doing a fantastic job, but I wonder what drives you?

They only gave out 2 awards at show. Best in show went to a Cougar and then a Bronco won a award. that was it.

For me on Why . .

I have owned many a new vehicle in my life and lost my shorts on each and every one.

I wanted something that drove like a new one but I would not have the depreciation loss.

A daily driver type that I could tow 8500-10000 lbs, get great MPG, do decent on a road course, haul stuff and to run a mid to low 13 second quarter in.

It also had to be comfortable to drive, quiet, smooth and have creature comforts. I really liked some of the features built into the late model F150's.

Building a Tribute truck to my dad and the one he bought new was also important. This truck pretty much is what I was after. Not to mention taking on a challenge and building something I had never done or even attempted.

I have had some type of project from 14yrs old on. Getting close to time to lay down the tools after so many years . .

Another biggie is this Garage Journal thread it has kept me motivated when times got tough. (many of those)

Felt like it would have been total failure had I not got it on road like so many other projects before this one. FAILURE on so many levels.


The WANT was huge. What really directed me in how to go about it and why certain things were done was simply $$. The ONLY possible way to be able to swing it was to buy the wrecked truck as cheap as I did then use as much as possible in the build to save $$.

I knew from the getgo I wanted a 3.5 eco 6R80 combo and that was it. Because as far as I knew there was no Autotrans eco swaps driving around so I used all the electronics so I knew it would work. It saved me the cost of having to buy interior pieces of approx 3-4000.00 and really big bucks for the HUGE brakes had I gone aftermarket.

There are many items on truck that would not have been had I had the $$ to invest to go in another direction.

What I have learned on this one will help guide me on Eco2 but for even less $$.
 
Last edited:
OP
T

TimeWarpF100

Well-known member
Joined
Aug 21, 2010
Messages
6,784
Location
not here
Re: 1966 F100 EcoBoost Engine Swap & 1966 427 Project

Was more! You can tell some things were unfinished but the amount of effort that went into making it "work" is beyond my ability that's for sure.


We have so many custom cars/trucks in SoCal and when I saw it from a distance I almost kept walking because it looks so stock. I looked at the front bumper and thought nope, that's Randy's truck for sure.

I vote you clean up some of the body issues and clear it just like it is. I'm not one for the patina look but something about the way it is screams keep it this way.


On edit: One thing that is so awesome about your work is the dash. Could not get over how it looked like it came that way form the factory. There was another older Ford down about six cars that was somewhat like what you did but they used a lightning as the donor. Your dash looked 1000Xs better.


Sent from my SM-G935V using Tapatalk

The truck I started with was pretty rough. Normally do not start with something like that but it was 300.00 good one to ruin and chop up had it not worked out. Once I got to a certain point as tough as it got there was no turning back or giving up as I would have lost all my time and $$ so just kept plugging away hoping for the best.

Yep, Many many things are Unfinished. I banged out the more major damage but most everything is just tacked together. Dash is pretty much just sitting there with one screw in middle holding it up, ends not finished basically everything dropped in place to see if it would fit or I could make it work. Once I got to that point knowing I could make it work just went to next step.
Chassis is about the only thing on truck that is complete.

Bunches of metal work like welding, grinding, fitting needs to be done. That will happen when I tear it apart for paint.

All the cuts in metal and metal mods are just in place, tacked together. Many many hours left in metal work. Tape over holes etc just so I can drive n enjoy until I get another project done. No $$ for paint at the moment but the bare metal is hard to maintain so eventually when $$ and time avail do plan on painting/finishing the truck.

As you said looks pretty plain and most people just walk by and nothing catches the eye. Some would catch the large intercooler then think something was up and would then look or see the Eco Badge on right fender.

Eco2 will be opposite. I fully plan on finishing truck prior to really going anywhere with it.

This was my first trip to Knott's in the 32 yrs wanting to go.
 

jayz66ragtop

Well-known member
Joined
Sep 11, 2009
Messages
1,540
Location
SoCal
Re: 1966 F100 EcoBoost Engine Swap & 1966 427 Project

The truck I started with was pretty rough. Normally do not start with something like that but it was 300.00 good one to ruin and chop up had it not worked out. Once I got to a certain point as tough as it got there was no turning back or giving up as I would have lost all my time and $$ so just kept plugging away hoping for the best.

Understood and part of the reason for my comment about all the work to get it where it is :rocker:


Yep, Many many things are Unfinished. I banged out the more major damage but most everything is just tacked together. Dash is pretty much just sitting there with one screw in middle holding it up, ends not finished basically everything dropped in place to see if it would fit or I could make it work. Once I got to that point knowing I could make it work just went to next step.
Chassis is about the only thing on truck that is complete.

Bunches of metal work like welding, grinding, fitting needs to be done. That will happen when I tear it apart for paint.

And I'm sure as much as a perfectionist as you are this will be even more time consuming than where you are now. I know body work can consume hundreds of hours. Cannot wait to see when all the body work is done.

As you said looks pretty plain and most people just walk by and nothing catches the eye. Some would catch the large intercooler then think something was up and would then look or see the Eco Badge on right fender.

Funny story:

I was behind some gentlemen who looked over the whole truck then were going past the engine compartment and one poked at the positive batter terminal cover and made the comment "think the cover is big enough". I just thought WTF, you just walked past one of the coolest trucks here and all you can do is poke fun at the STOCK cover?


Oh and pictures don't do the wheels justice. It's uncanny how close to the originals they look in person. I was showing my brother on the other one just down from you how the stock ones look.
 
OP
T

TimeWarpF100

Well-known member
Joined
Aug 21, 2010
Messages
6,784
Location
not here
If you take pics with your phone, photobucket has an app you can use to upload your pics. Its done in a matter of seconds...no different than uploading to facebook or instagram. Then just grab the img code paste it here when posting.

I do use the PB app for all my uploads. But, because I have nearly 10,000 pics and hundreds of albums when pics are uploaded they go to Phone Uploads. I then have to move them to correct album and some times make new album.

If I do not organize at time of upload things get really messed up.

I do not have cable avail here so it takes a while to upload.

I usually get the missing link deal as at times forget to put in proper album. Then when pic is finally moved the link is lost.

At least for me in order to find them for a link they have to be organized in a certain way. Even then with so many pics I have a issue keeping track.

I have not figured out how to do multiple pics from my phone.
 
OP
T

TimeWarpF100

Well-known member
Joined
Aug 21, 2010
Messages
6,784
Location
not here
Re: 1966 F100 EcoBoost Engine Swap & 1966 427 Project

Understood and part of the reason for my comment about all the work to get it where it is :rocker:


And I'm sure as much as a perfectionist as you are this will be even more time consuming than where you are now. I know body work can consume hundreds of hours. Cannot wait to see when all the body work is done.


Funny story:

I was behind some gentlemen who looked over the whole truck then were going past the engine compartment and one poked at the positive batter terminal cover and made the comment "think the cover is big enough". I just thought WTF, you just walked past one of the coolest trucks here and all you can do is poke fun at the STOCK cover?


Oh and pictures don't do the wheels justice. It's uncanny how close to the originals they look in person. I was showing my brother on the other one just down from you how the stock ones look.

We got as close as we could to copy the '66 wheel/hubcap. We had no choice in sizing as it was 18" minimum which clear calipers by under .125" and the backspace simply had to be where it is.

So many people just walked by without giving it a glance. Usually if there were a few people looking thru vehicles together either on the way in to truck area or way out one would spot something "off" and look then give the wave to others to come look. With 1800 vehicles there one could not spend too much time on a single vehicle.

On the computer this build has turned out to be more impressive than I ever thought... I cant imagine what its like in the flesh! :rocker:

Thanks!

Total Patina vehicles are not for me and especially "made up patina"
Although when this is finally done it will be much more difficult to care for and will not be quite so "truck use friendly" I really had that vision from beginning to make it look like dad's but drive like a new truck.

I surely could not have hopped in a stock 352 truck with a 4.10 gear and drove it to cali and back @ 80-85 with the cruise on and gotten over 19 mpg.
There would not have been enough gas stations or connecting rods & engine blocks to make it there and back in a couple days! HA:3gears::3gears::3gears:

Eco1 did get to be a feature vehicle here . .


http://www.fordnxt.com/news/socals-biggest-blue-oval-show-draws-nearly-1700-fast-fords/
.
.
.
.
.
 

Sweet Old Bill

Well-known member
Joined
Mar 20, 2009
Messages
362
Location
N. California
Randy,

Congratulations on the Knot's Berry write up. That is quite the recognition for the tremendous job that you have done.

Should we be cueing up the "Mission Impossible" theme whenever you roll in with Eco1?
 

MP&C

Well-known member
Joined
Oct 21, 2009
Messages
4,410
Location
Leonardtown, MD
I do use the PB app for all my uploads. But, because I have nearly 10,000 pics and hundreds of albums when pics are uploaded they go to Phone Uploads. I then have to move them to correct album and some times make new album.

Randy, When I upload from my phone to PB (email) I add an album title in the subject line and it drops it automatically in that album. Perhaps the app has a similar feature.

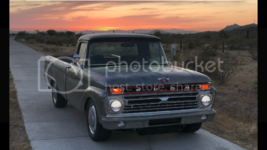
Congrats on a successful long distance journey, looks like it got plenty of attention!
 
OP
T

TimeWarpF100

Well-known member
Joined
Aug 21, 2010
Messages
6,784
Location
not here
Randy,

Congratulations on the Knot's Berry write up. That is quite the recognition for the tremendous job that you have done.

Should we be cueing up the "Mission Impossible" theme whenever you roll in with Eco1?

Thanks Bill!

Randy, When I upload from my phone to PB (email) I add an album title in the subject line and it drops it automatically in that album. Perhaps the app has a similar feature.

Congrats on a successful long distance journey, looks like it got plenty of attention!

App does not allow that. App will also only allow to attach 1 pic at a time. Might be a setting thing. I also have 132 different Albums with as many as 53 folders on those albums not to mention multiple files in each folder . .

Time, Energy & brain power. Pretty low on all 3, easiest path of resistance or something like that. Everything is between a crawl, backing up & a standstill right now. Getting anything done is down to a few hours a month of actual work.

Anything new or still recovering from your trip to SoCal?

Attempting to make progress but not much happening. Signed up for the F100 Western Nationals which is less than a month away. Been tinkering with organizing shop etc but not much else. My GetupNGoGotUpNWent.
 
OP
T

TimeWarpF100

Well-known member
Joined
Aug 21, 2010
Messages
6,784
Location
not here
Randy, When I upload from my phone to PB (email) I add an album title in the subject line and it drops it automatically in that album. Perhaps the app has a similar feature.

Congrats on a successful long distance journey, looks like it got plenty of attention!

Robert, I downloaded a new App for PB and now it will not do auto uploads.
But, it will now allow me to select what pics and what album
They will go to. Before all photos automatically went to same album.
I will see if this will make make it easier to upload and post photos here.
 
OP
T

TimeWarpF100

Well-known member
Joined
Aug 21, 2010
Messages
6,784
Location
not here
The brand new never run 351w signs of water
In intake ports.


Clearly new never run. Not a reman. A over the counter new engine


Good thing I never rotated engine. Full of shavings from body shop

 
OP
T

TimeWarpF100

Well-known member
Joined
Aug 21, 2010
Messages
6,784
Location
not here
Was that 351w left outside, uncovered? It looks savable, but wow!

Body shop was doing paint and body work. Must have got left in rain or under a hose. Short block is ok.

Luckily, appears no water in cylinders.

Volare front welded in crooked along with left rail 1" lower than right. Front cross member also cut apart and destroyed to fit volare front.
 
Status
Not open for further replies.
To avoid these ads, REGISTER NOW!
Top Bottom