To avoid these ads, REGISTER NOW!

Aussie 16x10m (53x33ft) new build

OP
Q

Q777

Well-known member
Joined
Jun 8, 2014
Messages
55
Location
Australia
Another week of unseasonal rain and we started the weekend trying to draw away excess water with a vacuum cleaner. I headed for the skies to see things from a different angle. I actually was working when I wasn't taking photos!

35404464335_40da5d8d9c_c.jpg


...and then the sun came out.

34562013554_c44d8d98c2_c.jpg


Shame it hadn't dried the ground enough. We still managed to get the forklift and scissor lift bogged again.

35274928411_f4ffe8b736_c.jpg


I can't tell you how happy I am to get the frame up.

34562024154_13228fa0c3_c.jpg
 
To avoid these ads, REGISTER NOW!

readhead

Well-known member
Joined
Dec 8, 2012
Messages
6,180
Location
Durango, Co.
How did they get them to all be the same height? Is there a chunk of concrete at the bottom of the hole? if so did the columns get cut to each elevation? I'm a structural steel fabricator but have never seen anything like this.
 
OP
Q

Q777

Well-known member
Joined
Jun 8, 2014
Messages
55
Location
Australia
How did they get them to all be the same height? Is there a chunk of concrete at the bottom of the hole? if so did the columns get cut to each elevation? I'm a structural steel fabricator but have never seen anything like this.

Hi readhead. The columns were all built to the same height. You're right - concrete was poured into each hole to a specific height measured with a laser level. Each column then sits on the concrete and if all goes according to plan, the pre-drilled holes for the girts, purlins and bracing will confirm things are level and square. Everything is just resting in the hole at the moment as we ran out of light.
 

Mudnut

Well-known member
Joined
Mar 29, 2015
Messages
284
Location
FNQ Australia (North of Cairns)
Great progress!!!

Will be a great relief when the roof is on, and no more rain on the pad.

Don't know if you have insulation on your plans, but highly recommend the 10mm foam and foil rolls. Will be about $1500 for your roof size, but makes a big difference to the amount of heat that enters the building. Only really need the roof, as not much direct heat enters the walls (compared to the roof). if it gets cold, traditional pink bats can be used on the walls (much cheaper), and can be done after the cladding is on.

Keep the photo's coming.

Cheers,

Ken
 
OP
Q

Q777

Well-known member
Joined
Jun 8, 2014
Messages
55
Location
Australia
Thanks for the tip Ken. I'm pretty lucky that I have good tree cover from the western sun, and the location always gets cooling coastal breezes. I hadn't thought I would need insulation, but I'll look into the foil/foam products.


Great progress!!!

Will be a great relief when the roof is on, and no more rain on the pad.

Don't know if you have insulation on your plans, but highly recommend the 10mm foam and foil rolls. Will be about $1500 for your roof size, but makes a big difference to the amount of heat that enters the building. Only really need the roof, as not much direct heat enters the walls (compared to the roof). if it gets cold, traditional pink bats can be used on the walls (much cheaper), and can be done after the cladding is on.

Keep the photo's coming.

Cheers,

Ken
 

gazza

Well-known member
Joined
Dec 24, 2009
Messages
364
Location
Melbourne Aust
A bit more information about roof colour and absorption using colourbond colours.
I have a mist green roof (old colourbond colour) and my brother has a dark caulfield green and his shed is heaps hotter inside.

Have you also considered using polycarb sheets? in your roof lots of sheds here use it.
I used clear poly, great in the winter but you cant work under it in the summer,
I should have used a tint or an opal polycarb.
 

Attachments

  • Roof absorbsion.jpg
    Roof absorbsion.jpg
    95 KB · Views: 41
OP
Q

Q777

Well-known member
Joined
Jun 8, 2014
Messages
55
Location
Australia
Gazza, I'm tossing up between tinted polycarbonate and fibreglass sheets. A friend supplies both and recommends the f/glass option but I need to understand why.
You definitely convinced me to go with much lighter sheeting colours - thanks for the advice.
 
OP
Q

Q777

Well-known member
Joined
Jun 8, 2014
Messages
55
Location
Australia
What's a new weekend without a new machine on the site! The 4WD scissor lift made it very easy to move around the pad, even where it was slightly damp.
34691773343_068c7d4550_c.jpg


Every minute of daylight on the weekend was spent measuring lengths, levels and angles. Another lesson I've learnt is that I should have been at home to supervise the holes being drilled, and I should have drilled 600mm holes. The 450mm holes proved to be too tight for the 310mm columns when factoring in a bit of misalignment in the holes. Nothing that a bit of work with a crowbar couldn't resolve, but for the sake of a bit of extra money for additional concrete in the hole it would have saved some time and physical effort.

It was really satisfying to loosely bolt the frames and top hats together, and to see the way everything pulled into alignment as we tweaked and tapped things around. By "tweak", sometimes that meant to push a top hat a millimetre to the side and sometimes it meant swinging a sledgehammer to move a seemingly immovable object.

Coming up the hill, the shed is taking shape nicely with the frame squared up and all top hats in place, and it looks pretty imposing against the leafy backdrop:

35566864595_e9c7868e55_c.jpg


...but if you continue along up the driveway and look back down to the shed, it seems to settle into the landscape as well as I could hope for.

35566851855_cc902a2cdc_b.jpg
 

gazza

Well-known member
Joined
Dec 24, 2009
Messages
364
Location
Melbourne Aust
Hi "????", thanks for the update, great progress.
My thoughts, poly vs fibreglass sheets.

Our dad's shed is 30 x 100ft around 26 years old, caufield green colour bond with one strip of fibreglass in every 20' bay, it is well past its functional/use by date, covered in moss and so cruddy it hardly lets any light through. It has broken down to the point where you can pluck the fibres from the resin on the outside. It is still quite waterproof but it is unsafe and no longer effective as a light source. Also there is a row of pine trees all above 60ft high about 40 ft from the shed, there are no gutters on the shed as the pine needles block and rust them out.

My shed is 17 years old, light green colourbond roof with 3 strips of clear polycarb about 40' long, still very see through, plyable and waterproof. Earlier this year I replaced most of the rubber grommets under the hex headed screws as a few of them were showing their age and were not a snug seal or waterproof. This is more of a maintenance move, when the fasteners loosen over time the sheet moves in the wind and elongates the holes allowing the wind to eventually pull the sheets off the roof. I do intend to replace these clear sheets with a tint or an opal sheet but they still have a few good years in them.
 
OP
Q

Q777

Well-known member
Joined
Jun 8, 2014
Messages
55
Location
Australia
Gazza - sounds like the polycarb is working out much better. Thanks for the tip.
Craig.
 
To avoid these ads, REGISTER NOW!
OP
Q

Q777

Well-known member
Joined
Jun 8, 2014
Messages
55
Location
Australia
There has been a range of red machinery during the build so far, so I thought I'd move one more piece on site to give me a bit of a feel for the space - and what might go where.

35599840196_14a0364f6f_c.jpg


35639304335_0a157978c1_c.jpg
 
OP
Q

Q777

Well-known member
Joined
Jun 8, 2014
Messages
55
Location
Australia
Ive been advised to paint the columns in bitumen based paint where it is in contact with the concrete. Looks like I'm off to Bunnings...
 
Last edited:

cros13

Well-known member
Joined
Sep 29, 2014
Messages
496
Location
Sydney, Australia
ohhhh!!! i like that alot!

Bunnings is great isn't it... your spending money... but... its like ToysRus for men!

Rudi.
 
OP
Q

Q777

Well-known member
Joined
Jun 8, 2014
Messages
55
Location
Australia
I haven't had a chance to do much to the shed lately, so it was nice to get the formwork in place for the slab. Because there won't be a swarm of people here when the concrete is poured, and because only one person knows what they're doing, we are taking the careful option and doing the slab in two pours. For the slab size, I was glad to hear the concrete rep agree with our idea. He said he actually preferred to do two pours. It certainly reduces the risk of the concrete getting away from us, so that's the plan.

Spent some time checking and double checking levels, so hopefully we will end up with something that appears semi professional at a glance...

35123435883_607e15c0a1_c.jpg


For no other reason than sparks look cool.
35092877104_e33432c887_c.jpg


35123444243_72784f254d_c.jpg


35123446383_1bf7046ef7_c.jpg


...and then the rain came down again...!
35544109670_b81caf02cf_c.jpg


It is pouring down as I type this, so I'm fully expecting the moisture barrier to have become a pool by the morning. Fun times...
 
OP
Q

Q777

Well-known member
Joined
Jun 8, 2014
Messages
55
Location
Australia
When a 13T excavator arrives, suddenly earth banks that are crowding the edge of the shed become a non-issue. From having very tight margins around 3 of the sides, I can now drive a car all the way around. Words can't describe how much earth was moved in the space of 1 day!

35980348776_d2f0ae72a9_c.jpg


35632635070_8142213332_c.jpg


35211478963_361681c53d_c.jpg


Big water diversion bank to keep rainwater from flowing onto the pad. When it rains here, it pours!
35182572504_7190f08ae0_c.jpg


35182551144_e6e02ce28a_c.jpg


35211468633_d296b5d345_c.jpg
 
OP
Q

Q777

Well-known member
Joined
Jun 8, 2014
Messages
55
Location
Australia
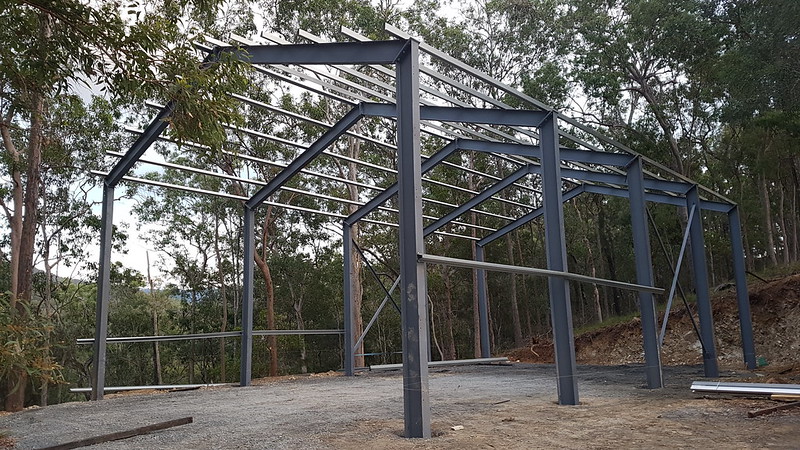
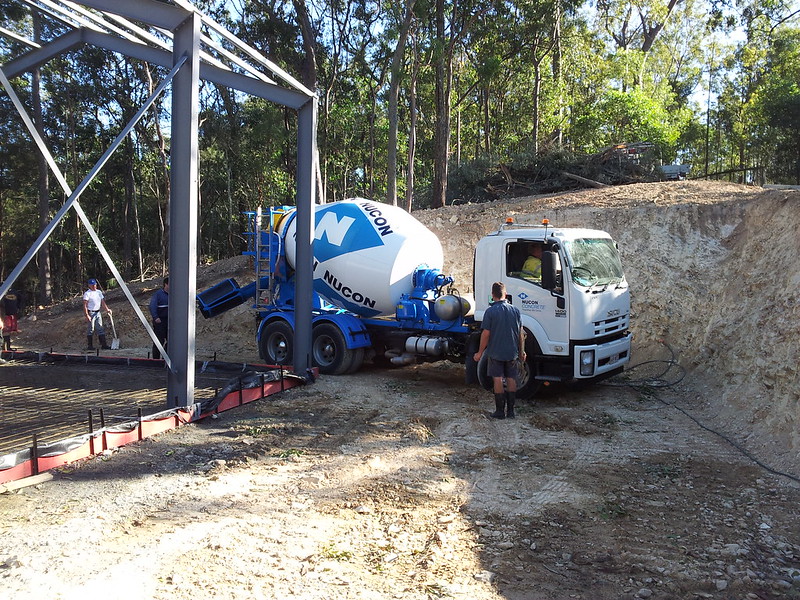
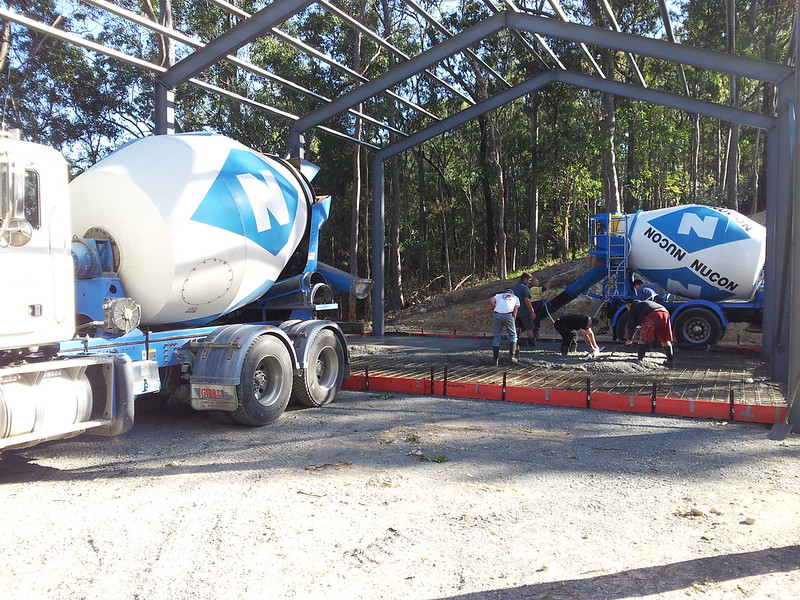
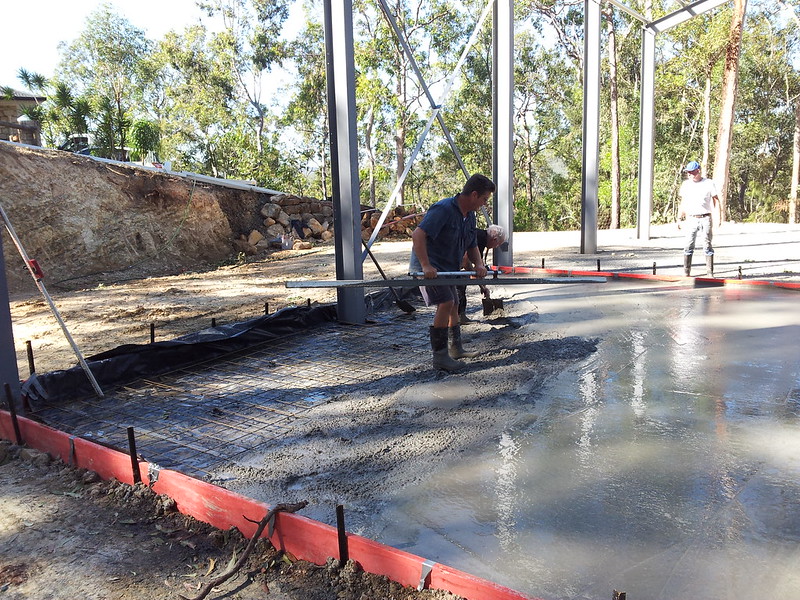
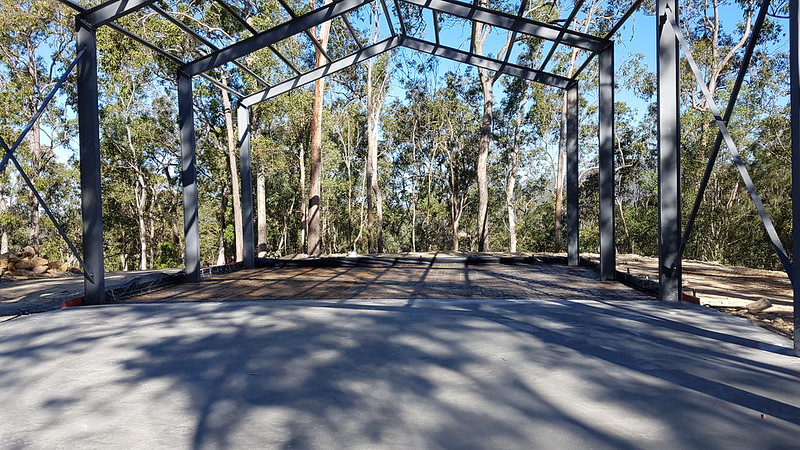
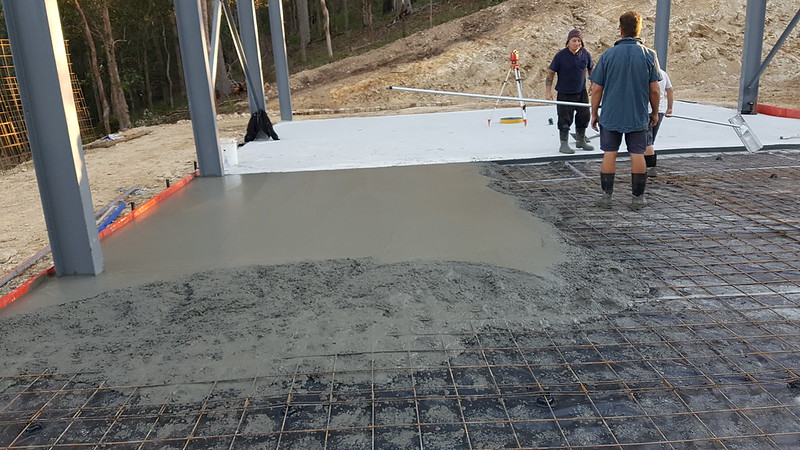
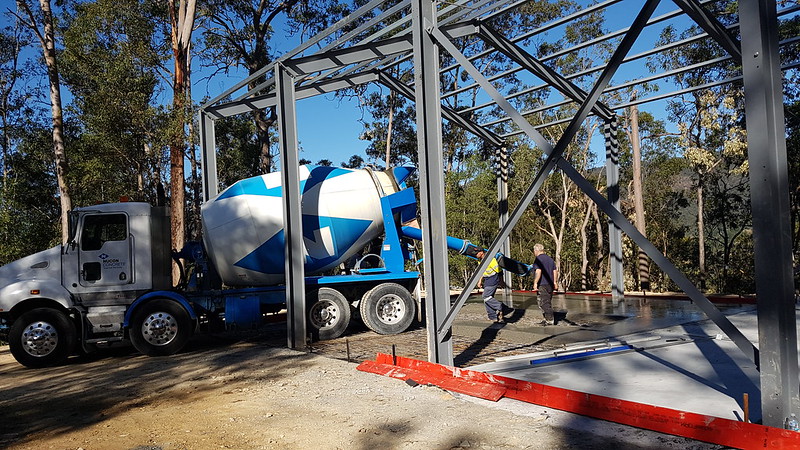
The first half of the slab was poured this weekend. Things went reasonably smoothly after the first concrete truck finally arrived. The company called it a miscommunication; I call it a stuff-up but whatever the case it meant the pour didn't start until 9am. The day was beautiful but it was a cool winters day with no breeze and very little sunshine hitting the pad due it nestling amongst tall trees. All that combined with the late pour meant the final machine trowel didn't happen until 9:30pm. I wasn't expecting it to be a 12+ hour day, but after the concrete was poured, screeded and bull floated, the rest of the slab work was mainly a waiting game.

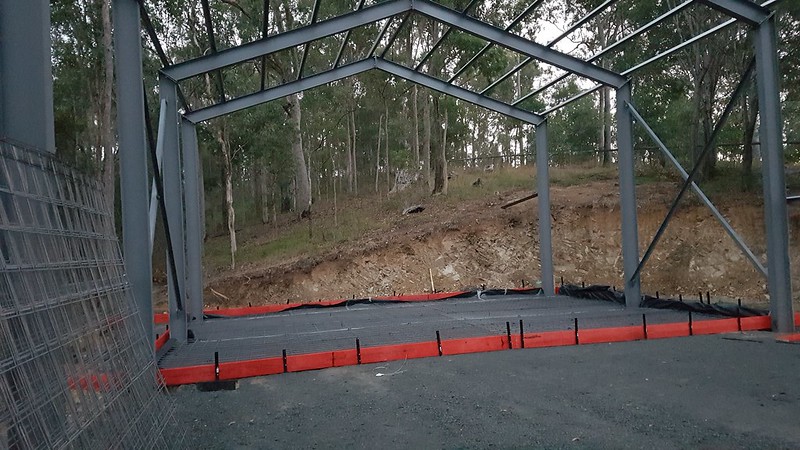
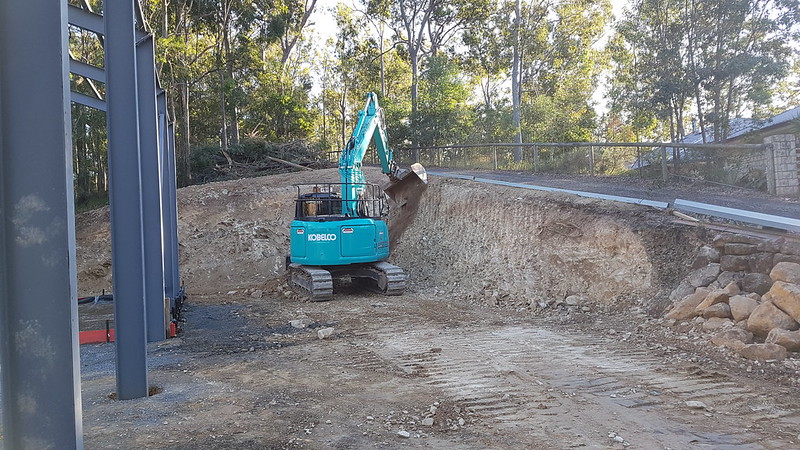
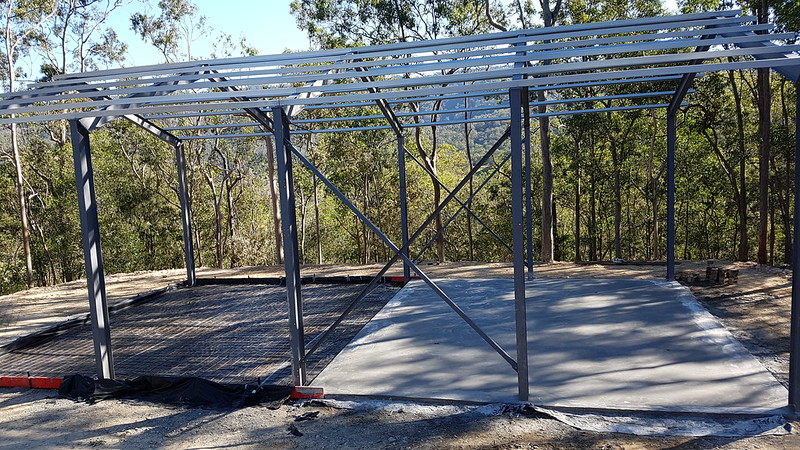
I'm so happy with the excavation work. Before this week, I wouldn't have imagined that I would have been able fit a concrete truck along the far end of the shed. Thankfully the driver was prepared to squeeze the truck up there which made the pour much easier for everyone on the shovels.

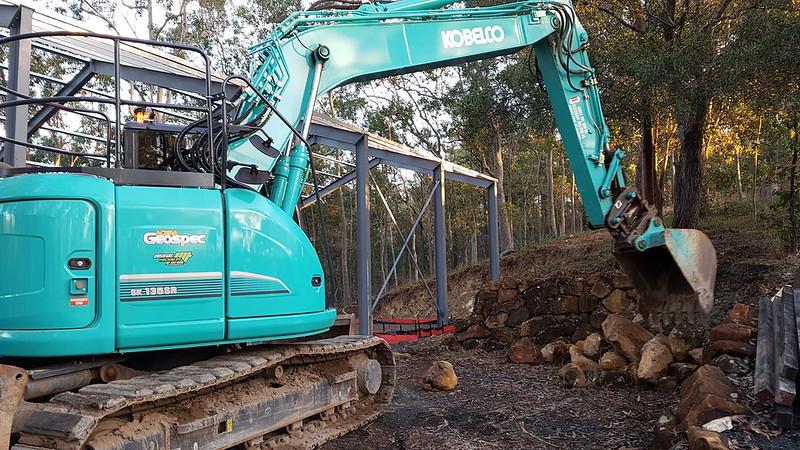
Speaking of which, what on earth would you do without family and mates? Mick (who has been driving this shed build from the start), Dad, my brother in law Jeff and a couple of mates all got stuck in to not only get the slab done but also to build a retaining wall, pour a water diversion drain and fix the driveway with the spare concrete. ****** legends!
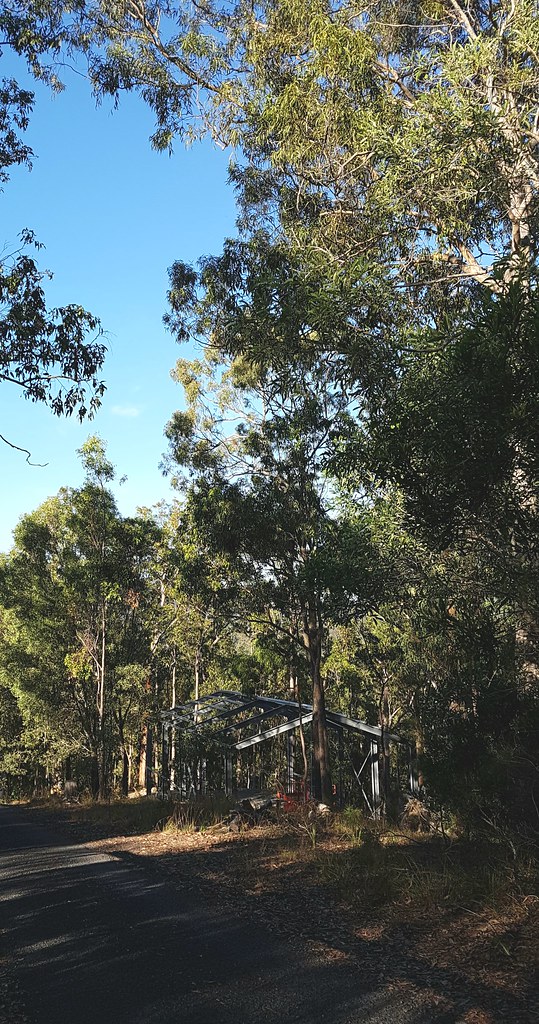
Around the corner.

35709681740_90726bdab3_c.jpg


No time for a break between deliveries.

35967921451_97c8d21842_c.jpg


36059727986_b5eef50118_c.jpg


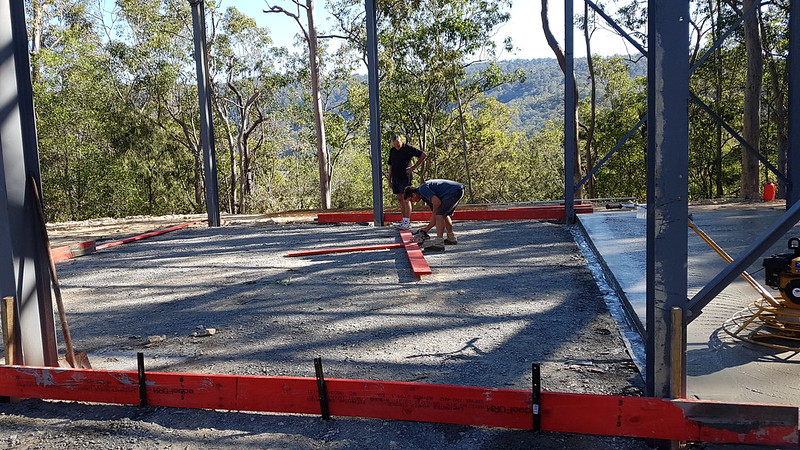
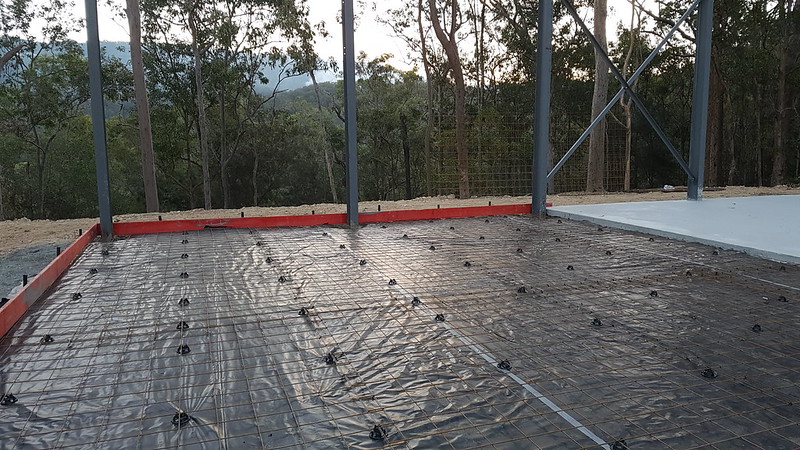
Way too wet for the machine trowel, so we started boxing up the second half of the slab for next weekend.

36059572666_62cb55f5f6_c.jpg


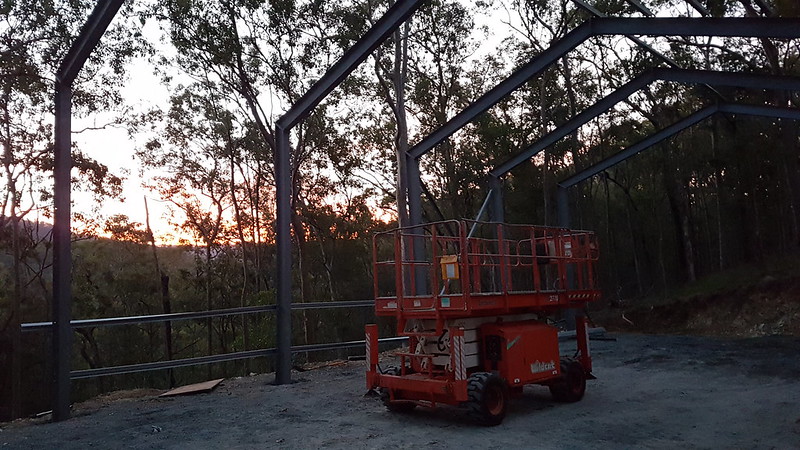
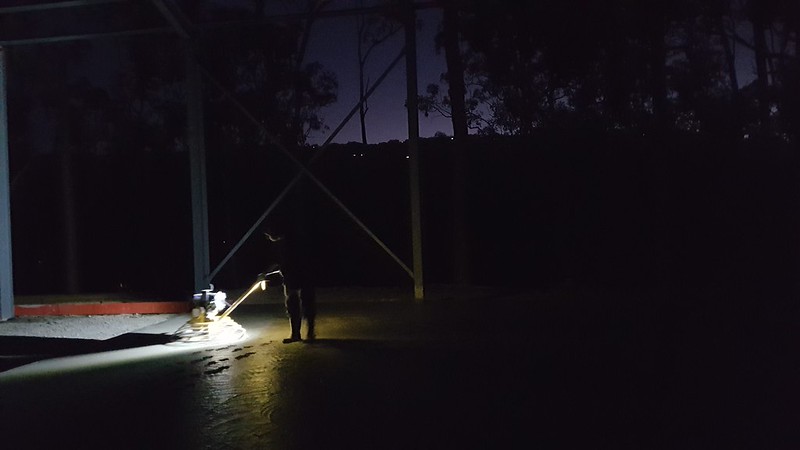
Finishing the slab with the moonlight making a soft silhouette against the mountain, and with an LED light strapped to the machine...

35931233782_030bb6f8ec_c.jpg


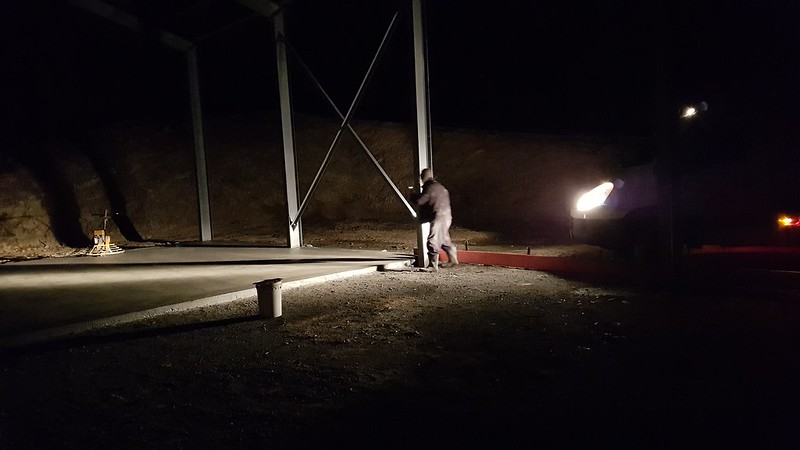
...and then the headlights from the truck!

35292151053_bc8052526d_c.jpg


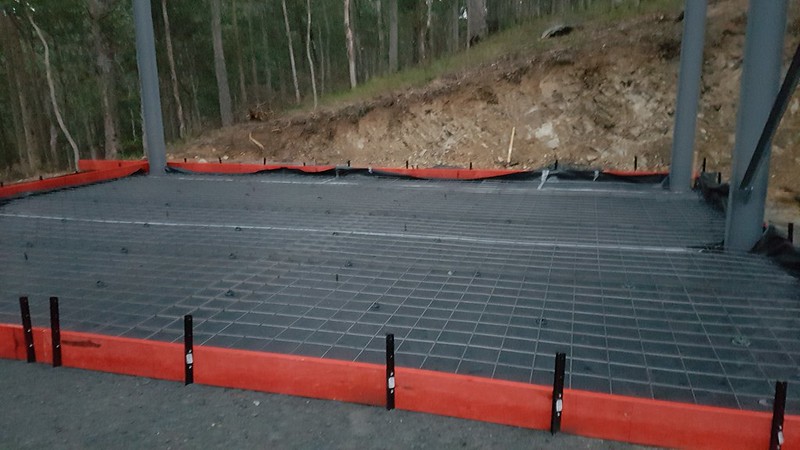
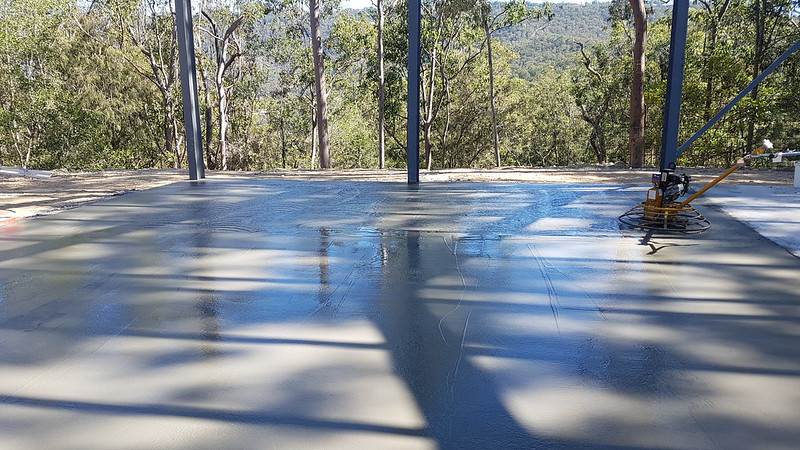
First half done. Second half boxed, wrapped and meshed, ready to go again next weekend. Bring it on!

36100550845_42d2228322_c.jpg


35292160773_2bbbf4a123_c.jpg
 
OP
Q

Q777

Well-known member
Joined
Jun 8, 2014
Messages
55
Location
Australia
The second half of the slab went down last weekend. The same group of champions pitched in, with the addition of my little nephew as the foreman to keep things running smoothly.

I had originally run the plastic on the ground and up the side of the boxing, but with the first slab taking until well into the night to harden up I decided to remove the vertical plastic in the hopes that any excess water could bleed off easier. It probably made little difference, but it definitely made for a neater side to the slab without the risk of the plastic folding and getting stuck in the slab edging.

The first truck arrived at 6:30am (2.5hrs earlier than the weekend before), and the slab was finished at 4:00pm (5.5hrs earlier than the weekend before). I'd call that a win!

Bushfire over the hill from me in the background. Dad being a smartie said the first shed burnout is supposed to be from a car...

36153108431_1b9d38bea5_c.jpg


It's at this point that I realised how much concrete we would need for this slab. The pad had been levelled with a bobcat, but there was still a slight fall towards the downhill side. I decided to fill that with concrete partly because it would make the slab thicker at what I'd call the most exposed corner, and also because that's where the hoist will go. The little section here used 3 cubic metres...

36153114001_c72d61cb2a_c.jpg


If an 8 wheeler concrete truck isn't too tall for the shed, I think I'll be able to fit any height vehicle in here just fine.

36153123231_583bc8b7e9_c.jpg


36153122891_8f69e1707a_c.jpg


Site foreman showing the oldies how it's done.

36285401095_8fb43659df_c.jpg
 
OP
Q

Q777

Well-known member
Joined
Jun 8, 2014
Messages
55
Location
Australia
Its funny how you find out who your mates are! You have a good crew helping.

So true Terrick. These guys volunteered to come back for the second slab without me asking, now they're lining up to help with the roof and wall sheeting. ****** legends!
 

Terrick down Under

Well-known member
Joined
Jul 2, 2015
Messages
1,904
Location
Royalla, NSW, Aust.
Great progress! My biggest challenge was finding ways to pay my mates back, on things they really wanted. Lots of swapping and dealing. It was a challenge and fun at the same time.
 
OP
Q

Q777

Well-known member
Joined
Jun 8, 2014
Messages
55
Location
Australia
Resurrecting this thread from 9 months ago...!!!

One thing I’ve come to realise is that I was kidding myself to think I would be able to work 70hrs per week at work and also get the shed done. I am also too tight to pay a company to finish the shed. As such, it had to wait until my work came to an end. With the work finished, no I have time to start playing with the shed again.

As a reminder, the slab was down and the roof battens are in place.

28333432398_d04ef8b958_c.jpg


As the frame had been sitting in the elements for almost a year by now, I decided to sand back the paint and give it another coat. I chose a different colour, so it was necessary to paint the entire thing again regardless of whether the existing paint looked weathered or perfect. Dad and I painted the lot with a 100mm roller and a 75mm brush :) In the photo above you can see the old darker colour along with new lighter colour as we worked our way through it.

It was necessary to weld in some 100x100 box section into the beams for the battens to attach to. Some people are less worried about heights than others. (That’s not me standing up there like that...)

42160012002_45ca6761e4_c.jpg


41485436204_2822ebe126_c.jpg


With the frame painted, the next step was to have the doors fitted. I went with B&D Firmadoor Series 2 Industrial doors, 4200mm high. Another smaller door - 2900H x 2400H - went in to the back wall for a bit of air flow.

40399372420_6f76428be6_c.jpg


41485467804_2091fbd5c8_c.jpg


Colorbond Terrain colour.

27335179357_eb29c35624_c.jpg


...and then the roof and wall sheeting was delivered! Next update should show the frame looking a bit more like a shed. I can’t wait!

42160073212_f225d6cee8_c.jpg
 
To avoid these ads, REGISTER NOW!
Top Bottom