
You are using an out of date browser. It may not display this or other websites correctly.
You should upgrade or use an alternative browser.
You should upgrade or use an alternative browser.
Between 705 & 1200 SQ/FT ZMotorsports Home and 50x60x16 Shop/RV Garage
- Thread starter zmotorsports
- Start date
Workspaces between 705 and 1200 squarefeet.
shortykorte
Well-known member
Ha! A great mind and I think a like. Scary. 
As you can see, I need handles so I looked at Global and found some replacements. Thanks.
On the lathe, I like the use of panel box to hold a magnetic clip for drawings. I'm new to all these controllers, VFRs, etc so have to ask want is that in the panel box.
Sent from my iPhone using Tapatalk
As you can see, I need handles so I looked at Global and found some replacements. Thanks.
On the lathe, I like the use of panel box to hold a magnetic clip for drawings. I'm new to all these controllers, VFRs, etc so have to ask want is that in the panel box.
Sent from my iPhone using Tapatalk
Attachments
OP
zmotorsports
ALLIANCE MEMBER
One heck of a set up. You sir ... did it right. Congrats!
Thank you. I appreciate that and thanks for following along.
Mike
OP
zmotorsports
ALLIANCE MEMBER
Ha! A great mind and I think a like. Scary.
As you can see, I need handles so I looked at Global and found some replacements. Thanks.
On the lathe, I like the use of panel box to hold a magnetic clip for drawings. I'm new to all these controllers, VFRs, etc so have to ask want is that in the panel box.
Sent from my iPhone using Tapatalk
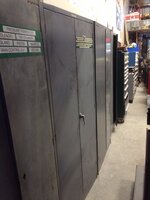
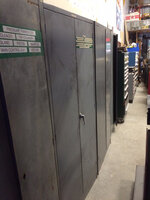
Hey, nice cabinets there Shorty.
 Ours look very similar and especially the way they are arranged.
As for the NEMA enclosure above my lathe, that is where my VFD (Variable Frequency Drive) for the lathe is mounted. I ordered my lathe in 3 phase and by using a VFD you can take single phase and convert it to 3 phase in small HP configurations. I prefer to have the lathe ran off of 3 phase and this was a nice option to power it as I really didn't want to mess with a phase converter.
Thanks again for posting and following along Shorty.
Mike
Attachments

OP
zmotorsports
ALLIANCE MEMBER
Well I started my Steevo style workbenches today.
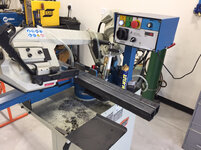
Started off with some mockup and measuring. I'm 6'2" (and shrinking slightly) and my son is 6'4" so we are shooting for a 39.5"-40" height to top of work surface.
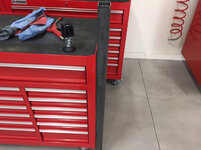
Finally getting to use some of my equipment and start fabricating.
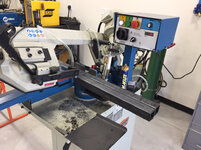
Thanks for looking.
Mike
Sent from my iPhone using Tapatalk
Started off with some mockup and measuring. I'm 6'2" (and shrinking slightly) and my son is 6'4" so we are shooting for a 39.5"-40" height to top of work surface.
Finally getting to use some of my equipment and start fabricating.
Thanks for looking.
Mike
Sent from my iPhone using Tapatalk
Attachments
Last edited:
Finallygotit
ALLIANCE MEMBER
Chips!! 

JCQuick
Well-known member
I got my pop corn yay the bench's have been started
yay the bench's have been startedshortykorte
Well-known member
Seeing that saw (and other tools) , I'll be stopping to do some fab work. At 6-6 can you make one bench 42". Lol.
Sent from my iPhone using Tapatalk
Sent from my iPhone using Tapatalk
Last edited:
OP
zmotorsports
ALLIANCE MEMBER
Chips!!
Thanks Dan.
Chips is right. Exciting.
Mike
Sent from my iPhone using Tapatalk
OP
zmotorsports
ALLIANCE MEMBER
I got my pop corn
Thanks JC. Yep, benches are officially started.
Thanks for checking in.
Mike
Sent from my iPhone using Tapatalk
OP
zmotorsports
ALLIANCE MEMBER
Seeing that saw (and other tools) , I'll be stopping to do some fab work. At 6-6 can you make one bench 42". Lol.
Sent from my iPhone using Tapatalk
Sorry Shorty, you're on your own there. Besides, that would be a loooong way to come for a bench. Aren't you in Florida?
Mike
OP
zmotorsports
ALLIANCE MEMBER
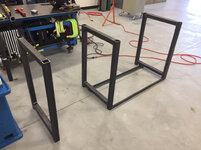
Benches are started.
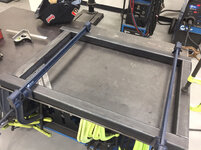
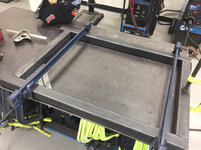
One end piece clamped together for welding.
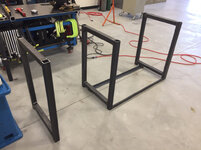
Two end pieces mocked into position around one box.
Ready to test fit a box before joining these three sections to make up my 6' bench.
It has been almost nine months since I have been behind a welding helmet and my welding *****. I definitely need to get back into a rhythm again.
On a positive note, my GC had his HVAC guy stop by today while I was working in the shop. He measured for the heater flu and gas line connection. He said he would be back in the next couple of days to finish it up.
Mike
Sent from my iPhone using Tapatalk
One end piece clamped together for welding.
Two end pieces mocked into position around one box.
Ready to test fit a box before joining these three sections to make up my 6' bench.
It has been almost nine months since I have been behind a welding helmet and my welding *****. I definitely need to get back into a rhythm again.
On a positive note, my GC had his HVAC guy stop by today while I was working in the shop. He measured for the heater flu and gas line connection. He said he would be back in the next couple of days to finish it up.
Mike
Sent from my iPhone using Tapatalk
Attachments

Last edited:
jbmatth
Well-known member
Great to see some construction in the shop and not on it. I'm sure even your terrible welding is better than my best.
JB
JB
OP
zmotorsports
ALLIANCE MEMBER
Great to see some construction in the shop and not on it. I'm sure even your terrible welding is better than my best.
JB
Thanks JB. Yes it is great to be working in the shop vs. working on the shop, even though technically the work benches are for the shop.
I definitely needed to get behind a helmet again and work on my welds.

Thanks for stopping by and checking on things.
Mike
OP
zmotorsports
ALLIANCE MEMBER
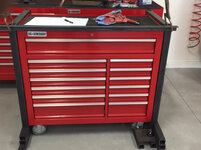
Smaller bench (6') welded and ready for paint.
Mocked up with toolbox to ensure measurements were accurate.

Mocked up without toolbox but in location.

Thanks for looking.
Mike
Mocked up with toolbox to ensure measurements were accurate.
Mocked up without toolbox but in location.
Thanks for looking.
Mike
Attachments


Last edited:
C_F
ALLIANCE MEMBER
Looks like your benches will end up being very stout, I likey!
richzuki
Member
Everything about this shop is amazing. The empty shop was already a dream and now to see all the equipment that goes in it...breath taking!
Amazing work Mike
Amazing work Mike
OP
zmotorsports
ALLIANCE MEMBER
Looks like your benches will end up being very stout, I likey!
Thanks. I hope they are stout enough. We'll see.
I appreciate you following along all this time. Been a long project.
Mike
Sent from my iPhone using Tapatalk
OP
zmotorsports
ALLIANCE MEMBER
Everything about this shop is amazing. The empty shop was already a dream and now to see all the equipment that goes in it...breath taking!
Amazing work Mike
Thank you. I am flattered by your comments. I appreciate you taking the time to follow along.
Mike
Sent from my iPhone using Tapatalk
OP
zmotorsports
ALLIANCE MEMBER
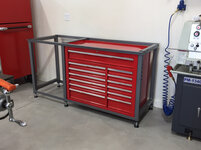
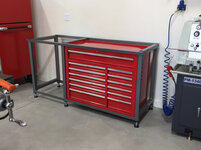
Framework after painting.

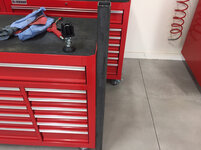
Feet installed in the frame, leveled and installing the toolbox.

Toolbox installed and in position. The area to the left of the toolbox will be a storage compartment. I will fabricate a door for it at a later time.

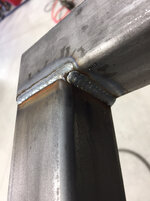
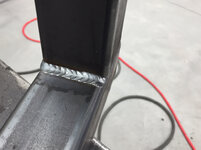
Getting back in the rhythm of things with the squirt gun. I can definitely tell it's been a while though.
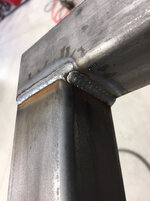
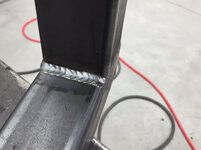

I was able to get four of the seven sections completed for the corner bench which I hope to make some progress on tomorrow then I can measure and order my tops.

Thanks for looking.
Mike
Sent from my iPhone using Tapatalk
Feet installed in the frame, leveled and installing the toolbox.
Toolbox installed and in position. The area to the left of the toolbox will be a storage compartment. I will fabricate a door for it at a later time.
Getting back in the rhythm of things with the squirt gun. I can definitely tell it's been a while though.
I was able to get four of the seven sections completed for the corner bench which I hope to make some progress on tomorrow then I can measure and order my tops.
Thanks for looking.
Mike
Sent from my iPhone using Tapatalk
Attachments
-
 6b808b653eff2ea7412ed14297274f2e.jpg712.5 KB · Views: 0
 -
 00a951d29553325d65d635e7e5178c91.jpg705.9 KB · Views: 0
 -
 18ed499355ee14e45cc8227e7edbcd44.jpg639.8 KB · Views: 0
 -
 f9dddc3380a09c576d3dd08ac1b963fb.jpg717 KB · Views: 0
 -
 a82c519e83865d5576acfe3503329a0d.jpg739.7 KB · Views: 0
 -
 82c7ce15404701a27e3b64cd1d3074e0.jpg714.1 KB · Views: 0
 -
 3d53c5ec70e133935197e0c3f9f05c4f.jpg793.2 KB · Views: 1
 -
 a2f99f2926d3388d4773eb804cb9d3c1.jpg1 MB · Views: 4
Last edited:
JCQuick
Well-known member
Oh this is going to be good  Hurry up
Hurry up
OP
zmotorsports
ALLIANCE MEMBER
Oh this is going to be good
Kickass Mike, let all the fun stuff begin.
Thanks guys. I appreciate the encouragement.
It's starting to feel like home now with all of my equipment in the shop and actually working in the shop. It will still be a while before I am able to get everything organized and stored in cabinets though but before long I should be able to walk right to things like in my old shop. This disorganization and chaos is not good for my OCD though.

Mike
shortykorte
Well-known member
Looking good. Those welds like just like mine......when I dream.
Sent from my iPhone using Tapatalk
Sent from my iPhone using Tapatalk
Finallygotit
ALLIANCE MEMBER
Feet installed in the frame, leveled and installing the toolbox.

Mike, how did you connect the tool box to the engine lift? Magnet?
Toolfool
Well-known member
It's good to see you're finally using and enjoying the shop.
OP
zmotorsports
ALLIANCE MEMBER
Looking good. Those welds like just like mine......when I dream.
Sent from my iPhone using Tapatalk
Thanks Shorty. They aren't my best but I'm happy with them, especially since it's been 9+ months.
I guess I just need more practice.
Mike
Sent from my iPhone using Tapatalk
OP
zmotorsports
ALLIANCE MEMBER
Mike, how did you connect the tool box to the engine lift? Magnet?
Dan, after removing the top drawer there are several hole that are accessible and I put a bolt through and connected to a strap across the top then lowered it in place.
But I like the magnet idea better.
Mike
Sent from my iPhone using Tapatalk
OP
zmotorsports
ALLIANCE MEMBER
It's good to see you're finally using and enjoying the shop.
Thanks. Yes it is. Working in the shop today it started raining a little bit. It was kind of nice to be working with the shop doors opened and enjoying a little thunderstorm rolling through.
Thanks for following along.
Mike
Sent from my iPhone using Tapatalk
Last edited:
Thanks. Yes it is. Working in the shop today and it started raining a little bit. It was kind of nice to be working with the shop doors opened and enjoying a little thunderstorm rolling through.
Thanks for following along.
Mike
Sent from my iPhone using Tapatalk
Bay far one of my most favorite things is to be working in the shop and watching the storms roll through.
Until I am welding, hood down and that huge crack of thunder makes me jump ruining a great weld bead.
Shop is looking awesome Mike, How many of the benches are you building?
OP
zmotorsports
ALLIANCE MEMBER
Bay far one of my most favorite things is to be working in the shop and watching the storms roll through.
Until I am welding, hood down and that huge crack of thunder makes me jump ruining a great weld bead.
Shop is looking awesome Mike, How many of the benches are you building?
Thanks.
I am building one 6' bench and then a corner style bench that will be 10' and 12'.
Thanks for stopping in.
Mike
Sent from my iPhone using Tapatalk
OP
zmotorsports
ALLIANCE MEMBER
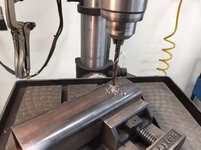
Grabbed a couple pieces of receiver tube out of my metal supply and drilled a hole in each one and tapped to 3/8"-16 thread.
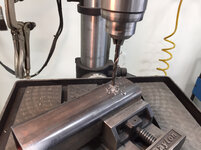
Then welded a nut on each one.

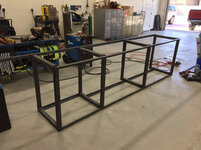
The 10' section mocked into position.

Then went to work welding up the 12' section.
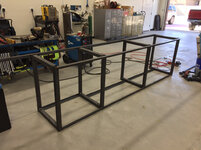
I added one receiver tube to each end so I can fabricate adapters as needed.

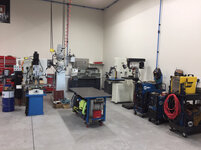
Corner bench mocked up and ready to paint tomorrow morning.

Lastly I cleaned up the shop from its first messy job.
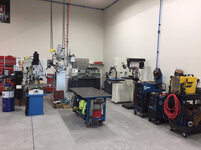
I guess I must be getting older because it's late Friday night and I am still in the shop working. The wife had to work late so my son and I are in the shop working and BSing. I don't think life gets much better.
Thanks for looking.
Mike
Sent from my iPhone using Tapatalk
Then welded a nut on each one.
The 10' section mocked into position.
Then went to work welding up the 12' section.
I added one receiver tube to each end so I can fabricate adapters as needed.
Corner bench mocked up and ready to paint tomorrow morning.
Lastly I cleaned up the shop from its first messy job.
I guess I must be getting older because it's late Friday night and I am still in the shop working. The wife had to work late so my son and I are in the shop working and BSing. I don't think life gets much better.
Thanks for looking.
Mike
Sent from my iPhone using Tapatalk
Attachments
-
 9a008cbde87fcc300a885f109b1809ed.jpg819.4 KB · Views: 4
 -
 af7969c10cb99449219baddacce643f4.jpg731.7 KB · Views: 1
 -
 e97819d66e90baed267c2760072cb846.jpg674.2 KB · Views: 0
 -
 b5a2628d959159320fb9be6ec40cbe57.jpg773 KB · Views: 0
 -
 9780fc70f0f719d98f245b7a5c401b80.jpg703.6 KB · Views: 0
 -
 206a599521da7a1a195b21e94ad5fdcd.jpg598.9 KB · Views: 0
 -
 c8e0d96a555058f12ae623e51f9e8d94.jpg712.9 KB · Views: 1
Last edited:
Bob Heine
ALLIANCE MEMBER
Looks like heaven to me!
OP
zmotorsports
ALLIANCE MEMBER
Looks like heaven to me!
Thanks Bob, sure feels like it to me.
Thanks for following along.
Mike
OP
zmotorsports
ALLIANCE MEMBER
Shop is DONE!!!
Well it is Friday night @ 10:45pm on July 28th and after almost six months to the day the shop is finally DONE!
My GC sent his plumbing contractor to connect the gas line at the meter as well as the heater and hook up the flu and get the heater up and running. He called me about 4:30 this afternoon and asked if it was too late to come by and work on the heater. I said HELL NO, come on by. He just left about 10:30pm after getting here around 6:30pm. I was shocked to see him stay to get it done but I was happy to see him get it done all the same.
Tomorrow I will be painting the last two benches and getting them set up then next week moving on to organizing and then chopping away at my projects list.
Thanks to all for following along on this adventure.
Mike
Well it is Friday night @ 10:45pm on July 28th and after almost six months to the day the shop is finally DONE!
My GC sent his plumbing contractor to connect the gas line at the meter as well as the heater and hook up the flu and get the heater up and running. He called me about 4:30 this afternoon and asked if it was too late to come by and work on the heater. I said HELL NO, come on by. He just left about 10:30pm after getting here around 6:30pm. I was shocked to see him stay to get it done but I was happy to see him get it done all the same.
Tomorrow I will be painting the last two benches and getting them set up then next week moving on to organizing and then chopping away at my projects list.
Thanks to all for following along on this adventure.
Mike
Boosted1
Well-known member
Is your receiver tube stock seamless? I had that idea, but the tube I had tried to use had a seam which made it a no go.
Shop is looking great.
Shop is looking great.
OP
zmotorsports
ALLIANCE MEMBER
Is your receiver tube stock seamless? I had that idea, but the tube I had tried to use had a seam which made it a no go.
Shop is looking great.
Yes, it is actually receiver tubing.
Thanks for following.
Mike
OP
zmotorsports
ALLIANCE MEMBER
Definitely winding things down on the shop.
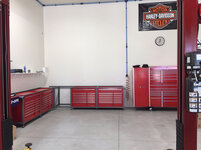
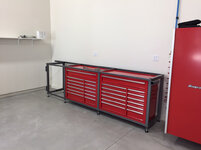
Twelve foot bench in place.
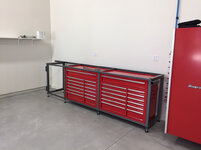
Ten foot bench in place and bolted to the 12' bench.


Once the benches were in place I moved on to some much needed vehicle maintenance. Starting with the wife's car. This was the first vehicle on the lift in the new shop.

And lastly I threw some chops on the grille and some peppers for dinner after closing up the shop for the day.

Thanks for looking.
Mike
Sent from my iPhone using Tapatalk
Twelve foot bench in place.
Ten foot bench in place and bolted to the 12' bench.
Once the benches were in place I moved on to some much needed vehicle maintenance. Starting with the wife's car. This was the first vehicle on the lift in the new shop.
And lastly I threw some chops on the grille and some peppers for dinner after closing up the shop for the day.
Thanks for looking.
Mike
Sent from my iPhone using Tapatalk
Attachments



Last edited:
shortykorte
Well-known member
That corner bench is looking the bomb and very functional.
I'm thinking you might need better lighting. lol. Another fantastic shop for me to inspire towards.
Sent from my iPhone using Tapatalk
I'm thinking you might need better lighting. lol. Another fantastic shop for me to inspire towards.
Sent from my iPhone using Tapatalk
OP
zmotorsports
ALLIANCE MEMBER
That corner bench is looking the bomb and very functional.
I'm thinking you might need better lighting. lol. Another fantastic shop for me to inspire towards.
Sent from my iPhone using Tapatalk
Thanks Shorty. I appreciate the comments.
Funny you mention the lighting. I have had two people now want the light information after being in my shop as they want to upgrade from their T8 lighting. I'm so glad I opted to upgrade to these LED's when I did.
Thanks again for following along.
Mike.
Sent from my iPhone using Tapatalk