dreamingmuscle
Well-known member
Sams club has LED shop lights for $35. Even had a sale on them Saturday for $25.


Sams club has LED shop lights for $35. Even had a sale on them Saturday for $25.
Whoa... Not bad for your first unsupervised go, messing around with TIG!
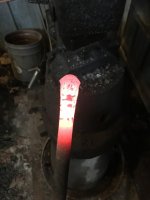
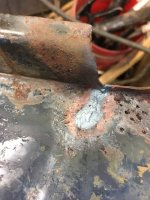
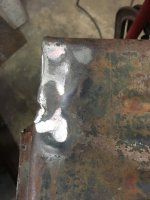
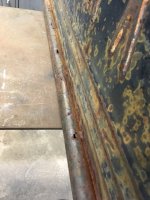
As usual I’m late to the party… definitely had the look of contaminated gas or welding in a breeze. Good catch on the leak though. I accidentally touched my torch to the hose while resting my hand and punctured the gas hose with the hot tungsten electrode. Same symptoms. Few wraps of PVC tape and everything now has a leather sleeve.
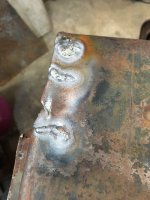
Always good to practice on an offcut of the same material if aesthetics are critical. I also prefer welding hot and fast with TIG. Most of my problems start when I loiter around too much. Though grinding is always a good 2nd option if that fails.
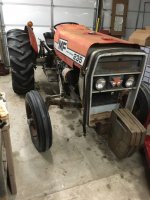
Now that part of the tractor looks good you will have to do all the rest!
")
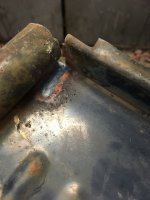
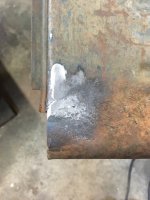
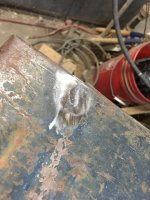
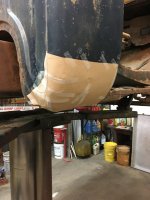
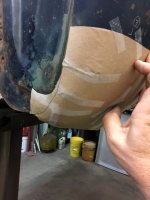
Hot and fast within reason I guess. With thin material I like to focus on getting a good fusion weld, keeping the heat affected zone small and localising the shrinkage to a small spot that I can plannish to stretch out a bit. This means often means doing little spot-welds 30-50mm apart to let material cool before doing the next one. I also take a bit of care when grinding the weld flat to keep from reintroducing localised shrinking by getting the material too hot again, grinding in the same order as the welds.
Good fit-up, weld backing(were needed) and good clamping also makes all the difference. Curved sheet metal is especially frustrating to keep aligned without those little sheet-metal clamps.
I still have years of practice ahead of me...

Andy you're a welder. I bow before your talent!
Looking forward to more work on the Studebaker.You're not the first person to ever do that...why do you think everybody recognized it so quickly? The old rigs had a manual valve you had to turn on, forgetting meant an "Oh ****", and out came the grinder on the weld and a resharpening of the tungsten.I wasn't as embarrassed as I was trying to find out what I was doing wrong. I wasn't getting it that I didn't have argon coming through in sufficient quantities. If fact, I was quite pleased I did so well without argon
You're not the first person to ever do that...why do you think everybody recognized it so quickly? The old rigs had a manual valve you had to turn on, forgetting meant an "Oh ****", and out came the grinder on the weld and a resharpening of the tungsten.
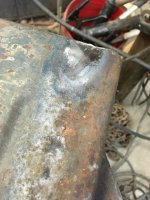
At least next time you will recognize it right away.
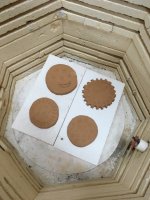
I had bought two, and the other did not need to be spread as much. Nice design, wish it was all brass. Forgot to take a picture. A nice win. Got to practice lots of skills and it's out of the shop for good!
It's hard to work on your own stuff when you have somebody else' stuff broke down.

Andy,
Good to see the tractor ready to go. Now you can practice welding on the studebaker.
How many days till it has to be ready?
Looking forward to the work and the solutions that you come up with to solve the problems.
Dwight
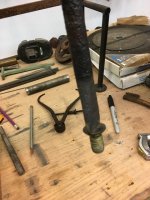
Are you going to cast your own brass fittings for future cable connections?
 But that's only 204 Saturdays
 I second that remark. (That's one for a signature quote!)
I bet you are just like me in that regard of dropping everything else to get it done and out of the way as you hate owing people or having them wait on you. Despite them saying there is no rush etc.
Still, you did good and made use of the time to practice new methods and getting the kinks out of others. Paid for some insulation too if I recall. Least you'll be cozy TIG welding on the Studebaker in the coming months!
Looking good Andy. I do not take in jobs anymore as I don't have enough time for my own fun projects. Good practice though.

AA. again you've come through with flying colors. Nice to see all the things you get accomplished. Just stopped by to keep you on your toes. I know what a slacker you'd be if I wasn't keeping my eyes on you.
 Also I wasn't knocking your welds, you may notice I never show mine for good reason.
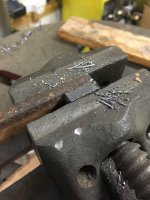
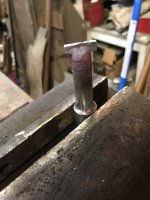
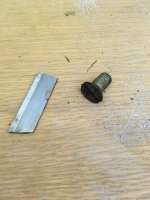
 Nice job on the screw removal, which reminds me I need to put a small forge together in my free time.
JB
I also don't take jobs in any more, try to stay away from vol. jobs also those are the ones that always have problem, but some times iam just a sucker for punishment, just to much to do here
It can be replaced with two single pole switches. But for this heat I wired the two coils together and ran it off the PID controller built for the big kiln. Smooth and sweet.Glad to see you got the mighty fart out and done. That was nice of you to not charge for labor - seems the only problem with that is it ends up being a one way street and taken for granted.
Find a piece of pipe for the tailgate it will be faster and stronger.
Depends on how fast you want it done...welding in patches will leave a distortion to relieve, a full new piece of pipe could be quicker but if it distorts under the roll it will be a nightmare to get straight again.
I would still go for the pipe tack it into position, then tack 1" and leave 4" then walk away for the day, then stich 1" and leave 4" gap, walk away for the day, stich the next 1" in each section and walk away. Slowly you will get a nice straight job. JMHO.
Use a heavy steel bench to work on so that it draws the heat out faster.
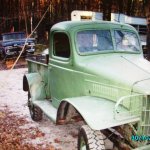
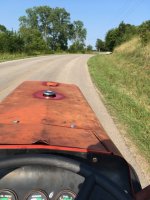
That does look like a nice drive. Job well done on the old Massey.
Are you telling me I need to make a heavy steel bench?

Thanks! It was a nice drive, a bit farther than I wanted but beautiful weather.

I would suggest using tubing for the bottom of the tailgate. You can get ERW
mild steel tubing in .060, .083 and .120 wall thickness fairly cheap. Try a muffler shop or somebody that fools with race cars or offroad trucks. Inch and a half or 1 3/4 is common and looks to be about what you have. I'd try to use .083, just because its a LOT easier to weld than the .060, but what you have is probably close to the thinner stuff. Good Luck
You have to ask?
8mile drive... how do you get back? Surely one of the benefits of loading onto trailer that definitely outweighs the one-way 8mile trip on the tractor is surely not having to walk almost 2 hours.
I can't wait till Saturday!
OIF, well actually , I assumed you had a heavy steel bench.......and yes the heavier pipe would help!
I'd be looking on CL, always good metal tables on there.
The only good thing about needing to finish up the Dodge is that when you get annoyed by the welding and busted bolts on the Stud e baker, you can go get something to drip in your eye instead for a while.
I can also get grease in my hair and on the back of my shirt. I guess I had failed to recognize the positive points.