To avoid these ads, REGISTER NOW!

Above 1200 Sq/FT The Lone Beech Garage (60x46x16)

Wokspaces above 1200 squarefeet.
OP
S

sbosecker

Well-known member
Joined
Sep 25, 2012
Messages
3,539
Location
Peachtree City, GA
Re: The Lone Beech Garage Build Thread (60x46)

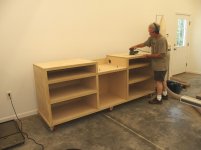
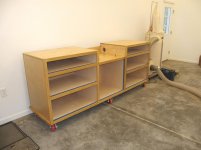
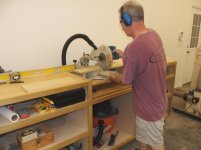
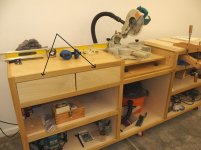
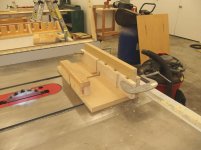
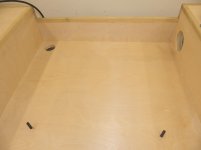
Fine job on the miter station. I see the huge dust collector next to it and the vacuum below. I also see a couple holes leading in the general direction of the dust collector. I don't see any hole in the back where the vacuum hose is positioned, so I don't know how you hooked that up. Are you eventually going to hook it up to the dust collector? If not, you'll need a vent into the lower cabinet for the air from the vacuum to escape, after the door is installed.

camarosrus69,

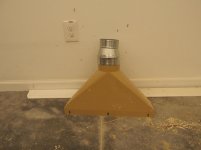
The plans call for two methods of dust removal. The Shop Vac handles the majority of day-to-day sawdust. There is a duct built into the cabinet for the larger dust collector to periodically be used to remove the saw dust that collects behind the Miter Saw. I haven't purchased the fittings for that second system yet.



20170718-01.jpg 20170718-02.jpg 20170718-03.jpg

I took these pictures on June 6th. The larger Dust Collector hole on the right should be closer to the shelf the miter saw "sled" sits on. I remember after I cut the hole I realized I had made a small mistake but - at the moment - I can't recall what the circumstances were that led to that error. It makes sense that the closer the bottom of the hole is to the shelf, the more likely it will remove more of the sawdust sitting on that shelf.


Best regards,

Scott
 
Last edited:
To avoid these ads, REGISTER NOW!

250

Well-known member
Joined
Oct 16, 2014
Messages
537
Location
West of the Sierras
Re: The Lone Beech Garage Build Thread (60x46)

I managed to get one of my fingers between the belt and the pulley.

That woke me up.

I tried to do that during the 143 start up, save it was my finger between the rubber and the blade. Just got a little knick, but now I only spin from the spokes. Too bad that didn't work, it was worth a shot and was free to try.

Miter saw stand looks good.
 
OP
S

sbosecker

Well-known member
Joined
Sep 25, 2012
Messages
3,539
Location
Peachtree City, GA
Re: The Lone Beech Garage Build Thread (60x46)

I tried to do that during the 143 start up, save it was my finger between the rubber and the blade. Just got a little knick, but now I only spin from the spokes. Too bad that didn't work, it was worth a shot and was free to try.

Miter saw stand looks good.

250,

Ouch!

Thanks for the information - it was worth a shot!

Best regards,

Scott
 
OP
S

sbosecker

Well-known member
Joined
Sep 25, 2012
Messages
3,539
Location
Peachtree City, GA
Re: The Lone Beech Garage Build Thread (60x46)

Friday - July 21, 2017

Decided to try to move forward on getting the Wood Shop a little more organized today. For the past few days I've done quite a bit of browsing on the internet - looking for Clamp Rack ideas. There are plenty to choose from and I finally settled on a simple concept found on the WoodSmith website. I climbed the stairs to the LBG's mezzanine, slapped a Moody Blues CD into the Music Box and got to work.


20170721-01.jpg 20170721-02.jpg

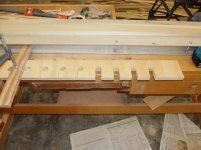
The plans in the WoodSmith article were modified a bit by me to store 12 of my Aluminum Bar clamps. When I finished my sketch I had enough information to pick out my materials. I'd need some plywood scraps at least 36-1/2 inches long.


20170721-03.jpg

I came downstairs to the Wood Shop. I cut some 3/4-inch plywood to the correct width. I left it oversize in length and would trim it after I had done all the other work.


20170721-04.jpg

I bored twelve 1-inch holes with a forstner bit.


20170721-05.jpg 20170721-06.jpg

The WoodSmith approach to cutting the slots in the plywood was to build a tall auxiliary fence and attach it to a table saw's miter gauge. Using that setup, the table saw blade would be run up as high as needed to make the cuts.
I decided to use my Oscillating Multi-Tool - with a scrap of straight plywood as a guide - to cut the slots. This worked pretty well.


20170721-07.jpg

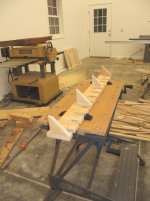
I cut some plywood scraps into triangles to act as braces for the Clamp Rack. I put some glue on these braces and left for the night.


I hope to finish this project tomorrow.


Scott
 
Last edited:

shortykorte

Well-known member
Joined
Sep 1, 2014
Messages
8,039
Location
Tallahassee, Fl
Re: The Lone Beech Garage Build Thread (60x46)

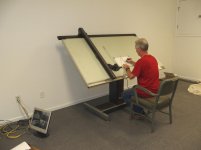
Your drafting setup is almost identical to what I used in the Air Force. A drafting stool with casters would be a nice upgrade.


Sent from my iPhone using Tapatalk
 
OP
S

sbosecker

Well-known member
Joined
Sep 25, 2012
Messages
3,539
Location
Peachtree City, GA
Re: The Lone Beech Garage Build Thread (60x46)

Your drafting setup is almost identical to what I used in the Air Force. A drafting stool with casters would be a nice upgrade.


shortykorte,

A rolling drafting stool would be a very nice upgrade!

I also need a Swing-Arm Lamp and some sort of small rolling set of drawers for "drafting stuff".


Best regards,

Scott
 
OP
S

sbosecker

Well-known member
Joined
Sep 25, 2012
Messages
3,539
Location
Peachtree City, GA
Re: The Lone Beech Garage Build Thread (60x46)

Saturday - July 22, 2017


Got back out to the LBG this morning to finish up the Clamp Rack project.


20170722-01.jpg

I set up the oscillating spindle sander with a 3/4-inch diameter sander and cleaned up the Clamp Rack slots.


20170722-02.jpg 20170722-03.jpg

Glue and the Pneumatic Brad Nailer came next. I let the Rack sit for a couple of hours so the glue could dry.


20170722-04.jpg 20170722-05.jpg

After spending a bit of time in the Lone Beech Garage Image Archive, I located the pictures showing the Wood Shop framing prior to sheet rock. This saved some time locating the studs and marking where the Clamp Rack would be fastened to the wall. Then it was time to drill clearance holes in the Clamp Rack before using the Impact Screw Gun to drive some 2-1/2 inch deck screws through Clamp Rack and into the studs.


20170722-06.jpg 20170722-07.jpg

This was a very useful project. I've still got another 8 Aluminum Bar Clamps to store so another Clamp Rack will probably be constructed in the near future.


Scott
 
OP
S

sbosecker

Well-known member
Joined
Sep 25, 2012
Messages
3,539
Location
Peachtree City, GA
Re: The Lone Beech Garage Build Thread (60x46)

Fun reading your posts & good choice in music to work by!


1949caddyman,

Thanks for stopping by and for the words of encouragement!


20170725-01.jpg

When I go to Estate Sales I usually look - after hitting the basement and any outbuildings - to see if there are any CD's of interest somewhere on the property. These 4 were at the last sale I went to so that's the Moody Blues CD I was listening to in the Mezzanine. Also at that estate sale was...


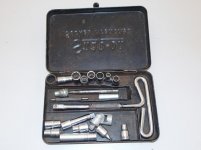
20170725-02.jpg 20170725-03.jpg

...this item.

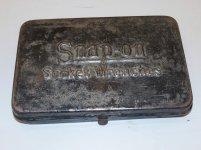
The Collecting Snap-On Web Site has quite a bit of information on these sets. The box appears to be black to my eye which should date this to around 1931-1933. (Collecting Snap-On Reference).
It is a 9/32-inch drive wrench with similar sized sockets. This is (apparently) an incomplete set and also there's a few extra items in the box.
I was unaware the 9/32-inch tools had ever existed. I assumed it was 1/4-inch when I picked it up and I just thought the box looked cool as well as the "T-Handle" .

Best regards,

Scott
 
Last edited:
OP
S

sbosecker

Well-known member
Joined
Sep 25, 2012
Messages
3,539
Location
Peachtree City, GA
Re: The Lone Beech Garage Build Thread (60x46)

Tuesday - July 25, 2017


While the process was still fresh in my mind, I thought it would be good to construct another Clamp Rack. Yesterday evening I cut all of the individual components out of some 3/4-inch plywood and glued some of the parts together. This morning I glued and nailed the remaining parts.


20170725-04.jpg

This evening the glue had set and I drew a few lines on the wall to mark the location of the studs. A couple of 2-inch deck screws later and the second Clamp Rack was secured to the wall.

Not that this is a complicated project but there's no doubt in my mind that doing the second rack fairly soon after the first dramatically sped up construction.


Scott
 
Last edited:

LutzTD

Well-known member
Joined
Dec 31, 2011
Messages
3,673
Location
Lutz, Florida
Re: The Lone Beech Garage Build Thread (60x46)

Tuesday - July 25, 2017


While the process was still fresh in my mind, I thought it would be good to construct another Clamp Rack. Yesterday evening I cut all of the individual components out of some 3/4-inch plywood and glued some of the parts together. This morning I glued and nailed the remaining parts.


20170725-04.jpg

This evening the glue had set and I drew a few lines on the wall to mark the location of the studs. A couple of 2-inch deck screws later and the second Clamp Rack was secured to the wall.

Not that this is a complicated project but there's no doubt in my mind that doing the second rack fairly soon after the first dramatically sped up construction.


Scott

ah the efficiency and attention to detail we all love about GJ'ers. looks awesome with the back jaws lined up.
 

F-117HWK

Well-known member
Joined
Apr 17, 2012
Messages
283
Location
Virginia
Re: The Lone Beech Garage Build Thread (60x46)

Clamp racks look great. That is how we have all of ours hung and they have been working beautifully for a few years now.
 

C_F

ALLIANCE MEMBER
Joined
Jan 21, 2005
Messages
9,675
Location
Utah...SNOW BLOWS!
Re: The Lone Beech Garage Build Thread (60x46)

Dang, I should make some clamp racks! I don't have near as many clamps as you do (only 6), but having mine on a shelf kinda *****.

Looking good in there!
 
OP
S

sbosecker

Well-known member
Joined
Sep 25, 2012
Messages
3,539
Location
Peachtree City, GA
Re: The Lone Beech Garage Build Thread (60x46)

ah the efficiency and attention to detail we all love about GJ'ers. looks awesome with the back jaws lined up.

Clamp racks look great. That is how we have all of ours hung and they have been working beautifully for a few years now.

Dang, I should make some clamp racks! I don't have near as many clamps as you do (only 6), but having mine on a shelf kinda *****.

Looking good in there!


Thanks guys! I've still got quite a few pipe clamps that I've got to organize. They vary so much in length that I think I'll have to plagiarize, via the Interweb, a different approach for them.

Best regards,

Scott
 
OP
S

sbosecker

Well-known member
Joined
Sep 25, 2012
Messages
3,539
Location
Peachtree City, GA
Re: The Lone Beech Garage Build Thread (60x46)

Thursday - July 27, 2017

Today I had enough time to do some more work on the Miter Saw Station.

I knew I needed to get a finish on it to try to prevent that raw wood from soaking up any stains. Some grime had already gotten on it from it being handled during the construction process. Mineral spirits and a rag did a good job of cleaning that up.

While the couple of areas I had cleaned up dried, I took a large pencil eraser and cleaned up all the pencil marks on the wood that had helped with the assembly of the parts.

I removed the Compound Miter Saw and all the "stuff" from the Miter Saw Station.


20170727-01.jpg

I gave all the exposed surfaces a little work with a random orbital sander.


20170727-02.jpg

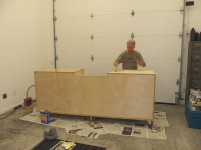
I then rolled the Miter Saw Station out of the Woodshop and put some newspapers down around it. A coat of satin polyurethane was applied and left to dry until tomorrow.


Scott
 

shortykorte

Well-known member
Joined
Sep 1, 2014
Messages
8,039
Location
Tallahassee, Fl
The Lone Beech Garage Build Thread (60x46)

I'm thinking the pipe clamp rack needs redoing. I'll take those off your hands so you can make some better ones. LOL


Sent from my iPhone using Tapatalk
 
Last edited:
OP
S

sbosecker

Well-known member
Joined
Sep 25, 2012
Messages
3,539
Location
Peachtree City, GA
Re: The Lone Beech Garage Build Thread (60x46)

I'm thinking the pipe clamp rack needs redoing. I'll take those off your hands so you can make some better ones. LOL

shortykorte,

Ha!

I think I've finally learned the wisdom of "better is the worst enemy of good enough".

I'm sure the clamp rack could be done better but there are plenty of other fish to fry ...and the clamps are off the floor!

The latest fish fry follows


Best regards,

Scott
 
OP
S

sbosecker

Well-known member
Joined
Sep 25, 2012
Messages
3,539
Location
Peachtree City, GA
Re: The Lone Beech Garage Build Thread (60x46)

Saturday - July 29, 2017


I reported in Post # 1969 of this thread that I had purchased a Autel MD802 OBDII Scanner. In Post # 1981 I wrote that I was having problems with the device less than 24 hours after I had received it.

I had purchased the Autel MD802 from a vendor on Amazon. The vendor's name was AutelOnlineShop. I received the device and, as reported in the above post link, played around with it. The next day it was deader than a hammer. It would not power up. Period.

I returned it to Amazon and ordered another one from the same vendor. It arrived and... I'll give you the condensed version: It behaved exactly like the previous device. It worked when I first got it; the next morning it would not power up.

I must say that when two of these malfunctioned in exactly the same way I had to consider the possibility that I had somehow done something wrong. Especially when I seemed to be the only person in the whole world - Google search could locate nothing similar to my issue - that was having this problem. Yet, I had done nothing other than use the device, put it on the shelf for the evening, and then try to use it the next morning.

I purchased another MD802 from another Amazon vendor (Weyland). This one arrived and it worked fine - even the next day - except I couldn't register it on the Autel website. I was not happy and contacted the vendor. It took a while - the folks I was communicating with were apparently in China so they were asleep when I was awake and vice versa. Eventually we got the registration issue worked out and I now have an updated Autel MD802. It's been over a week since it arrived and it's still working.


20170729-01.jpg 20170729-02.jpg 20170729-03.jpg

I scanned my 2013 Toyota Highlander and it is clean as a whistle. On the other hand, my 2000 Ford F150 has a troubled soul. There are a few codes that were displayed and I'll be trouble shooting those issues in the future.


20170729-04.jpg

I got another coat of polyurethane on the Miter Saw Station and moved it back into the Woodshop. I put a coat of finish on the miter saw "sled" and it is drying. That gave me time to...


20170729-05.jpg

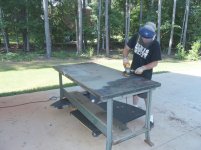
...start cleaning up the Steel Table. [Post # 1814] I took it outside and started working on the tabletop.


20170729-06.jpg 20170729-07.jpg

With the many layers of paint removed from the top of the table, I removed the 8 machine screws securing the top to the legs and removed the top. This should make it easier to clean up the table's legs.

I hope to continue working on the table in the next few days.


Scott
 
Last edited:
OP
S

sbosecker

Well-known member
Joined
Sep 25, 2012
Messages
3,539
Location
Peachtree City, GA
Re: The Lone Beech Garage Build Thread (60x46)

Sunday - July 30, 2017

A week ago my dad called me on his cell phone to let me know that the American Beech that the Lone Beech Melon Farm was named for had lost a lower limb and his internet & landline were out of action.

Dad said that the limb was 2-1/2 foot in diameter. I asked him to take pictures.

The only other time something like this has happened in my lifetime was in the 90's when another lower limb fell off.

I spoke with dad this evening and he still hasn't had his phone/internet service restored. He was the only one affected by the limb falling off so response has been slow. The county was out the next day clearing the limb from the road. Dad said they had some impressive equipment dealing with the enormous limb.

Telephone service is scheduled to be restored by Wednesday.

Scott
 
Last edited:
To avoid these ads, REGISTER NOW!
OP
S

sbosecker

Well-known member
Joined
Sep 25, 2012
Messages
3,539
Location
Peachtree City, GA
Re: The Lone Beech Garage Build Thread (60x46)

So no idea on why the two units from vendor A didn't work?

shortykorte,

No.

Extremely strange behavior.

Worked out of the box without updates.

Accepted by Autel.com's registration and update process.

Worked after updates.

...and, like Cinderella, the magic went away at midnight.

The next day - the device(s) would not power up.

It was a Kodak moment when it happened the second time.

...and I can find no reviews on the Internet that voice similar complaints. Which really pointed to me being the problem... until the third device from a different vendor worked for longer than 12 hours.

Best regards,

Scott
 
Last edited:
OP
S

sbosecker

Well-known member
Joined
Sep 25, 2012
Messages
3,539
Location
Peachtree City, GA
Re: The Lone Beech Garage Build Thread (60x46)

Monday - July 31, 2017


I decided to continue to work on the Steel Table today but I didn't have an enormous amount of time available. However, the weather was about as good as it can possibly be on July 31st in Georgia. In the 80's with low humidity and a light breeze blowing under a clear blue sky. A really nice day!


20170731-01.jpg

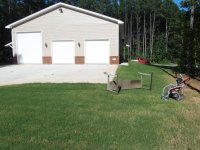
I rolled the Steel Table legs out of the middle bay and across the concrete pad to a convenient location near the water hydrant and the pressure washer.


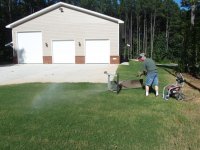
20170731-02.jpg 20170731-03.jpg

The actual job of cleaning off the Table took less time than all the schlepping of hoses, pressure washer, etc. to the work site.


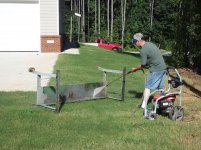
20170731-04.jpg

A few minutes of high pressure water and the Table looked much better. I let it dry in the afternoon sun before bringing it back inside the LBG for the evening.


Scott
 

shortykorte

Well-known member
Joined
Sep 1, 2014
Messages
8,039
Location
Tallahassee, Fl
Re: The Lone Beech Garage Build Thread (60x46)

Looking good. I see a truck backed into the loading deck. Are you using the dock much?


Sent from my iPhone using Tapatalk
 
OP
S

sbosecker

Well-known member
Joined
Sep 25, 2012
Messages
3,539
Location
Peachtree City, GA
Re: The Lone Beech Garage Build Thread (60x46)

Looking good. I see a truck backed into the loading deck. Are you using the dock much?

shortykorte,

I've only used the dock once so far.

The approach to the loading dock is a very convenient place to park my pickup and not block the entrance to the house garage.

Best regards,

Scott
 
OP
S

sbosecker

Well-known member
Joined
Sep 25, 2012
Messages
3,539
Location
Peachtree City, GA
Re: The Lone Beech Garage Build Thread (60x46)

Saturday - August 5, 2017

Today I spent quite a bit of time considering what would be involved with building a storage rack for my pipe clamps. I had settled on a basic design and I spent a bit of time at the drafting table sketching up how the clamps might be arranged in the storage system. Since the pipes are various lengths, there is a bit of Tetris involved with placing them.

I had worked out the arrangement to my satisfaction and had made a mock up of the design to see how best to construct it. I was staring at the wall where I had planned to store the pipe clamps - trying to decide the best method of attaching the racks to the wall - when I realized I had a conflict. That conflict was with...

Earlier this week I'd been thinking about dust control in the Woodshop. I've been mentally running duct work from the dust collector to the various stationary machines and I spent some time at some of the big box stores looking a what's available for this task.

Yeah, my planned pipe clamp storage system was going to conflict with some of my imaginary duct work.

Back to the drawing board.


Scott
 

AZpilot

Well-known member
Joined
Sep 29, 2012
Messages
413
Location
Mesa, AZ
Re: The Lone Beech Garage Build Thread (60x46)

Imaginary duct work is cheaper to move than actual.
 
OP
S

sbosecker

Well-known member
Joined
Sep 25, 2012
Messages
3,539
Location
Peachtree City, GA
Re: The Lone Beech Garage Build Thread (60x46)

Sunday - August 6, 2017


Most of this week has been occupied with getting the roof on my house repaired. Some time ago here I mentioned having some leaks in my roof. I had done a repair that seemed to be doing the trick until a recent deluge. It was time to hire someone to get the job done properly. That repair was finished Friday afternoon so late this afternoon - after yesterday's wasted day - I was able to get out into the LBG again.


20170806-01.jpg

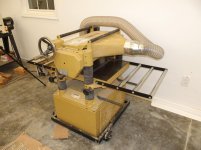
I didn't have a lot of time so I decided to see if I could figure out what needed to be done to get my Powermatic 208-1 Planer to function properly. I had acquired this machine almost by accident via a Craigslist ad. It's a long story but the machine wouldn't power up when the owner tried to show me it would run. I made him a low offer and he took it. I brought it home - put a new switch on it - and it powered up. I then stored it in my basement until moving it to its new home in the LBG Woodshop last year.

After the move I tried planning some 2x8's but the machine really didn't want to feed the board through. If I pushed and pulled the lumber through it seemed to plane it OK. Since I still had my fully operational Makita 2040 planer - purchased new in the early 1980's - in the house's basement, I wasn't in any hurry to tinker with the Powermatic.

This evening I again tried to run a piece of framing lumber through the Powermatic. It really didn't want to feed the board at all.

I shut the machine down and came into the house to do a little light Internet work. I found a few complaints similar to mine and the various solutions seemed to revolve around friction on the bed of the planer. I was dubious as the bed of my machine seemed to be in good condition but I came back out to the Woodshop and ran the planer's bed down about as far as it would go. I removed power from the machine and examined the bed. It looked pretty good but I wiped it down with some mineral spirits to remove any residue. When that was dry I planned on putting some paste wax onto the planner bed in an attempt to reduce friction.

While that was drying I examined the feed roller. A good brushing to get the roller clean seemed appropriate but, again, it didn't look too bad.

I now placed a level onto the bed of planner and noticed the bed rollers were fully retracted beneath the level of the bed. Moving the level back and forth did not move the rollers at all. I consulted the operator's manual and located a discussion regarding how high the rollers should be.


20170806-02.jpg

The Bed Rollers are controlled by Hex Socket Screws (White Lines) & Roller Axle Knobs (Black Lines). Backing the screws all the way out allows one to turn the axle knobs. The Roller Axles are adjusted up & down with the Black Knobs and then locked into position with the Screws.

I decided to run the Bed Rollers as high as they would go and see if that would reduce the friction enough to allow boards to self-feed through the machine.


20170806-03.jpg

What a difference! The piece of framing lumber sailed right through the planer. I then took a piece of rough-sawn 3x3 Cherry and ran it through the planer a few times. The Powermatic grabbed the Cherry and cleaned it up nicely.

This is not to say that the machine is perfect. A wee bit of snipe on the planed wood indicates there is more tweaking to be done but a big hurdle has been made to getting this machine fully operational.


Scott
 
Last edited:

shortykorte

Well-known member
Joined
Sep 1, 2014
Messages
8,039
Location
Tallahassee, Fl
The Lone Beech Garage Build Thread (60x46)

That's great you got the planer working. Looks like a nice machine.
I've recently read several threads on planers and seems like some snipe can be the norm. They do mention using a following board to lessen the chances.


Sent from my iPhone using Tapatalk
 
OP
S

sbosecker

Well-known member
Joined
Sep 25, 2012
Messages
3,539
Location
Peachtree City, GA
Re: The Lone Beech Garage Build Thread (60x46)

That's great you got the planer working. Looks like a nice machine.
I've recently read several threads on planers and seems like some snipe can be the norm. They do mention using a following board to lessen the chances.


shortykorte,

Thanks for the kind words.

The snipe was minor and I expect that it may have been aggravated by the Bed Rollers being at their maximum height.

More tinkering will give me more data.

Best regards,

Scott
 
OP
S

sbosecker

Well-known member
Joined
Sep 25, 2012
Messages
3,539
Location
Peachtree City, GA
Re: The Lone Beech Garage Build Thread (60x46)

Tuesday - August 8, 2017

Yesterday & today, in between household chores, I did a little more tweaking of the Powermatic 208-1 Planer.


20170807-01.jpg

This is the Planer's Feed Roller. It doesn't show up that well but there was a bit of embedded sawdust in the grooves of this part. A cleaning couldn't hurt.


20170807-02.jpg 20170807-03.jpg

My wife is an animal lover and this is some sort of brush she had worn out grooming pets. I thought it would be perfect for cleaning the bits of wood fibers out of the Feed Roller grooves. With the power turned off at the Circuit Breaker Panel, I cleaned the Roller.


20170807-04.jpg

Much better!


20170808-01.jpg 20170808-02.jpg 20170808-03.jpg

I had a can of Johnson Paste Wax I had used on other projects. I thought it would work well to reduce the friction on the Planer's bed.

I put a thin layer onto the bed, let it dry to a haze, and then buffed it off. I did this 4 times.


Continued in next post...
 
Last edited:
OP
S

sbosecker

Well-known member
Joined
Sep 25, 2012
Messages
3,539
Location
Peachtree City, GA
Re: The Lone Beech Garage Build Thread (60x46)

Continued...

After the waxing, the Planer's Bed had a very nice shine.

As a test, I lowered the Bed Rollers so that they were retraced below the level of the surface of the Planer's Bed.


20170808-04.jpg

I turned on the Planer and fed a piece of framing lumber through. While this did not work prior to the waxing, the Planer grabbed the board and pulled it through perfectly.

I would not have thought that just waxing the bed would make that much difference.


Scott
 
Last edited:

OP
S

sbosecker

Well-known member
Joined
Sep 25, 2012
Messages
3,539
Location
Peachtree City, GA
Re: The Lone Beech Garage Build Thread (60x46)

Thursday - August 10, 2017


A little more time spent in the Woodshop today.


20170810-01.jpg

Since the Planer had benefited from some wax, I thought it only appropriate to do the same to the Jointer.


20170810-02.jpg 20170810-03.jpg


I had some more Poplar that was 5/8-inch thick in the basement. I decided to use the 5/8-inch thick material to make some drawers for the Miter Saw Station. I brought the 5/8-inch lumber to the LBG's Woodshop.

I also had some Poplar lumber left over from the Miter Saw Station's face frame. It had been planed to 3/4-inch thick. Since it didn't look like I had enough clear 5/8-inch material to complete the drawers, I planed the 3/4-inch planks to 5/8-inch.

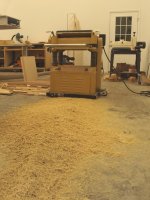
I had planned to hook up the Shop Fox Dust Collector for the first time to the Planer's Shaving Shroud but, when I examined the Shroud I found it to have a 5-inch diameter port. I will need a 5-inch to 4-inch adapter to use my current flexible duct pipe. I proceeded to make a mess and will clean it up later.


20170810-04.jpg 20170810-05.jpg 20170810-06.jpg

I jointed the 5/8-inch lumber on the Jointer and then I ripped the planed boards into 5-3/4 inch wide lengths. I then used the Miter Saw Station to cut the boards to the correct length. The last picture shows the two pieces that will be the fronts of the drawers in position on the Miter Saw Station. The outer dimensions of the drawers will be 15-3/4 inches by 18-inches.


20170810-07.jpg

A few years ago I made a Box Joint Sled. I thought I'd use it to construct the Drawers.


Continued in next post...
 
OP
S

sbosecker

Well-known member
Joined
Sep 25, 2012
Messages
3,539
Location
Peachtree City, GA
Re: The Lone Beech Garage Build Thread (60x46)

Continued...


By this time it is night and it is raining - hard - outside. I was startled when my bride entered the door to the Woodshop, umbrella in hand, to inform me that last week's roof repair had not been completely successful.

I shut down my equipment and came back to the house. I spent some time in the attic with a flashlight and found where the leak was making its entry into the house. Two of the Three repair locations had been successful but looks like the roofing guy will need to come back and take another crack at this.


20170810-11.jpg

My wife's arrival with the roof news had happened while I was starting to cut the box joints in some scrap pieces of wood. I now picked up where I had left off. The above picture is the result. It is not a great fit so I'm not sure if the roof issue caused me to goof this up or it was just operator error on my part. I decided to try again tomorrow and left the LBG for the night.


20170810-12.jpg

A couple of weeks ago I noticed that a breaker was tripped in the Main Electrical Panel. I had had my Electrician over several weeks earlier and I assumed he had shut something down while he was doing some work and then didn't reengage the breaker before he left.

I reset the breaker at that time. Mid-afternoon today I noticed the breaker was tripped again. I went to the outlets that were served by this breaker and nothing was on nor had anything on those outlets been used since I had reset it.

Hmmm....

I reset the breaker at about 4:00 pm. At about 9:00 pm this evening, while I was working in the Woodshop, I heard a "snap". I went over to the Main Electrical Panel and the breaker was tripped again.

I suppose it could be a weak breaker but a call to the Electrician is probably in order tomorrow. I left the breaker tripped.

Despite the setbacks and interruptions, I had a great time in the Woodshop today. All the machinery is slowly getting dialed in and the Miter Saw Station is functional. I suppose the next big project in here will installing proper dust control duct work.


Scott
 
Last edited:

OP
S

sbosecker

Well-known member
Joined
Sep 25, 2012
Messages
3,539
Location
Peachtree City, GA
Re: The Lone Beech Garage Build Thread (60x46)

Monday - August 14, 2017

Late last week I had made a trip over to Home Depot and I procured a 5-inch to 4-inch Duct Reducer.


20170811-01.jpg 20170812-01.jpg

To be honest I didn't think it would fit. Nothing involving duct or pipe ever seems to fit. Ha! ...but this time it worked. Score one for the good guys!


20170813-01.jpg

Saturday I spotted a 4-drawer Blueprint Cabinet on Craigslist. It wasn't too far away so I went over to have a look at it. The seller & I came to an agreement on price and my son helped me schlep it up to the Mezzanine of the LBG. I must say after we got it up there it was a "What was I thinking" moment. Ha! This thing has a huge footprint. It needs some clean-up and I'll need to make a stand for it.

More projects - just what I need.


20170814-01.jpg 20170814-02.jpg

A few days ago I had tried to use my Box Joint Jig and it resulted in a sloppy fit. My Jig is adjustable so I spent quite a bit of time today dialing it in on pieces of scrap Poplar. When I got the fit right, I put some scrap piece of plywood in place to help with the tear-out and started cutting the box joints.


20170814-03.jpg 20170814-04.jpg

This is as far as I got tonight. I'm pretty pleased with how it's going so far. I still need to cut some sort of a "Half-Moon" chunk out of the top middle of the drawer front to act as "pull". Then I'll be ready to put the bottom in.

The drawers actually will go on the opposite side of the Miter Saw Station but it was easier to move the stuff on the left side and see how the drawers looked.


Scott
 

shortykorte

Well-known member
Joined
Sep 1, 2014
Messages
8,039
Location
Tallahassee, Fl
Re: The Lone Beech Garage Build Thread (60x46)

We still have a map cabinet at work. It's only 7' wide, 5' deep and is a 4 stack reaching about 6-6.
It would be good for storing various templates or longer tools.
Since you're out working in August, how's the AC working out? Have you guesstimated the daily cost?


Sent from my iPhone using Tapatalk
 

C_F

ALLIANCE MEMBER
Joined
Jan 21, 2005
Messages
9,675
Location
Utah...SNOW BLOWS!
Re: The Lone Beech Garage Build Thread (60x46)

Has your electrician made it over to look at the breaker issue? Pretty odd that it's tripping like that.

Nice idea waxing the planer & jointer beds, I'll have to remember that one. :)
 
OP
S

sbosecker

Well-known member
Joined
Sep 25, 2012
Messages
3,539
Location
Peachtree City, GA
Re: The Lone Beech Garage Build Thread (60x46)

We still have a map cabinet at work. It's only 7' wide, 5' deep and is a 4 stack reaching about 6-6.
It would be good for storing various templates or longer tools.
Since you're out working in August, how's the AC working out? Have you guesstimated the daily cost?

shortykorte,

Mine's a baby compared to that - 41 inches deep & 54 inches wide!

I'm very pleased with the air conditioning. I keep the main floor at 78 and the mezzanine at 82. When I go up to the mezzanine I drop the temperature and turn on the fans.

Last summer was stinking hot and - at its peak - it cost about $2.50 a day - this summer has been cooler and it's running about $2.15 a day.

Best regards,

Scott
 
To avoid these ads, REGISTER NOW!
Top Bottom