To avoid these ads, REGISTER NOW!

Tommy's Toy Box: 36x40x12

TommyGp

Active member
Joined
Feb 20, 2017
Messages
34
Location
Kansas City, MO
Getting ready to start on my garage. We were fortunate enough to be able to buy a house on 3 acres and to be able to afford a shop for all my ****.

Specs:
- 36W x 40D x 12H
- Scissor trusses, with attic truss over the overhead doors for some extra space.
- Two 10x10 doors on one gable end, and one 10x10 on opposite end to allow pull through.
- 6" slab w/ thickened edge and radiant heat tubes(for later completion)
- 5' deep 6" aprons in front of all doors
- 200A service with its own meter
- 10k 2-post lift
- Motorcycle storage lift
- R19 batt in walls and ceiling w/ OSB walls
- More lights than I think I need

Photoshop model and sketch of layout:

1983B0FC-F2D2-4BA8-8048-C0996EB67CAA_zpstho0duek.jpeg


7F4EB35E-A66E-4947-85D1-3E96F92A13A7_zpspqoehry5.png


The prior owner had done some cut/fill for a stick built garage and never gotten around to actually building it. Thankfully they leveled a nice 36x50 pad area. Unfortunately, since I'm building a pole barn, I can't really use the space intended for what would be a 3' stem wall. Therefore, I've decided to grade the old cut line out to a mowable slope and set the pole barn about 10-12' away from the base of the graded area and throw a French drain around the slab.

Area of shop:

DC2956BA-E1F6-49CC-8263-644C656DC156_zpsmwxjads2.jpg


This leads to a question. Is 10-12' away from the base of that slope enough to keep water from getting under the slab if I put a French drain around the slab?

Partial grading complete pic. Still working at it. First time using a bobcat, so I kinda ****.

4040086A-1721-45B7-8466-CD003655A6F6_zpsttjqou74.jpg
 
To avoid these ads, REGISTER NOW!

MagKarl

Well-known member
Joined
Oct 15, 2012
Messages
684
Location
Olympia, WA
Given that it looks like you have a lot of space around the barn site, I'd cut a mowable swale around the high sides to assure drainage without relying on a French drain.
 
OP
T

TommyGp

Active member
Joined
Feb 20, 2017
Messages
34
Location
Kansas City, MO
Got the rough grading completed this weekend. Once the shop is done I will bring in fresh topsoil for final grading, creation of the swale on top side, and whatnot. Didn't turn out too bad for a novice operator. Took way too many hours compared to someone who knows what they are doing though.


Sent from my iPhone using Tapatalk
 
OP
T

TommyGp

Active member
Joined
Feb 20, 2017
Messages
34
Location
Kansas City, MO
Ugh. One step forward, two steps back. After lots of contemplation I am thinking about just building a 3'x40' retaining wall on the long end, with a 10' stub wall on the front and back of the garage (Imagine a horseshoe shape) and pouring a footing all the way around the perimeter. I can do this all with the help of my friends over the course of a weekend or two and my pole barn builder will get a set of wall forms for me to use for cheap.

I laid out the corners of the building and am not excited about it at all. I think it's going to look goofy, and I'm really not comfortable that it will drain well enough.

The orange spikes are where the corners of the building would go under the old plan.


Sent from my iPhone using Tapatalk
 
OP
T

TommyGp

Active member
Joined
Feb 20, 2017
Messages
34
Location
Kansas City, MO
I'm back to my original plan after having several friends who know what they are doing come take a look and give me their opinion. I am going to cut that little evergreen tree down and push the grading out another 10-15' that direction. Then I should be able to add enough grade to the area to move any water out toward the back.

I signed the contract on the building and put my deposit down on Thursday. Made a few upgrades with my final selection:

- carriage style doors with windows and carriage hardware. Wife requested, and we will probably replace the two doors on the house with matching ones.

- poured piers with brackets set into the concrete. $100/post option, and the builder didn't really want to do it because it takes more work and is more expensive, but I look at it this way. In 20 years or so if the posts in ground were to rot, who am I going to claim a warranty from? And if I do, what am I getting? At best I would get a bunch of boards to replace them (they use laminated columns) and would have to do the work myself or pay someone. Plus, true CCA treatment isn't allowed anymore and who knows what 20-30 yrs will do to the new stuff.

- 12" overhangs on both gables to fix my obsession with symmetry.

- the middle door is widened to 12' because the net cost was $70 since it eliminated a post and saved that money.

- 36" cupola with weathervane thingy

- 5" aluminum gutters

Now I just have to wait...and wait...and wait. There were some tornados a few weeks back and the builder has a lot of insurance claim work in front of me. Looks like he will be done in June...hopefully before 4th of July when we have our big party.


Sent from my iPhone using Tapatalk
 
OP
T

TommyGp

Active member
Joined
Feb 20, 2017
Messages
34
Location
Kansas City, MO
Almost 2 months later and we still haven't started. Was supposed to pour the piers today, but it rained. It has been an incredibly wet spring around here and I'm tired of it. Maybe tomorrow if it dries out today?

27a5b05385396c83eb6aedb6313bcb55.jpg


Sent from my iPhone using Tapatalk
 

Attachments

  • 27a5b05385396c83eb6aedb6313bcb55.jpg
    27a5b05385396c83eb6aedb6313bcb55.jpg
    1.1 MB · Views: 0
OP
T

TommyGp

Active member
Joined
Feb 20, 2017
Messages
34
Location
Kansas City, MO
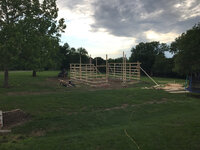
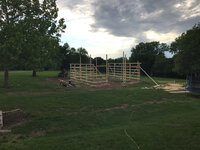
Builder showed up today and did a decent job of making progress. I am having them install attic trusses over the front doors so that I have a 10x16 attic space in that area, then the rest are scissor trusses with a 2:12 pitch on the bottom chord. When I got home they had the wrong trusses and were getting ready to install the attic trusses over the wrong area. Glad I caught it before they got them installed.

e222ee637a44c6fd9731ac11ccff3843.jpg


Sent from my iPhone using Tapatalk
 

Attachments

  • e222ee637a44c6fd9731ac11ccff3843.jpg
    e222ee637a44c6fd9731ac11ccff3843.jpg
    743.4 KB · Views: 0
OP
T

TommyGp

Active member
Joined
Feb 20, 2017
Messages
34
Location
Kansas City, MO
Better progress today. Supposed to have all the skin, trim, gutters and doors on by end of the week. Of course, the day didn't come without some drama. The original plan of using a skid steer with a boom to lift the trusses failed because the skid had a hydraulic issue so they had to go back to the shop (2+ hour round trip) to get a bigger lift.

9700a193d3fa3434e0de039a813cbe94.jpg


Sent from my iPhone using Tapatalk
 

Attachments

  • 9700a193d3fa3434e0de039a813cbe94.jpg
    9700a193d3fa3434e0de039a813cbe94.jpg
    788.6 KB · Views: 0
OP
T

TommyGp

Active member
Joined
Feb 20, 2017
Messages
34
Location
Kansas City, MO
Well, it almost took an entire month but it's materially complete! The builder has a few things to fix that aren't quite correct, but he will finish those this week, or at least when he wants his last 40% of the money. ;-)

7504687486fca32da3922235b4588a10.jpg


Sent from my iPhone using Tapatalk
 

Attachments

  • 7504687486fca32da3922235b4588a10.jpg
    7504687486fca32da3922235b4588a10.jpg
    942.3 KB · Views: 0
OP
T

TommyGp

Active member
Joined
Feb 20, 2017
Messages
34
Location
Kansas City, MO
Tapatalk wouldn't let me upload all the pics yesterday so here are some more.

1d6685d884060082d51ab305e5114ff2.jpg

I'll have a dedicated 200A meter for the building. Generally I plan to have outlets on every post (10' span), welder and power for a lift.

I put 6" concrete floors in, have 12' walls with scissor trusses which give about 14' or so of peak clearance. I'll finish the walls with drywall, and the ceiling is still undetermined. However I do plan to finish it on the bottom of the roof purlins (2x6 on saddle hangers) so I can nestle just about anything between the 10' spans between the trusses.

I picked up some surplus R19 faced fiberglass insulation from the builder for $400 I got enough to fully insulate the walls. I'll shop around on Craigslist to find some deals to insulate the ceiling. I figure with the hot water radiant floors and maybe a small supplemental shop heater I should be able to keep it comfortable for not too much money.

I had the builder install an attic above the overhead doors to give some storage for things I won't use often. I'll build an electric hoist to lift things up there and probably just access with a ladder.

c5e4b113158d83de47f7c390e007414e.jpg

I'm excited to get it all set up over the next several months!


Sent from my iPhone using Tapatalk
 

Attachments

  • 1d6685d884060082d51ab305e5114ff2.jpg
    1d6685d884060082d51ab305e5114ff2.jpg
    941 KB · Views: 0
  • c5e4b113158d83de47f7c390e007414e.jpg
    c5e4b113158d83de47f7c390e007414e.jpg
    804.7 KB · Views: 0
OP
T

TommyGp

Active member
Joined
Feb 20, 2017
Messages
34
Location
Kansas City, MO
It's been a while but I'm slowly moving along on the garage. Wiring is mostly done, just a couple outdoor lights and a 220v circuit for the lift left to go.

I decided that I needed to frame, insulate, and line a few sections of my walls so I could start getting my tools moved from the house garage to this one. I picked up some R19 from my builder for super cheap ($400 for all I need for the walls and then some). I opted for drywall rather than OSB for cost reasons. We have spent a ton of money this year with the garage, vacation, kid had a broken leg, car repairs, blah blah blah. I decided that the cost premium for OSB over drywall (40-50%) just wasn't worth it. I own a stud finder already. I can deal with it. LOL. I don't plan to mud and tape though. That way if I decide I want to run a new circuit I can pull a couple panels off and do what I need, and the screws make it easy to find the studs.

First order of business is shelving and workbench.

I snagged some 36"x100" uprights, two 36"x42" uprights, and a dozen 10' beams for $80 today on Craigslist. The plan is to use the tall ones for shelves, then modify the shorter ones to make a workbench.

I'm going to cut the bench you see in the pics apart to make it fit inside the beams. The entire bench is made from 1.5" thick pressboard commercial doors. It's heavy as hell and makes for a great bench top. Plus, it has a fancy woodgrain laminate top! LOL

d04e46d5b2dff01e142a62045ca813b5.jpg

This fall I'll turn my attention to the outside and get the landscaping in order for spring plantings. Needs a drain around the top side of the garage as it is. Just waiting for the rain to stop here. Every time I have a window to work it's either 95 degrees or everything is muddy. For now all I've done is have some gravel dumped on the driveway and put some railroad ties in to hold it back from the rest of the yard.

835f600eb530a5ef1b12b9d34fbdaee5.jpg


Sent from my iPhone using Tapatalk
 

Attachments

  • d04e46d5b2dff01e142a62045ca813b5.jpg
    d04e46d5b2dff01e142a62045ca813b5.jpg
    814.5 KB · Views: 0
  • 835f600eb530a5ef1b12b9d34fbdaee5.jpg
    835f600eb530a5ef1b12b9d34fbdaee5.jpg
    924.4 KB · Views: 0

skippydoo

Well-known member
Joined
Oct 28, 2012
Messages
177
Location
Sussex NJ
What pitch roof did you go with and how much height do you have in your storage area? I ask because I'm going to build this spring. What did you put down on the roof under the metal?
Thanks!
 
To avoid these ads, REGISTER NOW!
OP
T

TommyGp

Active member
Joined
Feb 20, 2017
Messages
34
Location
Kansas City, MO
What pitch roof did you go with and how much height do you have in your storage area? I ask because I'm going to build this spring. What did you put down on the roof under the metal?
Thanks!


I believe it's 4/12 but can't remember at the moment. Pretty sure that's right though.

With the scissor trusses and 12' walls I have just over 14' of ceiling clearance.

I've never even been in the loft yet because I haven't needed to and haven't had a ladder tall enough until this weekend. The one I bought is a bear to handle and is tucked away for now. I plan to build a power hoist to lift things up there eventually.

But, I just measured and I have right at 65" at the peak.

Under the metal is just that thin vapor barrier. I considered having them sheet it, but they really didn't want to and the cost showed.


Sent from my iPhone using Tapatalk
 
OP
T

TommyGp

Active member
Joined
Feb 20, 2017
Messages
34
Location
Kansas City, MO
The wife let me spend the entire weekend in the garage. She is ready for me to get my **** out of the house garage so it was worth me being "gone" in order to get to that point. For the first time ever in over 15 years of home ownership, I have all of my vehicles parked inside somewhere!

I also finally got the exterior lights wired and mounted.

13cc68036fa23638b8a982d918f07049.jpg


Sent from my iPhone using Tapatalk
 

Attachments

  • 13cc68036fa23638b8a982d918f07049.jpg
    13cc68036fa23638b8a982d918f07049.jpg
    636.4 KB · Views: 0
OP
T

TommyGp

Active member
Joined
Feb 20, 2017
Messages
34
Location
Kansas City, MO
Thanks for all the compliments! I'm super happy with how it turned out. I need to get some pics of the entire property to help give an idea of how it fits with the existing house but so far I've gotten a lot of compliments from the neighbors too. Hopefully since they think we are making the place look nice they will look past the burnout and donut marks in the street in front of the house. ;-)


Sent from my iPhone using Tapatalk
 
OP
T

TommyGp

Active member
Joined
Feb 20, 2017
Messages
34
Location
Kansas City, MO
Still lots of work to do, like finish framing the walls, install the attic ladder, blah blah blah.

So, because I have a short attention span and like to keep at least 27 partially finished projects going, I decided to tear down one of my bikes.

The first official project in Tommy's Toy Box!

6c0fcca20f758a8108791eacf0548510.jpg


Sent from my iPhone using Tapatalk
 

Attachments

  • 6c0fcca20f758a8108791eacf0548510.jpg
    6c0fcca20f758a8108791eacf0548510.jpg
    960.4 KB · Views: 0
OP
T

TommyGp

Active member
Joined
Feb 20, 2017
Messages
34
Location
Kansas City, MO
Keeping up with my theme of unfinished projects...

It’s getting cold here in KC so I plumbed and wired the radiant heater system.

756a3b8ea455c1af8687cdfc4525f6b0.jpg

I’m a little concerned the boiler (12 kW tankless water heater) won’t be big enough and will never shut down, but I’ll give it a few days to see if it levels out.


Sent from my iPhone using Tapatalk
 

Attachments

  • 756a3b8ea455c1af8687cdfc4525f6b0.jpg
    756a3b8ea455c1af8687cdfc4525f6b0.jpg
    803.4 KB · Views: 0
OP
T

TommyGp

Active member
Joined
Feb 20, 2017
Messages
34
Location
Kansas City, MO
As I expected, the heater wasn’t big enough. It didn’t get really cold here until last week so it was hard to tell if the heater was really doing much.

I swapped it out for a 27kW unit last night. Within 2 hours the shop floor had risen 10-15 degrees throughout the shop so I think it’s going to be better. Now let’s just hope it doesn’t run 24/7 once I get the insulation on. Now that it is all running and as final as I’m going to get the system for this winter I’ll go ahead and insulate that section.

6657628a106d9e52a61ec317a4d83794.jpg

I also framed and insulated Harley Corner. I have 3 bikes that will park in that roughly 10x10 area, thus the nickname.

ad564d553095c12cdfa40a07e0de8579.jpg

Just a few more sections before I move to the ceiling.


Sent from my iPhone using Tapatalk
 

Attachments

  • 6657628a106d9e52a61ec317a4d83794.jpg
    6657628a106d9e52a61ec317a4d83794.jpg
    833.3 KB · Views: 0
  • ad564d553095c12cdfa40a07e0de8579.jpg
    ad564d553095c12cdfa40a07e0de8579.jpg
    580.4 KB · Views: 0

rebelranger

Well-known member
Joined
Sep 18, 2012
Messages
188
Tommy what was your temp split with the smaller hot water heater? Did you insulate under the concrete? What is your tube spacing? Did you self install the pex? That set-up looks like Menards setup, is it? The 10deg rise in an hour sounds high for concrete temp increase.
 
OP
T

TommyGp

Active member
Joined
Feb 20, 2017
Messages
34
Location
Kansas City, MO
Tommy what was your temp split with the smaller hot water heater? Did you insulate under the concrete? What is your tube spacing? Did you self install the pex? That set-up looks like Menards setup, is it? The 10deg rise in an hour sounds high for concrete temp increase.


The smaller heater couldn’t get the hot side past about 95-100 on a cold day, and return temp wouldn’t even reach the 60 mark on the panel. I basically needed something that could achieve 50* split at 3 gallons/minute. At these cold temps it never could do that.

I didn’t insulate under the slab or around it. Probably should have, and actually had second thoughts about my initial decision not to do so, but my builder was ready to pour before I was so I didn’t have time to over excavate to allow for any and maintain my desired 6” depth.

Tubes are on 12” spacing.

Same as menards but purchased at Lowes. Prices were similar when accounting for the 5% discount for using my Lowes card, and Lowes is closer to me.

It was probably closer to 2 hours. I wasn’t necessarily watching the clock. That wasn’t from a dead cold temp, but it was pretty cold. Since then it has only risen another 10-15 on average, if I had to estimate. I haven’t actually been out there today, but last night I had some areas in the 65-70 range, and some in the 50-55 range.

It is currently 2* here, so it is running nonstop.


Sent from my iPhone using Tapatalk
 
OP
T

TommyGp

Active member
Joined
Feb 20, 2017
Messages
34
Location
Kansas City, MO
I actually just went out there and checked now. Running the length of the shop, so across all circuits, the temp ranged from 79.1 down to 50.9 using my little handheld laser temp gun.

Outlet water temp is 130, inlet is 70.

Not bad for a barn that isn’t insulated on the north side yet, and an outdoor temp of 2* F.


Sent from my iPhone using Tapatalk
 
OP
T

TommyGp

Active member
Joined
Feb 20, 2017
Messages
34
Location
Kansas City, MO
Long time no post. Busy doing all kinds of nonsense. Some fun, some not. That’s life.

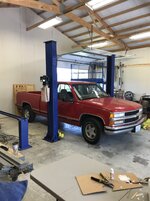
Picked up a 2-post lift from a buddy who had to upgrade so he could work on newer F350-F450 trucks.

He’s had it so long he can’t recall the brand, but thinks it’s a Challenger. It’s a 7k rated lift.

I searched but didn’t find so at the risk of repeating a question, where should I put this thing?

I left a space in the radiant tube routing that allows me to be as much as 165” from the wall. I think it would be nice to back vehicles onto the lift to avoid working up against the wall, since most jobs are toward the front of most vehicles. I fear placing it too far from the wall that it winds up in the way, or worse yet, in the way but not far enough to back a 1/2 ton truck onto it.

Thoughts and opinions welcome. Here’s what I have to work with. The garage has a pull-thru door so what you see in the background is basically the next lane over. The lift sits basically in the middle of the garage width.


89553172f633c7992bfaa3dd4953501c.jpg


Sent from my iPhone using Tapatalk
 

Attachments

  • 89553172f633c7992bfaa3dd4953501c.jpg
    89553172f633c7992bfaa3dd4953501c.jpg
    671.9 KB · Views: 0
OP
T

TommyGp

Active member
Joined
Feb 20, 2017
Messages
34
Location
Kansas City, MO
I think I’ve placed it about correct. The centerline of the posts is about 13ft 4in from the wall.

7d9831b225de03a775c8ee86961f6672.jpg

905b4fef1f436dd947e94373559474aa.jpg

The lift is a semi-symmetrical, which I don’t think lends itself to being lined up quite so aggressively, so I think this is the best spot for it.


Sent from my iPhone using Tapatalk
 

Attachments

  • 905b4fef1f436dd947e94373559474aa.jpg
    905b4fef1f436dd947e94373559474aa.jpg
    415.2 KB · Views: 0
  • 7d9831b225de03a775c8ee86961f6672.jpg
    7d9831b225de03a775c8ee86961f6672.jpg
    387.2 KB · Views: 0
To avoid these ads, REGISTER NOW!
Top Bottom