To avoid these ads, REGISTER NOW!

VISE REPAIR 101 all vise repairs, lubricants, sources for parts and the tricks to fix

scooternut

Well-known member
Joined
Jul 31, 2013
Messages
684
Location
Pittsburgh, PA
Nice job on the versa vise.

I sized up a file for one of those labels, but never figured out how to print stickers. Really leaves my 2 looking unfinished


Sent from my iPhone using Tapatalk
 
To avoid these ads, REGISTER NOW!

GETRIDAONE

Well-known member
Joined
May 21, 2013
Messages
1,549
Location
Auburn, GA
I made the image a little larger to fill the oval. The picture is a test one printed on paper and cut out. I should receive the decal paper today and will hopefully get some printed next week. PM me if anyone is still in need of a decal.
 

Attachments

  • 20171118_035517.jpg
    20171118_035517.jpg
    141.6 KB · Views: 35
Joined
Jul 14, 2016
Messages
9
LO: if you are able and have the time to spiff up the bigger craftsman like you did the smaller one i'd like to see how you do on your second effort cause i also like those shiny spiffed up vises.


i'm guessing you might not have done much to break the weld on your old wood vise cause it didn't look like that good of a weld or brazing. i wonder if you might be able to maybe put a piece of 1/8 or 1/4 inch steel plate in it and either weld it or bolt it to your vise's existing part that is broken to give it a bit more support?


good luck!!


I will definitely document the larger vise restore. My first attempt is ok but not nearly what it could be. I wasn’t familiar enough with the different grits... I was too aggressive on a few spots and others I just couldn’t get to with my grinder so it’s not perfectly uniform. Plus, I plan on actually using these so putting the kind of time in to get all the nooks & crannies to a mirror finish isn’t worth it to me. I’m really liking the shiny so the large one may end up the same. Prob won’t get to it until after the holidays but I will indeed post it up.

As for the Colombian... i don’t weld so I had a friend who welds professionally attempt to weld it back up. He tells me it’s 50/50 on it holding long term because of the previous owners shoddy work. I’ve made an aluminum “sandwich plate” (see original post photo) that will hopefully keep the stresses off of the weld. Fingers crossed.


Sent from my iPhone using Tapatalk
 
Joined
Jul 14, 2016
Messages
9
Nice job on the polishing :beer:


I concur with CRS about avoiding shellac for the same reasons.


Many of us use clear coat. Rustoleum sells it in an aerosol either gloss or satin.


I was planning on paste wax. Is clear coat better for a working vise? I was worried about the clear coat chipping since my polished vise is so smooth. I’ve read about the negatives of shellac.


Sent from my iPhone using Tapatalk
 

paulm12

Well-known member
Joined
Apr 29, 2015
Messages
584
Location
NW Chicago 'burbs
I recently salvaged this woodworking vise from a barn floor for $5. Needs a little TLC. I have the Craftsman parts diagram, and I did get the pieces apart. Some parts are now in the e-tank. The main screw seems pretty good.

- how does the pin on the dog come out? Just press fit? I want to clean out every part real well.
- the straight shafts have some pitting after electrolysis, how should I clean these up beyond soft wire wheel?

thanks
 

Attachments

  • IMG_20171020_144047436.jpg
    IMG_20171020_144047436.jpg
    151.1 KB · Views: 24
  • IMG_20171020_144119987_HDR.jpg
    IMG_20171020_144119987_HDR.jpg
    153.3 KB · Views: 23
  • IMG_20171020_144122727.jpg
    IMG_20171020_144122727.jpg
    151.5 KB · Views: 25

CRSINMICH

Well-known member
Joined
Aug 15, 2015
Messages
2,418
Location
Southeastern Michigan
liquid: I wasn't knocking shellac. I think it's a fine finish but not for that application. Paste wax would work but it would have to be renewed from time to time. One GJ member from England has even used shoe polish and says it holds up well even in a dampish climate.

paul: That's a nice vise you rescued for a YOU **** price. Don't go overboard on the straight shafts. They just need to slide in and out smoothly. I don't know how the pin on the dog comes out. Somebody here likely will. Congrats!
 

jimreed2160

Well-known member
Joined
Aug 7, 2016
Messages
3,589
Location
Tallahassee FL
Paul--Those dogs can be troublesome. I have restored quite a few ww vises. The easiest ones are those with missing dogs. Easy to clean and dogmaking is not that hard. Most of the dogs I encounter were press fit. Some are loose and some are impossible. I use vise grips on a shoprag and try to twist the dog pin off. Sometimes it comes and sometimes it does not. If not, I leave it in place and work around it. That is a pain but it beats having to make a new pin.

Your crusty project is probably nicer than it looks. I'll bet there is a gem underneath.

Good luck with your refurb.
 

chippuller

Member
Joined
Nov 17, 2008
Messages
7
Location
St. Louis. MO
I just picked up this vise at a garage sale the other day...guess I have the disease too... more vices than benches to put them on, but this was unique and only $10!?!?
I've seen a few posts on similar vises (Erie Tool Works, Empire #25) and also found a history if Erie Tool Works (http://www.lakeviewforge.com/about-us/company-history.html).
The reason I am posting this is because something seems odd about it.... either this was a foundry reject or their quality control was not very good; and based on how long they had been around, I find that hard to believe.
Here are some pics of it as purchased and after a quick sand blast.
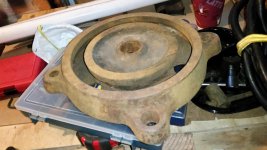
As you can see, the parting line flash have not been removed very well, there is, what appears to be a significant casting defect on the movable jaw, the key way that guides the movable jaw is poorly formed, and the mating key is also poorly formed and looks like it was chamfered to clear the defect in the key way!?!? Finally, the surface that sits on the bench is not even machined flat!
Anyone have any thoughts on this?

P.S. I could not figure out how to create a new post ( this is my first) so I'm not sure where this will end up!?!?
 

Attachments

  • 20171115_112428_resized[1].jpg
    20171115_112428_resized[1].jpg
    71.1 KB · Views: 53
  • 20171115_112438_resized[1].jpg
    20171115_112438_resized[1].jpg
    67.7 KB · Views: 47
  • 20171115_112507_resized[1].jpg
    20171115_112507_resized[1].jpg
    74.2 KB · Views: 49
  • 20171118_132015_resized[1].jpg
    20171118_132015_resized[1].jpg
    82.2 KB · Views: 56
  • 20171118_131937_resized[1].jpg
    20171118_131937_resized[1].jpg
    77.5 KB · Views: 59
  • 20171118_131913_resized[1].jpg
    20171118_131913_resized[1].jpg
    89.7 KB · Views: 54
  • 20171118_131906_resized[1].jpg
    20171118_131906_resized[1].jpg
    81.4 KB · Views: 56
OP
D

drivesitfar

Well-known member
Joined
Oct 23, 2013
Messages
36,062
Location
Pacific Northwest
Chip: first post in 9 years that's almost a record. WELCOME BTW.

your vise is probably over 100 years old so hard to say if that is a terrible casting or a lot of welding slag build up. if it were mine i'd probably see if i could grind and sand it off and put a coat of linseed oil on it if i didn't just set it on a shelf to sit and look good cause i like those triangle shaped slides.

looks like you did ok on your first post and if you want to make another posts either cause you wanted to post more than the allowed 7 pics per post just click on post reply and make another post. i think you have to add maybe a few words if you are trying to just add pictures so it will post otherwise post away and give us more pictures, show us more vises or ask questions.

cheers
 

va.grouseman

Well-known member
Joined
Mar 26, 2011
Messages
4,965
Location
Southern-Central VA.
Chippuller, At your rate of posting, you are going to make senior member in 900 years.---Methuselah would have made it with a few years to spare.---You better start eating right and exercising regularly.:D

Just kidding, a person can glean a lot from this Forum if he never posts at all.

Welcome.
 

ALLFAST

Well-known member
Joined
Feb 20, 2017
Messages
1,233
Location
Northern California
Are there any GJ members here that live between say Auburn Ca and the greater SF Bay Area that posess the TIG skills and experience to help me with my Rock Island 577 ?

I can provide pictures, but the beast needs abit of filling of minor blemishes (unsightly grinder gouges, minor pilot hole fill, etc), and padding up of my jaw towers in places. It would be along the lines of what Kevin does on his fine repairs, with I believe bronze inconel filler rod (?). I need to have this done so my machinist can make my new jaw inserts and Mill it all to perfection. I was all amped up on doing this fill work with my Idealarc 250, and was going to invest in some expensive rods....I really only have one shot with getting this prep work done right, so I'd rather invest that money into paying an experienced hand and be done with it.

The shops I've inquired with obviously have their set hourly rates, etc, and I haven't gotten good vibes from whom I have inquired of. I am willing to pay, and would rather pay a fellow vise maniac to work on the old girl.

Thanks for the considerarion.

Shawn
 

KMScott

Well-known member
Joined
Feb 14, 2012
Messages
4,643
Location
Daufuskie Island, South Carolina
I have a extra set of original jaws for a 577 if you need jaws, (cheap). They are used but in very good shape. Here is a drawing of the 577 jaws for your Machinist.

I have 4 different TIG rods I use on vises. Inconel, Nickle, Silicon Bronze and Eutectic 224U. I try each one in a inconspicuous area to see which one bonds the best, you can tell while under the hood which rod works the best. Just a few pointers that I have had success with. Good luck with your repair.
 

Attachments

  • Rock_Island_577-594.jpg
    Rock_Island_577-594.jpg
    101.6 KB · Views: 26

ALLFAST

Well-known member
Joined
Feb 20, 2017
Messages
1,233
Location
Northern California
Kevin,

It's the same Shawn that conversed with you (via email and telephone a few times)...you probably converse with many people! I live in snow country in Ca, as a memory jogger.

You kindly sent this drawing to me some months back. I appreciate the offer of the used jaws (I will contact you soon about purchasing them) and the welding tips !

Be Well Sir-Shawn
 

KMScott

Well-known member
Joined
Feb 14, 2012
Messages
4,643
Location
Daufuskie Island, South Carolina
Shawn
Sorry about not remembering, now I do. I get calls everyday from every kind of vise owner, collector and business owner's looking for parts. That is the best part of my day since I work on vises everyday and it gets a little boring. I actually could write a book on my conversations. I would be happy to add a few sticks of TIG rod if you are interested in the jaws. Call and we can discuss and catch up.
 

chippuller

Member
Joined
Nov 17, 2008
Messages
7
Location
St. Louis. MO
Drivesit,
Well, I am one of the world's best procrastinators!?!? LOL.

I thought it was welding splatter at first, but when I looked closer, it looks just like some of the crappy castings I have made in my backyard foundry!
That's my plan... grind off the ugly stuff. I don't want to make it look too good, though. It will loose some of it's 'character'. It is a cute little vise.
I have to admit, it took me a while just to find these replies, but I think I'm getting the hang of it. By the way, i did run out of picture space, so thanks for the hint about adding photos... here's one of the pics I wanted to add originally... shows the 'integral' jaws. They apparently were done by hand since the spacing is not even.
 

Attachments

  • 20171118_131836_resized[1].jpg
    20171118_131836_resized[1].jpg
    89.2 KB · Views: 38

CRSINMICH

Well-known member
Joined
Aug 15, 2015
Messages
2,418
Location
Southeastern Michigan
chip: Here's an Erie Empire #25 that I spiffed up last year. There were no problems with the casting but it does almost seem like a toy vise. Cute little ****** though.
 

Attachments

  • Erie Empire No25 restored right.jpg
    Erie Empire No25 restored right.jpg
    104.8 KB · Views: 47
  • Erie Empire No25 restored left.jpg
    Erie Empire No25 restored left.jpg
    132.9 KB · Views: 52
Last edited:

BFBOB

Well-known member
Joined
Sep 20, 2011
Messages
5,073
tjdux, To do it right in my opinion is to have access to a machine shop. I bought a American Scale with the handle and handle support missing and just by looking at my pictures you can see how I did mine. It takes careful measurement's and possibly more machining on the vise to create flat areas for the collar and a area for the large handle support to rotate on. You want the backlash to a minimum.

Note how I machined two flats on the threaded spindle and matched the same shape in the handle support. It will be to hard to match your same hole but possible.

Welding is another possibility. If welding I would use a very strong filler rod like Eutectic 680 TIG rod since you have no idea what Asia used for the spindle material. This filler rod was made for dissimilar metals and has a very strong tensile strength.

In my opinion I would find another vise but if you are looking for a fun project like I did on this A-Scale then go for it. Good Luck.

Many thanks for posting the main screw repair photos above. That's a very good guide to what I need to do.
I just bought an AS 3 1/4" with everything but the screw itself missing. I don't have a way to accurately make a double-flatted shaft and matching hole, but I do have a lathe. My plan is to make the hole/shaft fit as well as possible (not very) and braze them together, then machine the handle support true. I can also spotface the dynamic jaw. The question is whether brazing the main screw will weaken it - draw the temper. If so, is there any realistic possibility of restoring the heat treating by heating dull red - just shy of brass-melting - and quenching? Quench in oil or water?
While I'm at it, I might as well make the handle support oversize, tapered and with two accent grooves - like the famed 59xx Craftsmans.
 
To avoid these ads, REGISTER NOW!

ALLFAST

Well-known member
Joined
Feb 20, 2017
Messages
1,233
Location
Northern California
Does anyone have photos of the swivel base disassembled from an Athol 6" jaw bench vise ? If anyone owns such a vise could you take some specific base measurements for me ?

TIA,

Shawn
 

chippuller

Member
Joined
Nov 17, 2008
Messages
7
Location
St. Louis. MO
CRS,
That sure is nice! Good inspiration for me... I'll have to get out the grinder and files.
A couple of questons...
- is the surface that sits on the bench machined flat on yours, or is it a cast surface with the parting line flash ground off?
- were there any parting line flash on the top surfaces of the jaws (as seen in the pics of mine?
Also, I see you painted yours dark green... I noticed some spots of a dark green under the red paint on mine. I'm wondering if that was the original color.

Chippuller
 

CRSINMICH

Well-known member
Joined
Aug 15, 2015
Messages
2,418
Location
Southeastern Michigan
chip: The part that sits on the bench had a parting line that had been roughly ground flat. I think I might have done some additional filing. The rest of the vise was smooth although you could see where the parting line was. I painted it green because of the ad for Erie Pipe wrenches that I attached here. I have an old Erie wrench and it has some green left on it.
 

Attachments

  • Erie Empire Vise and Monkey Wrench.jpg
    Erie Empire Vise and Monkey Wrench.jpg
    131.1 KB · Views: 40

KMScott

Well-known member
Joined
Feb 14, 2012
Messages
4,643
Location
Daufuskie Island, South Carolina
Many thanks for posting the main screw repair photos above. That's a very good guide to what I need to do.
I just bought an AS 3 1/4" with everything but the screw itself missing. I don't have a way to accurately make a double-flatted shaft and matching hole, but I do have a lathe. My plan is to make the hole/shaft fit as well as possible (not very) and braze them together, then machine the handle support true. I can also spotface the dynamic jaw. The question is whether brazing the main screw will weaken it - draw the temper. If so, is there any realistic possibility of restoring the heat treating by heating dull red - just shy of brass-melting - and quenching? Quench in oil or water?
While I'm at it, I might as well make the handle support oversize, tapered and with two accent grooves - like the famed 59xx Craftsmans.

BFBOB, I believe brazing or using Silver Solder will work great. Maybe check what a perfect gap would be for the solder joint and the deeper the bore and braze area the better. The vise makers mostly friction welded the spindle to the handle support end and if they annealed it after the welding is anyone's guess since I have not found any thing written about it. The threaded spindle are cut by a large geometric threading head like the pic I added. In my opinion I would not worry about it especially if the brazing came out nice. Good luck and post pics of your repair for all to see.
 

Attachments

  • Friction welding (2).jpg
    Friction welding (2).jpg
    98.5 KB · Views: 40
  • Friction Welding-union Parker (2).jpg
    Friction Welding-union Parker (2).jpg
    74.8 KB · Views: 39
  • $_12.JPG
    $_12.JPG
    21.4 KB · Views: 37

chippuller

Member
Joined
Nov 17, 2008
Messages
7
Location
St. Louis. MO
CRS
Sounds like another vote for green as the original color. Thanks for sending that ad, but now I know I didn't get as good a deal as I thought.... I paid twice as much as it cost new!?!? ;-)
 

ALLFAST

Well-known member
Joined
Feb 20, 2017
Messages
1,233
Location
Northern California
Does any member presently have an 6 inch vise apart who can measure their swivel base, if it approximately resembles this Rock Island 577 base's configuration?

I'm trying to find a base that might interchange. I had read that some models might, even with some minor mods.

I'm trying to get a base for PackardV8. The one I'm trying to save may have to be sacrificed in order to not destroy my 577 body (beyond repair). I'm looking into having a duplicate cast from mine, but I'm nervous about shipping it.

TIA,

Shawn
 

Attachments

  • 2017-11-20 11.38.57.jpg
    2017-11-20 11.38.57.jpg
    139 KB · Views: 27

Jason1972

Well-known member
Joined
Nov 14, 2017
Messages
51
Location
Indiana
Picked up this old Record No. 4. It had seized lockdowns and vise wouldn’t open all the way. Tore it open and found broken lockdown nuts and after bead blasting I noticed this crack near the fixed jaws. Getting new nuts machined and I went ahead and cleaned it up, just hope the crack remains as I first found it, not sure tinkering with it would improve the cosmetics too much.i think it was caused by someone mistakingly thinking they had an anvil.sorry bout photos sideways, not sure exactly what I did with that
 

Attachments

  • E95FE74C-A6C0-4287-ADFC-C529BAB4BE7A.jpg
    E95FE74C-A6C0-4287-ADFC-C529BAB4BE7A.jpg
    9.3 KB · Views: 17
  • 0BAD3F6F-84FC-4274-9DA8-51D053AFCC61.jpg
    0BAD3F6F-84FC-4274-9DA8-51D053AFCC61.jpg
    11.1 KB · Views: 15
  • 73DE5FAB-E08A-491A-A2FF-4BB8331E7373.jpg
    73DE5FAB-E08A-491A-A2FF-4BB8331E7373.jpg
    18.2 KB · Views: 48
  • BEC473C3-35B7-4180-AAC1-E130A2D32DB0.jpg
    BEC473C3-35B7-4180-AAC1-E130A2D32DB0.jpg
    18.5 KB · Views: 46
  • E0D857E2-10F4-46F6-BA1F-45A93F71D9DB.jpg
    E0D857E2-10F4-46F6-BA1F-45A93F71D9DB.jpg
    19.9 KB · Views: 15
  • ADFA2EF7-73D9-47D1-95EA-4DBE0F6A79A1.jpg
    ADFA2EF7-73D9-47D1-95EA-4DBE0F6A79A1.jpg
    12.4 KB · Views: 50

Fretters

Well-known member
Joined
Jan 25, 2014
Messages
4,217
Location
South Yorkshire, England
Chunks missing from ledges aren't uncommon. As you surmised, it's usually due to people pounding away at something within the jaws. Even if the chunk breaks away, it won't impact functionality though.
 

Bunk

Well-known member
Joined
Oct 25, 2008
Messages
262
Location
Alexandria, VA
Jason - What paint brand/color did you use on your vise? I have a Paramo No.3 that is getting for paint and they are cousins, so I think the same blue would be appropriate.

Thanks
 

Jason1972

Well-known member
Joined
Nov 14, 2017
Messages
51
Location
Indiana
Bunk, it is valspar Blue paint and primer. Seems funnier than rustoleum paint which I normally use but I seen somewhere where someone suggested this color for Record vises and I think it’s a pretty good match for my particular vise. Hope that helps. I’d love to see pics when you’re done painting your vise
 

Jason1972

Well-known member
Joined
Nov 14, 2017
Messages
51
Location
Indiana
I meant runnier. I could see the white (I assume the primer) bleed through but I coated it lightly a 2nd time and had no issues....... but I does seem runnier than the rustoleum spray paint I normally use and it seems to dry pretty quickly
 

Attachments

  • D17BC4A9-1561-48C9-9734-FA84784B8324.jpg
    D17BC4A9-1561-48C9-9734-FA84784B8324.jpg
    12.2 KB · Views: 32

Bunk

Well-known member
Joined
Oct 25, 2008
Messages
262
Location
Alexandria, VA
Bunk, it is valspar Blue paint and primer. Seems funnier than rustoleum paint which I normally use but I seen somewhere where someone suggested this color for Record vises and I think it’s a pretty good match for my particular vise. Hope that helps. I’d love to see pics when you’re done painting your vise

Cool, thanks. I'm definitely going to post pics when complete.
 

chippuller

Member
Joined
Nov 17, 2008
Messages
7
Location
St. Louis. MO
CRS
I started cleaning up my #25 and the more i saw, the more I am convinced that someone working at the Eire Tool Works pulled this puppy out of the scrap bin.
In addition to the casting defects I showed in my original post, there are just so many areas of excess surface porosity to have made it past the inspection dept..... even on Monday morning:D
As you can see in the attached pics there is a lot of porosity on those pretty curved screw covers, (pic 1), and on the movable jaw (pic 2), and there is a piece of flash in a corner that prevented the movable jaw from closing against the fixed jaw... and just look at the surface finish :lol_hitti (pic 3).
I did clean it up and throw a coat of paint on it to see if it would be worth spending any more time on it and as you can see, in spite of it's questionable heritage, it's still a cute little vise. (pic 4)
If I get some spare time, I may even try to remove the handle and polish the head of the lead screw.
By the way, anyone have any good tricks for highlighting the lettering on castings..... besides spending an hour or so with a tiny artist's brush?
 

Attachments

  • 20171121_105359_resized[1].jpg
    20171121_105359_resized[1].jpg
    83.6 KB · Views: 50
  • 20171120_141336_resized[1].jpg
    20171120_141336_resized[1].jpg
    89.1 KB · Views: 43
  • 20171120_141440_resized[1].jpg
    20171120_141440_resized[1].jpg
    93.1 KB · Views: 40
  • 20171120_141418_resized[1].jpg
    20171120_141418_resized[1].jpg
    103 KB · Views: 38

ALLFAST

Well-known member
Joined
Feb 20, 2017
Messages
1,233
Location
Northern California
I have the dimensions of the base here, and believe the best candidates (that look exactly like this style here) are the Reed, Hollands, and Athol. If anyone has a 6" swivel base from one of these (apart for refurbishment, or laying around as parts) I'd sure appreciate some measurements. The base is 1-5/8 thick. The dimensions of the internal circle is 6-1/8, the ouside is 9-1/8 across, and the "lands" that the vise body rest upon are about 5/8" thick. Thsee measurements are for my Green Rock Island Model 577 base I posted a photo of a few days ago. I don't know if this update will end up in sequence.
 

CRSINMICH

Well-known member
Joined
Aug 15, 2015
Messages
2,418
Location
Southeastern Michigan
chip: I think it looks pretty good. If the pores bother you they could be filled before painting. I do have a tip for highlighting the letters. I'm not sure I did it on the Empire but I use it a lot. Just before priming or painting I file the tops of the letters flat with a small fine file. That makes it easier to get well defined edges if I paint the letters a contrasting color. One of the GJ members took that a step farther and polished the flat tops so that they looked like chrome when the vise color coat was carefully scraped off the letters. Look carefully at the letters on the Empire I posted. I think I may have done that (without the polishing). Other members have had good luck with a paint pen.
 
Last edited:

Outlawmws

Well-known member
Joined
Aug 9, 2011
Messages
39,321
Location
The Badlands
CRS
I started cleaning up my #25 and the more i saw, the more I am convinced that someone working at the Eire Tool Works pulled this puppy out of the scrap bin.
In addition to the casting defects I showed in my original post, there are just so many areas of excess surface porosity to have made it past the inspection dept..... even on Monday morning:D
As you can see in the attached pics there is a lot of porosity on those pretty curved screw covers, (pic 1), and on the movable jaw (pic 2), and there is a piece of flash in a corner that prevented the movable jaw from closing against the fixed jaw... and just look at the surface finish :lol_hitti (pic 3).
I did clean it up and throw a coat of paint on it to see if it would be worth spending any more time on it and as you can see, in spite of it's questionable heritage, it's still a cute little vise. (pic 4)
If I get some spare time, I may even try to remove the handle and polish the head of the lead screw.
By the way, anyone have any good tricks for highlighting the lettering on castings..... besides spending an hour or so with a tiny artist's brush?

[Musically]
"I got it one part at a time,
And it didn't cost me a Dime..."

-Johny Cash...
 
OP
D

drivesitfar

Well-known member
Joined
Oct 23, 2013
Messages
36,062
Location
Pacific Northwest
CP: I hope you start posting more cause comments like I PAID MORE THAN TWICE WHAT A NEW ONE COSTS (back in 1910 or in that era) will make more than a few of us smile.

lettering can be done several ways other than the paint brush if you don't want to do it. some even use a sharpie.

there was a YOUTUBE video floating around where a guy showed how to put paint on raised lettering on his old cast iron stove with a wadded up paper towel and dipping it in the paint and sort of dabbing it on.

another method i just heard from another member is he tapes off the entire area, then lightly grinds off the tape on the top of the lettering and he just spray paints it.

keep posting at this rate and you might make senior member status (100 posts or more) in your lifetime.

cheers
 

jtolbert

Member
Joined
Jun 2, 2017
Messages
21
Location
Urbana, IL
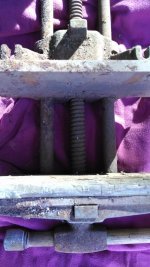
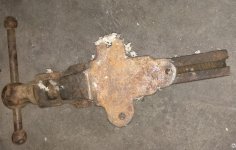
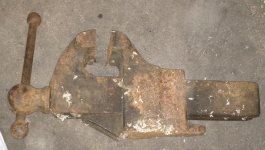
So I've got an odd bird here. I looked through ~ seventy pages of pics in this thread but didn't find another one like this. Not sure it's worth messing with, but I'd like to give it a try.

Back story: my dad has had this vise sitting on his garage floor for around a decade. The vise was given to my dad by a mutual friend that got it from his grandfather's estate. It is basically in the same shape now as it was when we got it. There are no markings I can yet discern.

I was able to unwind the dynamic jaw all the way out, and the set screw on the collar actually came out on the first try! It's almost like this thing wants to live. :) I wanted to remove the gib in the static jaw for cleaning; it's just dovetailed in, but there's a pin in front that I can't seem to drive out. What should I do?

The screw looks good and clean for most of its length. Handles are rusty but don't look abused.

Everything is now soaking in vinegar, cause it was cheap. :)

Plans would be to clean it up, maybe figure out how to add some spring washers or similar between the collar and the dynamic jaw to cut down on play, powder coat areas red, and...Enjoy it. I'd like to see about maybe drilling/tapping holes for mounting vise jaw inserts, but I am not certain if that's realistic or wise.
 

Attachments

  • IMG_20171125_172744.jpg
    IMG_20171125_172744.jpg
    147.2 KB · Views: 48
  • IMG_20171125_172818.jpg
    IMG_20171125_172818.jpg
    142.7 KB · Views: 49
  • IMG_20171125_172846.jpg
    IMG_20171125_172846.jpg
    150 KB · Views: 56
  • IMG_20171125_172905.jpg
    IMG_20171125_172905.jpg
    147.7 KB · Views: 56
  • IMG_20171126_190517.jpg
    IMG_20171126_190517.jpg
    140.2 KB · Views: 50
  • IMG_20171126_190529.jpg
    IMG_20171126_190529.jpg
    144.3 KB · Views: 51
  • IMG_20171126_190555.jpg
    IMG_20171126_190555.jpg
    152.1 KB · Views: 45
OP
D

drivesitfar

Well-known member
Joined
Oct 23, 2013
Messages
36,062
Location
Pacific Northwest
JT: first of all WELCOME TO GJ and thanks for making your first post on this vise repair thread with an old vise that's probably close to 100 years old. i'm guessing it's a Prentiss vise, but it might be another brand cause a few brands had that style and sold their vises without any information about their vise company on the vise.

for the pin blocking the vise nut you can usually hit them up and out from the bottom with a few firm blows with punch almost the size of the pin.

soaking it it vinegar is a good idea to free it up and maybe remove some of the rust, but make sure you rinse off all the vinegar and then dry the vise cause vinegar will eat cast iron if left on it.

as far as improving the slop issue you can maybe get the sleeve tighter after you put the vise back together or some guys use washers or thrust washers or thin bearings so if you still need help when you get to that part just ask.

good luck
 

jtolbert

Member
Joined
Jun 2, 2017
Messages
21
Location
Urbana, IL
Thanks for the info, drivesitfar! I've been lurking on GJ for a while; I built one of those giant 2" pipe-based desiccant dryers for my powder coating setup from plans I found here...But having the opportunity to work with this old vise and finding this thread finally prompted me to post.

It'll be neat to see if any more info comes out when it gets cleaned up a bit.

Is there a good default color for Prentiss stuff that would be good to (re)finish this vise in? Thanks.
 
To avoid these ads, REGISTER NOW!
Top Bottom