To avoid these ads, REGISTER NOW!

Townhouse Double Garage (26x18) in Alberta

lourens13

Member
Joined
Dec 15, 2015
Messages
18
Location
Edmonton, Alberta
Hey everyone! I've lurked around this site taking ideas and admiring tons of garage and finally figured it was time to post my own. This year I purchased my first house, a townhouse with an oversized double garage, which measures 18x26. During the summer the garage housed two cars, my Nissan 240SX (track car) and my daily, but during the winter a third car is using it as well. Lots of work left to be done, but once completed the garage will be used primarily for maintenance and tinkering on the 240SX and small woodworking projects.

Garage when I bought the house.
38543778366_ccb8846634_b.jpg


Starting some sanding.
26824502449_9c59a03454_b.jpg


Paint!
38543779176_003face901_b.jpg


Two tone.
38568102622_7ac92430b8_b.jpg


Adding some colour.
38543778646_56e23d249e_b.jpg


Paint is finished! Also removed the two incandescent bulbs that came with the house, replaced with four LED shop lights.
38543778466_2c44e8f7cc_b.jpg


More updates and pics to come!
 
Last edited:
To avoid these ads, REGISTER NOW!

TomcoPDR

Well-known member
Joined
Oct 19, 2011
Messages
606
Location
Calgary, Alberta
Congrats being a first time home owner.

Like others have said, can’t see the photos except for the drywalled starting out picture. Can’t wait to see progress and finished product
 

Bessy

Well-known member
Joined
Dec 18, 2012
Messages
995
Location
Ontario, Canada
I'm a Google Photos user (or at least I should be, since I have the Pixel...) and all I see is the first photo of mud/tape.
 
OP
L

lourens13

Member
Joined
Dec 15, 2015
Messages
18
Location
Edmonton, Alberta
Have started filling up the garage with goodies
- spare motor
- engine crane
- air compressor
- beer fridge
- wheels and tires
- racks for other assorted tools and parts
- started decorating with some old drifting memorabilia

Next up is a workbench. I would like to build one at the front of the garage, between the air compressor and black tool chest), as well as thinking about making a folding one somewhere along the side. The front of the garage is a little tight and crowded with the red car pushed to the front for the winter.

24737513388_c145087386_b.jpg


24737513748_3af67243a2.jpg
24737514088_d7812b01bb.jpg
24737512938_f7d7fa7863.jpg
 
OP
L

lourens13

Member
Joined
Dec 15, 2015
Messages
18
Location
Edmonton, Alberta
This what the front of the garage looked like, before the shelves were hung and before the red car was tucked away for the winter. I'd like to build a workbench between the air compressor on the left and the toolbox on the right, with it going over top of the beer fridge. Still looking at designs and figuring out the best way to tackle it.

The powerbar with the LED's in it and the wire to the roof lights will all be cleaned up once the bench is built.

24751557398_3aa6a02b22_c.jpg
 
OP
L

lourens13

Member
Joined
Dec 15, 2015
Messages
18
Location
Edmonton, Alberta
Looks good so far. Where in Edmonton did you buy?

What are you going to do for flooring?

I bought in the north - northwest, towards St. Albert.

At this point likely just keep it as is. Some of the reviews of the DIY epoxy kits scare me and I'm unfortunately on a bit of a budget and can't splurge to have it professionally done or any of the nice interlocking tiles.
 

MrQuiet

Active member
Joined
Nov 8, 2017
Messages
38
Location
Oslo, Norway
Subscribed! This looks very much like what I have to work with.

I should have done the two-tone walls, to be Garage Journal approved :)
 
OP
L

lourens13

Member
Joined
Dec 15, 2015
Messages
18
Location
Edmonton, Alberta
the work bench looks great! taking ideas as I want to build a new one this winter.

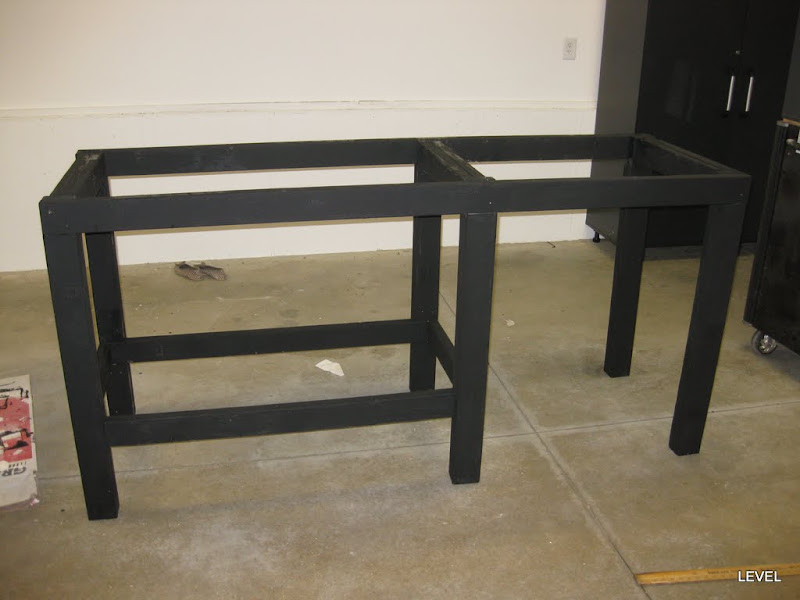
Sorry, that could have been confusing, that is not MY workbench, just a picture of the design I'm stealing. I went out and bought the lumber and my workbench construction will start this weekend!

In the meantime, rearranged some of the shelves. Initially the 8 foot shelf was on the wall behind the heater and the 6 foot shelf was on the right wall near the door (as pictured below).

38864296291_24c57257a2_b.jpg


The 8 foot shelf above the black toolbox kind of cluttered the area above where the workbench will be built, so swapped the location of the 6 and 8 foot shelves to make some more room.

38833835352_b0c46226cc_c.jpg


38833835852_35d868b14c_c.jpg
 

buildyourown

Well-known member
Joined
Jan 8, 2010
Messages
185
Whatever you do with your bench, figure out how to best utilize the storage underneath.
I never sit down in my shop unless I'm tig welding so I dont see the need for stools.
My point is to think it through. Every sqft in my shop has to be earned too
 
To avoid these ads, REGISTER NOW!

sean Buick 76

Well-known member
Joined
May 7, 2013
Messages
3,221
Location
Edmonton Alberta
Very nice job on the garage so far! Look into some fold down work benches off the walls if you are interested... I found that to be very useful on the side of the garage where my wife parks her daily driver... Then when her vehicle is out I flip down the extra benches and have room to work for a few hours. She comes home and I clean up and make space for princess to park again LOL!
 
OP
L

lourens13

Member
Joined
Dec 15, 2015
Messages
18
Location
Edmonton, Alberta
Whatever you do with your bench, figure out how to best utilize the storage underneath.
I never sit down in my shop unless I'm tig welding so I dont see the need for stools.
My point is to think it through. Every sqft in my shop has to be earned too

Perfect, thank you for the feedback / ideas! I personally kind of like the ideas of having a pair of stools in there. As much as the garage is used for work, there's still a beer fridge and I would eventually like to include a small TV for when I want to take a break and just watch the game.

Very nice job on the garage so far! Look into some fold down work benches off the walls if you are interested... I found that to be very useful on the side of the garage where my wife parks her daily driver...

Definitely! I would like to eventually put one folding bench on one of the sides where the two daily drivers park. The bench I'm building this weekend is at the very front of the garage, and while the red car is tucked away for the winter, like it currently is, there won't be a ton of room to use that bench.
 
OP
L

lourens13

Member
Joined
Dec 15, 2015
Messages
18
Location
Edmonton, Alberta
Workbench is done! Well, close to it. Really happy with how it turned out. I think I'll take a 2x6 and wrap the front and sides of the plywood top, just to protect it and make clamping a little easier. For the time being I decided against the stools, but it would be easy to turn the red and black cart sideways if I change my mind. Will eventually paint it grey to match the walls, but for now I like how it looks!

38949047301_a12a37c31a_b.jpg
 
OP
L

lourens13

Member
Joined
Dec 15, 2015
Messages
18
Location
Edmonton, Alberta
Looks good!

Me I would of done the double boxes underneath to gain more workbench space.

Any plans to run a few more lights?

How do you mean double boxes?

I'm not sure, there's currently four big LED shop lights as well as additional LED lights on the workbench. Maybe eventually, but I would say it's brighter in there than my iPhone pictures show.

Great use of space for sure. Is that a gas or electric heater??? Kind of close to the tires don't you think...

Just an electric heater, so I would guess it doesn't get as hot as a gas heater? Regardless, I haven't really turned it on yet. It came with the house but the garage is quite well insulated, even when it dipped down to -20 at night I didn't see it get below 10 degrees in the garage.

Started running a 2x2 the length of the bench to hang some wrenches and screwdrivers on. I'll eventually paint match it red but figured I would get it all laid out before I apply the paint.

25101023568_8d1ee5ee25_c.jpg


The vice isn't mounted yet. Would pre drilling the some holes into the 2x4s and installing lag bolts like pictured work, or thoughts on a better idea? Or maybe a better location?

38972122841_3ae1e037e6_c.jpg
 
Last edited:
OP
L

lourens13

Member
Joined
Dec 15, 2015
Messages
18
Location
Edmonton, Alberta
Cleaned up the wiring a bit on the workbench light and hung some more wrenches.

Anyone have feedback / suggestions on the bench place to mount the vise? And best method? Through the 2x4? Through the plywood with reinforcements underneath?

25168683918_8114407457_b.jpg
 

Legacyruss

Member
Joined
May 25, 2006
Messages
18
Location
Redmond, WA
For all the bench mounted vices I have owned (2), I have bolted through the plywood. On 1 of those vices I doubled up the thickness of the plywood and bolted through that. doubling up you ply also gets the vise away form the bench-top making it easier to turn and manipulate.
 
OP
L

lourens13

Member
Joined
Dec 15, 2015
Messages
18
Location
Edmonton, Alberta
Minor update to the workbench! Took some 1x6 and ripped it to size for trim on the front and sides to protect the edge of the plywood and then left the back tall to prevent pencils and drill bits from running off the back.

I'm not sure where to go with the workbench next, I had initially wanted to paint it grey to match the wall but now I'm starting to think I may stain it instead.

Hung some more screwdrivers and files from the 2x2 and mounted an old TV on the wall.

39632520631_6f86b55d1d_b.jpg
 

nicholam77

Well-known member
Joined
Dec 18, 2016
Messages
2,673
Location
Minneapolis, MN
Bench is looking great. I am building a similar one right now (and have similar space along the back wall as you - 18').

I too am contemplating how to mount a vice. I think I am going to put it in the left corner where you have yours sitting and lag screw into the 2x4 legs. Two of the mounting holes will be over 3/4 inch plywood alone, so I will likely double up underneath the work surface for those. Not sure if this is the best method (instructions that came with my vice said long bolts with washers and locking nuts) but that won't work if mounted in the corner due to the bench leg. So that's my plan.

Would be interested in more details on the electric heater. Does it run on 110v?

Keep sharing and great progress!
 
OP
L

lourens13

Member
Joined
Dec 15, 2015
Messages
18
Location
Edmonton, Alberta
I think I am going to put it in the left corner where you have yours sitting and lag screw into the 2x4 legs. Two of the mounting holes will be over 3/4 inch plywood alone, so I will likely double up underneath the work surface for those. Not sure if this is the best method (instructions that came with my vice said long bolts with washers and locking nuts) but that won't work if mounted in the corner due to the bench leg. So that's my plan.

Would be interested in more details on the electric heater. Does it run on 110v?

Just checked your thread, very nice! Very similar to mine, from the color scheme, to the tire racks, to the workbench.

For the vice, will you be using bolts and screws on the two bolts that do not go into the legs?

As for the heater, I'm not sure. It came with the house and is hardwired, not plugged in. I would need to check in my homeowner binder that came with the house to find more info.
 

sean Buick 76

Well-known member
Joined
May 7, 2013
Messages
3,221
Location
Edmonton Alberta
Where you locate the vice over the leg you can use a lag bolt instead of a nut and bolt on that one spot, just pre-drill it so it does not crack. I would not bother with locking nuts but I would use a second nut to tighten onto the first nut, then it will not loosen up.

Have a look into a few of these I find them handy:

I have a vice mounted on one, a drill press, a grinder etc, I just need to mount the receiver nice and sturdy and then I can just slide in whichever tool I want into the bench.

Enjoying the -30?? I know I am not LOL!

https://www.harborfreight.com/hitch-mount-vise-plate-66260.html

https://www.harborfreight.com/3500-lb-capacity-step-bumper-receiver-67159.html
 

PhantomEB

Well-known member
Joined
Feb 6, 2006
Messages
6,787
Location
Medicine Hat, AB, Canuckistan
Looks awesome, Neighbour!

I sure am intrigued to see the exterior of this place. Way to acheive #dowithwhatyougot!

I would love to see more townhouses being built around the city with first floor garages, best of all worlds!
 
Last edited:
OP
L

lourens13

Member
Joined
Dec 15, 2015
Messages
18
Location
Edmonton, Alberta
OP
L

lourens13

Member
Joined
Dec 15, 2015
Messages
18
Location
Edmonton, Alberta
Minor update to the garage! Finally mounted the vise. Mounted on the left side where there's more room away from the toolbox. Mounted through the plywood and then another piece of plywood underneath, with the stationary jaw mounted flush with the edge of the bench.

Also ran seem 2x6 which was ripped to size along the edge of the bench, to protect the edge of the plywood and give more area to clamp on.

41289903994_cd1b2eb239_z.jpg


40202402260_bc5e48cc0e_z.jpg


41109749955_25023f1ff3_z.jpg
 
To avoid these ads, REGISTER NOW!
Top Bottom