
You are using an out of date browser. It may not display this or other websites correctly.
You should upgrade or use an alternative browser.
You should upgrade or use an alternative browser.
Modifications to the HF 4 and 5 drawer service carts - what changes have you made?
- Thread starter ndnchf
- Start date
Project_shadow
Well-known member
- Joined
- Jun 14, 2014
- Messages
- 677


Well I have a few mods I thought worth mentioning. This thread gave me some great ideas so I thought I would give back a little bit. Here are my mods so far. 1. Mounted Surge Protector
2. Magnet Bar to Hold screwdrivers in place
3. Grommets in screwdriver holes
4. Magnetic strips on lid
5. Car weather stripped to create soft tight seal when lid is closed
6. Magnetic Home Depot bluetooth portable speaker (not a mod but one of my favorite additions to the cart at 20 bucks)
7. Side Shelf
I will post some pictures of my more interesting mods and a how to after this.
2. Magnet Bar to Hold screwdrivers in place
3. Grommets in screwdriver holes
4. Magnetic strips on lid
5. Car weather stripped to create soft tight seal when lid is closed
6. Magnetic Home Depot bluetooth portable speaker (not a mod but one of my favorite additions to the cart at 20 bucks)
7. Side Shelf
I will post some pictures of my more interesting mods and a how to after this.
Surge Protector Mod
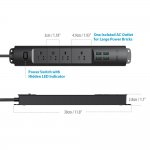
This is a fantastic, sleek, and hidden mod. I found a surge protector with mounting tabs on the end that would be perfect for the cart. And it fit right into the spot I wanted it to. It also has 4 usb charging ports on it which is great for my portable speaker, tablet with pdf repair manuals, or just using my iphone.
Here is the surge protector I chose to use:
https://www.amazon.com/dp/B01K73M8VS/?tag=atomicindus08-20
Picture one is a screeenshot of it.
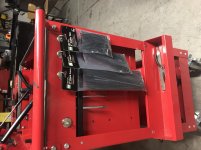
1. Take the surge protector and choose where you want to mount it. The holes are small tolerance so make sure you mark where you want to drill using the surge protector itself as a template. I chose to make my marks on the outside of a leg and drill from the outside because it was easier with the same result since the surge protector is symmetric. see photo 2
2. I used rivets because it was cleaner but it worried me about cracking the plastic mounting tabs. Screws with nuts are alright to mount it as well. see photo 3
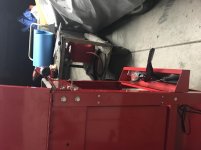
3. Once installed it tucks away nicely. I ran usb cables up through a screwdriver hole and into the main portion of my box from the surge protector. see photo 4
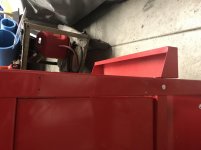
4. from the side you can't even tell it's there hardly in photo 5
5. In photo 6 I took a hook that I found at Home Depot. Another poster gave me the idea for it. It was drilled perfectly to go where the carriage bolts on the support leg are already pre-drilled. These are at home depot for around 6 dollars a pop and are called tornado brand hooks. There is a tab on the back to grind away (took me a minute literally). I used bolts and didn't have to enlarge the pre-drilled holes. Using carriage bolts might require slight modification.
6. Voila! Surge protector with 4 plugs, and extension cord, and all the usb port you need in a compact and sleek location
This is a fantastic, sleek, and hidden mod. I found a surge protector with mounting tabs on the end that would be perfect for the cart. And it fit right into the spot I wanted it to. It also has 4 usb charging ports on it which is great for my portable speaker, tablet with pdf repair manuals, or just using my iphone.
Here is the surge protector I chose to use:
https://www.amazon.com/dp/B01K73M8VS/?tag=atomicindus08-20
Picture one is a screeenshot of it.
1. Take the surge protector and choose where you want to mount it. The holes are small tolerance so make sure you mark where you want to drill using the surge protector itself as a template. I chose to make my marks on the outside of a leg and drill from the outside because it was easier with the same result since the surge protector is symmetric. see photo 2
2. I used rivets because it was cleaner but it worried me about cracking the plastic mounting tabs. Screws with nuts are alright to mount it as well. see photo 3
3. Once installed it tucks away nicely. I ran usb cables up through a screwdriver hole and into the main portion of my box from the surge protector. see photo 4
4. from the side you can't even tell it's there hardly in photo 5
5. In photo 6 I took a hook that I found at Home Depot. Another poster gave me the idea for it. It was drilled perfectly to go where the carriage bolts on the support leg are already pre-drilled. These are at home depot for around 6 dollars a pop and are called tornado brand hooks. There is a tab on the back to grind away (took me a minute literally). I used bolts and didn't have to enlarge the pre-drilled holes. Using carriage bolts might require slight modification.
6. Voila! Surge protector with 4 plugs, and extension cord, and all the usb port you need in a compact and sleek location
Attachments


PelicanPines
ALLIANCE MEMBER
The black bar you riveted on the side??? Magnetic strip...?
Awesome job.
Awesome job.
The black bar you riveted on the side??? Magnetic strip...?
Awesome job.
Thanks. Yeah it's a magnetic strip from harbor freight. The screwdrivers tipping and jostling around drove me nuts. Now they stay upright and in place until i take one out. When im home at my computer later tonight i'll post more pics of it.
Colin Len
Well-known member
Ooh, I like that idea, I hate how mine move around as well. Actually, more than that I hate that with larger screwdrivers in there I can't even close the lid. Friend of mine had the same problem with a similar cart and hacked it up to lower the screwdrivers - worked like a charm!Thanks. Yeah it's a magnetic strip from harbor freight. The screwdrivers tipping and jostling around drove me nuts. Now they stay upright and in place until i take one out. When im home at my computer later tonight i'll post more pics of it.
Ooh, I like that idea, I hate how mine move around as well. Actually, more than that I hate that with larger screwdrivers in there I can't even close the lid. Friend of mine had the same problem with a similar cart and hacked it up to lower the screwdrivers - worked like a charm!
I think you could saw or drill out a hole for the screwdriver to drop it down for handle clearance and the magnetic strip would still hold it in place in that gap where the rest of them are, depending on how low you put the strip.
Colin Len
Well-known member
Not a bad idea. I'm actually not sure if I'll be keeping screwdrivers in mine anymore. Recently moved them to another location in the garage. I really need to find some time to reorganize - recently inherited my grandfather's tools and toolboxes so I now have too many tool boxes (for my garage to hold).I think you could saw or drill out a hole for the screwdriver to drop it down for handle clearance and the magnetic strip would still hold it in place in that gap where the rest of them are, depending on how low you put the strip.
PelicanPines
ALLIANCE MEMBER
I no longer use the screwdrivers that live there... I noticed the black bar and said what the... then the bulb lit. Great idea.
I used rubber grommets...
Now I have wera drivers hung on the side of the box...
FWIW... if you painted that strip red... I really would have been WTF ....
I used rubber grommets...
Now I have wera drivers hung on the side of the box...
FWIW... if you painted that strip red... I really would have been WTF ....
pajibson
Well-known member
"Hacked it up" pics or it didn't happen. For scientific researchOoh, I like that idea, I hate how mine move around as well. Actually, more than that I hate that with larger screwdrivers in there I can't even close the lid. Friend of mine had the same problem with a similar cart and hacked it up to lower the screwdrivers - worked like a charm!
Sent from my SM-N920P using Tapatalk
PelicanPines
ALLIANCE MEMBER
"Hacked it up" pics or it didn't happen. For scientific research
Sent from my SM-N920P using Tapatalk
https://www.garagejournal.com/forum/showpost.php?p=3223191&postcount=590
Been "hacked it up" before...
pajibson
Well-known member
Hmm not sure how I missed that one when I went through this. Thanks
Sent from my SM-N920P using Tapatalk
Sent from my SM-N920P using Tapatalk
PelicanPines
ALLIANCE MEMBER
Hmm not sure how I missed that one when I went through this. Thanks
Sent from my SM-N920P using Tapatalk
I know this thread like the back of my hand... it's this threads fault I am here at GJ and have over 10,000 posts... and why I have more tools than any one retired person should have...
PelicanPines
ALLIANCE MEMBER
How do people attach the 18" magnet strip from HF to the lid?
I tried using just 3M molding tape... it didn't hold. I ended up making Z clips and used rivets thru the lid.
The rivets are hidden under the rubber mat I have attached to the lid.
Link: https://www.garagejournal.com/forum/showpost.php?p=4147736&postcount=1131
pajibson
Well-known member
LmaoI know this thread like the back of my hand... it's this threads fault I am here at GJ and have over 10,000 posts... and why I have more tools than any one retired person should have...
Sent from my SM-N920P using Tapatalk
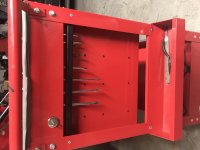
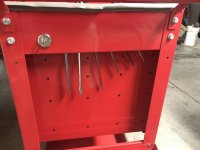
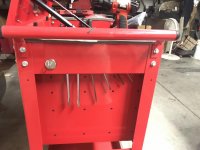
here is my writeup on installing the magnet bar on the tool cart. It bugged me how the screwdrivers would shift around and never stray straight up (see picture 1). This problem was made worse by having grommets in the screwdriver holes. I didn't want to give up the grommets because i liked them for several reasons. So i came up with this solution.
First you'll need an 18" magentic bar strip from harbor freight. Item#61199
https://www.harborfreight.com/18-in-magnetic-tool-holder-61199.html
sometimes they are on sale for cheaper and sometimes they are even on the free coupons.
First decide where you want to mount it. I decided after my first side that higher up and closer to the holes is better. Then you can put any size screwdriver in the slots not matter how short. It also blends in better when its mounted higher up.
1. Hold up the magentic bar, center it, and mark your drill holes. The strip mounting points line up perfectly with the tool cart legs (pic 2 and 3).
2. After drilling you need to mount it on. You will have to have some kind of spacer or washer to get the magnetic bar closer to the screwdriver slots. I put mine about 1/3 into the slots if you are looking at them from above. !/2 way might have worked. You want them into the slots so when the screwdriver shaft grabs the magnetic strip it does't tip one way or the other but stands straight up. For my spacer I used a washer and extra 6mm flanged nuts on the backside i had lying around and it lined up pretty well. You want to put the spacer between the inside of the leg and the magnetic bar so it creates more space between the bar and the legs it's mounted to.
3. You then want to mount it. I advise using long rivets. You can use screws or bolts but be advised they need to be sunk into the leg metal, especially if you are using the shelf. I found out the hard way that bolts would interfere with the add on shelf that harbor freight sells so that it wouldn't sit flush. That is somewhat impoortant.
4. Tighten down rivets and voila. you've got a working magnetic screwdriver holder that keeps them in place no matter how much you jostle the cart around
PS I don't know why i can't get the pictures oriented right but you guys get the idea
First you'll need an 18" magentic bar strip from harbor freight. Item#61199
https://www.harborfreight.com/18-in-magnetic-tool-holder-61199.html
sometimes they are on sale for cheaper and sometimes they are even on the free coupons.
First decide where you want to mount it. I decided after my first side that higher up and closer to the holes is better. Then you can put any size screwdriver in the slots not matter how short. It also blends in better when its mounted higher up.
1. Hold up the magentic bar, center it, and mark your drill holes. The strip mounting points line up perfectly with the tool cart legs (pic 2 and 3).
2. After drilling you need to mount it on. You will have to have some kind of spacer or washer to get the magnetic bar closer to the screwdriver slots. I put mine about 1/3 into the slots if you are looking at them from above. !/2 way might have worked. You want them into the slots so when the screwdriver shaft grabs the magnetic strip it does't tip one way or the other but stands straight up. For my spacer I used a washer and extra 6mm flanged nuts on the backside i had lying around and it lined up pretty well. You want to put the spacer between the inside of the leg and the magnetic bar so it creates more space between the bar and the legs it's mounted to.
3. You then want to mount it. I advise using long rivets. You can use screws or bolts but be advised they need to be sunk into the leg metal, especially if you are using the shelf. I found out the hard way that bolts would interfere with the add on shelf that harbor freight sells so that it wouldn't sit flush. That is somewhat impoortant.
4. Tighten down rivets and voila. you've got a working magnetic screwdriver holder that keeps them in place no matter how much you jostle the cart around
PS I don't know why i can't get the pictures oriented right but you guys get the idea
Attachments


PelicanPines
ALLIANCE MEMBER
Rx7ToAudi: That is officially a NEW mod being shown here and is freaking awesome. I'm considering reorganizing my cart to use those holes again and retrofitting YOUR mod.
Thank You.
Thank You.
Duker
Well-known member
Rx7ToAudi: That is officially a NEW mod being shown here and is freaking awesome. I'm considering reorganizing my cart to use those holes again and retrofitting YOUR mod.
Thank You.
Agreed, That is a neat solution.....
As an aside I guess I have been late to the party but I see an ad now for a Blue and Black 5 drawer cart. Nice additions to the red.
Sent from my iPad using Tapatalk Pro
archirelic
Well-known member
Agreed, That is a neat solution.....
As an aside I guess I have been late to the party but I see an ad now for a Blue and Black 5 drawer cart. Nice additions to the red.
Sent from my iPad using Tapatalk Pro
Where did you see this ad? I'd love to get an additional 5 drawer cart, even moreso in black!
Craftsman_88
Well-known member
Last email I got showed black and blue but can't find on website. Be interested if colors are coming for all boxes!
chipper
Well-known member
I just got the newest email and see the 5 drawer comes in blue and black now....pretty cool
Where did you see this ad? I'd love to get an additional 5 drawer cart, even moreso in black!
Email.

Sent from my iPhone using Tapatalk
PelicanPines
ALLIANCE MEMBER
But but but... green... I want GREEN. Well the blue is nice... dang it... I just got a different cart... had i known... i would have gotten the black... if i got blue... i would have wanted it in my bedroom...
Thanks for confirming Juice...
Thanks for confirming Juice...
ThatSickRip
Well-known member
- Joined
- May 23, 2017
- Messages
- 763
Just picked up the 4 drawer thanks to this thread  I wanted black to go with my Husky box, and Im too impatient to wait to get the new 5 drawer in black lol.
Im setting it up strictly for working on my 4Runner, so its going to be all automotive and metric. My main box will hold the rest of my tools that arent auto related.
Plans so far for the cart:
-side tray
-grommets
-metal peg board on the sides
-magnetic tray/spray can holder
-power strip
I wanted black to go with my Husky box, and Im too impatient to wait to get the new 5 drawer in black lol.Im setting it up strictly for working on my 4Runner, so its going to be all automotive and metric. My main box will hold the rest of my tools that arent auto related.
Plans so far for the cart:
-side tray
-grommets
-metal peg board on the sides
-magnetic tray/spray can holder
-power strip
PelicanPines
ALLIANCE MEMBER
I added labels... my tools have no issues with their "identity"...
Snakebyt
Well-known member
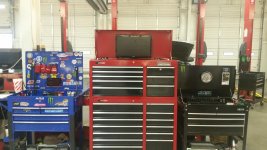
Since I last posted mine in here I have added multiple stickers. My tools are much faster now as a result.

needs more stickers
Attachments
PelicanPines
ALLIANCE MEMBER
If i get a second 5 drawer cart... I'm dedicating the top/lid to the largest monitor that would fit in there... would need to fabricate some kind of hinge/gas strut thing along the edges too.
ThatSickRip
Well-known member
- Joined
- May 23, 2017
- Messages
- 763
Found some new mods Im going to do to the 4 drawer cart. At first I was looking at Wall Control and AllSpace metal peg board to install in the bottom sides, and maybe a long run on the back bottom side, essentially boxing in the bottom but having peg board storage all around. Today I found these at Home Depot, and they are the exact inner dimensions of the bottom sides, 16" x 16". Theyre a lot cheaper and essentially wont have to cut or fab the metal of the other brands to fit.
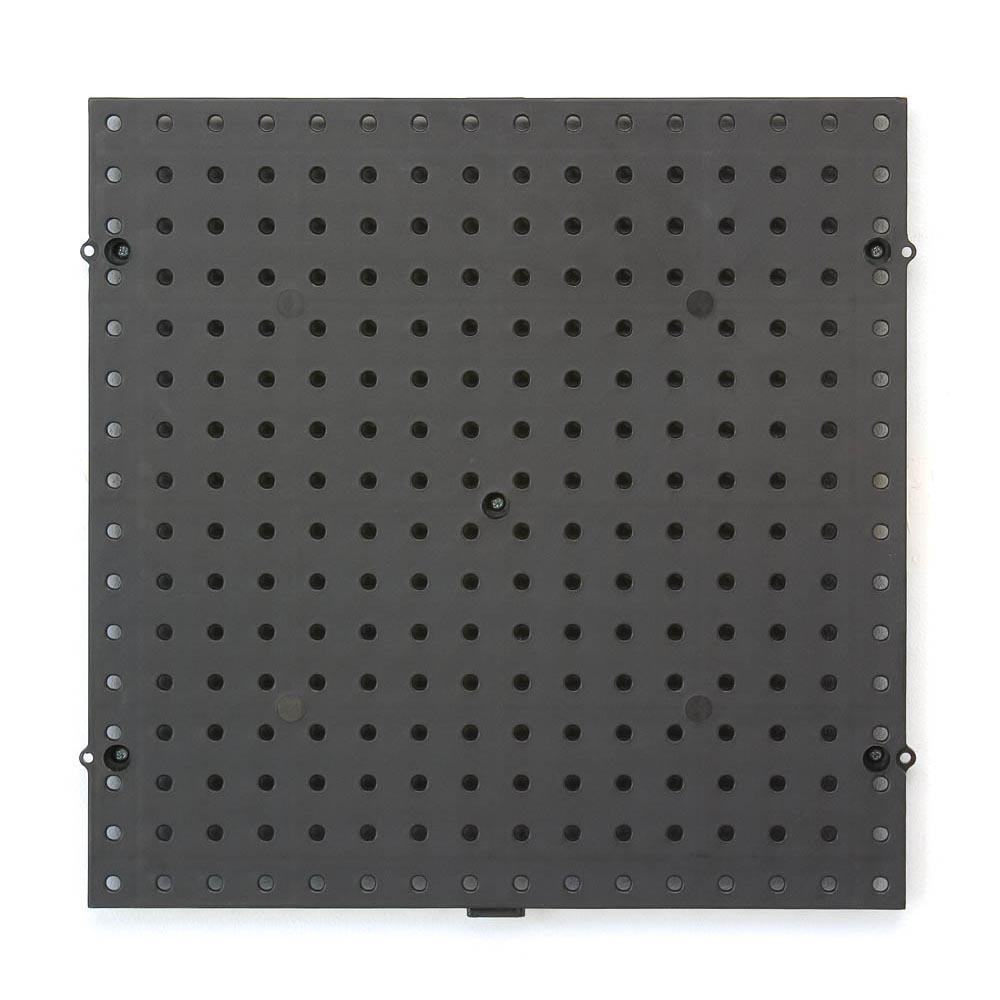
$5.69 a piece
https://www.homedepot.com/p/Everbilt-16-in-x-16-in-Plastic-Pegboard-in-Black-17961/202249707
$5.69 a piece
https://www.homedepot.com/p/Everbilt-16-in-x-16-in-Plastic-Pegboard-in-Black-17961/202249707
ThatSickRip
Well-known member
- Joined
- May 23, 2017
- Messages
- 763
Also ordered these. A little bit more money than the HF ones, and they dont have, the holes for screwdrivers, but my OCD doesnt want the red holders on the black boxes, and Id rather pay a few more dollars and not have to spend time prepping and painting the red ones.
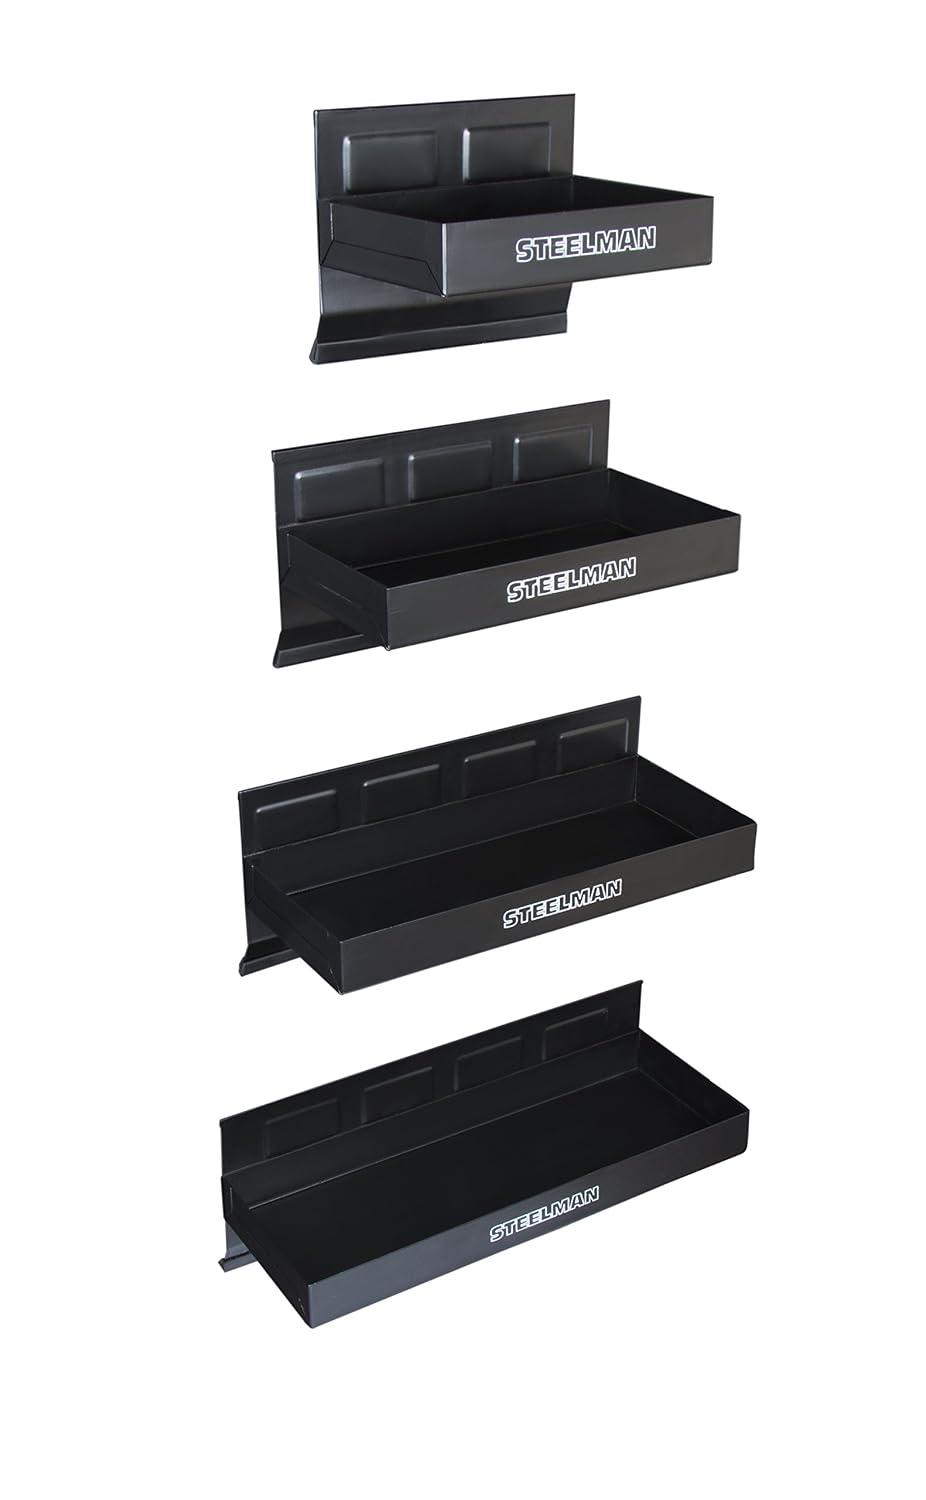
https://www.amazon.com/gp/product/B01EJ9FPKW/ref=oh_aui_detailpage_o01_s00?ie=UTF8&psc=1
Plan on putting them on the back of the box of the cart for spray cans, rags, misc. items
https://www.amazon.com/gp/product/B01EJ9FPKW/ref=oh_aui_detailpage_o01_s00?ie=UTF8&psc=1
Plan on putting them on the back of the box of the cart for spray cans, rags, misc. items
jon72vega
Well-known member
Here are the mods I've done to date.
Side tray.

..
Swivel casters replaced the stationary ones...... why did HF decide to make the tires in BLUE?

..
Pegboard on one end.... not happy with how the color of the painting turned out.

..
Made a screwdriver holder that keeps them standing up pretty much straight.

..
Socket organizers and a tray for ratchets and extensions.

Side tray.
..
Swivel casters replaced the stationary ones...... why did HF decide to make the tires in BLUE?
..
Pegboard on one end.... not happy with how the color of the painting turned out.
..
Made a screwdriver holder that keeps them standing up pretty much straight.
..
Socket organizers and a tray for ratchets and extensions.
Last edited:
Motorman55
Well-known member
Email.
Sent from my iPhone using Tapatalk
If HF is coming out with those colors in the five drawer model, then there's definitely a blue one in my future.
jon72vega
Well-known member
Do you have any more pictures or information on the screwdriver holder?
titanjeep,
Here are a couple more pictures.
The ends are cut down to clear the carriage bolts and nuts holding the cart together.
The screwdrivers odd spacing to one another matches up with the odd hole spacing in the tool cart.
The plastic tubing is press-fit into the drilled holes which helps keep the screwdrivers standing up straighter.

..
I used a spade bit to counterbore the wood to hold the screwdrivers better.

..
After I did all that, I purchased a set of better screwdrivers with taller handles and had to remake the whole thing.

mbshop
Well-known member
Wonder if the colored 5 drawers are a regional thing because I have not seen it advertised here.
jakemac
Well-known member
It appears that they are a custom order item.
Not sure if they're Ship-to-Store, or Ship-to-Home.
Not sure if they're Ship-to-Store, or Ship-to-Home.