To avoid these ads, REGISTER NOW!

AB´s 2-car garage project up north

Joined
Jul 11, 2015
Messages
23
Location
Finland
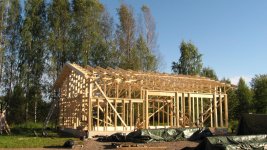
So, as I did told in the introduce yourself-section, my garage project which has been long time on hold is picking up some speed in the next few weeks.

The specs of the garage are :

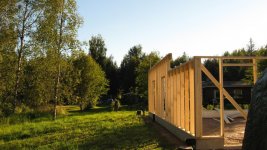
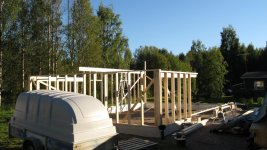
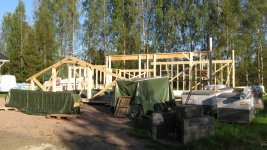
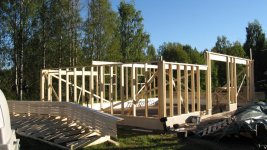
Foundation measurements are 8 m x 12 m, garage section will be in inside 7.5 m long x 9.5 m wide x 3.6 m high.

Storage section will be 5.5 m long x 2 m wide x 2.3 m high, also the storage section will contain 1.8-1.9 m long x 2 m wide WC.

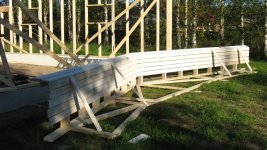
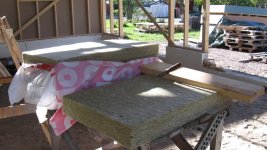
The frame will be made in out of 48 x 125 mm timber and additional 48 x 48 mm cross frame, total rock wool insulated wall thickness will be 175 mm. The roof will be insulated with 500 mm of rock wool. In the floor will be 150 mm of styrofoam and 100 mm reinforced concrete with extra reinforcements for the 2-post lift (s).
The outside will be painted board upholstery (of course because I live in finland which is a country that is basically one big forest and my house has the same kind upholstery :bounce:). The roof will be made in concrete roof tiles, also same kind that is in the house.

It will be a warm garage with storage attic and running water, oil and sand separation sewer, fire alarm, burglar alarm, fixed compressor and air lines, antenna and network capabilities. Also at some point, when I start to stop being poor and start to get richer, I will get there a 2-post lift.

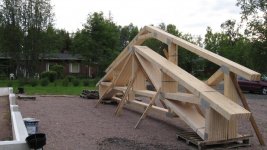
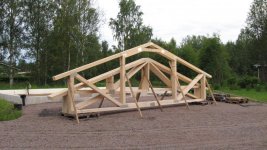
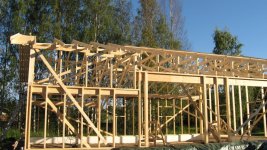
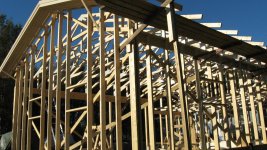
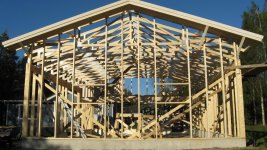
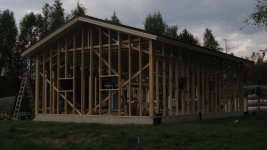
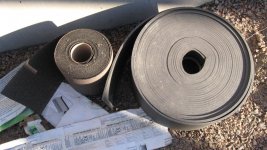
here are some pics from the lot and the frame waiting foundations.
 

Attachments

  • IMG 0001.jpg
    IMG 0001.jpg
    145 KB · Views: 172
  • IMG_2570 – kopio.jpg
    IMG_2570 – kopio.jpg
    152 KB · Views: 164
  • IMG_2571 – kopio.jpg
    IMG_2571 – kopio.jpg
    152.6 KB · Views: 145
  • IMG_2563.jpg
    IMG_2563.jpg
    155.1 KB · Views: 154
  • IMG_2596.jpg
    IMG_2596.jpg
    147.9 KB · Views: 126
  • IMG_2603.jpg
    IMG_2603.jpg
    148.7 KB · Views: 116
  • IMG_2612.jpg
    IMG_2612.jpg
    152.2 KB · Views: 117
Last edited:
To avoid these ads, REGISTER NOW!
OP
A
Joined
Jul 11, 2015
Messages
23
Location
Finland
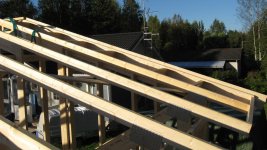
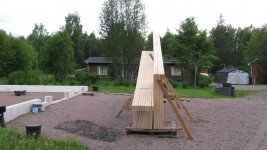
At finally the roof trusses arrived today. Also later this week the frame and roofing materials should arrive. Next week the builders come and starts to erecting the garage frame. A Bit by bit the dream begins to take a shape.

But the downside of it is that after the builders have finished their part of the frame erecting and all their bills are payed, which contains the roof trusses, heat insulators, frame and roofing I am almost 20.000 € poorer. Not to forget that I am already spend approx. 14.000 € to the ground works, building permit, building masters fee, foundations, sand and gravel materials, excavator, rain water drains and frost insulators.

Still there is missing the floor casting and levelling, lifting doors, access doors, windows, gutters, air source heat pump, electrics, plumbing........

Honestly, I think that I am soon in bankruptcy :willy_nil:dunno:. But when it is started, it have to make finish.
 

Attachments

  • IMG_2654.jpg
    IMG_2654.jpg
    154.9 KB · Views: 58
  • IMG_2653.jpg
    IMG_2653.jpg
    150.3 KB · Views: 57
  • IMG_2652.jpg
    IMG_2652.jpg
    152.4 KB · Views: 63
  • IMG_2648.jpg
    IMG_2648.jpg
    152.5 KB · Views: 68
OP
A
Joined
Jul 11, 2015
Messages
23
Location
Finland
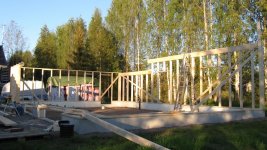
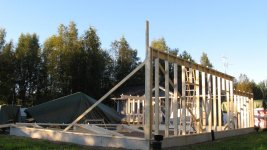
All right, I thought that it would be a decent to post an update to current situation.

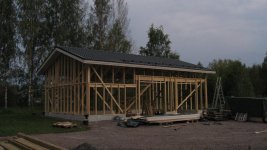
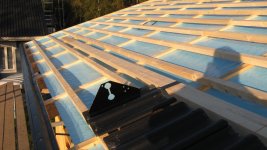
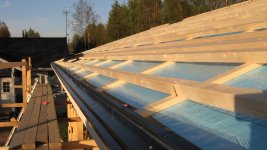
Work has been progressing as it should be, despite that the erection of the frame started two weeks later than it was initially agreed and next week the builders will lay the roof underlay and roof tiles on place and after that their part is finish. Downside of this arrangement is that, I had to postpone my other half of summer vacation also two weeks later and because at here we are going towards autumn at full speed and I know my ****** luck, when my vacation starts the heaven opens up and then it will pour water like biblical style whole three weeks what my vacation lasts.
But the lord of the weathers did bless the builders, because they have had two weeks straight sunshine and temperature has been every day + 20-26 C.
I would have liked to go on holiday now........:(

During those three weeks my intention was / is that I can get the wind barrier boards and the facade get done ready before winter. Because the idea of installing the facade boards in the winter time after work as I am tired, when temperature is about -25 C and it is dark like inside elves ***, snowfalls and blows like in the frozen hell, the thought of that does not raise my **** up.
I did build my house in that way few years ago and I can say that it *****. Big time, it really does.

I have had two builders on site and I have to say that the progress of the professionals is stunning :bowdown:, if I would be doing the frame build with friends and relatives after work and weekends, it would not be ready ever.
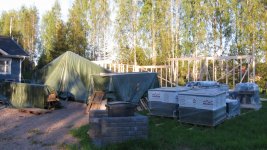
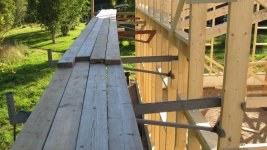
Here are some pics of the current situation after one day / 16 hours, two men, á 8 h man.
 

Attachments

  • IMG_2680.jpg
    IMG_2680.jpg
    154.3 KB · Views: 59
  • IMG_2675.jpg
    IMG_2675.jpg
    148.8 KB · Views: 60
  • IMG_2673.jpg
    IMG_2673.jpg
    145.1 KB · Views: 63
  • IMG_2671.jpg
    IMG_2671.jpg
    154.9 KB · Views: 61
  • IMG_2669.jpg
    IMG_2669.jpg
    149.6 KB · Views: 65
  • IMG_2668.jpg
    IMG_2668.jpg
    153.3 KB · Views: 62
  • IMG_2664.jpg
    IMG_2664.jpg
    152.5 KB · Views: 65
Last edited:
OP
A
Joined
Jul 11, 2015
Messages
23
Location
Finland
The fruits of the second day, after 32 h:
 

Attachments

  • IMG_2687.jpg
    IMG_2687.jpg
    155.2 KB · Views: 40
  • IMG_2685.jpg
    IMG_2685.jpg
    154.3 KB · Views: 40
  • IMG_2684.jpg
    IMG_2684.jpg
    157.6 KB · Views: 40
  • IMG_2683.jpg
    IMG_2683.jpg
    156.1 KB · Views: 40
  • IMG_2682.jpg
    IMG_2682.jpg
    155.6 KB · Views: 40
  • IMG_2681.jpg
    IMG_2681.jpg
    156.6 KB · Views: 40
OP
A
Joined
Jul 11, 2015
Messages
23
Location
Finland
The result of the third day, after 48 h:
 

Attachments

  • IMG_2712.jpg
    IMG_2712.jpg
    158.8 KB · Views: 47
  • IMG_2710.jpg
    IMG_2710.jpg
    156.1 KB · Views: 45
  • IMG_2706.jpg
    IMG_2706.jpg
    163 KB · Views: 46
  • IMG_2705.jpg
    IMG_2705.jpg
    162.9 KB · Views: 55
  • IMG_2702.jpg
    IMG_2702.jpg
    154.8 KB · Views: 48
  • IMG_2700.jpg
    IMG_2700.jpg
    155 KB · Views: 49
  • IMG_2699.jpg
    IMG_2699.jpg
    156.8 KB · Views: 50
OP
A
Joined
Jul 11, 2015
Messages
23
Location
Finland
I manage to found in the photo archive a two photo, that shows how much the lot have changed over 5 years since I bought it.
 

Attachments

  • IMG_2703.jpg
    IMG_2703.jpg
    153.9 KB · Views: 57
  • TONTIN KUVAT 017.jpg
    TONTIN KUVAT 017.jpg
    150 KB · Views: 54
  • TONTIN KUVAT 012.jpg
    TONTIN KUVAT 012.jpg
    150.9 KB · Views: 54
OP
A
Joined
Jul 11, 2015
Messages
23
Location
Finland
A little update with the current status :
 

Attachments

  • IMG_2735.jpg
    IMG_2735.jpg
    146.4 KB · Views: 47
  • IMG_2733.jpg
    IMG_2733.jpg
    148.4 KB · Views: 61
  • IMG_2731.jpg
    IMG_2731.jpg
    147 KB · Views: 47
  • IMG_2729.jpg
    IMG_2729.jpg
    148.3 KB · Views: 49
  • IMG_2723.jpg
    IMG_2723.jpg
    151.3 KB · Views: 44
  • IMG_2721.jpg
    IMG_2721.jpg
    152.7 KB · Views: 47
  • IMG_2708.jpg
    IMG_2708.jpg
    152.3 KB · Views: 43
OP
A
Joined
Jul 11, 2015
Messages
23
Location
Finland
An update after long time, progress haven't been much because the early winter was / has been exceptional wet. The frost and snow didn't come until under christmas, which is in finland also exceptional late during winter time. Well, my goal for the get the wind barrier boards and outside upholstery done before the winter was mildly expressed, fucked up. The outcome is that I have to do those works in any case now in the middle of the winter, despite that it was my intention to especially avoid this.
Why the frost and snow is important for the building sake ?, because the autumn was wet and every building material and every place is soaking wet and if i would closed the walls with the insulations, the structures would be start mildew and rotten when the temperature begin to rise towards summer because the moisture would not be enabled to ventilate / vapourised out of the structures.

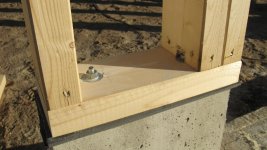
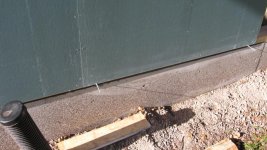
Here are few structural detail which i didn´t remember to put in earlier.
 

Attachments

  • IMG_2750.jpg
    IMG_2750.jpg
    144 KB · Views: 37
  • IMG_2749.jpg
    IMG_2749.jpg
    144.2 KB · Views: 38
  • IMG_2745.jpg
    IMG_2745.jpg
    151.8 KB · Views: 37
  • IMG_2744.jpg
    IMG_2744.jpg
    140.6 KB · Views: 40
  • IMG_2696.jpg
    IMG_2696.jpg
    151.7 KB · Views: 39
  • IMG_2690.jpg
    IMG_2690.jpg
    144.8 KB · Views: 46
  • IMG_2688.jpg
    IMG_2688.jpg
    146.2 KB · Views: 41
OP
A
Joined
Jul 11, 2015
Messages
23
Location
Finland
More pics due the 7 pictures / post limit.
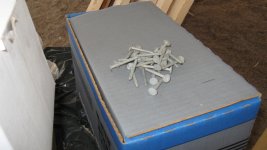
The one picture where are two nails hitted on the lower runner plank, is how i could alone put the wind barrier boards on place. The nails are temporary supports / "third hand" because the boards are quite large and heavy to handle them alone. The measurements of one board is width 1200 mm, height 2700 mm, thick 9 mm, weight is 25,5 Kg so they are really tricky to hold and try to attach them at the same time.

The blue handle is board carry helper, so that one man can handle and carry those boards and i have to say that it is one priceless tool :thumbup:.

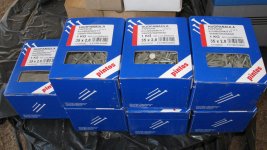
The nail packages (all 8 of them) contains 450 pcs./each, so the total amount of nails that i have to hit by hand on place is roughly 3600 pcs. :bounce:.
I dear to say that, i know after that how to hold a hammer.
 

Attachments

  • IMG_2742.jpg
    IMG_2742.jpg
    150.1 KB · Views: 52
  • IMG_2740.jpg
    IMG_2740.jpg
    140.6 KB · Views: 54
  • IMG_2739.jpg
    IMG_2739.jpg
    149.9 KB · Views: 59
  • IMG_2743.jpg
    IMG_2743.jpg
    151.5 KB · Views: 62
  • IMG_2741.jpg
    IMG_2741.jpg
    143.1 KB · Views: 59
  • IMG_0000.jpg
    IMG_0000.jpg
    152.2 KB · Views: 57
  • IMG_2752.jpg
    IMG_2752.jpg
    147.4 KB · Views: 57
Last edited:

Erkka Herola

Member
Joined
Apr 2, 2013
Messages
10
Good looking project there! Floor plan looks clean and really well organised. This should be a great space when done.
Tsemppiä Espoon suunnalta!
 
OP
A
Joined
Jul 11, 2015
Messages
23
Location
Finland
Good looking project there! Floor plan looks clean and really well organised. This should be a great space when done.

Tsemppiä Espoon suunnalta!

Thanks for your encouragement Erkka :beer:. I will try to post updates accordingly to progress.
Mukava nähdä täällä muitakin suomalaisia :thumbup:.
 
To avoid these ads, REGISTER NOW!
OP
A
Joined
Jul 11, 2015
Messages
23
Location
Finland
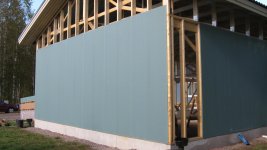
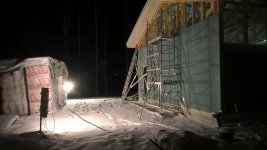
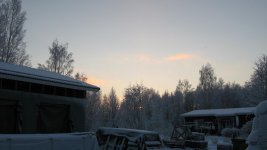
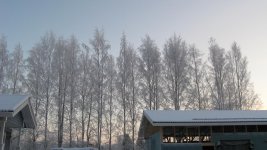
Here are a few pics of the current situation, not much have happened but the pics are quite self explanatory why that is so. Brisk freezing weather, temperature is approx. -25 C. So that little slows down everything. It is really frustrating to wait more convenient weathers, so that there would be even some progress before summer. Those pics obviously show why I chose my user name :).
 

Attachments

  • IMG_2763.jpg
    IMG_2763.jpg
    142.2 KB · Views: 47
  • IMG_2764.jpg
    IMG_2764.jpg
    149.8 KB · Views: 46
  • IMG_5930.jpg
    IMG_5930.jpg
    137.6 KB · Views: 48
  • IMG_5929.jpg
    IMG_5929.jpg
    139.2 KB · Views: 49
  • IMG_5931.jpg
    IMG_5931.jpg
    139.6 KB · Views: 46
  • IMG_2761.jpg
    IMG_2761.jpg
    151.6 KB · Views: 56
  • IMG_2759.jpg
    IMG_2759.jpg
    141.7 KB · Views: 56
OP
A
Joined
Jul 11, 2015
Messages
23
Location
Finland
Here are the temperatures from the house ventilation unit control panel :evil:.

ULKO = outside air temperature, SISÄ = inside air temperature, TULO = extracted air temp. from inside and JÄTE = waste air temp.
 

Attachments

  • IMG_5945 (2).jpg
    IMG_5945 (2).jpg
    148 KB · Views: 65

vision8

Well-known member
Joined
Jan 19, 2012
Messages
124
Location
Southern Ontario Canada
Looks like a major undertaking for this time of year ! But the end result will be well worth the effort ; you will be proud of your accomplishment. Well done.
Al in Dundas, Canada
 
OP
A
Joined
Jul 11, 2015
Messages
23
Location
Finland
After long time, it´s time to update what is going on in my garage project.
Unfortunately I have to admit that I am quite lazy, the progress has been and most likely will continue to be slow. It really is bigger job than you could imagine when you are building it after full 8h workday and you have driven over 100 km per day to work and done all the mandatory tasks of the day :headshake.

My most greatest concern in this moment is that, will I get the floor slab casted before next winter. But my original timetable has flown to the trash can, I had in last summer the intention to get the outside paneling done and get the floor slab casted. Did not happened. Well, maybe this summer ....

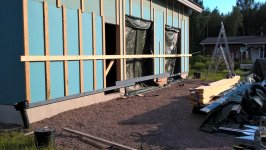
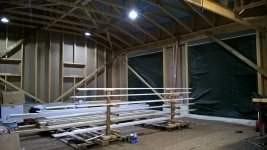
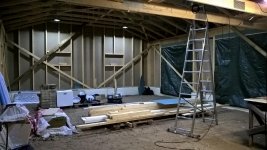
What I have got done, I have done the cold attic floor supports and floor boards and installed the lights (2pcs 2x18 W T8 fluorescent lamp) and sockets. Almost all wind barrier boards are in place and the facade paneling has begun. I have got advanced :bounce:my everlasting deck project, who knows, it also will be ready some day.

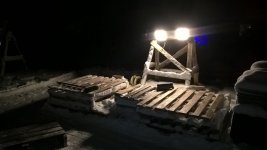
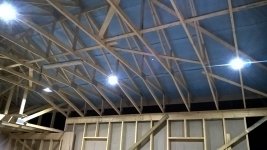
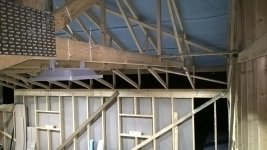
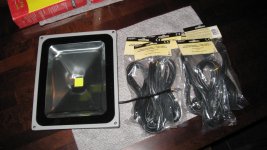
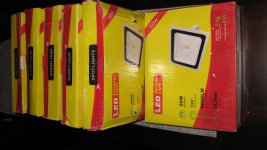
I have also purchased 6 pieces of 50 W LED floodlights, which are the final ceiling lights when the garage is ready. I have installed them temporarily to the roof trusses so that I would see how good they fits to intended purpose. I have to say that they work surprisingly good !, although I have to put in the wall additional lights, because the floodlights create shadows as they are installed in the ceiling to prevent dazzling. But they are very energy efficient and relatively cheap way to get general lighting in the garage.

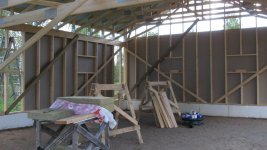
Here are few pics at the current situation and my rainy day job site, the improvised panel painting and drying stand.

I apologise any misspelling, it is quite late when i write this and it goes through google converter....
 

Attachments

  • IMG 4882.jpg
    IMG 4882.jpg
    162.8 KB · Views: 32
  • IMG 222.jpg
    IMG 222.jpg
    155.5 KB · Views: 33
  • IMG 5578.jpg
    IMG 5578.jpg
    142.6 KB · Views: 34
  • IMG 6954.jpg
    IMG 6954.jpg
    150.2 KB · Views: 36
  • IMG 3940.jpg
    IMG 3940.jpg
    148.1 KB · Views: 37
OP
A
Joined
Jul 11, 2015
Messages
23
Location
Finland
More pics of the floodlights.
 

Attachments

  • IMG 9987.jpg
    IMG 9987.jpg
    151.2 KB · Views: 35
  • IMG 6887.jpg
    IMG 6887.jpg
    145.6 KB · Views: 31
  • IMG 1120.jpg
    IMG 1120.jpg
    147.7 KB · Views: 32
  • IMG_2778.jpg
    IMG_2778.jpg
    150.7 KB · Views: 31
  • IMG_2771.jpg
    IMG_2771.jpg
    150.4 KB · Views: 29
  • IMG_2770.jpg
    IMG_2770.jpg
    148.9 KB · Views: 33
  • IMG_2768.jpg
    IMG_2768.jpg
    142.9 KB · Views: 28
OP
A
Joined
Jul 11, 2015
Messages
23
Location
Finland
I thought that it would be a decent thing to post some news on the western front, it has been almost a 1.5 years since last one :lol: . I know, I am a lazy mother f#cker :p, but what can I say . . .

Not much of progress have been happend, (well, who would guessed that ! :D) Although, there are some small projects, which have get some wind under their wings. I´ll put here some pics of those projects. First ones are a lift door thresholds, the ones which will come outside on front of lift doors, on the edge of the floor concrete. I took welding machine from my job site to home and I welded on a 2.5 m wide / long L-shape iron some concrete grasps. The both lift door accesses will be 2.5 m wide and 2.5 m height. After I had got the weldings done, the next day I took them to a nearby city in one company to get them hot galvanized. About a four days later, they called to me and told I could come and pick them up. It was not even that expensive case, if I remember right it was some where between 50-60 euros.

There are one local entrepeneur guy who sell these same door thresholds, but he charges those ~150 euros per one. And he gets them hot galvanized in the same company that I did use. Because those companys which does that, does not exist on every city. I did earn quite good hour salary by making those by my self. But, there are one disadvantage on this. And as in the pics show, I was not a awake when I did welded those concrete grasps and now they are bended by the heat of the welding. What I should have needed to do, to weld by tacking them together to prevent the heat bending. But I did notice that bending too late, they were already treated. In the installation phase I have to rely on some mild violence to get them straight.
 

Attachments

  • WP_20160730_13_20_05_Pro.jpg
    WP_20160730_13_20_05_Pro.jpg
    156.6 KB · Views: 26
  • WP_20160730_13_19_47_Pro.jpg
    WP_20160730_13_19_47_Pro.jpg
    156.7 KB · Views: 24
  • WP_20160717_20_17_10_Pro.jpg
    WP_20160717_20_17_10_Pro.jpg
    158.3 KB · Views: 19
  • WP_20160717_19_12_17_Pro.jpg
    WP_20160717_19_12_17_Pro.jpg
    155.7 KB · Views: 20
  • WP_20160717_16_58_55_Pro.jpg
    WP_20160717_16_58_55_Pro.jpg
    159.9 KB · Views: 20
  • WP_20160717_16_58_40_Pro.jpg
    WP_20160717_16_58_40_Pro.jpg
    157.8 KB · Views: 25
Last edited:
OP
A
Joined
Jul 11, 2015
Messages
23
Location
Finland
Thanks GoldCar for support. I did check your project and I have to say, that I am envious to you because you have steady floor and heating. I have A LONG ROAD ahead of me before I am in that same position. Not to mention, A LOT of €€€€€.
By the way, what brand are those your drawers and what kind of prices they are approx. ?
 

GoldCar

Well-known member
Joined
Jul 26, 2015
Messages
109
Location
Alsace, France
The cabinets I chose are from a german brand calling BOTT, you find them here :

https://www.bott.fi/

They are solid and practical, and they cost approximately 1300 € each with taxes. It is a sacred budget but I was lucky being able to be pleased.
 
OP
A
Joined
Jul 11, 2015
Messages
23
Location
Finland
The cabinets I chose are from a german brand calling BOTT, you find them here :

https://www.bott.fi/

They are solid and practical, and they cost approximately 1300 € each with taxes. It is a sacred budget but I was lucky being able to be pleased.

Ouch ! 1300€ ?!. We have here in finland saying what fits perfectly in that :

Wonderfully expensive ! :lol:

Not that I would complain, I did bought last summer in one auction a 4 domestic TRESTON metal cabinets, which have a brand new the same price at one piece, what I did pay for those four. If I would had need to buy those new, they would cost me over 4000€, so I think I did quite good deal with those. I know, what do you mean with that to use a shitload of money to those kind of stuff. I also could use significantly less money on those cabinets and buy some lighter and wobbling, cheaper cabinets. But I want quality and I am ready to pay for it. It is important that when you buy or acquire something, you are satisfied with the quality and don't regret that purchase, it means that you got yourself a successful purchase :thumbup:.
 
Last edited:

Bempa

Well-known member
Joined
Jul 26, 2012
Messages
79
Location
Avesta, Dalarna, Sweden
Slow progress is still progress! I have a friend that use to say" Even if i just put one board up it´s still one board less then before"

I think that is a very good saying :) And you should´nt rush or force yourself into something, wjere is the fun in that :)

The build looks like a top quality build, great work!
 

PugetDude

ALLIANCE MEMBER
Joined
Mar 13, 2013
Messages
22,473
Location
Superstition Mountains, AZ
Thanks for bumping this thread, subscribed for updates.
I'm always amazed to hear how much higher building costs are in different parts of the world. In many parts of the US, you could construct a similar size garage/shop building for less than what you have spent on your foundation!
Good luck with the project.
 
OP
A
Joined
Jul 11, 2015
Messages
23
Location
Finland
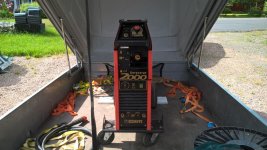
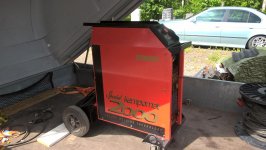
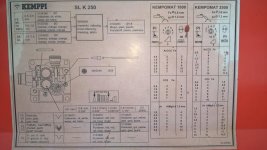
Here is few of my auction finds, two welding machines, TIG-welder and MIG-welder. Both are KEMPPI brand, that much I need to pulling home because Kemppi is finnish. But that is not only reason why I like them, They are from the start designed, manufactured and intended for heavy industry and production use. So they are basically infinitely durable in garage use and spare parts supply is guaranteed also in the future. That thing is taken notice on pricing of them, even they are used machines and relatively expensive.

250 Amps MIG on lower and 220 Amps pulse-TIG higher
 

Attachments

  • WP_20170713_13_26_20_Pro.jpg
    WP_20170713_13_26_20_Pro.jpg
    153.4 KB · Views: 13
  • WP_20170713_13_26_32_Pro.jpg
    WP_20170713_13_26_32_Pro.jpg
    146.9 KB · Views: 17
  • WP_20170620_21_43_27_Pro.jpg
    WP_20170620_21_43_27_Pro.jpg
    145.5 KB · Views: 16
  • WP_20170620_21_43_55_Pro.jpg
    WP_20170620_21_43_55_Pro.jpg
    149.4 KB · Views: 15
  • WP_20170717_20_30_19_Pro.jpg
    WP_20170717_20_30_19_Pro.jpg
    146.4 KB · Views: 14
  • WP_20170717_20_26_09_Pro – 2.jpg
    WP_20170717_20_26_09_Pro – 2.jpg
    147.2 KB · Views: 13
Last edited:
OP
A
Joined
Jul 11, 2015
Messages
23
Location
Finland
Slow progress is still progress! I have a friend that use to say" Even if i just put one board up it´s still one board less then before"

Thanks Bempa ! Your friend is right, slow progress is better than no progress at all, but it is so f#cking frustrating when nothing goes like you have intended :mad:.
 
To avoid these ads, REGISTER NOW!
Top Bottom