To avoid these ads, REGISTER NOW!

Between 485 & 705 SQ/FT Mid-Century Moto Mecca Makeover

Workspaces between 485 and 705 squarefeet.
OP
S

sakurama

Well-known member
Joined
Oct 10, 2010
Messages
1,458
Location
Portland - the cool one.
Oh man, that shot of the bike in the house. Now that is a real work of art :)

In related news. I'm starting work this spring on a minor renovation of our living room and one of the projects is to build a set of cabinets and shelves along one wall. Naturally there's a festool tracksaw now in the workshop and I'll be going back over your cupboard build photos to figure out how I'm going to do this. I've not used the 32mm system before so it'll be a good learning process.

Thanks, I need more bikes in the house I guess. A bike reading nook, maybe a bike in the TV room...

The thing that saves the most frustration or reduces the difficulty is to make your cabinets a multiple of 32mm on the height. When you flip the board around and drill the other side you will get the holes aligned perfectly without having to remeasure or reset.

Gregor, will you be at The One show again this year? Will you be bringing a bike or two there?

I talked briefly to Thor about me shooting it again. I guess I'm the only one to have shot it and actually finished on time even though last year was more bikes than ever. If I shoot it or not I'll be there but time ran out for me to finish the Triumph for this year. Too many house projects. But, yes, I'll certainly be there. Wouldn't miss it.

You have reminded me to get those engine plates cut. I'll get that from Ben today and drop it off at the laser cutting place. That will get the ball rolling on the Trumpet at least.

G
 
To avoid these ads, REGISTER NOW!

Denwood

Well-known member
Joined
Sep 22, 2014
Messages
4,191
Location
Thunder Bay, Ontario, Canada
i-ScT4rVL-X2.jpg

Wow...super ****. I see you have some serious history with that bike! That said, how does your wife manage the bike in the house thing?

I was suddenly struck with the "compact" nature of bike wrenching. It's pretty awesome that you can shine one up and just roll it into your house as a art piece. I figure that as this bike was on a magazine cover, it should be good enough for home decor :)

I remember reading your thread a few yrs back and thinking "This guy is crazy with all the wood stripping going on...". Well, some crazy is a good thing sometimes. The after pics look amazing.
 

wingnutthehutt

Well-known member
Joined
Jul 29, 2009
Messages
140
Location
Sacramento, CA, USA
I hadn't seen the Aero-1946 thread. Definitely worth spending some time on. I have always wanted to learn to work with sheetmetal. I worked for a suspension and chassis manufacturer for several years and would play with tools from time to time, but no one ever had the time to show me anything and it's a huge investment to start. Especially when I have other things I need to work on improving.
 

bicycle019

New member
Joined
Jan 13, 2014
Messages
3
Location
Denver, CO
Amazing thread, thanks for sharing. It took me a while to get through, but it's been inspirational to follow your progress. I've learned a lot from it, thanks for taking the time to document your work. Oh and yeah, another lurker coming out of the woodwork to make post #1 on GJ. :)
 
OP
S

sakurama

Well-known member
Joined
Oct 10, 2010
Messages
1,458
Location
Portland - the cool one.
Wow...super ****. I see you have some serious history with that bike! That said, how does your wife manage the bike in the house thing?

Well, it goes in the house while she's on a business trip. And it's temporary. You know, like how long it will take to finish the house...

I hadn't seen the Aero-1946 thread. Definitely worth spending some time on. I have always wanted to learn to work with sheetmetal. I worked for a suspension and chassis manufacturer for several years and would play with tools from time to time, but no one ever had the time to show me anything and it's a huge investment to start. Especially when I have other things I need to work on improving.

Yeah, I find I have way more things I want to do and learn than I have time for. I remember as a kid saying I was bored and my fathers response was always, "Things (or places) aren't boring, people are. If you're bored it's because you're boring - get off your but and do something." Which I seem to have taken to the other extreme now.

Are this the ones I put the fillets in a long time ago? We both dropped the ball after that.

Ha, I couldn't recall who it was and meant to look through my PM's. Do you still have the files? At this point I'll take them as is but if you've done any work on them with the fillets that would be great. I'd like to get them cut this month.

Amazing thread, thanks for sharing. It took me a while to get through, but it's been inspirational to follow your progress. I've learned a lot from it, thanks for taking the time to document your work. Oh and yeah, another lurker coming out of the woodwork to make post #1 on GJ. :)

That's so cool. Thanks for posting. I just spent three days trying to true up the chuck in my lathe and it's been three days of one step forward three steps back. I had to just shut off the lights and walk out so it's nice to your comment before I call it a night.

Gregor
 

BoilermakerFan

Well-known member
Joined
Apr 17, 2006
Messages
2,188
Location
Indianapolis, Indiana
Well, it goes in the house while she's on a business trip. And it's temporary. You know, like how long it will take to finish the house...


Yeah, I find I have way more things I want to do and learn than I have time for. I remember as a kid saying I was bored and my fathers response was always, "Things (or places) aren't boring, people are. If you're bored it's because you're boring - get off your but and do something." Which I seem to have taken to the other extreme now.


Gregor

That's awesome! My wife views my "temporary" storage of things in the same light.

My F-I-L used to tell my wife and her siblings, "only stupid kids are bored." We used the same quote on our kids. Only took about 3 times before they quit telling us they were bored. And if they tell us they are bored now, we give them chores to do to help out. We know my son is bored when he comes to us and asks what we would like him to do to help around the house. :thumbup:
 

Sham

Well-known member
Joined
Jan 29, 2013
Messages
76
Location
Antibes, France
Well, it goes in the house while she's on a business trip. And it's temporary. You know, like how long it will take to finish the house...

I, too, had two-wheeled vehicles in my appartment at some point.
People who who'd come for the first time who be amused ; the other inhabitants of the building, well, not so much. Aaaaaaaaaaaaaand I was single at the time. :lol: :lol: :lol: :lol:

attachment.php
attachment.php
 

Attachments

  • Resize of IMG_0844.JPG
    Resize of IMG_0844.JPG
    48.9 KB · Views: 2,981
  • Resize of IMG_0845.JPG
    Resize of IMG_0845.JPG
    48.5 KB · Views: 2,980

Huxley

Well-known member
Joined
Mar 4, 2008
Messages
210
Location
Colorado
Ha, I couldn't recall who it was and meant to look through my PM's. Do you still have the files? At this point I'll take them as is but if you've done any work on them with the fillets that would be great. I'd like to get them cut this month

I forwarded the e-mail with the DXF file. It has only been 2 years - the Aluminum should be properly aged by now.
 
Joined
Sep 19, 2013
Messages
20
Gregor, I have been following your thread for what seems like forever now, but this is my first post. Somewhere way back I read about Wilton Vises... well, today I came across this one in a local buy and sell group and I picked it up. It’s a Wilton 9450 and the date stamp on the bottom reads 10/53. I gather from what I have read that that date is actually the warranty expiry date, which would put date of manufacture in 1948. Oh, and here’s the best part, price was $30 Canadian or about $24 American.

082e6480f7df730434a5b6e23d81e29a.jpg


Sent from my iPhone using Tapatalk
 

Attachments

  • 082e6480f7df730434a5b6e23d81e29a.jpg
    082e6480f7df730434a5b6e23d81e29a.jpg
    888.2 KB · Views: 2
OP
S

sakurama

Well-known member
Joined
Oct 10, 2010
Messages
1,458
Location
Portland - the cool one.
Gregor, I have been following your thread for what seems like forever now, but this is my first post. I gather from what I have read that that date is actually the warranty expiry date, which would put date of manufacture in 1948. Oh, and here’s the best part, price was $30 Canadian or about $24 American.

Are you kidding?!? That's amazing. Those are such fantastic vises. I'm sure you've seen the vice thread here in the tool section. Lots of fun. Looking forward to seeing it cleaned up.

Gregor
 
OP
S

sakurama

Well-known member
Joined
Oct 10, 2010
Messages
1,458
Location
Portland - the cool one.
How about some garage stuff?

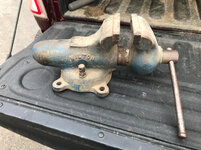
I few years back I was getting frustrated with the runout of my 6-jaw Buck chuck. It's an older USA made chuck and they're expensive to replace - like $1500. It wasn't quite holding things repeatably. Chucks can have a little runout but they need to be consistent and mine wasn't.

Runout is basically how much out of true something is when placed in the chuck. If you have a lathe there are three, well, maybe five, ways to hold parts.

First is a three or six jaw chuck. Basically a much larger version of what's on your drill press. It's fast and can generally be counted on to hold within .003-.005" or as we like to call it "thou" and that amount is about the thickness of human hair. So not much. 6-jaws are more expensive and better at holding thin stock.

i-7wLrpBX-X2.jpg


If you need to be more accurate you move to a collet. These are sized sleeves that hold a much greater tolerance but are limited to smaller diameter work generally. There are some specialty ones but they're special. Collets should hold work under a thou or .001"

i-mz2pnDs-X2.jpg


Finally if you really need to be absolutely accurate you hold your work in a four jaw chuck. These don't self center so every time you put work into them you need to get out your dial indicator and slowly tweak each jaw one at a time nudging the part into concentricity. It's tedious but accurate and with patience you can get your part running to a few tenths or .0001"

i-GLvKBrS-X2.jpg


There is also holding work on a face plate and between centers but it's just not something that is done much. I've used my face plate once and centers never. Most work on a lathe happens in a 3-jaw or 6-jaw chuck.

Since it's what gets used most often you'd like it to be accurate and after a while it wears and just isn't. Mine wasn't. You could turn a part and have it be round but if you removed it and put it back it wouldn't be concentric again.

My solution at the time was to cobble together a grinding wheel from a Dremmel extension.

i-3CXtkjx-X2.jpg


I figured it was off and if I ground it with some really light passes I could get it back to serviceable shape. The shot above is me trying to grind it. Well, it didn't work. In fact I made it worse through my cobbled method. This is when, as an amateur machinist, you start to realize how much you don't know. Machining is interesting because it's the art of making parts and so as a craft you're sort of at square one - you often can't buy a solution to your problems - you can only devise (or make) a solution. The better the machinist the better the solution.

My solution was weak. And as you'll see one problem often requires many solutions.

So I watched a bunch of YouTube videos and called my friend Scott who is a master machinist. He explained that my solution simply wasn't rigid enough and the only way to fix the chuck was with an actual tool post grinder. So I started looking for one on eBay and after a few months snagged a deal on a used one.

i-7qnd72k-X2.jpg


As the name suggests it's a grinder... you attach to your lathe's tool post. The reason you are using a grinder instead of just the lathe itself is because the jaws of the chuck are hardened and can't be cut with standard tooling.

So to give you a sense of the cascading problem/solution situation I'll run you through what it took for me to work this solution out. First off the grinder had a broken switch. Now don't expect a lot of photos here because I never expected any of this to become the hassle that it was. Anyway, it draws 11 amps so all the hardware store switches were 4 amps so I had to find a vintage switch on ebay and rob parts. Of course while the cord was being repaired I rewired it with a new cord.

Next it was missing a spring. Buying the spring would set me back $50 and since I didn't want to spend $50 or wait the week for it I instead decided to wind my own spring. Something I've never done before.

i-6PHsg63-X2.jpg


I made this small arbor and an arm and used my boring tool to hold the wire. Again, no action shots because I was sort of frustrated and just wanting to get the dang thing working. Several attempts later I fashioned a workable spring.

i-rmCqwMp-X2.jpg


With the grinder running I turned my attention to the chuck. In order to accurately grind it you have to place the jaws under tension like they would be holding a part. My first attempt used a brass sleeve that I moved to the back to grind the front part of the jaws and then to the front to grind the back. Another weak solution.

There are other solutions but I found none for doing a 6-jaw chuck so I modified one idea I found to work with the 6-jaw but since I'd never seen it tried had no idea if it would work. But basically you make a plate and drill (very accurately) 6 holes for the chuck jaws.

i-xkgVK3k-X2.jpg


Then you open the center hole enough to break into the six holes so the tips of the jaws can sneak through and you tighten the jaws. What you're not seeing here is that center hole was opened while the plate was mounted in the 4-jaw chuck...

i-mss3mZp-X2.jpg


Next we go back to the grinder. In order to use the grinder the wheels have to run true and be fresh so they need to be "dressed" which is basically cutting them to expose fresh abrasive. Since we're using a grinder because the steel is too hard to machine we now need something harder than the grinder wheel - which is a diamond.

And we need a way to hold the diamond.

i-HG3zGBd-X2.jpg


I drill some holes into a 1" bar stock and drill and tap for set screws. I order a diamond dresser.

i-BFZTbpj-X2.jpg


Now we have a way to hold the diamond tipped dresser.

I also need to make a shaft extension for the tool post grinder because it won't reach to the back of the chuck jaws without that. So I make that only to discover that it wobbles. I assume it's me so I make it three more times each one more careful than the last. Nope. Something is very slightly off.

i-jsJ9ddd-X2.jpg


I decide to reverse grind the shaft using the lathe so I take an extension shaft I've already made and mount it in a collet and then put a dressing tip in the lathes tool holder and dress the wheel.

i-sPwSnbj-X2.jpg


Then I mount my turned shaft and attempt to grind out the wobble. I get it close but not perfect but figure I'll have to dress the wheel anyway so I move on.

i-VSk7DrD-X2.jpg


My lathe chuck is adjustable so I put in a precision ground bar stock to check it's run out and then decide to center the chuck body and fix the jaws from there.

i-Z7hWpwP-X2.jpg


So let's review. These are the parts that I had to make to be able to use the tool post grinder to try to fix the lathe chuck. Don't think this happened in a few days. Each time I hit a road block I'd work on it until I got frustrated or ran out of time and then came back later. So this process has taken weeks.

i-KPgR3H9-X2.jpg


Then, to make sure you're not grinding a cone or at an angle you put a piece of precision ground stock into a collet and mount an indicator to the grinder and run it back while nudging the grinder into place.

i-892snLP-X2.jpg


Finally, I dressed the new smaller grinding wheel, mounted it up in the improved but not perfect extended shaft and tightened the jaws of the chuck and started grinding away. You'll notice that I've covered the lathes ways with towels to help keep grinding dust off them. That dust mixed with cutting fluid is like valve grinding past - bad for the lathe bed.

After many passes I kept getting the same error when I'd measure either test stock or the actual inside jaw faces. Every time the same exact error - .012 out or +-.006" so I'd somehow spent all this time and accomplished absolutely zero. Worse, I've probably ruined the chuck to the point where I couldn't even sell it to get my money back.

At the point where I'd given up and started shopping for a new chuck to replace this one I decided to re-true the chuck body to see if that might help. I didn't understand how I was getting the error and thought maybe if I try to true the test stock with the chuck body and regrind I might be able to save it still.

i-ttSpbTV-X2.jpg


To my complete and utter surprise the chuck was perfectly true. Okay, not "perfect" but less than a thou or about .0003" which is about as good as you could ever expect a chuck to get. I took out the bar and reset it a few times, swapped ends and it was always the same. Yeah! I don't think I can explain it but I'm not going to argue with it.

So, after several weeks of work, and dozens of hours I've somehow managed to save the chuck. Along the way I learned a lot and now I'm a marginally better machinist who still can't quite understand how I managed to stumble onto my solution. But I'll take it!

Gregor
 

BoilermakerFan

Well-known member
Joined
Apr 17, 2006
Messages
2,188
Location
Indianapolis, Indiana
Wow!

I'm just curious... how many hours do you think you spent on that?

The reason I ask is that I always do a time vs. cost analysis. I put a value on my time at $25-$35/hr if it's something I enjoy doing or cannot buy exactly what I want so I have to build it. If it's something I don't like to do or will take a lot of time then I put the value on my time at $55-$75/hr which is about what it would cost to have somebody do a skilled trade job with one or two guys on site. And this is just for my time, not materials. Sometimes the cost of materials is significantly lower if you do it yourself, but usually labor makes up a large portion of the project, as you are well aware in your home remodel and motorcycle builds.

When I was laid off and drawing unemployment many years ago, my time was truly valued at just $10/hr since I got $400/wk unemployment... and I built a chicken coop for our backyard hens. I had 80 hours plus in that coop... I should have just waited until I was back to work and bought a bigger one or a small yard barn and modded it.

Anyway, I suspect you had more than $1500 in labor time invested in the refurbish... Granted, you learned a lot from the experience, but it might have been cheaper in the long run to just buy the replacement chuck. You always do amazing work, but if I was in your shoes, in this case I probably would have just bought the new chuck.
 

lilscorpion

Well-known member
Joined
Mar 15, 2010
Messages
3,600
Location
Colorado
So, after several weeks of work, and dozens of hours I've somehow managed to save the chuck. Along the way I learned a lot and now I'm a marginally better machinist who still can't quite understand how I managed to stumble onto my solution. But I'll take it!


Gregor


Way impressed and very much enjoyed following along. I bought a new chuck. To be completely transparent, it took a few weeks to ship so your way might still have been faster.


Sent from my iPhone using Tapatalk Pro
 
OP
S

sakurama

Well-known member
Joined
Oct 10, 2010
Messages
1,458
Location
Portland - the cool one.
Wow!

I'm just curious... how many hours do you think you spent on that?

I bought the grinder for $150 and then wheels for it for $20. Dresser was $35 I think and the switch was $10 and cord was $10. So parts were $225. I worked on this evenings and when I needed to take a break from retouching and I’d guess I have maybe 15-20 hours all told. My work can pay me very well (between $100-250/hr) but I don’t work 40 hour weeks. I work on projects with plenty of time between which I enjoy and allows me to work on the house. So no, by an hourly basis it doesn’t make sense. But the shop is a form of therapy for me. On my jobs I work inside my head thinking and solving problems and then pushing pixels around a screen but the shop allows me to move metal which is something I find incredibly satisfying. So if I did work 40 hours a week I’d be taking that money and paying a therapist. This is a nice balance.

Good job Gregor! As an old mold maker, you did good. Truing up a lathe chuck is tedious work.

Bravo!

:beer:

Wow, thanks. Moldmaking is some amazing stuff. Cheers!

Way impressed and very much enjoyed following along. I bought a new chuck. To be completely transparent, it took a few weeks to ship so your way might still have been faster.

Dude! Your new thread is awesome. I hope everyone checks out LilScorpions sig line and subscribes because man can you learn a lot.

Great job, the learning experience was added bonus.

Dwight

Thanks Dwight! It was a lot of one step forward and two steps back but I learned a lot along the way. If I look back on parts I’ve made I can see how simple or crude they were and how much better my work is now.

Today my sister and I rebuilt a brake system for my little XR100. As we stripped the caliper I was explaining the system to her and simultaneously realizing that I don’t use manuals much anymore. I know how to take apart the brakes and rebuild it because it’s a logical system that I’ve dealt with many times over the years. I look at my time in the shop, solving problems, as an extension of this.

It’s not the destination but the journey.

Gregor
 

wmrra13

Well-known member
Joined
Apr 28, 2008
Messages
93
Location
PNW
Hi,

I can’t remember if I’ve ever posted here but, we share a lot of interests and apparently bought MCM houses about the same time.

I’m always impressed with your projects, thanks for sharing.

Coincidentally, I just bought and dialed in a new chinesium chuck for my **** Taiwanese 12x36 so I really enjoyed your write-up on grinding that awesome 6 jaw.

One thing I didn’t understand is why you made that elaborate jig with the 6 hole pattern? Why not just simple ring?

Thanks,
Tyler
 
OP
S

sakurama

Well-known member
Joined
Oct 10, 2010
Messages
1,458
Location
Portland - the cool one.
Hi,

I can’t remember if I’ve ever posted here but, we share a lot of interests and apparently bought MCM houses about the same time.

I’m always impressed with your projects, thanks for sharing.

Coincidentally, I just bought and dialed in a new chinesium chuck for my **** Taiwanese 12x36 so I really enjoyed your write-up on grinding that awesome 6 jaw.

One thing I didn’t understand is why you made that elaborate jig with the 6 hole pattern? Why not just simple ring?

Thanks,
Tyler

Thanks Tyler. From your photo there I see we’ve also ice raced too.

Basically I made it because I tried the ring the first time and I felt that i didn’t get the consistent result. If you’re tensioning the chuck by holding a ring with the jaws, first in back while you grind the front part of the jaws you then have to take it out and move it to the front and then grind the back part of the jaws.

If you’re using a DRO you can repeat the exact position (or with dials too) but you’re not doing it in one pass. There’s also the chance that the jaws will tip and not be perfectly flat.

If you have removable jaws (mine aren’t) you can make a ring held on the outside... Like Keith is doing here:

I went with my solution because I’d already done it wrong once and really didn’t want to do it again. I’d seen my method done on three jaws but not a six jaw and it seemed like it would be possible and work better.

So, the main reason is holding the jaws evenly in tension while allowing consistent and complete passes front to back in one go.

How’d I do? :dunno:

Gregor
 
To avoid these ads, REGISTER NOW!

Interceptor08

Member
Joined
Jan 15, 2018
Messages
8
Location
WNY
To the OP....Purely amazing! Your talent and drive are amazing! I'm new to this forum but I'm hooked!
You had me with the first picture of the BMW! I own 2 60s "Airheads" (R69S & R50) and now, my first house. This is one of those threads I can relate to and hope to get to your level of skill as I'm still young, per say!
Anyway, this was the first time I was ok with being sick (damn cold here in the NE), staying home from work and reading through the first 20 pages of posts! Again, amazing work!!! :beer:
 

BoilermakerFan

Well-known member
Joined
Apr 17, 2006
Messages
2,188
Location
Indianapolis, Indiana
I bought the grinder for $150 and then wheels for it for $20. Dresser was $35 I think and the switch was $10 and cord was $10. So parts were $225. I worked on this evenings and when I needed to take a break from retouching and I’d guess I have maybe 15-20 hours all told. My work can pay me very well (between $100-250/hr) but I don’t work 40 hour weeks. I work on projects with plenty of time between which I enjoy and allows me to work on the house. So no, by an hourly basis it doesn’t make sense. But the shop is a form of therapy for me. On my jobs I work inside my head thinking and solving problems and then pushing pixels around a screen but the shop allows me to move metal which is something I find incredibly satisfying. So if I did work 40 hours a week I’d be taking that money and paying a therapist. This is a nice balance.

<snip>

It’s not the destination but the journey.

Gregor

Well, that's a lot less time that I thought... your pics and description kind of had me thinking 40+ hours total. Your time was right on the cusp or buy/repair... but I know you place a high value on the lessons and learning you get along the way. I do that as well with some things, but in the case of a chuck, I would have just ordered a new one. :D
 

wmrra13

Well-known member
Joined
Apr 28, 2008
Messages
93
Location
PNW
Thanks Tyler. From your photo there I see we’ve also ice raced too.

Basically I made it because I tried the ring the first time and I felt that i didn’t get the consistent result. If you’re tensioning the chuck by holding a ring with the jaws, first in back while you grind the front part of the jaws you then have to take it out and move it to the front and then grind the back part of the jaws.

If you’re using a DRO you can repeat the exact position (or with dials too) but you’re not doing it in one pass. There’s also the chance that the jaws will tip and not be perfectly flat.

If you have removable jaws (mine aren’t) you can make a ring held on the outside... Like Keith is doing here:

I went with my solution because I’d already done it wrong once and really didn’t want to do it again. I’d seen my method done on three jaws but not a six jaw and it seemed like it would be possible and work better.

So, the main reason is holding the jaws evenly in tension while allowing consistent and complete passes front to back in one go.

How’d I do? :dunno:

Gregor

Got it, thanks for the quick and detailed response.

Where did you ice race?

We've got a group of Seattle based degenerates that go up to Edmonton and do a 24 hour endunce race called the Numb Bum. So far we've done it about 15 times since 2001 but unfortunately, we're not doing this year. We have a variety of BS excuses for this but chief among them is that we can't find anyone to give us free bikes to use.

Here's a video one of our guys made many moons ago when we were still trying to figure it out:

Thanks again for all the great content you're providing.
 
Last edited:
OP
S

sakurama

Well-known member
Joined
Oct 10, 2010
Messages
1,458
Location
Portland - the cool one.
Got it, thanks for the quick and detailed response.

Where did you ice race?

We've got a group of Seattle based degenerates that go up to Edmonton and do a 24 hour endunce race called the Numb Bum. So far we've done it about 15 times since 2001 but unfortunately, we're not doing this year. We have a variety of BS excuses for this but chief among them is that we can't find anyone to give us free bikes to use.

Here's a video one of our guys made many moons ago when we were still trying to figure it out:

Thanks again for all the great content you're providing.

That was cool. I raced with a group of ex road racers and young road racers back east on the Hudson River. We didn’t race big bikes but XR100’s - cheaper, slower, safer. We have no ice here in Portland so I just sold my ice tires.

Gregor
 

locul

Well-known member
Joined
May 13, 2010
Messages
98
hmmm. Did you actually get to the point where you are working in/with the garage or is the house still in for some treat?!

Ps: That Alta though
 

TGL

Member
Joined
May 3, 2014
Messages
13
Oddly not many. The documenting-my-life thing didn't really grab hold until this thread. Which is a bit sad really. But I did find a few. Most were shot in film and are buried in boxes somewhere...
[...]

i-xvWKwSS-X2.jpg


[...]
Wish I had more shots.

Gregor

Gregor,

You've had some great spaces and transformed them really well.

Do you know who manufactured the chair in the bottom of this photo?
 
OP
S

sakurama

Well-known member
Joined
Oct 10, 2010
Messages
1,458
Location
Portland - the cool one.
Gregor,

You've had some great spaces and transformed them really well.

Do you know who manufactured the chair in the bottom of this photo?

I swear I bought them ages ago at McMaster-Carr but they don't sell them anymore. They weren't expensive - like $75 - and there was a stainless version that I always wanted but it was like $300-400. So instead I bought the Herman Miller chairs at a flea market.

Here's a place with them: Shop Stool in Wood and Metal

They have others but these are still only $88 so not bad. Mine have lasted for going on 20 years now.

Gregor
 

gasgas17

Well-known member
Joined
Nov 7, 2009
Messages
443
Location
Nova Scotia, Canada
Hey, more guys with ice experience! We used to ice race around here both organized and just a bunch of buddies for fun.

Ice%20riding%202-M.jpg


Now we mostly ride icy/snowy trails in the woods on these

Winter%20tires-M.jpg
 

gasgas17

Well-known member
Joined
Nov 7, 2009
Messages
443
Location
Nova Scotia, Canada
That was cool. I raced with a group of ex road racers and young road racers back east on the Hudson River. We didn’t race big bikes but XR100’s - cheaper, slower, safer. We have no ice here in Portland so I just sold my ice tires.

Gregor

We have a small crowd of XR 100 ice racing road racers here too. We would ride with those guys a lot. My daughter would join in with them on her KX 65.
 

tmatul

New member
Joined
Nov 11, 2010
Messages
2
Gas Gas, Are you building or buying your woods tires and where are you getting either the tires or studs (if you're building them). We have lots of people here in the northeast that ride in the winter as well.
 

TGL

Member
Joined
May 3, 2014
Messages
13
I swear I bought them ages ago at McMaster-Carr but they don't sell them anymore. They weren't expensive - like $75 - and there was a stainless version that I always wanted but it was like $300-400. So instead I bought the Herman Miller chairs at a flea market.

Here's a place with them: Shop Stool in Wood and Metal

They have others but these are still only $88 so not bad. Mine have lasted for going on 20 years now.

Gregor

Thank you for the link.

I prefer the Toledo Metal Furniture Company ones but people are now asking WAY too much for the old ones and the new ones do not have the same feel.
Cheap $88 ones it is then.
 

gasgas17

Well-known member
Joined
Nov 7, 2009
Messages
443
Location
Nova Scotia, Canada
Gas Gas, Are you building or buying your woods tires and where are you getting either the tires or studs (if you're building them). We have lots of people here in the northeast that ride in the winter as well.

We mostly build our own or the local dealer builds them too. Sometimes it's worth saving your arm to have someone else build them. We are all getting the studs from the same place but I'm not sure where that is as I have always just bought from other guys looking to split on a box.
 

LaneRover

Well-known member
Joined
Jan 19, 2014
Messages
301
Location
Maine
There is an event called "Riding Into History" that takes place each year at the 'World Golf Village' in St Augustine FL. There are hundreds if not thousands of bikes from each decade and just about every manufacturer - even some that are modified.

While walking around we would discuss the condition of them and the nicer ones went from 'well taken care of' and 'not ridden much' to 'garaged all its life' . . . and then we came across one that was in even nicer original condition that the garaged ones and we said, "That one's been living roomed all its life!"

We thought we were joking . . . . ;-)


If you haven't been I would highly recommend the show, its only $10 (or was) and all proceeds go to Wounded Warriors or K9's for warriors.
 

bdking

Well-known member
Joined
May 16, 2013
Messages
94
Location
PDX
That boxer doesn’t stay in the living room. He rides it plenty, and it has honest wear & dings. Kinda like the Millennium Falcon, but louder.
 
To avoid these ads, REGISTER NOW!
Top Bottom