Wow! Thanks so much.
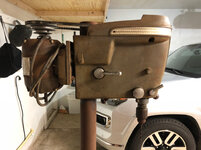
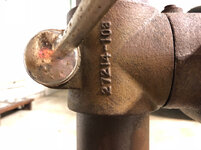
The knob lock screw is bent. Can you tell me what each lever does specifically in that side of the DP? The one on the front appears to lock the spindle. The one on the back, I have no idea.
I will do that. Normally in my practice I would mount a mag base with an indicator but I don’t have that necessity at home. Do you have any tricks for checking runout?
Thank you so much. Full of information.
Sent from my iPhone using Tapatalk
You're welcome.
The bolt near the rear secures the motor mount. There's one bolt on each side. Loosen both bolts, push the motor further into the head frame, remove the belt, pull the motor and mount out and free of the head frame. This
may be difficult due to the condition. If so, remove the motor from the mount first, then work on removing the mount from the head frame.
The larger chrome lever towards the rear is the head frame lock. It secures the head frame assembly to the column. Do not loosen that until, a) you have the head frame supported, or
b) you tilt the whole drill press forward so the column is near horizontal. Because of the condition of your machine the head frame
may be seized to the column. So, option b may be a better option so you can apply some rust penetrant.
The round chrome knob is for spring tension adjustment. This knob may also be stuck, but usually frees easily with a spray of penetrant.
You are correct on the quill lock.
Regarding runout... I usually run the machine with a small machined rod in the chuck and feel for wobble as it's spinning. I'm not sure that is an option for you at this point.
https://www.garagejournal.com/forum/showthread.php?p=6507328&post6507328