To avoid these ads, REGISTER NOW!

What did you do "IN" your garage today?

Outlawmws

Well-known member
Joined
Aug 9, 2011
Messages
39,297
Location
The Badlands
NSG, clamp a belt sander (Not too coarse) in a vise facing up, and lock the switch on. then going length wise, lightly hit the tops of the fins.
 
To avoid these ads, REGISTER NOW!

NewShockerGuy

Well-known member
Joined
Oct 12, 2010
Messages
2,481
Location
Northern Virginia / DC
Thanks for the suggestions! I do not own a belt sander and my orbital sander is a pos that is getting thrown out so I can get a better one. How long are we talking if I did this by hand? I have all grits of sand paper so I don't mind doing it by hand but if it is something like it's going to take hours, then I will just go out and buy a belt sander even though this would probably be the only time I would use it..lol

-Nigel
 

NewShockerGuy

Well-known member
Joined
Oct 12, 2010
Messages
2,481
Location
Northern Virginia / DC
Next question..lol When you say fully dry do you mean dry or cured?

I ask ONLY because according to VHT's directions on the can it's as the following.

Once dry it's very important for the part to be "cured" Place in a 200 degree F' oven for 1 hour, failure to do so will not have a product that is checmically resistant to oils/gas and ...bla bla bla.

The funny thing is they tell you what the paint is dry to the touch/handle but not fully dry. I figured 15+ hours is dry.. But I was planning on sanding it with the block as noted above and then once it's sanded put it in the oven to cure. I say this because as it sits you can sort of scratch off the paint if you really dig your finger nails into it before it's in the oven. Once in the oven and it's been cured you can't scratch the paint off at all. I tried multiple times on the valve cover once it cured and was really impressed. Even more impressed when I was trying to put the intake manifold back on and it was just rubbing up against the valve cover while I was fumbling with it and when I realized wtf was going on I checked and the valve cover didn't have a mark on it at all. Prior to curing had I done the same thing it would have been scratched to hell I'm sure.

-Nigel
 

Fix Until Broke

Well-known member
Joined
Feb 21, 2016
Messages
794
Location
SE Wisconsin
NewShockerGuy - I did this on a set of valve covers once so the top of the ribs were aluminum and the rest was painted. I painted the whole thing like you have, then took a small sanding block with a high quality paper towel moistened with acetone wrapped around it and "sanded" the paint off. Light, smooth, parallel with the ribs, strokes in one direction - kind of like filing - until they were clean. This was done in the ~30 minutes between the base coat and the clear coat. The clear coat covered everything and kept the aluminum shiny and the edges of the paint from pealing off the ribs.

Sand paper will work if the paint is dry enough and shouldn't take very long (few minutes I'd guess with some 180 grit), however you'll have to make sure you get all the sanding swarf out of the ribs before you clear coat it or cure it.

Good luck, it will look awesome when you get it done.
 

Plastikosmd

Well-known member
Joined
Nov 17, 2016
Messages
1,254
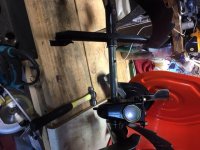
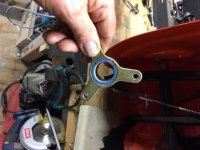
Couple hours off this am, gator tear down
Gator_bed_removal.jpg
 

NewShockerGuy

Well-known member
Joined
Oct 12, 2010
Messages
2,481
Location
Northern Virginia / DC
Welp much easier than what I thought...lol

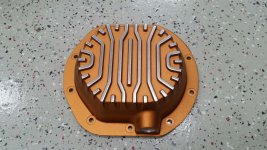
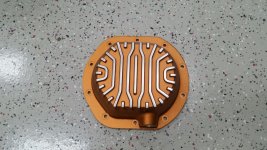
Started with 600 gritt, the 800, 1000, 1200, 1500, then finshed with 2000. It's in the oven now curing. I will then polish the fins with mothers. It's pretty smooth shiny now but I guess just for sake of making it so it doesn't oxidize too crazy the polish will help greatly.

I thought about clearing it but every time I have used VHT or duplicolor clear it ends up yellowing and or making the end product of color look different.

So far this is what it looks like. It's in the oven now curing then I'll polish it up shortly.

-Nigel
 

Attachments

  • 20180227_081303_resized.jpg
    20180227_081303_resized.jpg
    155.1 KB · Views: 73
  • 20180227_081309_resized.jpg
    20180227_081309_resized.jpg
    154 KB · Views: 74
  • 20180227_081317_resized.jpg
    20180227_081317_resized.jpg
    154 KB · Views: 67
  • 20180227_081322_resized.jpg
    20180227_081322_resized.jpg
    152.5 KB · Views: 65

EOC_Jason

Well-known member
Joined
Jun 25, 2012
Messages
11,388
Location
Bentonville, AR
Nigel,

Are you supposed to paint the inside? The oil won't strip the paint off over time?

Painted my diff cover. What is the best way to make the fins not have paint? I tried taping off the fins and for about 30 minutes it was a debacle because the tape either would come up or I couldn't cut the tape close enough without it looking like ***. I then said f it and I will paint the whole thing and figure out how to remove the paint after.
 

smalltown

Well-known member
Joined
Jul 9, 2015
Messages
985
Location
Western Maine
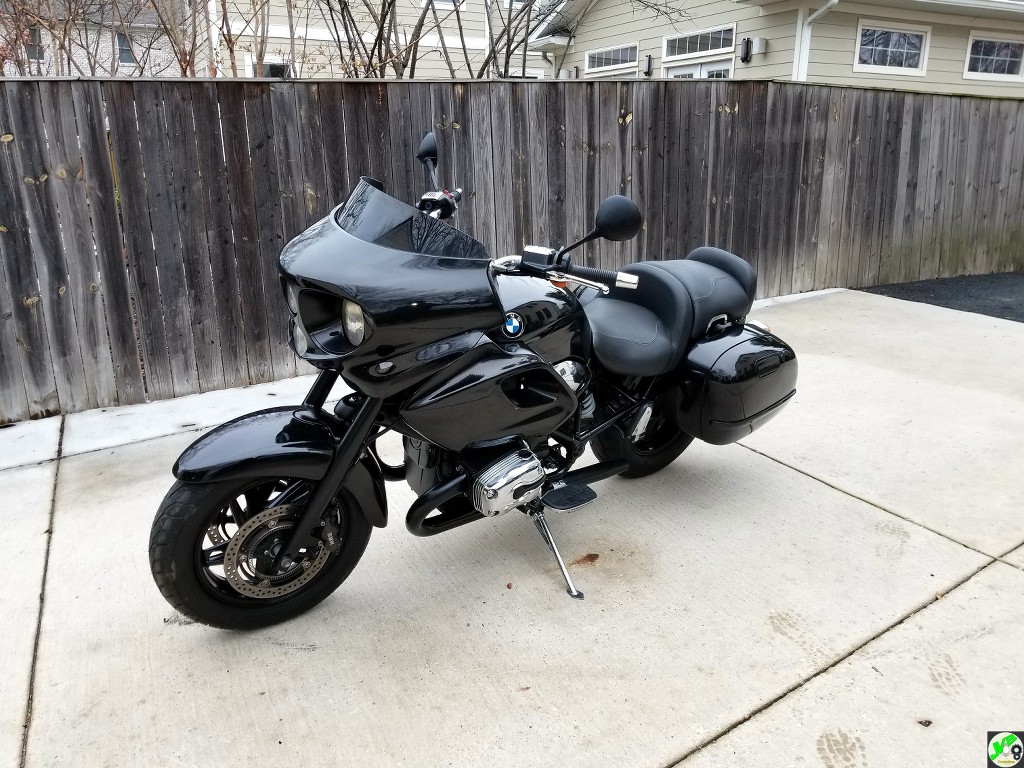
Finally got it nearly done. It runs great and rides well. The 70 pound weight loss and slimmer front tire helps handling a lot. Other than the ABS light on, it is working perfectly, even the brakes.
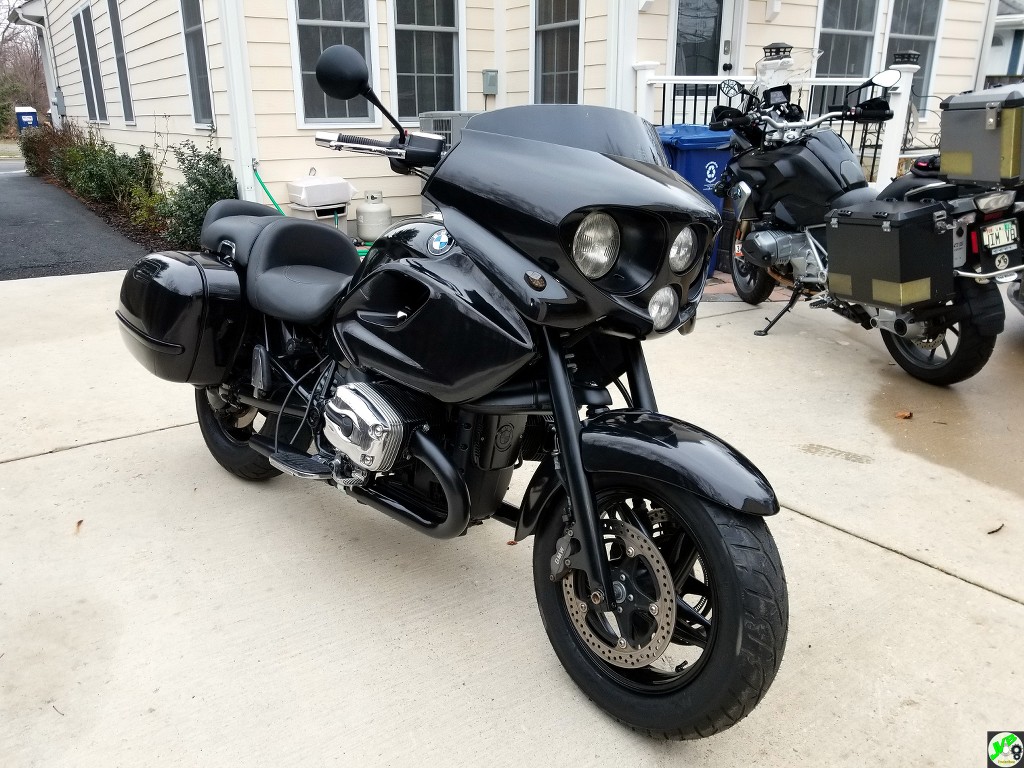


Video of it running at the end of the video.

JimVonBaden all your hard work paid off it look great !
 

smalltown

Well-known member
Joined
Jul 9, 2015
Messages
985
Location
Western Maine
Welp much easier than what I thought...lol

Started with 600 gritt, the 800, 1000, 1200, 1500, then finshed with 2000. It's in the oven now curing. I will then polish the fins with mothers. It's pretty smooth shiny now but I guess just for sake of making it so it doesn't oxidize too crazy the polish will help greatly.

I thought about clearing it but every time I have used VHT or duplicolor clear it ends up yellowing and or making the end product of color look different.

So far this is what it looks like. It's in the oven now curing then I'll polish it up shortly.

-Nigel

Wow Nigel that's looking super. The bare fins really stand out.
 

engineer2

Well-known member
Joined
Dec 13, 2009
Messages
11,814
Location
Chicago burbs
my orbital sander is a pos
Mine was failing too. I discovered if you take the rubber pad off, you'll see a ball bearing. The ball bearing was rough and almost locked up. For a quicky repair I removed the ball bearing, sprayed WD-40 under the seal s to free it up and got some regular oil in there and turned it until it was smooth. Good as new unti I get a new bearing.
 

FANTM58

Well-known member
Joined
Feb 21, 2015
Messages
575
Location
Brighton, Co
Ok , someone responded to my post
How do I respond
I typed a reply , but that was the only
Thing I my box. It looks like I’m just talking to my self.??
Quote ?
Multi quote ?
 
Last edited:

Bad Eye Bill

Well-known member
Joined
Nov 15, 2017
Messages
5,031
Location
New Brunswick Canada
Ok , someone responded to my post
How do I respond
I typed a reply , but that was the only
Thing I my box. It looks like I’m just talking to my self.??
Quote ?
Multi quote ?

Click on the QUOTE button in the post that replied to you. You should see their post in the box where you type your reply.
 

Boilerhouse

Well-known member
Joined
Mar 20, 2012
Messages
1,321
Location
Muskoka
Have been doing a bunch of brake work lately, mainly disassemble, clean, and re-lube. All caliper pins on the Ranger were replaced.

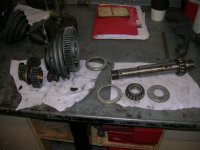
To take a break, decided to replace the speed change belt, which was badly worn and had a couple bulges in it, on the Atlas lathe. Checked the bearings and they seem to be fine, but found it interesting that the install dates were scribed into the bearings, in this case Dec 17, 1942 and Jan 2, 1943 respectively. Cleaned them up and reinstalled them.
 

Attachments

  • new belt installed.jpg
    new belt installed.jpg
    149.2 KB · Views: 92
  • empty headstock .jpg
    empty headstock .jpg
    149.4 KB · Views: 95
  • Dec 17 1942.jpg
    Dec 17 1942.jpg
    116.1 KB · Views: 101
  • gears and shaft.jpg
    gears and shaft.jpg
    145.6 KB · Views: 101
  • old belt.jpg
    old belt.jpg
    146.8 KB · Views: 104

C_F

ALLIANCE MEMBER
Joined
Jan 21, 2005
Messages
9,675
Location
Utah...SNOW BLOWS!
Painted my diff cover. What is the best way to make the fins not have paint? I tried taping off the fins and for about 30 minutes it was a debacle because the tape either would come up or I couldn't cut the tape close enough without it looking like ***. I then said f it and I will paint the whole thing and figure out how to remove the paint after.

I figured take a small sanding block or a piece of wood with sand paper on it and slowly go up and down on the fins? Ideally I'd like to make it shiny. Then I will bake it in the oven to get the paint to cure. Figured sanding it first would be easier than trying to sand it after it's cured/baked.

-Nigel
I was going to suggest my method (but too late now :lol: ), but looking closer, your aluminum may be too textured.

My method with smooth surfaces...is while the paint is still very wet, soak a rag (T-shirt material) with either paint thinner or brake cleaner, wring it out so there's no drips (but still plenty wet), then wipe the paint off the fins with one finger in the rag. Switch to a fresh spot in the rag after each wipe.
I'm sure this method is nothing new to many, but I thought I'd share in case it's new to you. :)
 

Crazyjake8493

Well-known member
Joined
Sep 26, 2014
Messages
3,977
Location
Upstate NY
Organization day for me. Got most of my electrical and plumbing supplies organized: outlets, GFCIs, cover plates, switches, conduit, PEX and copper fittings. All winter I'd been tossing extra parts on my workbench or tool carts and let it pile up.

Also took a bunch of cardboard and other garbage/clutter to the dump.
 

NewShockerGuy

Well-known member
Joined
Oct 12, 2010
Messages
2,481
Location
Northern Virginia / DC
Nigel,

Are you supposed to paint the inside? The oil won't strip the paint off over time?


I didn't paint the inside. Only outside. Inside is still the sand casted whitish aluminum looking color. That's the reason I didn't paint the inside, I figured over time or pretty quickly all the paint would end up turning into something with the diff oil and then make a mess/cause a problem.

-Nigel
 

IPACA9

Well-known member
Joined
Jul 18, 2013
Messages
489
Location
Independence, Mo
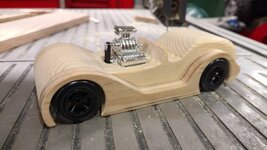
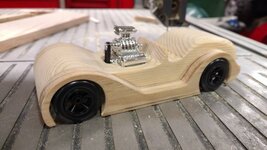
Started last minute for Saturday's Pinewood Derby. We have an adult class. I always bring something crazyaa5e2f2e0cd6a21d87b971be745a79df.jpg

Sent from my XT1585 using Tapatalk
 

Attachments

  • aa5e2f2e0cd6a21d87b971be745a79df.jpg
    aa5e2f2e0cd6a21d87b971be745a79df.jpg
    89.4 KB · Views: 0
To avoid these ads, REGISTER NOW!

EOC_Jason

Well-known member
Joined
Jun 25, 2012
Messages
11,388
Location
Bentonville, AR
*phew* okay... This pic is just an optical illusion, I see now it's still the outside. But you took the angle just right it also looks like it's recessed instead of raised.

I didn't paint the inside. Only outside. Inside is still the sand casted whitish aluminum looking color. That's the reason I didn't paint the inside, I figured over time or pretty quickly all the paint would end up turning into something with the diff oil and then make a mess/cause a problem.
 

Attachments

  • 3.jpg
    3.jpg
    144.6 KB · Views: 74

niget2002

Well-known member
Joined
Oct 2, 2012
Messages
11,176
Location
Josephine, TX
Got the last coat of varnish on a small spoon rack for my daughter.

Neighbor came over with the TV he owed me. We traded some stuff a while back and he had to got get it out of storage. It's a rather old Plasma setup, but it'll do fine in the garage. Will try to get it setup on Friday.
 

FarmerWill

Well-known member
Joined
Dec 6, 2017
Messages
292
Location
South Texas
Last night... put the Voyager XII on a float charger, interesting little Harbor Freight rig- see if that works.
Started organizing two full road boxes of hand tools that been tossed back in their drawers for a while.
 

engineer2

Well-known member
Joined
Dec 13, 2009
Messages
11,814
Location
Chicago burbs
Major scrap run. Glad I read up on scrap categories.
Cut the soldered ends off of copper pipe to make it #1 copper
300lbs of steel
40lbs of house wire
70 lbs of electric motors, solenoids, ignition coils
26 lbs die cast metal
plus copper pipe, brass, aluminum
Totaled $95 :beer:

Hated to scrap a couple of nice JB brand HVAC vacuum pumps, but they just aren't worth repairing when the pump wears out.
 

engineer2

Well-known member
Joined
Dec 13, 2009
Messages
11,814
Location
Chicago burbs
Started last minute for Saturday's Pinewood Derby. We have an adult class. I always bring something crazy
Anybody interested in a small assortment on Pinewood derby stuff? Polished tool steel axles, tungsten weights, Teflon bushed wheels, finished car body. Never could finish better than mid-pack because I don't have access to lathe or a machine shop. The dads who built the winning cars wouldn't let their kids touch them, LOL. They were works of art and got faster as the races went on. Of course, nobody cheats.
 

Lassen Forge

Well-known member
Joined
Apr 26, 2014
Messages
15,324
Location
The romantic hills of central Umbria, Italy,
Long story - Monday we got hit by snow, so I went to plow the driveway. What I didn't intend to plow was the 12GA extension cord across the drive powering up the driveway lighting. Oops.

Amazing how fast 12 wraps of heavy extension cord (anchored on both sides) can pull the rake axle out of a snowblower... Fortunately, the sheet metal deformed enough to let it jump the housing without breaking it.

Anyway, last night, with an UGLY (3-5 feet) snowstorm coming in tonight, figured I'd do some Q&D repairs.

With a nasty storm coming in tonight, I had to get busy... Fortunately getting the housing off was easy... no one told me it would weight a ton, tho. Anyway, got it apart, got the pieces pit back together, replaced the shear pins, fought like a (deleted) getting it all back together, and she ran like a Swiss Watch (or at least a Minnesota Snowblower)... Took a beating, and keeps on Eating... (the snow, that is...)

First 2 are when it first hit the bench - the support bushing was not attached to the shaft end. Third is the thing disassembled, waiting to go back together... 4th is the test run, and 5th is back in position waiting for tonight's "follies" (or "flurries").

What a machine!
 

Attachments

  • 7.jpg
    7.jpg
    106.1 KB · Views: 94
  • 6.jpg
    6.jpg
    103.3 KB · Views: 91
  • 3.jpg
    3.jpg
    102.1 KB · Views: 94
  • 4.jpg
    4.jpg
    80.7 KB · Views: 97
  • 2.jpg
    2.jpg
    61.8 KB · Views: 104

isb cornbinder

Well-known member
Joined
Nov 3, 2010
Messages
7,073
Location
Pacific South West, BC, Canada
This will be attempt number three to post this little something. My first try was interrupted by a power outage for a second. Five minutes later and just before I could hit submit, the power went out for the next 57 minutes.
Yesterday I was taking empty coffee cups out of my truck and tossing them into the recycling blue box. The first two cups hit the blue box like and NBA player had tossed them. Number three cup took a detour and hit my 1940 Ford across the LF fender. I thought the cup only had a dry paper bag and some serviettes stuffed inside. There was coffee over the hood, windshield, LF fender and door and some running down the running board. I dabbed off some of the mess with a plan to return this afternoon to wash the car.
My wife ordered Boston Pizza for supper. I have about two hours to become Mister Clean. Today is chilly, raining and generally uncomfortable.
 

Attachments

  • TOWING BACK IN THE SHOP (3).jpg
    TOWING BACK IN THE SHOP (3).jpg
    45.8 KB · Views: 81

Outlawmws

Well-known member
Joined
Aug 9, 2011
Messages
39,297
Location
The Badlands
Started last minute for Saturday's Pinewood Derby. We have an adult class. I always bring something crazyaa5e2f2e0cd6a21d87b971be745a79df.jpg

Sent from my XT1585 using Tapatalk

Not sure that would go down the track without getting hung up...
 

Attachments

  • aa5e2f2e0cd6a21d87b971be745a79df.jpg
    aa5e2f2e0cd6a21d87b971be745a79df.jpg
    87.8 KB · Views: 0

Outlawmws

Well-known member
Joined
Aug 9, 2011
Messages
39,297
Location
The Badlands
It looks super cool but doesn't it high center in the middle anywhere?

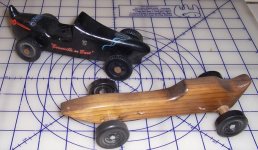
These are my two, the black one was made in grade school as a cub scout. The wood one was for the "dad's Race" the year my son made one. We both won! Mine was better than a foot faster than any other car though.

I was going to also run the old car to see how it would stand up after decades, but the plastic wheels got brittle and the "hub" inside disintegrated so the wheels wobble... I'd love to find vintage wheels and replace them...

attachment.php
 

Attachments

  • cars.jpg
    cars.jpg
    80.5 KB · Views: 697
Last edited:

jpickar

Well-known member
Joined
May 21, 2010
Messages
964
I never built a car for the dads race. I let my youngest son build a car and race it for me in the dads race. He couldn't hardly stand it he wasn't old enough to be in scouts yet. :thumbup:
 

IPACA9

Well-known member
Joined
Jul 18, 2013
Messages
489
Location
Independence, Mo
Re: What did you do "IN" your garage today?

It looks super cool but doesn't it high center in the middle anywhere?

These are my two, the black one was made in grade school as a cub scout. The wood one was for the "dad's Race" the year my son made one. We both won! Mine was better than a foot faster than any other car though.

I was going to also run the old car to see how it would stand up after decades, but the plastic wheels got brittle and the "hub" inside disintegrated so the wheels wobble... I'd love to find vintage wheels and replace them...

attachment.php
They ride on a six lane aluminum track. Basically your wheels bounce down the raised center of the track keeping it on course. As long as the fenders don't interfere with the wheels you are good to go.

A few cars through the years.
dda8a5d25399529db81c32a1d5dfa485.jpg
b94748ad59ece85dd911078ac0fa4a4c.jpg
a5c4b10c155c88917af7c8c33fa1ffaa.jpg
fb996d6fd96637c94d40d3dc7c57c9cc.jpg
546b8c5003a519ef34319ec8529962b6.jpg
44a49158b61f5a0cbdcf58ee0bed6f03.jpg


Sent from my XT1585 using Tapatalk
025be338aae7aded67dbcf52cf8bf81b.jpg
 
Last edited:

Outlawmws

Well-known member
Joined
Aug 9, 2011
Messages
39,297
Location
The Badlands
Some nice looking car there!

Ours was a wood track with the raised centers (Both generations). I found that keeping the weight to the back generally helped as light front wheels were less likely to drag on the center divider.
 

IPACA9

Well-known member
Joined
Jul 18, 2013
Messages
489
Location
Independence, Mo
Some nice looking car there!

Ours was a wood track with the raised centers (Both generations). I found that keeping the weight to the back generally helped as light front wheels were less likely to drag on the center divider.
Right. I have three boys. Ages 11, 8 and 4. I'm in it for a long time. I've played with different ways of building and weight placement. Every year is different. Just never know till you run it down that track. I've had some awesome cars be the slowest and the most stupid be the fastest.

Not even all of them. Need to make a display shelf in my shop I think.

88bf1043415059116f6fc1c0849dee04.jpg


Sent from my XT1585 using Tapatalk
 
To avoid these ads, REGISTER NOW!
Top Bottom