
You are using an out of date browser. It may not display this or other websites correctly.
You should upgrade or use an alternative browser.
You should upgrade or use an alternative browser.
Between 485 & 705 SQ/FT BJ383SS's Woodshop/Garage
- Thread starter bj383ss
- Start date
Workspaces between 485 and 705 squarefeet.
sdavis622
Well-known member
Wow man! What a busy vacation you’ve had, you’ve made some great progress though! Nice work!
oldironfarmer
Well-known member
Very nice vacation, I'd say.
Door looks great
Nice shifter. I guess you have an extra screwdriver now?
Door looks great
Nice shifter. I guess you have an extra screwdriver now?
jbmatth
Well-known member
Great to see the progress, I really enjoy following you thread.
JB
JB
drivesitfar
Well-known member
BJ: your progress on your old truck is AMAZING. best of luck with finishing up all the detail work and I bet when it's done you'll get even more praise from onlookers and even better you'll love driving and riding in it too.
the Caprice looked pretty sweet and sorry to see it left the family cause having a convertable in your part of the world i bet would be nice.
cheers and keep up the great work and thanks for sharing your thoughts and pictures.
the Caprice looked pretty sweet and sorry to see it left the family cause having a convertable in your part of the world i bet would be nice.
cheers and keep up the great work and thanks for sharing your thoughts and pictures.
What are you using for undercoating and sound? Lizard skin?
Terra I went kind of a cheap route on undercoating and sound deadening.
I am using 3M profession undercoating. You can get it at Autozone.
https://www.amazon.com/3M-03584-Professional-Rubberized-Undercoating/dp/B002H9CMCQ/ref=sr_1_1?ie=UTF8&qid=1521505845&sr=8-1&keywords=3m+undercoating
And for the sound deadening I am using Peel N' Stick from Lowes. About $16 for a single roll.
https://www.lowes.com/pd/Peel-Seal-Instant-Waterproof-Repairs-6-in-x-25-ft-Aluminum-Roll-Flashing/1018733
Bret the progress is looking good on the truck. You may have had a mishap but it only slowed you down for a day.
Dwight
Thank You Dwight. I didn't get as far with the doors. I wanted to have both painted by the end of vacation but I did make significant progress. There are always setbacks in auto work.
Wow man! What a busy vacation you’ve had, you’ve made some great progress though! Nice work!
Thank You Davis. My body is ready to go back to work so I can rest!
Very nice vacation, I'd say.
Door looks great
Nice shifter. I guess you have an extra screwdriver now?
HaHa. Yes and the wife can drive the thing now. It was definitely my kind of vacation.
Great to see the progress, I really enjoy following you thread.
JB
Thanks JB.
BJ: your progress on your old truck is AMAZING. best of luck with finishing up all the detail work and I bet when it's done you'll get even more praise from onlookers and even better you'll love driving and riding in it too.
the Caprice looked pretty sweet and sorry to see it left the family cause having a convertable in your part of the world i bet would be nice.
cheers and keep up the great work and thanks for sharing your thoughts and pictures.
Thanks Drives.
Thank you guys for all the great comments. It is truly inspiring!
Bret
jbmatth
Well-known member
Have you used the Peel N' Stick before, and if so how do you like the results?
JB
JB
JB I have it all over the floor of my 64'. It is really easy to use and cut. As far as how it compares to the expensive stuff I don't know but it is better than nothing I suppose.
 20160607_202426 by bjohnson388, on Flickr
Bret
20160607_202426 by bjohnson388, on FlickrBret
Got a couple more things knocked off my never ending project list.
Installed the new gloves for Dad's sandblasting cabinet today and fired it up. No hiccups at all. Blasted bolts for the 64' for about 30 minutes and shot them all with primer and then Silver.
 20180322_140448 by bjohnson388, on Flickr
Next I was planning to block sand on the driver door but the wife wanted to go to Lowe's to replace a dead plant and that snowballed.
I ended up doing my driveway extension that I was wanting to get done over my vacation. I wasn't too bad I am glad to be done with it.
I dug out all the grass sod and then put a layer of crushed granite. This stuff packs down hard and weeds and grass have a very hard time growing up through it. I topped it with Colorado River Rock. It came out ok. Eventually when I get dad's cement mixer I want to pour some concrete here and probably go a little bigger.
 20180322_125359 by bjohnson388, on Flickr
 20180322_125406 by bjohnson388, on Flickr
 20180322_140100 by bjohnson388, on Flickr
Now the Camaro won't mess up the grass. That was driving me nuts.
 20180322_140051 by bjohnson388, on Flickr
Spent the rest of the afternoon cleaning and organizing in the shop and the shed and helping the wife with the yard.
The boys had picture day at school so they got haircuts yesterday and wanted their traditional mohawks for their pictures.
 20180322_070956 by bjohnson388, on Flickr
Bret
Installed the new gloves for Dad's sandblasting cabinet today and fired it up. No hiccups at all. Blasted bolts for the 64' for about 30 minutes and shot them all with primer and then Silver.
20180322_140448 by bjohnson388, on FlickrNext I was planning to block sand on the driver door but the wife wanted to go to Lowe's to replace a dead plant and that snowballed.
I ended up doing my driveway extension that I was wanting to get done over my vacation. I wasn't too bad I am glad to be done with it.
I dug out all the grass sod and then put a layer of crushed granite. This stuff packs down hard and weeds and grass have a very hard time growing up through it. I topped it with Colorado River Rock. It came out ok. Eventually when I get dad's cement mixer I want to pour some concrete here and probably go a little bigger.
20180322_125359 by bjohnson388, on Flickr
20180322_125406 by bjohnson388, on Flickr
20180322_140100 by bjohnson388, on FlickrNow the Camaro won't mess up the grass. That was driving me nuts.
20180322_140051 by bjohnson388, on FlickrSpent the rest of the afternoon cleaning and organizing in the shop and the shed and helping the wife with the yard.
The boys had picture day at school so they got haircuts yesterday and wanted their traditional mohawks for their pictures.
20180322_070956 by bjohnson388, on FlickrBret
sdavis622
Well-known member
Nice progress Bret! Driveway extension looks awesome!
Sent from my iPhone using Tapatalk
Sent from my iPhone using Tapatalk
shortykorte
Well-known member
Looks like great progress and a lot of items checked off the to-do list. Great idea on the sound deadening. I wouldn’t be surprised if it’s the same stuff as the expensive auto mat.
Sent from my iPhone using Tapatalk
Sent from my iPhone using Tapatalk
Grizz1963
Well-known member
Morning Bret,
I have a spot of grass, well it was grass that I removed for the same reason. And the stone made all the difference.
Boys are looking great, and growing up so fast.
I have a spot of grass, well it was grass that I removed for the same reason. And the stone made all the difference.
Boys are looking great, and growing up so fast.
jbmatth
Well-known member
I'll have to try the mat in one of my vehicles to see how I like it. The mohawks are great, most of my brothers and I had them at least once for pictures in school.
JB
JB
drivesitfar
Well-known member
BJ: while changing brake pads is like a 10 minute job for you and a few hours for me if I could even do it on some cars that cement work is a couple 80 pound bags of cement from Home Depot or Lowes and done in 20 minutes in a wheelbarrow for me. my bride used to do all the finish work, but i'm actually starting to like doing that myself cause it's a lot easier than painting and caulking which is what she prefers to do.
do you maybe need to move that sprinkler head before you start driving over it?
always nice to see what you are up to and good to see the truck is getting not only the attention, but the quality is up there so you'll be able to drive it for years with just normal maintenance when you are finished. i love the new shifter even though i don't think i saw the one made with a screwdriver for your first test drive.
keep up the good work.
do you maybe need to move that sprinkler head before you start driving over it?
always nice to see what you are up to and good to see the truck is getting not only the attention, but the quality is up there so you'll be able to drive it for years with just normal maintenance when you are finished. i love the new shifter even though i don't think i saw the one made with a screwdriver for your first test drive.
keep up the good work.
Nice progress Bret! Driveway extension looks awesome!
Sent from my iPhone using Tapatalk
Thanks Davis
Looks like great progress and a lot of items checked off the to-do list. Great idea on the sound deadening. I wouldn’t be surprised if it’s the same stuff as the expensive auto mat.
Sent from my iPhone using Tapatalk
Yes Shorty I need to go back and have a look at the to do list I think there are several things to scratch off.
Morning Bret,
I have a spot of grass, well it was grass that I removed for the same reason. And the stone made all the difference.
Boys are looking great, and growing up so fast.
Thanks for stopping in Rian. I hope you are feeling better my friend. I am watching a new car series on Motor Trend on Deman called For the Love of Cars and everything in it reminds me of you.
I'll have to try the mat in one of my vehicles to see how I like it. The mohawks are great, most of my brothers and I had them at least once for pictures in school.
JB
I think they have done it the last 3 or 4 years. It drives my mom nuts.
BJ: while changing brake pads is like a 10 minute job for you and a few hours for me if I could even do it on some cars that cement work is a couple 80 pound bags of cement from Home Depot or Lowes and done in 20 minutes in a wheelbarrow for me. my bride used to do all the finish work, but i'm actually starting to like doing that myself cause it's a lot easier than painting and caulking which is what she prefers to do.
do you maybe need to move that sprinkler head before you start driving over it?
always nice to see what you are up to and good to see the truck is getting not only the attention, but the quality is up there so you'll be able to drive it for years with just normal maintenance when you are finished. i love the new shifter even though i don't think i saw the one made with a screwdriver for your first test drive.
keep up the good work.
Thank You Drives. Yes I know I need to venture into some cement work. I did a whole bunch of it with my Grandpa when I was younger and I have all of his concrete finishing tools. I will do eventually. I was going to move the sprinkler head but I don't actually drive on that part. I drive closer to the edge so we shall see how it goes. If I break it then I will move it. I put the rocks about an inch higher than the sprinkler.
All I did was use a big screwdriver to shift the trans lever. It wasn't hooked up in anyway that's why I dropped it. HAHA.
Bret
I got the through hole cut in the hump today and test fitted it.
Used a 3 1/4" hole saw. The biggest I had. The boot instructions said up to a 4 " hole could be cut. So I still had a little grinding on the edge to get it perfect.
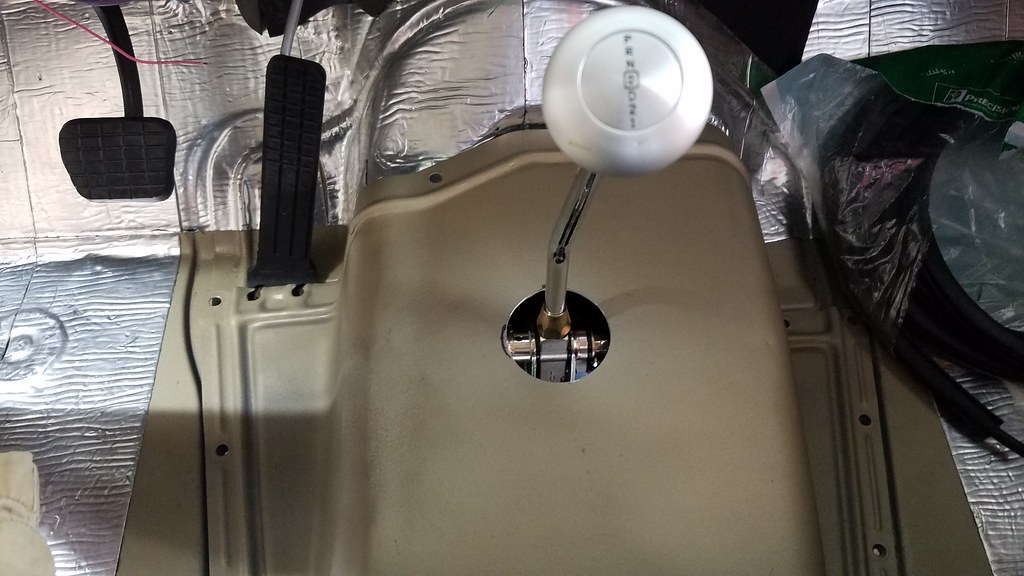 20180323_183346 by bjohnson388, on Flickr
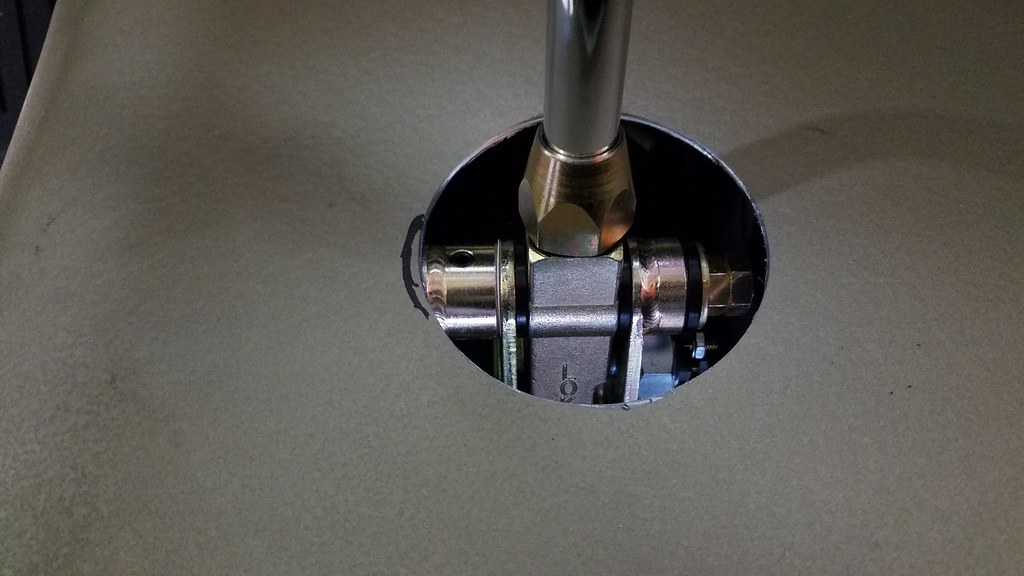 20180323_183355 by bjohnson388, on Flickr
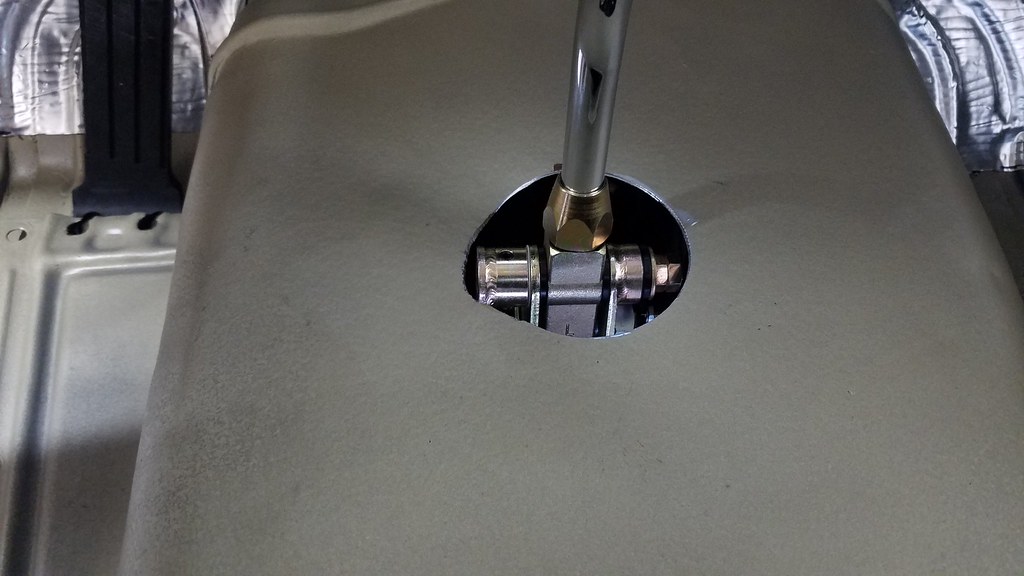 20180323_184548 by bjohnson388, on Flickr
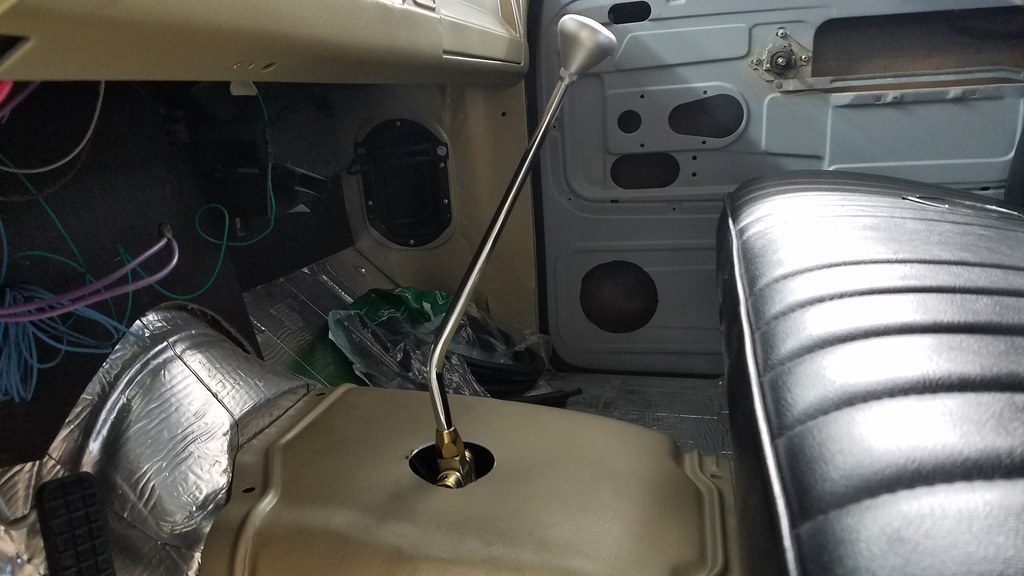 20180323_184554 by bjohnson388, on Flickr
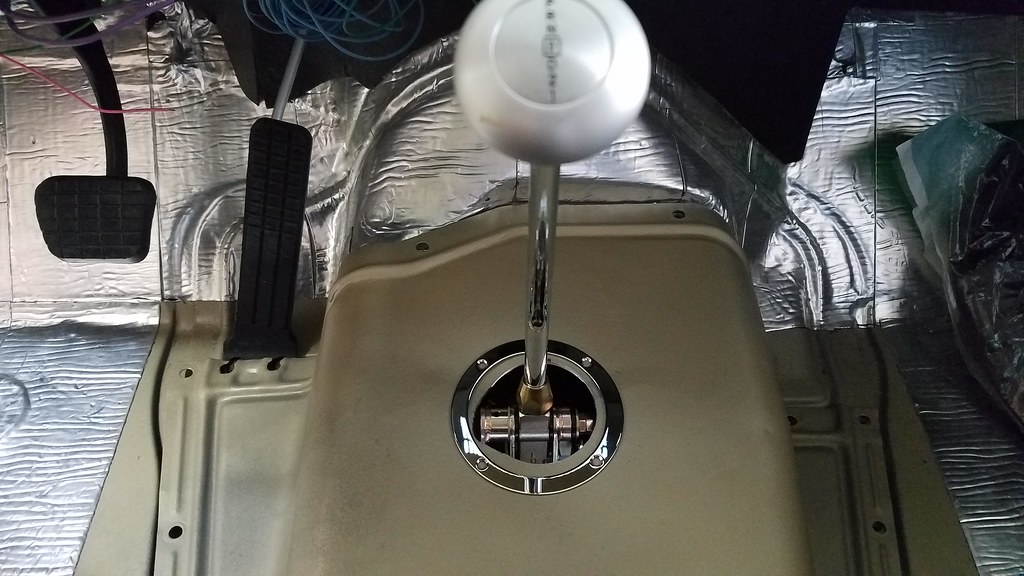 20180323_184614 by bjohnson388, on Flickr
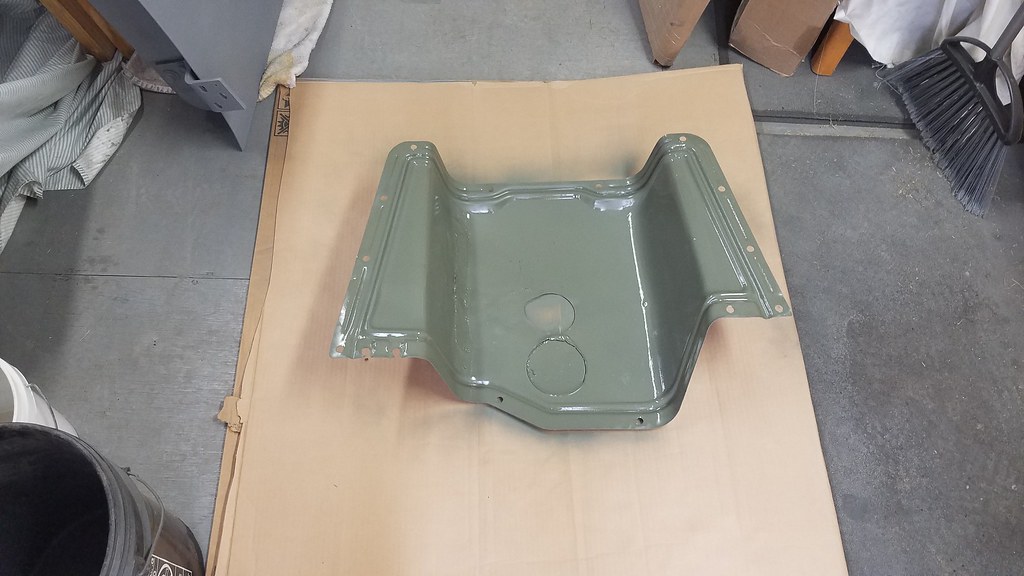
And with that I primed the bottom of the hump and tomorrow after work I will get the undercoating sprayed on and then install it for good and cover it in peel in stick.
 20180323_185807 by bjohnson388, on Flickr
Bret
Used a 3 1/4" hole saw. The biggest I had. The boot instructions said up to a 4 " hole could be cut. So I still had a little grinding on the edge to get it perfect.
20180323_183346 by bjohnson388, on Flickr
20180323_183355 by bjohnson388, on Flickr
20180323_184548 by bjohnson388, on Flickr
20180323_184554 by bjohnson388, on Flickr
20180323_184614 by bjohnson388, on FlickrAnd with that I primed the bottom of the hump and tomorrow after work I will get the undercoating sprayed on and then install it for good and cover it in peel in stick.
20180323_185807 by bjohnson388, on FlickrBret
Last edited:
oldironfarmer
Well-known member
Looks like you used a comealong to move that shifter hole. How did you grab hold of it?
looks like you used a comealong to move that shifter hole. How did you grab hold of it?
haha!
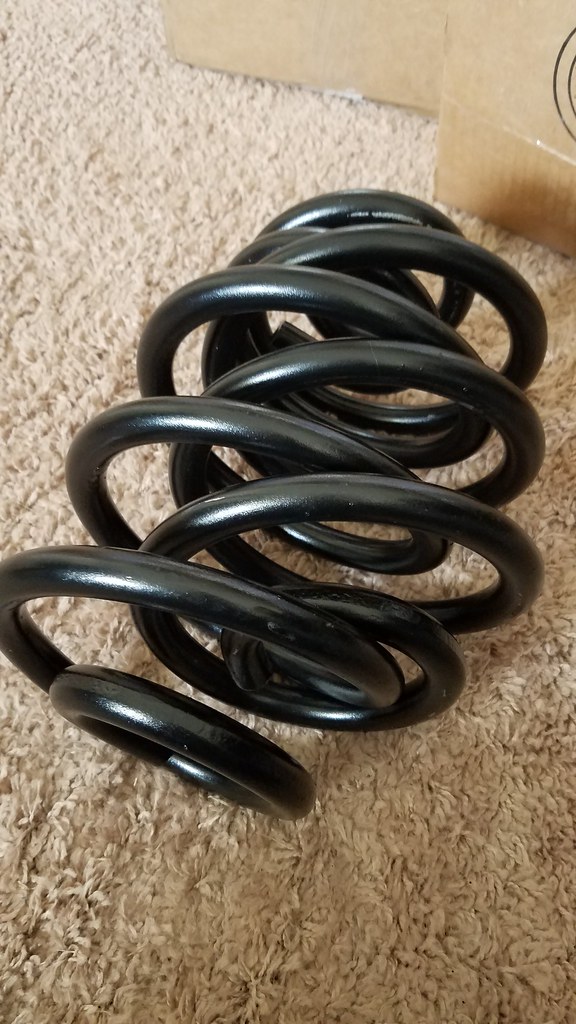
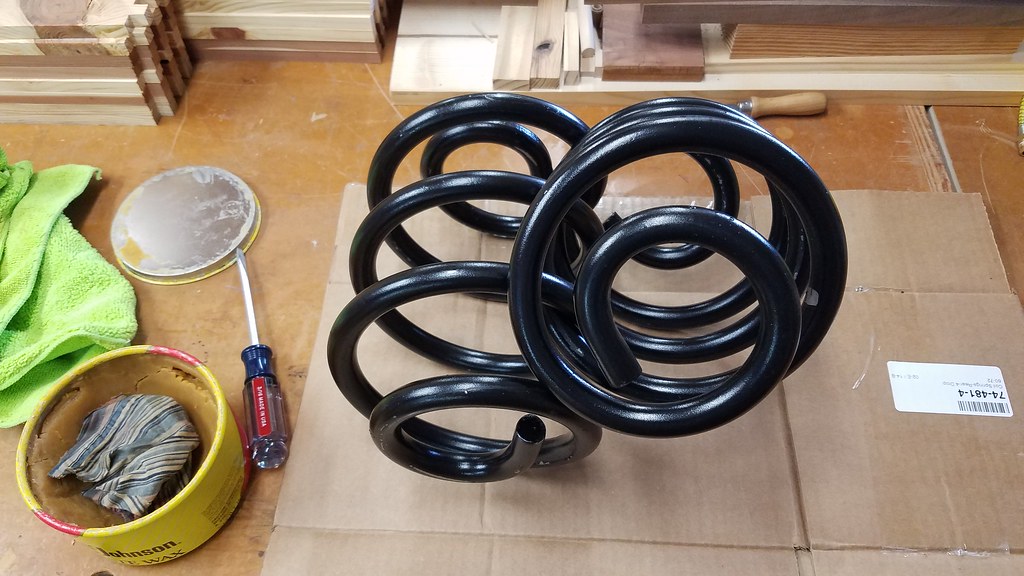
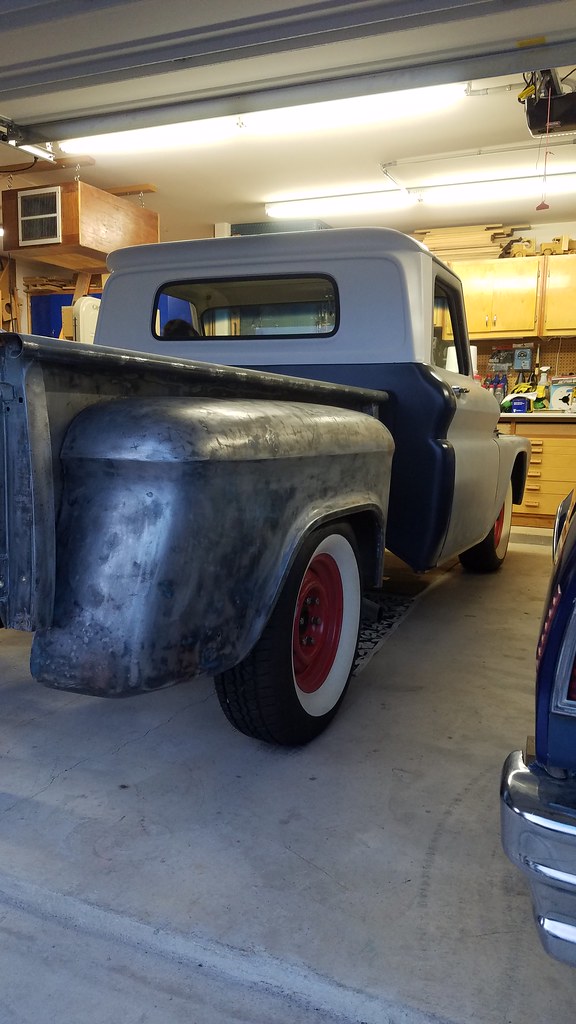
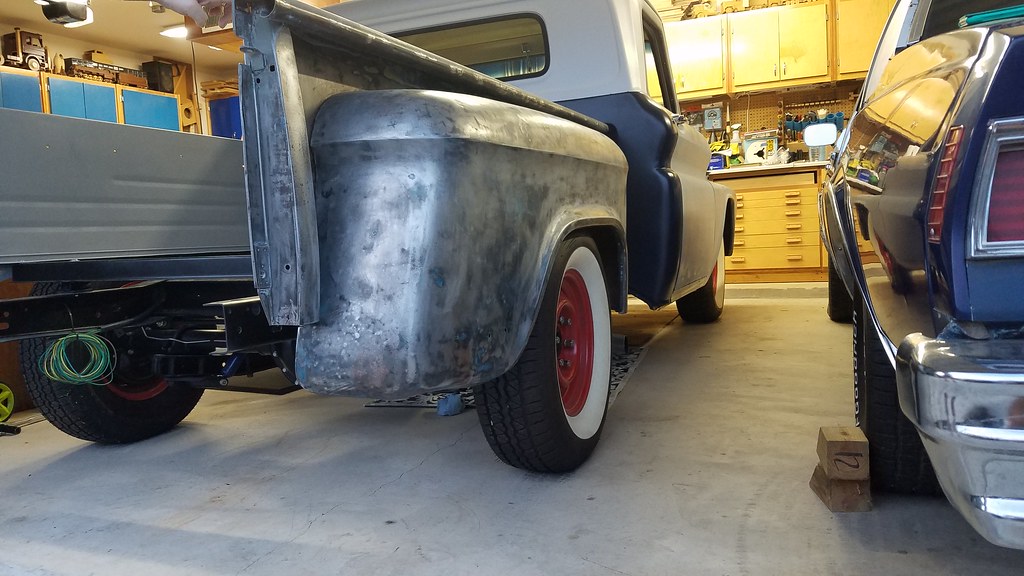
My 4" lowering springs for the rear of the 64 showed up today. Wow what a huge difference they make. I will pull the Caprice out of the garage tomorrow and get a better side shot for comparison.
So they arrived entangled together. I spent over 30 minutes trying to get them apart and scratched the paint. The wife comes out and separates them in 30 SECONDS!. I WAS ABOUT TO PULL MY HAIR OUT!
 20180324_155514 by bjohnson388, on Flickr
 20180324_181153 by bjohnson388, on Flickr
What a huge difference to the factory. The factory definitely look more heavy duty. But now that I have the 95' I won't be hauling anything heavy in this truck.
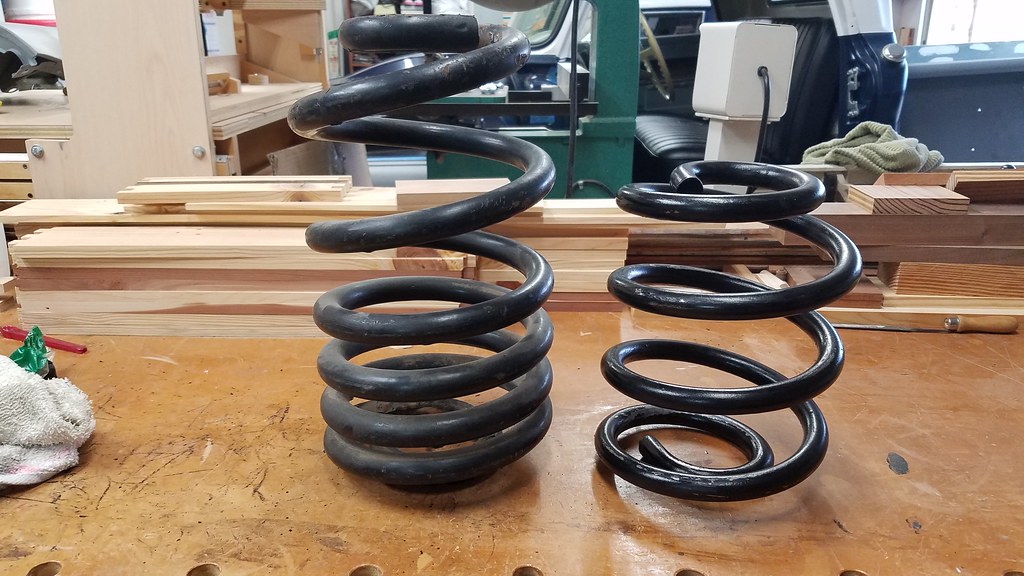 20180324_190622 by bjohnson388, on Flickr
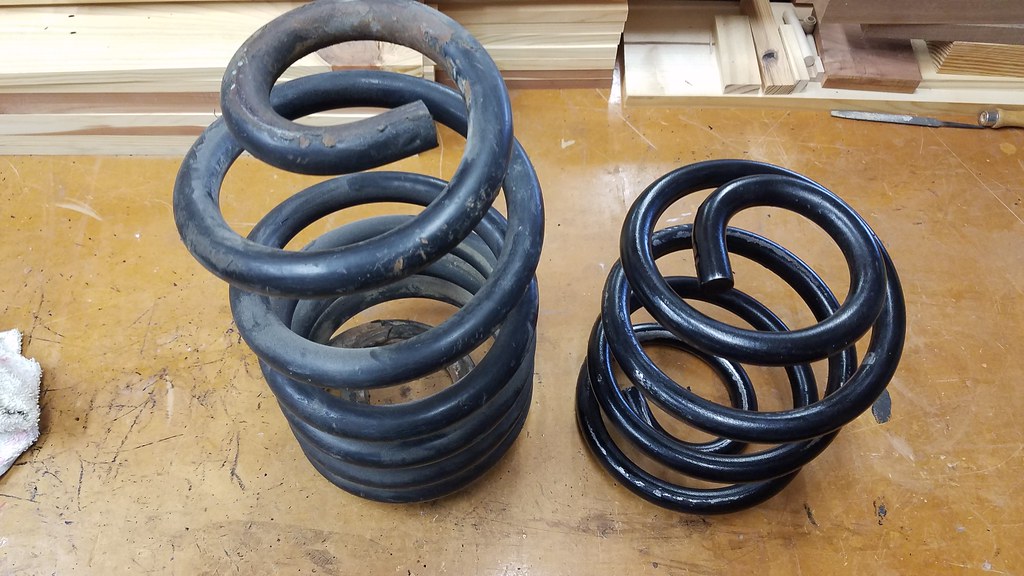 20180324_190626 by bjohnson388, on Flickr
Very rear of the frame with old springs. It is exactly at 24"
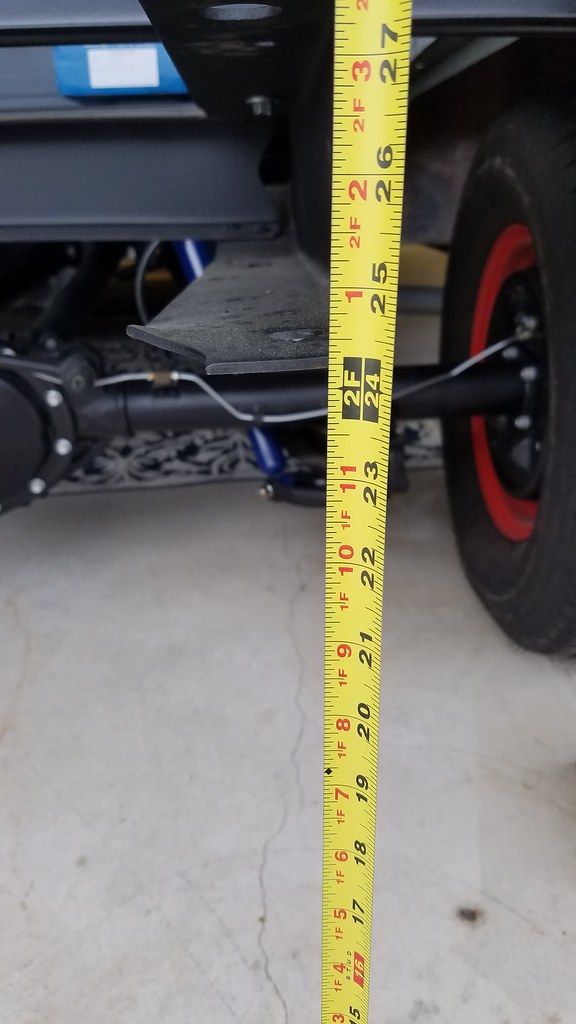 20180324_185200 by bjohnson388, on Flickr
New springs installed it dropped 6" down to 18"
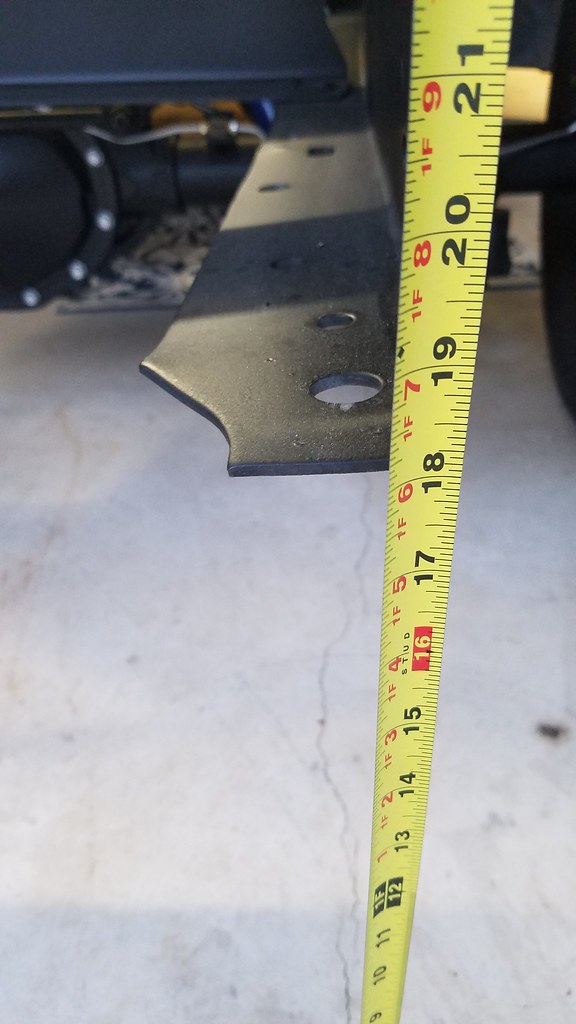 20180324_194156 by bjohnson388, on Flickr
 20180324_194206 by bjohnson388, on Flickr
The tire tucks into the fender nicely now.
 20180324_194212 by bjohnson388, on Flickr
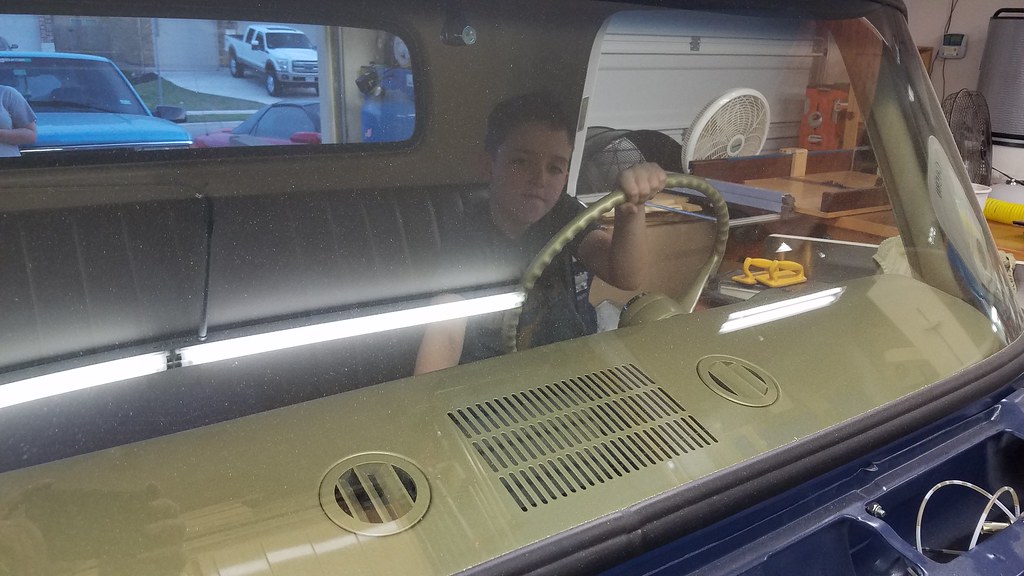
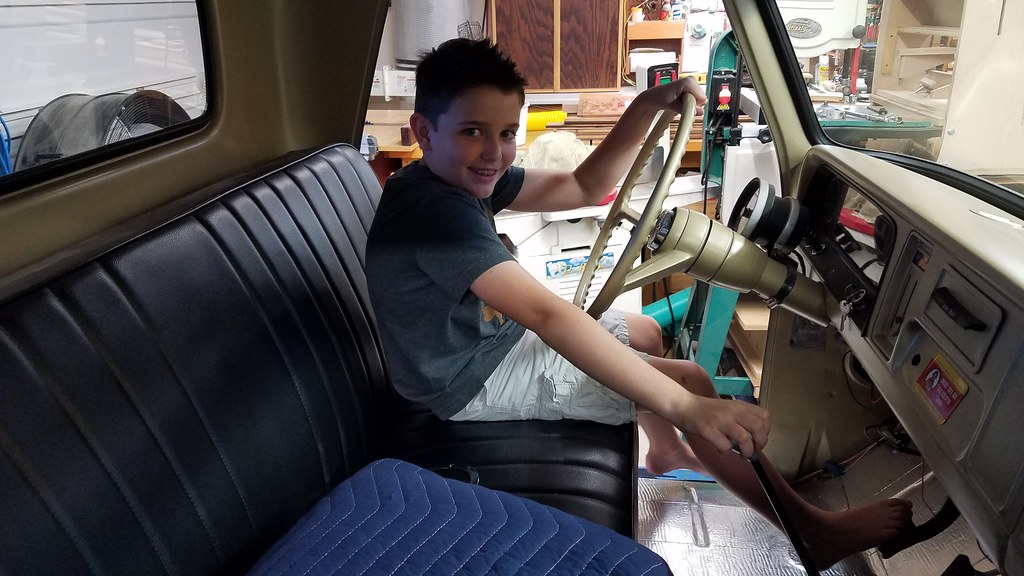
The youngest is driving again!
 20180324_194341 by bjohnson388, on Flickr
 20180324_194352 by bjohnson388, on Flickr
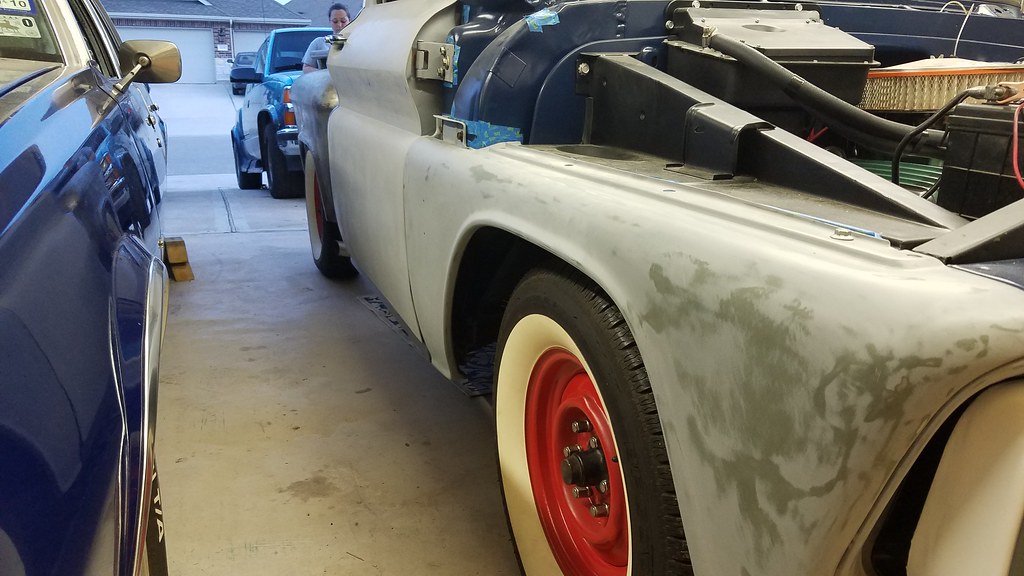 20180324_194402 by bjohnson388, on Flickr
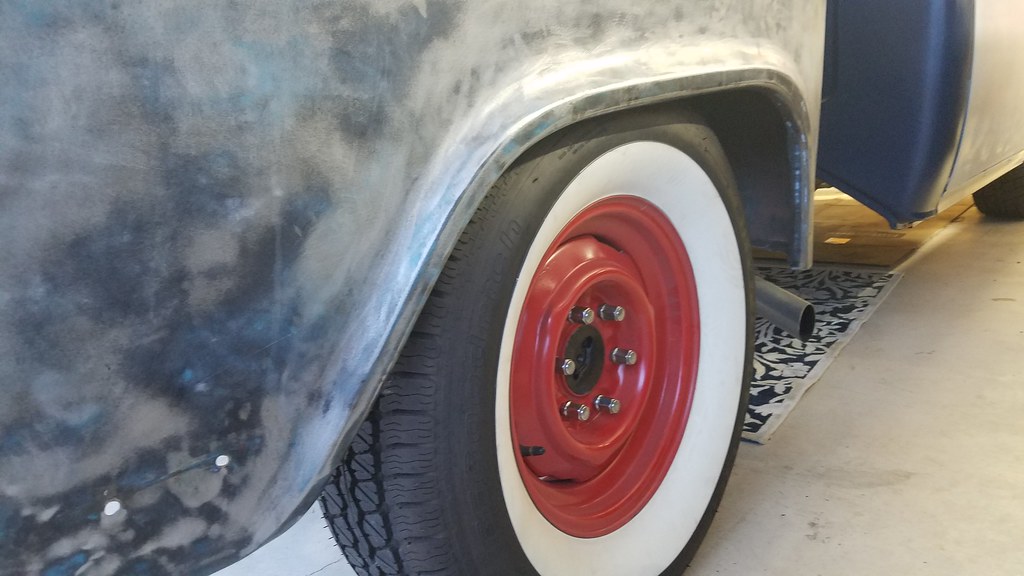 20180324_194411 by bjohnson388, on Flickr
These pics are from October.
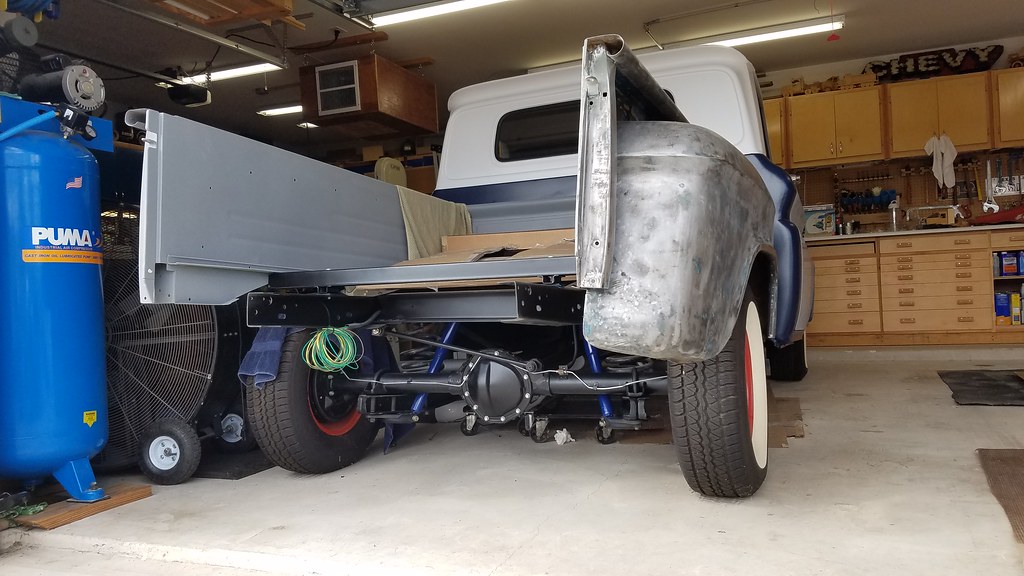 20171116_135238 by bjohnson388, on Flickr
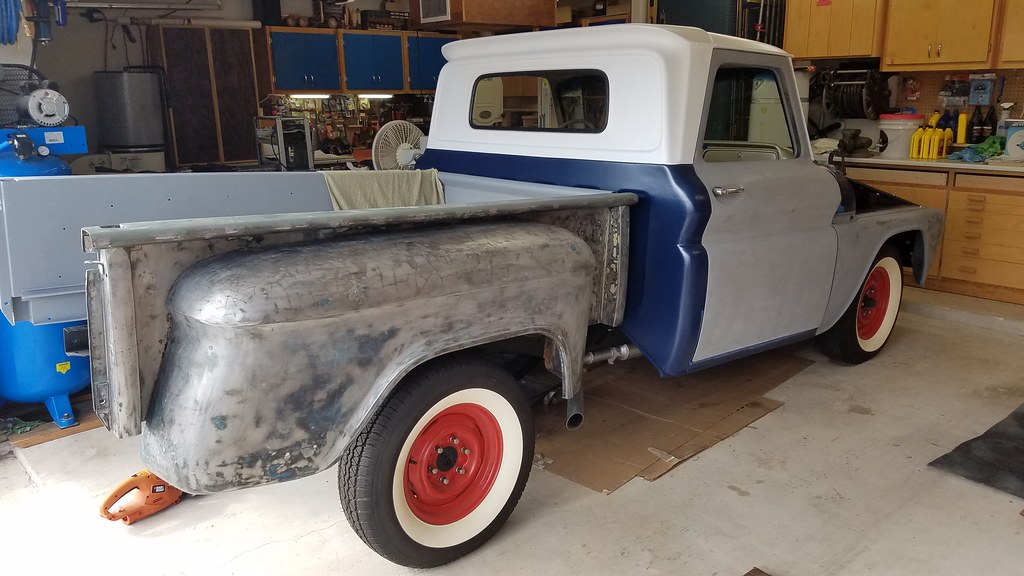 20171116_134959 by bjohnson388, on Flickr
I think the truck damn near sits level now. I will get some more pics tomorrow. I have been wanting the springs from day one just never got around to ordering them.
I also shot the bottom of the hump with undercoating so I can get it installed tomorrow.
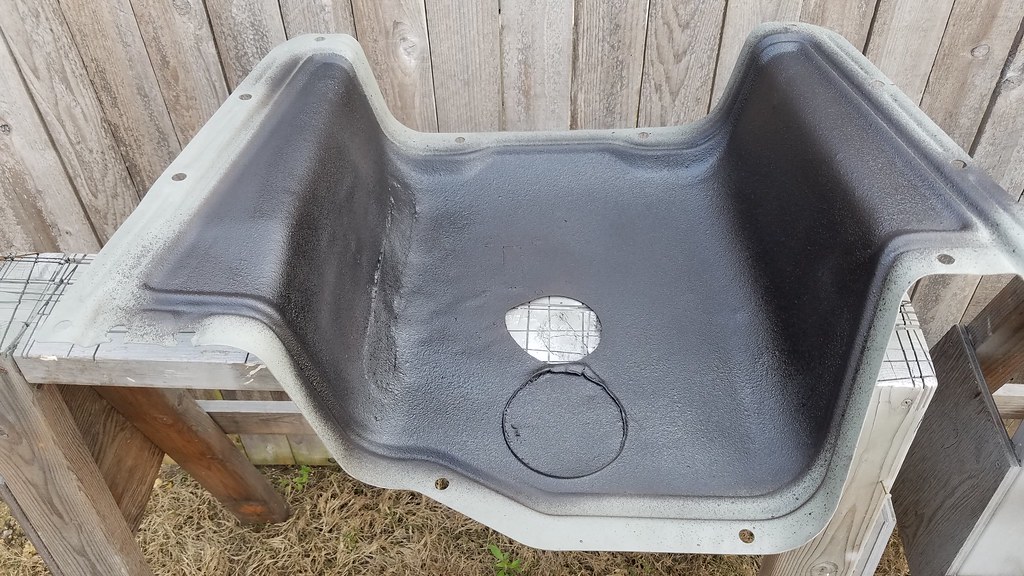 20180324_180842 by bjohnson388, on Flickr
Bret
So they arrived entangled together. I spent over 30 minutes trying to get them apart and scratched the paint. The wife comes out and separates them in 30 SECONDS!. I WAS ABOUT TO PULL MY HAIR OUT!
20180324_155514 by bjohnson388, on Flickr
20180324_181153 by bjohnson388, on FlickrWhat a huge difference to the factory. The factory definitely look more heavy duty. But now that I have the 95' I won't be hauling anything heavy in this truck.
20180324_190622 by bjohnson388, on Flickr
20180324_190626 by bjohnson388, on FlickrVery rear of the frame with old springs. It is exactly at 24"
20180324_185200 by bjohnson388, on FlickrNew springs installed it dropped 6" down to 18"
20180324_194156 by bjohnson388, on Flickr
20180324_194206 by bjohnson388, on FlickrThe tire tucks into the fender nicely now.
20180324_194212 by bjohnson388, on FlickrThe youngest is driving again!
20180324_194341 by bjohnson388, on Flickr
20180324_194352 by bjohnson388, on Flickr
20180324_194402 by bjohnson388, on Flickr
20180324_194411 by bjohnson388, on FlickrThese pics are from October.
20171116_135238 by bjohnson388, on Flickr
20171116_134959 by bjohnson388, on FlickrI think the truck damn near sits level now. I will get some more pics tomorrow. I have been wanting the springs from day one just never got around to ordering them.
I also shot the bottom of the hump with undercoating so I can get it installed tomorrow.
20180324_180842 by bjohnson388, on FlickrBret
Started early this morning had a long list I wanted to get done.
First up was installing the high hump for the final time. 1/4" thick gasket to seal it up.
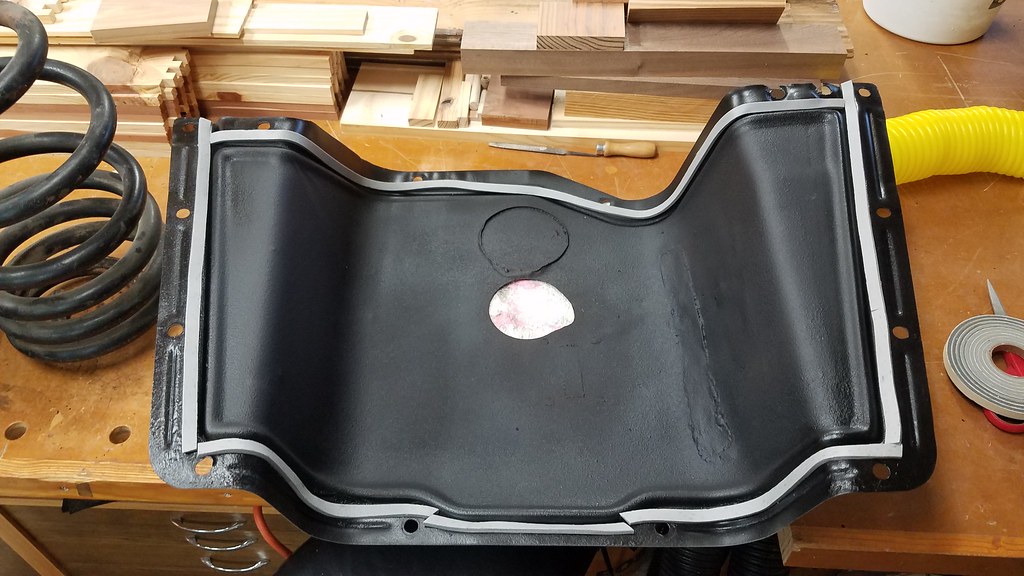 20180325_080546 by bjohnson388, on Flickr
Then finalized the shifter boot placement and drilled the holes.
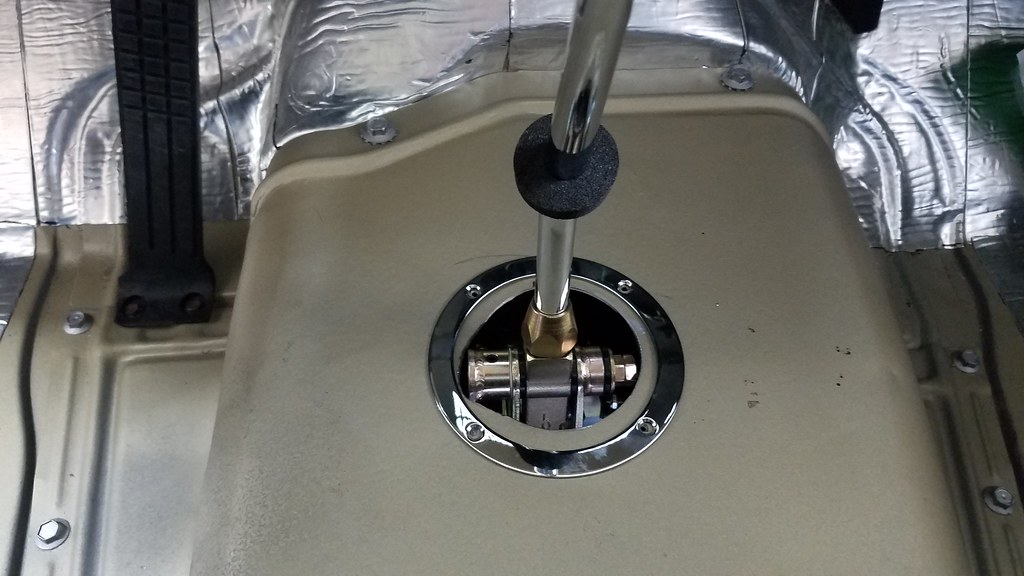 20180325_083321 by bjohnson388, on Flickr
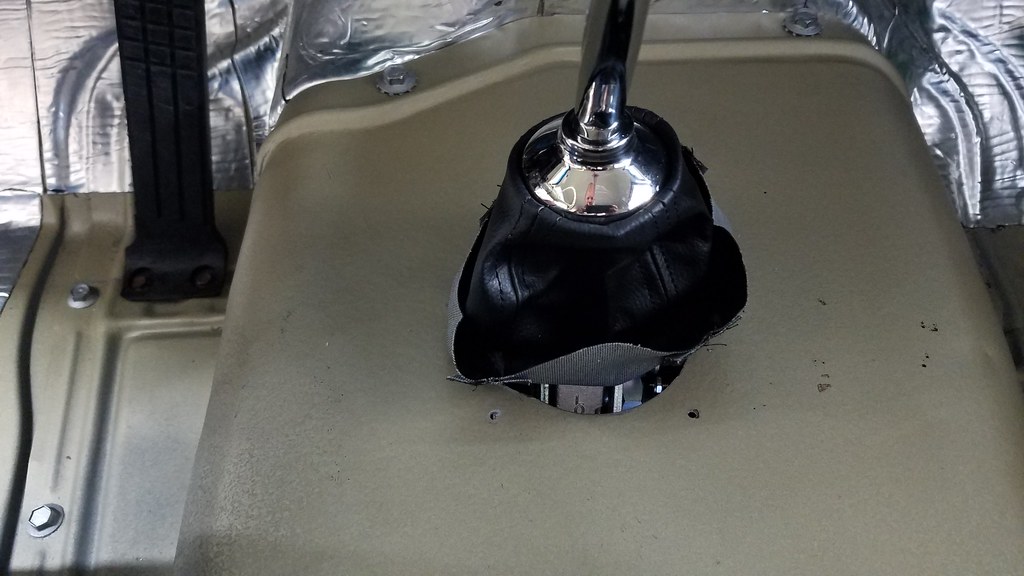 20180325_083534 by bjohnson388, on Flickr
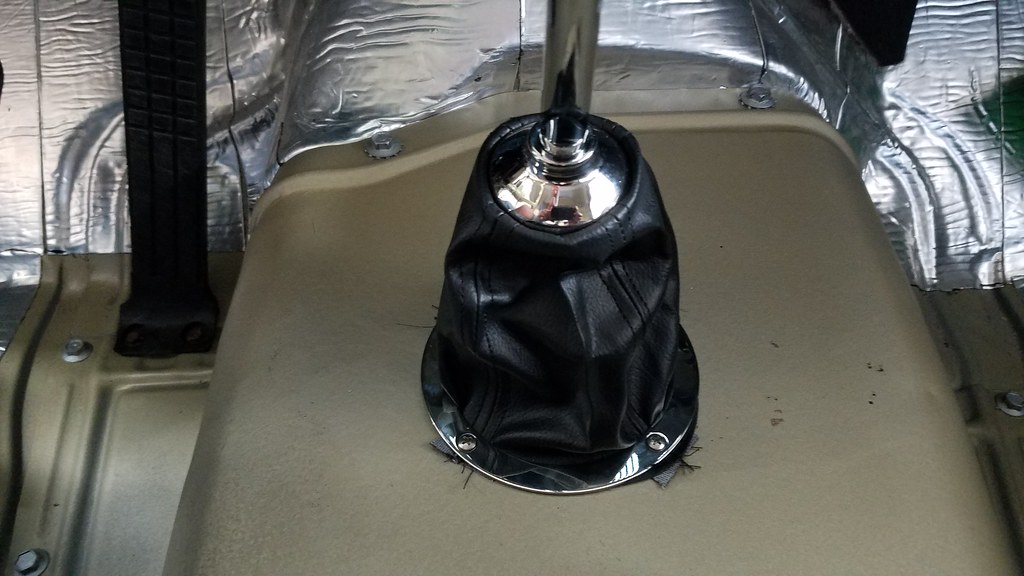 20180325_084137 by bjohnson388, on Flickr
Trimmed off the excess.
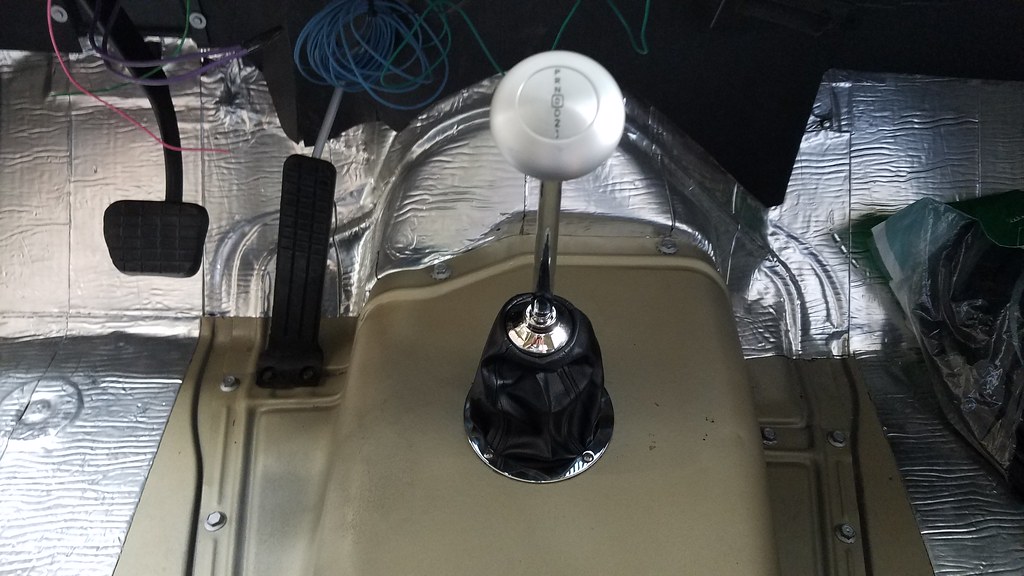 20180325_084730 by bjohnson388, on Flickr
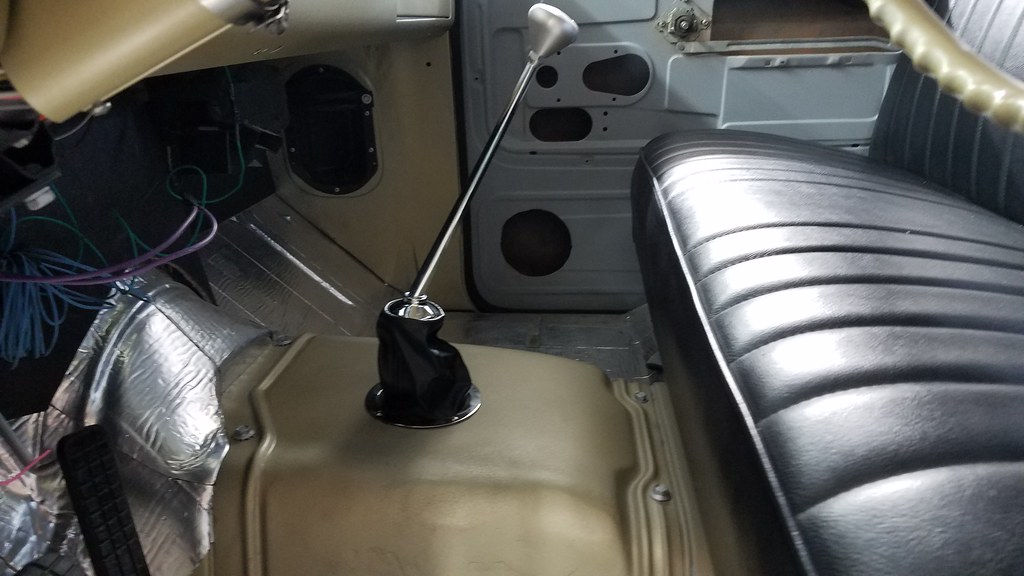 20180325_084750 by bjohnson388, on Flickr
Next up was putting this door seal on.
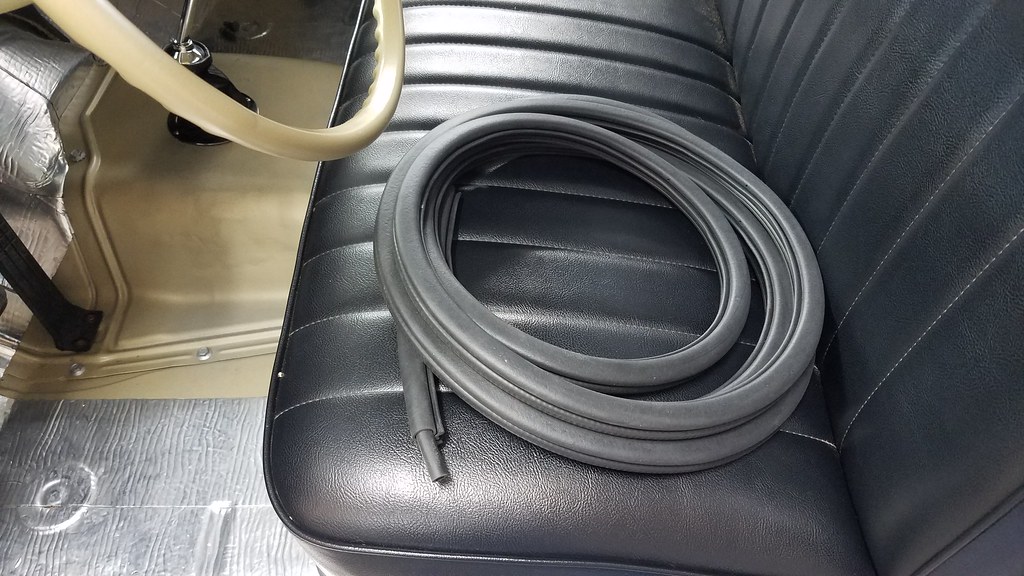 20180325_085306 by bjohnson388, on Flickr
Easy peasy.
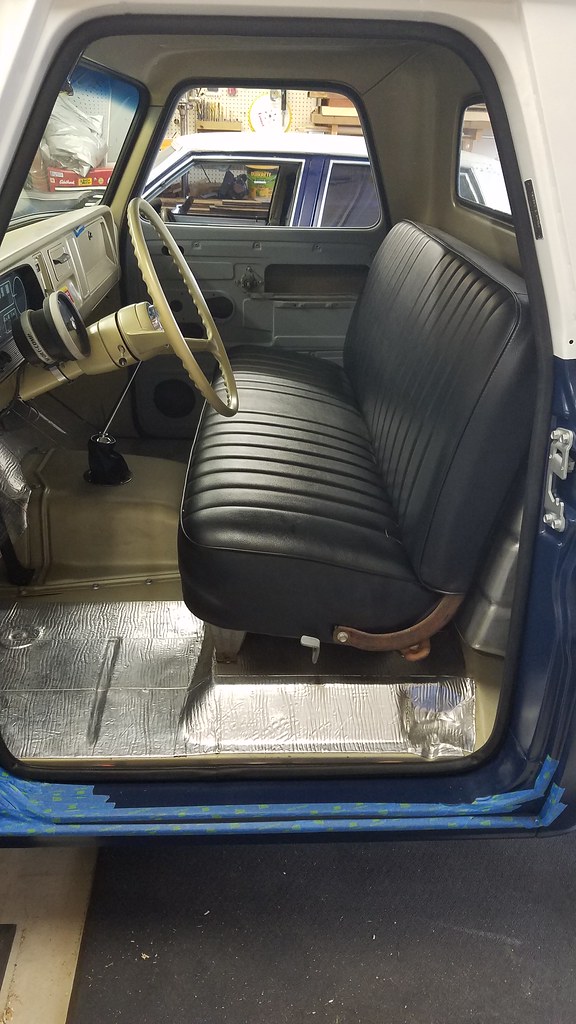 20180325_090756 by bjohnson388, on Flickr
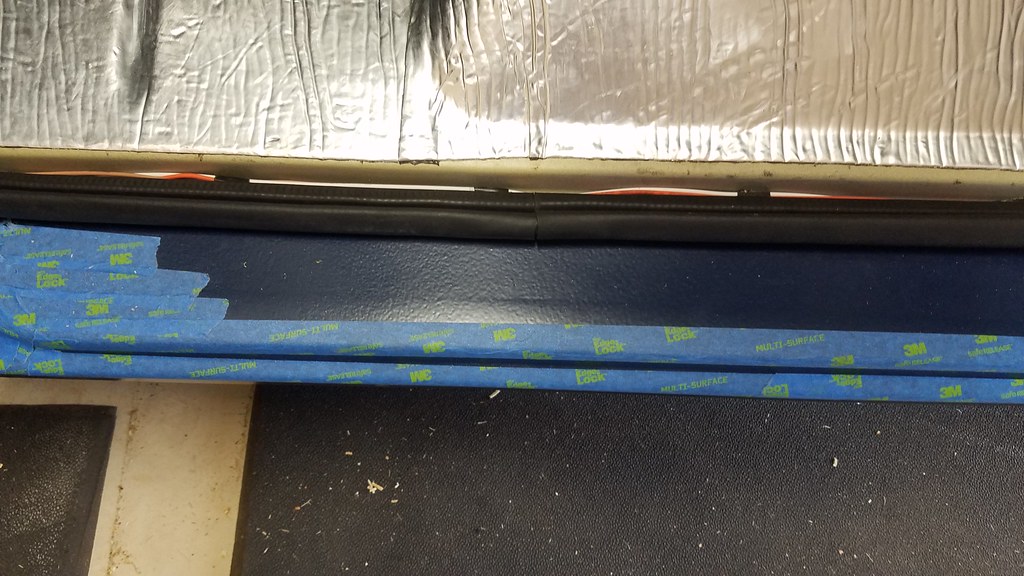 20180325_090801 by bjohnson388, on Flickr
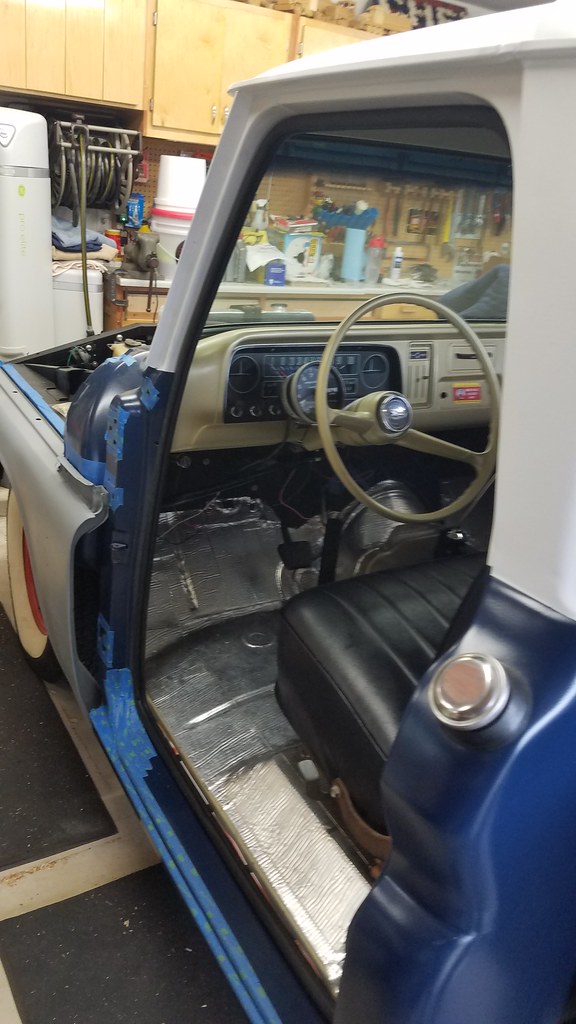 20180325_090809 by bjohnson388, on Flickr
Then I changed the oil in the air compressor. Its 2 years old and black.
 20180325_091906 by bjohnson388, on Flickr
Then replaced all the RO filters. Made a mess too!
 20180325_111513 by bjohnson388, on Flickr
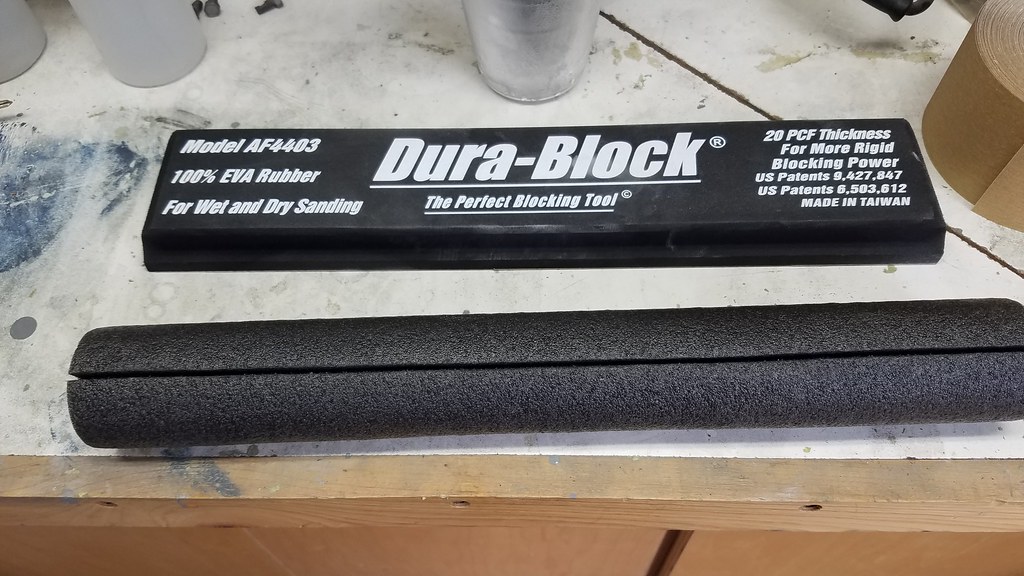
Next project was block sanding the driver door with my new Durablock and my homemade round Durablock. They both work great. I am using PSA sandpaper that comes in rolls. What a joy to work with.
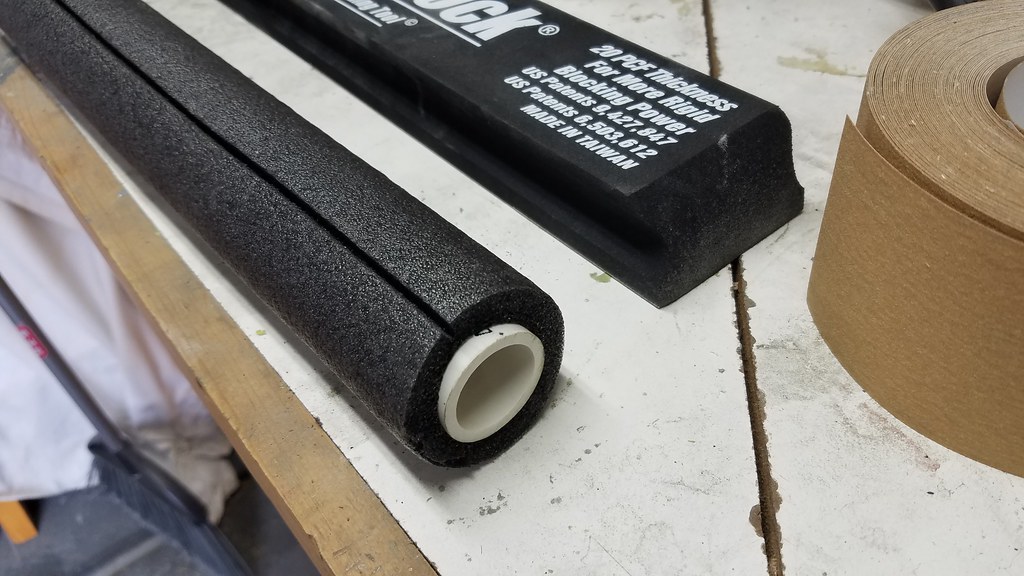 20180325_123148 by bjohnson388, on Flickr
 20180325_123143 by bjohnson388, on Flickr
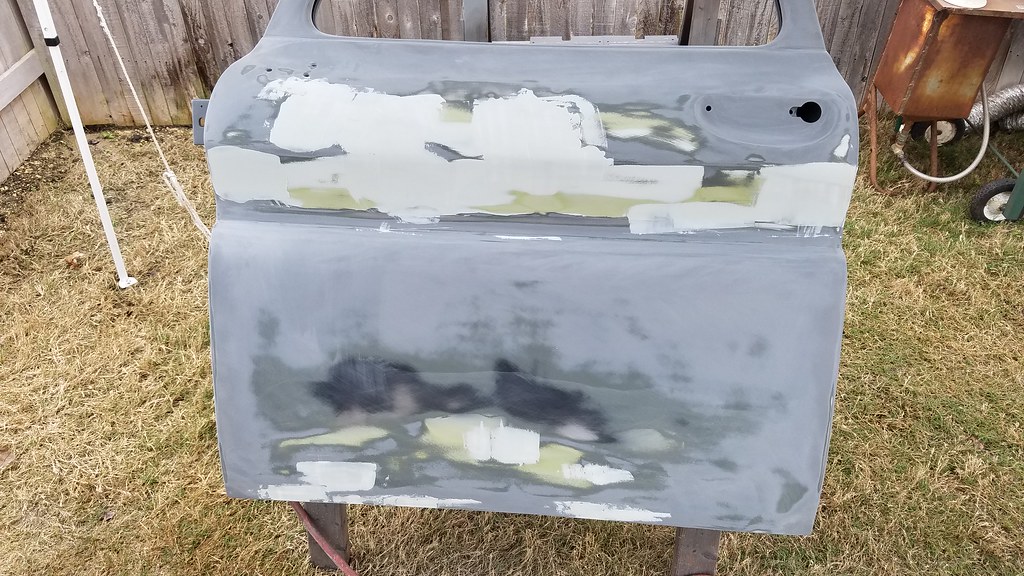
Blocked the door and found some low spots and did a round of glazing putty.
 20180325_130859 by bjohnson388, on Flickr
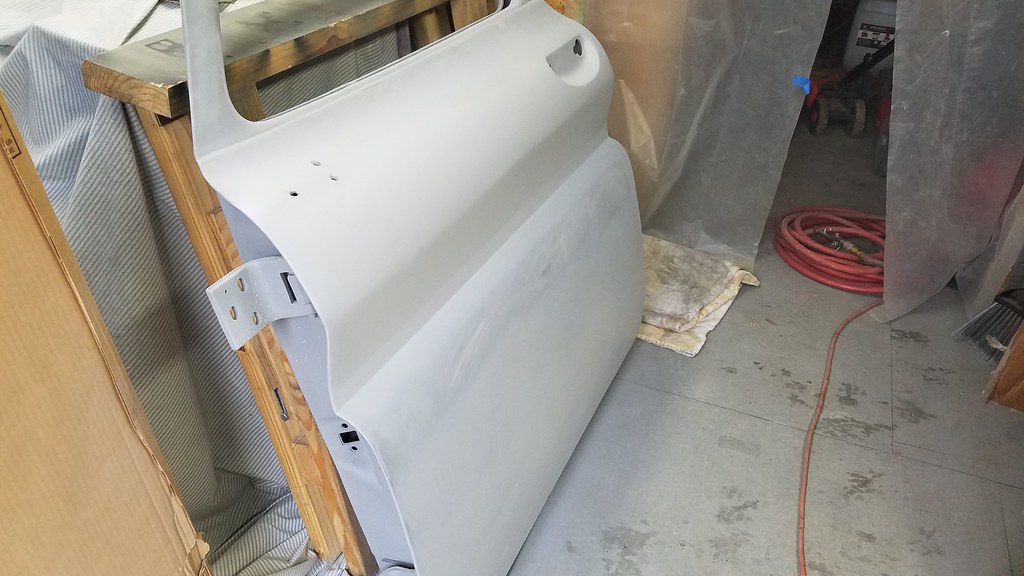
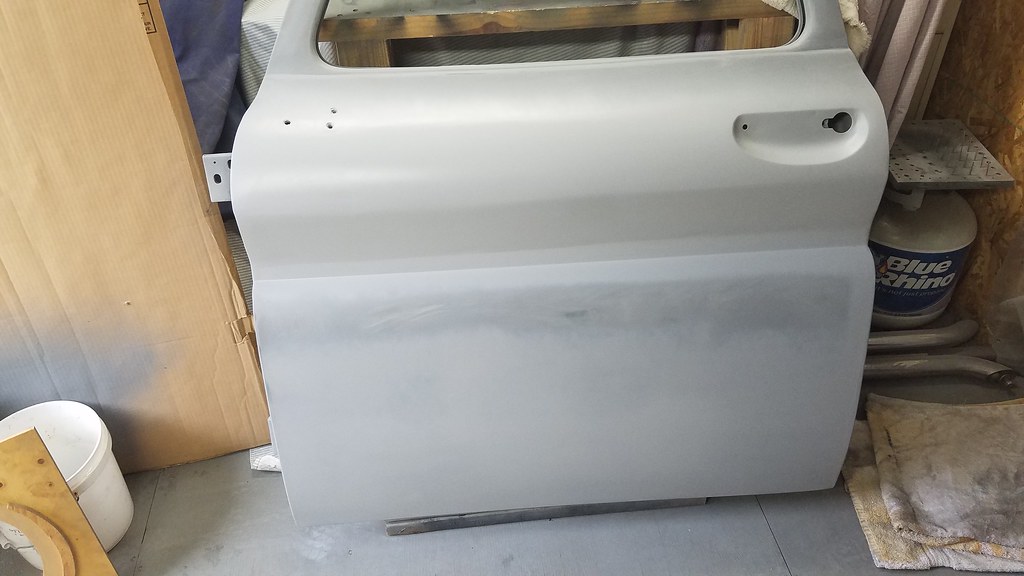
Another round of filler primer. Will block sand this in the next few days and see where I am at. I shot this with Rattle can dupli color. Didn't have time to break out the spray gun.
 20180325_151106 by bjohnson388, on Flickr
 20180325_151101 by bjohnson388, on Flickr
That's it. One of my truck buddies stopped by with his 66' and I didn't get anything else done.
Bret
First up was installing the high hump for the final time. 1/4" thick gasket to seal it up.
20180325_080546 by bjohnson388, on FlickrThen finalized the shifter boot placement and drilled the holes.
20180325_083321 by bjohnson388, on Flickr
20180325_083534 by bjohnson388, on Flickr
20180325_084137 by bjohnson388, on FlickrTrimmed off the excess.
20180325_084730 by bjohnson388, on Flickr
20180325_084750 by bjohnson388, on FlickrNext up was putting this door seal on.
20180325_085306 by bjohnson388, on FlickrEasy peasy.
20180325_090756 by bjohnson388, on Flickr
20180325_090801 by bjohnson388, on Flickr
20180325_090809 by bjohnson388, on FlickrThen I changed the oil in the air compressor. Its 2 years old and black.
20180325_091906 by bjohnson388, on FlickrThen replaced all the RO filters. Made a mess too!
20180325_111513 by bjohnson388, on FlickrNext project was block sanding the driver door with my new Durablock and my homemade round Durablock. They both work great. I am using PSA sandpaper that comes in rolls. What a joy to work with.
20180325_123148 by bjohnson388, on Flickr
20180325_123143 by bjohnson388, on FlickrBlocked the door and found some low spots and did a round of glazing putty.
20180325_130859 by bjohnson388, on FlickrAnother round of filler primer. Will block sand this in the next few days and see where I am at. I shot this with Rattle can dupli color. Didn't have time to break out the spray gun.
20180325_151106 by bjohnson388, on Flickr
20180325_151101 by bjohnson388, on FlickrThat's it. One of my truck buddies stopped by with his 66' and I didn't get anything else done.
Bret
YukonXL04
Well-known member
Wow... I have no idea how you get so much accomplished lol.
Hey so word of warning on the lowes sound deadening. Aka peel n' seal.
It will be just fine on the floor, and usually ok on a door that has a interior panel to help hold it, but on the inside of a door skin, cab walls, and roof panels, it doesn't last long in hot climates. Even with a headliner holding it on the roof, the adhesive gets too hot and fails. I have don't several vehicles with it, and different versions of it.
My choice for budget deadener is the noico brand 80mil on amazon.
Hey so word of warning on the lowes sound deadening. Aka peel n' seal.
It will be just fine on the floor, and usually ok on a door that has a interior panel to help hold it, but on the inside of a door skin, cab walls, and roof panels, it doesn't last long in hot climates. Even with a headliner holding it on the roof, the adhesive gets too hot and fails. I have don't several vehicles with it, and different versions of it.
My choice for budget deadener is the noico brand 80mil on amazon.
1/2 Cup
Member Emeritus
Bret, great progress..
drivesitfar
Well-known member
BJ: i know you can't see that piece you filed or sawed off, but wish i lived closer cause I think i have a Greenlee 4 inch punch out that might have worked or a 4 inch metal hole saw. in any cause you GOT R DONE and you will be the only one that knows it's there (except HANDY ANDY and me and a few thousand other guys that follow your thread). it's looking great and hope you don't have any of the issues that Yukon mentioned.
how does your door fit now that you've adjusted it and put on some weather stripping?
nice to know you can just drive this around and use it for fun now that you have the other work truck. I like the new springs too as far as the look and if you think they are built well enough then that's good enough for me cause you don't always need stuff built to last hundreds of years like those old springs were. is there a re purpose project for the old springs?
how does your door fit now that you've adjusted it and put on some weather stripping?
nice to know you can just drive this around and use it for fun now that you have the other work truck. I like the new springs too as far as the look and if you think they are built well enough then that's good enough for me cause you don't always need stuff built to last hundreds of years like those old springs were. is there a re purpose project for the old springs?
Wow... I have no idea how you get so much accomplished lol.
Hey so word of warning on the lowes sound deadening. Aka peel n' seal.
It will be just fine on the floor, and usually ok on a door that has a interior panel to help hold it, but on the inside of a door skin, cab walls, and roof panels, it doesn't last long in hot climates. Even with a headliner holding it on the roof, the adhesive gets too hot and fails. I have don't several vehicles with it, and different versions of it.
My choice for budget deadener is the noico brand 80mil on amazon.
Thanks for the heads up Yukon. While I do live in a hot climate my truck will spend 95% if its life in the garage. Only time it might be in the sun and heat for extended periods would be maybe at a local car show. Not sure if this would be enough to worry about the peel n stick coming loose. And speaking of that, stuff is so sticky I can't imagine it coming loose. And its made for roofing so that is surprising to hear but thanks for the heads up.
I chuckled at your first comment I am always down on myself for not getting enough done everyday. The projects are just piling up past my eyeballs to where I can't even see the finish line in the next couple of years at the least

Bret, great progress..
Thank You Steve.
BJ: i know you can't see that piece you filed or sawed off, but wish i lived closer cause I think i have a Greenlee 4 inch punch out that might have worked or a 4 inch metal hole saw. in any cause you GOT R DONE and you will be the only one that knows it's there (except HANDY ANDY and me and a few thousand other guys that follow your thread). it's looking great and hope you don't have any of the issues that Yukon mentioned.
how does your door fit now that you've adjusted it and put on some weather stripping?
nice to know you can just drive this around and use it for fun now that you have the other work truck. I like the new springs too as far as the look and if you think they are built well enough then that's good enough for me cause you don't always need stuff built to last hundreds of years like those old springs were. is there a re purpose project for the old springs?
Thanks Drives. The oblong hole seems to be bothering everybody but me.
 . To be honest the hump was such a mess to begin with all the butchering I really don't feel bad about the hole.
 The driver door fits pretty good I need to do some massaging at the bottom corners to fit into the pocket a little better which is factory. I looked at my buddies unmolested 66 and his doors fit just as poorly as mine.
And yes it will be a toy now and probably not haul much like I originally intended. The new springs definitely won't haul as much load as the originals but will definitely ride and handle better especially when I get the correct shocks, adjustable trac bar and sway bar put on the back. Not sure what I would do with the old springs so into the junk corner outside the shed they went.
Bret
Bob Heine
ALLIANCE MEMBER
Bret, don't feel bad about those old springs and know you are not alone. I keep my old springs in warm, dry and cozy places. When I bought a front coilover conversion for my '72 Corvette...Not sure what I would do with the old springs so into the junk corner outside the shed they went.
Bret
...the old springs landed nearby.
I keep the stock coils for the PT Cruiser in the Eibach box in the garage attic (never know when I might want to put it back to stock ride height).
Attachments


Beags86
Well-known member
Started early this morning had a long list I wanted to get done.
First up was installing the high hump for the final time. 1/4" thick gasket to seal it up.
Then finalized the shifter boot placement and drilled the holes.
Trimmed off the excess.
Next up was putting this door seal on.
Easy peasy.
Then I changed the oil in the air compressor. Its 2 years old and black.
Then replaced all the RO filters. Made a mess too!
Next project was block sanding the driver door with my new Durablock and my homemade round Durablock. They both work great. I am using PSA sandpaper that comes in rolls. What a joy to work with.
Blocked the door and found some low spots and did a round of glazing putty.
Another round of filler primer. Will block sand this in the next few days and see where I am at. I shot this with Rattle can dupli color. Didn't have time to break out the spray gun.
That's it. One of my truck buddies stopped by with his 66' and I didn't get anything else done.
Bret
How do you like that shifter?
oldironfarmer
Well-known member
Save those coil springs. They make great knives when you start forging.
Progress is great!!
Progress is great!!
Bret, don't feel bad about those old springs and know you are not alone. I keep my old springs in warm, dry and cozy places. When I bought a front coilover conversion for my '72 Corvette...
I keep the stock coils for the PT Cruiser in the Eibach box in the garage attic (never know when I might want to put it back to stock ride height).
Thanks for making me feel better Bob. They are now resting safely beside the shed in the Stanford and sons corner.
How do you like that shifter?
I absolutely love it. It works very smooth and fits the style of the truck. I have changed my mind and I am going to order the Black knob though.
Save those coil springs. They make great knives when you start forging.
Progress is great!!
Great idea Andy. I knew someone would have a use for them. They don't make steel the same as back in the day.
Bret
Beags86
Well-known member
They don't make steel the same as back in the day.
Bret
Your right they don't make steel like they did back in the day. New steel has much more quality control and much stricter regulations to adhere to. Along with tighter tolerances of metallurgy. New steel is much better then the stuff from the 60s and 70s.
oldironfarmer
Well-known member
Your right they don't make steel like they did back in the day. New steel has much more quality control and much stricter regulations to adhere to. Along with tighter tolerances of metallurgy. New steel is much better then the stuff from the 60s and 70s.
Good point. And with higher confidence with the better metallurgy comes the ability to design closer to the limits of the materials. Then inevitably there are more failures due to closer design limits and the perception the new stuff is not as good.
But lower alloying agents of older steel make for better hand forging results. Straight high carbon 1095 springs from up to the forties are a joy to work with and deliver reliable results. Newer stuff you can't be sure the alloy unless you know the origin.
BoilermakerFan
Well-known member
My choice for budget deadener is the noico brand 80mil on amazon.
Thanks for the recommendation Yukon. I need to sound deaden an electrical enclosure I'm repurposing for a 3D printer. Amazon has an 18sqFt pack that is perfect for my enclosure, but I'll probably go ahead and order the 36sqFt pack so I will have additional material for the top compartment of the enclosure and extra pieces to deaden a rolling tool chest that may end up with another 3D printer on it.
My wife is complaining about the noise of the 3D printer so I need to address it sooner than later. I also need to order leveling casters and some GT2 belt for a new build as well so I can get it all on one order with free Prime shipping.
Oh yeah, the truck is looking great Bret! The new springs really set the rear stance to the proper height.
Beags86
Well-known member
Good point. And with higher confidence with the better metallurgy comes the ability to design closer to the limits of the materials. Then inevitably there are more failures due to closer design limits and the perception the new stuff is not as good.
But lower alloying agents of older steel make for better hand forging results. Straight high carbon 1095 springs from up to the forties are a joy to work with and deliver reliable results. Newer stuff you can't be sure the alloy unless you know the origin.
Your correct ironfarmer, new steel isn't just general old steel like it used to be, it's all spec'ed out to the customer and their needs of said steel. With most stuff being made these days some sort of alloy. You most certainly would like to know the alloy before you stated forging or welding or putting heat to it.
I just wanted to comment on the fact indeed there are alot of misconceptions of new steel. Good points farmer.
elguappo
Well-known member
Regarding the peel-n-stick use in vehicles and on roofs.
On a roof it will sit usually no more than 45d from flat, where the adhesive just sits and sticks.
The problems in car use (speaking from firsthand experience) is on vertical and upside down panels. While the adhesive is sticky/gooey, it will separate from those vertical/upside down surfaces eventually.
On a roof it will sit usually no more than 45d from flat, where the adhesive just sits and sticks.
The problems in car use (speaking from firsthand experience) is on vertical and upside down panels. While the adhesive is sticky/gooey, it will separate from those vertical/upside down surfaces eventually.
Regarding the peel-n-stick use in vehicles and on roofs.
On a roof it will sit usually no more than 45d from flat, where the adhesive just sits and sticks.
The problems in car use (speaking from firsthand experience) is on vertical and upside down panels. While the adhesive is sticky/gooey, it will separate from those vertical/upside down surfaces eventually.
Thank you for the confirmation. I think I am going to get some stuff designed for vehicles for inside the doors.
Bret
Driver door is just about as good as I am going to get it.
 20180405_162627 by bjohnson388, on Flickr
One more test fit before color. Guess what it doesn't fit very good with the door seal on.
 20180405_175253 by bjohnson388, on Flickr
I had to persuade the front part of the rocker lip in towards the cab a little bit. I checked these with the doors on after I tacked the rocker in but I didn't have the door seals on. HEAD SLAP!. Another tough lesson learned.
 20180405_175348 by bjohnson388, on Flickr
 20180405_175351 by bjohnson388, on Flickr
I finally got it to close after some fiddling and cussing and getting pissed off!
 20180405_202641 by bjohnson388, on Flickr
The back edge sticks out. I think this might be the new skin. It doesn't curve in towards the back of the cab like the original does on the pass side. Not sure yet how I am going to fix that. So paint is on hold for the moment. This driver door has given me nothing but hell from day one.
 20180406_192625 by bjohnson388, on Flickr
I may have to cut this part of the rocker and move it in some. Going to keep messing with it and see what other options there are. Might even order a different door gasket. This one is extremely thick. At this point I don't know if the rocker is in the wrong place, or the door is messed up, or the seal. The seal works on the pass side so...
 DSCN8387scrib by bjohnson388, on Flickr
Bret
20180405_162627 by bjohnson388, on FlickrOne more test fit before color. Guess what it doesn't fit very good with the door seal on.
20180405_175253 by bjohnson388, on FlickrI had to persuade the front part of the rocker lip in towards the cab a little bit. I checked these with the doors on after I tacked the rocker in but I didn't have the door seals on. HEAD SLAP!. Another tough lesson learned.
20180405_175348 by bjohnson388, on Flickr
20180405_175351 by bjohnson388, on FlickrI finally got it to close after some fiddling and cussing and getting pissed off!
20180405_202641 by bjohnson388, on FlickrThe back edge sticks out. I think this might be the new skin. It doesn't curve in towards the back of the cab like the original does on the pass side. Not sure yet how I am going to fix that. So paint is on hold for the moment. This driver door has given me nothing but hell from day one.
20180406_192625 by bjohnson388, on FlickrI may have to cut this part of the rocker and move it in some. Going to keep messing with it and see what other options there are. Might even order a different door gasket. This one is extremely thick. At this point I don't know if the rocker is in the wrong place, or the door is messed up, or the seal. The seal works on the pass side so...
DSCN8387scrib by bjohnson388, on FlickrBret
Bob Heine
ALLIANCE MEMBER
Bret, before you do anything drastic, I suggest you put the truck out in the sun or wait until the weather warms up. I didn't do any body work but when I put new door and window seals on my '87 Corvette, the doors wouldn't close, looking a lot like yours. After a day in the Florida sun and heat they closed much better and now close and seal just fine.I finally got it to close after some fiddling and cussing and getting pissed off!
The back edge sticks out. I think this might be the new skin. It doesn't curve in towards the back of the cab like the original does on the pass side. Not sure yet how I am going to fix that. So paint is on hold for the moment. This driver door has given me nothing but hell from day one.
I may have to cut this part of the rocker and move it in some. Going to keep messing with it and see what other options there are. Might even order a different door gasket. This one is extremely thick. At this point I don't know if the rocker is in the wrong place, or the door is messed up, or the seal. The seal works on the pass side so...
Bret
oldironfarmer
Well-known member
I like Bob's idea.
In your picture it does look like the sill is standing proud where it joins the jamb.
In your picture it does look like the sill is standing proud where it joins the jamb.
Bret, before you do anything drastic, I suggest you put the truck out in the sun or wait until the weather warms up. I didn't do any body work but when I put new door and window seals on my '87 Corvette, the doors wouldn't close, looking a lot like yours. After a day in the Florida sun and heat they closed much better and now close and seal just fine.
I like Bob's idea.
In your picture it does look like the sill is standing proud where it joins the jamb.
Not a bad idea Bob. I have decided to order a brand new door from Goodmark. I am tired of messing with this junk of a door I have created. I can just paint it and hang it!
Bret
Finallygotit
ALLIANCE MEMBER
...... I can just paint it and hang it!
Bret
You hope.......
 Not trying to be negative but we all now how these things go.
 (In a very poor Jedi tone) I wish you luck, young Brett.

Denwood
Well-known member
Bret that shifter/boot is looking very like art Your saga on the door sounds like about zero fun..hopefully the new one works better.
Great progress and as always excellent attention to detail!
Your saga on the door sounds like about zero fun..hopefully the new one works better.Great progress and as always excellent attention to detail!