To avoid these ads, REGISTER NOW!

Above 1200 Sq/FT The Lone Beech Garage (60x46x16)

Wokspaces above 1200 squarefeet.
OP
S

sbosecker

Well-known member
Joined
Sep 25, 2012
Messages
3,539
Location
Peachtree City, GA
Re: The Lone Beech Garage Build Thread (60x46)

Sunday - February 11, 2018

Returned to Georgia yesterday after a week of vacation at the Heavenly Ski Resort near Lake Tahoe. It was great to hook up with old Navy buddies again!

I will be heading to Indiana tomorrow to help my dad with a few chores but today I was able to get out to the LBG for a little building repair.

Back on October 22nd I posted that I had noticed a couple of my T5HO fluorescent tubes had failed in one of my fixtures.

It seemed odd that two tubes next to each other would fail at exactly the same time so I suspected that the ballast or wiring was the issue.

When the electrician was installing the wiring for the JET Mill and Rockwell Metal lathe a couple of weeks ago, I asked him to take a peek at the fixture to see if the wiring was OK.

He did so and found everything to be in order. We moved the tubes around and known good tubes failed to light up when placed in the non-working part of the fixture.

I got on eBay that evening, found a replacement ballast at a reasonable price, and bought it. It arrived the day after I left for vacation.

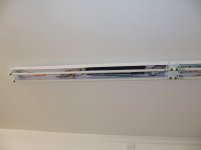
Today my son and I went out and replaced the ballast. After tripping the circuit breaker, I climbed up on the scaffolding and my son was on the ground receiving and sending up items as needed.


20180211-01.jpg 20180211-02.jpg

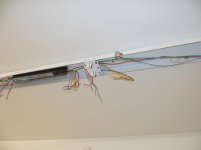
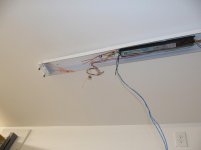
First item of business was to evaluate the wiring.


20180211-03.jpg 20180211-04.jpg

Then I started cutting the wires that needed to be freed from the fixture so that the faulty ballast could be removed.
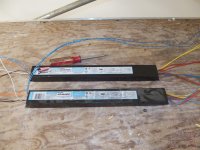


20180211-05.jpg

The new ballast is above the old one.
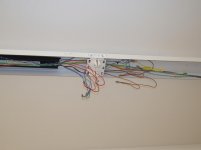


20180211-06.jpg

The new ballast was mounted into the fixture and then the wires were reattached using either the existing connectors or wire nuts.
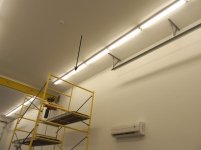


20180211-07.jpg

Apparently the old ballast was malfunctioning because the new one solved the problem. Black arrow points to the tubes that hadn't been working prior to the repair.


Scott
 
To avoid these ads, REGISTER NOW!

drivesitfar

Well-known member
Joined
Oct 23, 2013
Messages
36,082
Location
Pacific Northwest
Re: The Lone Beech Garage Build Thread (60x46)

SB: if I recall correctly you had weather issues or something hampering your good time in TAHOE with your buds so glad to hear you just had fun this year maybe without any drama or issues.

I missed the line about the dead mice and speaking of which my daughter's honda that's sitting in front of our house until she and her hubby decide to fly up and get it and drive it home or sell it has a rat living on it's engine. i have to keep charging up her battery (I should just buy her a new one, but trying to teach kids it's their STUFF) and every couple weeks a few new turds show up. I can't put out rat poison out there cause my cat or the neighborhood pets might get it and i'm surprised my cat hasn't killed it yet, but maybe my cat doesn't kill anything anymore since my wife scolded her for trying to kill a baby rabbit (yep the scream was just like a baby and my wife saved it after it spent time in my cat's jaws).

any thoughts on keeping critters out of an engine since you grew up on a farm?

nice fix on the light!!

back to the LATHES or is it MILL(er) TIME?
 

drivesitfar

Well-known member
Joined
Oct 23, 2013
Messages
36,082
Location
Pacific Northwest
Re: The Lone Beech Garage Build Thread (60x46)

SB: if I recall correctly you had weather issues or something hampering your good time in TAHOE with your buds last year so glad to hear you just had fun this year maybe without any drama or issues.

I missed the line about the dead mice and speaking of which my daughter's honda that's sitting in front of our house until she and her hubby decide to fly up and get it and drive it home or sell it has a rat living on it's engine. i have to keep charging up her battery (I should just buy her a new one, but trying to teach kids it's their STUFF and they need to maintain it) and every couple weeks a few new turds show up. I can't put out rat poison out there cause my cat or the neighborhood pets might get it and i'm surprised my cat hasn't killed it yet, but maybe my cat doesn't kill anything anymore since my wife scolded her for trying to kill a baby rabbit (yep the scream was just like a baby and my wife saved it after it spent time in my cat's jaws).

any thoughts on keeping critters out of an engine since you grew up on a farm?

nice fix on the light!!

back to the LATHES or is it MILL(er) TIME?
 
OP
S

sbosecker

Well-known member
Joined
Sep 25, 2012
Messages
3,539
Location
Peachtree City, GA
Re: The Lone Beech Garage Build Thread (60x46)

SB: if I recall correctly you had weather issues or something hampering your good time in TAHOE with your buds last year so glad to hear you just had fun this year maybe without any drama or issues.

I missed the line about the dead mice and speaking of which my daughter's honda that's sitting in front of our house until she and her hubby decide to fly up and get it and drive it home or sell it has a rat living on it's engine. i have to keep charging up her battery (I should just buy her a new one, but trying to teach kids it's their STUFF and they need to maintain it) and every couple weeks a few new turds show up. I can't put out rat poison out there cause my cat or the neighborhood pets might get it and i'm surprised my cat hasn't killed it yet, but maybe my cat doesn't kill anything anymore since my wife scolded her for trying to kill a baby rabbit (yep the scream was just like a baby and my wife saved it after it spent time in my cat's jaws).

any thoughts on keeping critters out of an engine since you grew up on a farm?

nice fix on the light!!

back to the LATHES or is it MILL(er) TIME?


DrivesItFar,

Despite a meager amount of snow in the Sierra Nevada this season my old Navy buddies and I had a great time.


20180206-01.jpg

Nothing like physical activity to work up a thirst! Skied at Northstar last Tuesday and then stopped into the 50 50 Brew Pub in Truckee CA for supper and a cold adult beverage (I'm the guy on the right). We spent most of our time at the Heavenly Ski area on the Nevada side.

Yes, I know, a lot of gray hair there... It's been a long time since we were active duty. Ha!


As to your rodent problem... our farm cats were generally pretty hungry and that seemed to motivate them as far as catching vermin.

You're right about rabbits - they can make a startling noise!

One possible solution might be to place something like a Real-Kill Mouse Glue Trap on top your engine. I suppose the glue trap would have to be anchored in some way to keep a larger rodent from getting the "goo" onto the engine itself if it flipped it over. Of course a standard mouse trap or rat trap, properly baited, might be the best way to approach the problem.

Good luck with the rodent removal!

Hoping to get an inspection of the electrical work done by the Electrician Thursday or Friday.

Best regards,

Scott
 
Last edited:

AZpilot

Well-known member
Joined
Sep 29, 2012
Messages
413
Location
Mesa, AZ
Re: The Lone Beech Garage Build Thread (60x46)

Bunch of old pilots drinking? I can hear the lies from here...LOL
 

drivesitfar

Well-known member
Joined
Oct 23, 2013
Messages
36,082
Location
Pacific Northwest
Re: The Lone Beech Garage Build Thread (60x46)

SB: thanks for the tips on RODENT control and i think just feeding our cool cat less might just be the answer.

nice to see you have a good group to hang with on a yearly basis and good weather or not sounds like good times.

best of luck with all the LATHE AND MILL stuff you have going on or are you taking a break from it and working on a tractor or your Honey Do list or house now?

cheers
 
OP
S

sbosecker

Well-known member
Joined
Sep 25, 2012
Messages
3,539
Location
Peachtree City, GA
Re: The Lone Beech Garage Build Thread (60x46)

Bunch of old pilots drinking? I can hear the lies from here...LOL

AZpilot,

Lies?!? That's an ugly word!

"Artistic license" is a more correct and appropriate description!

The guy on the far left has a PhD in Aeronautical Engineering and the other two work for the John Hopkins University Applied Physics Laboratory. Probably a little different discussion - OK, OK ...lies - taking place over our beers than most of the other tables.

Ha!

Best regards,

Scott
 
OP
S

sbosecker

Well-known member
Joined
Sep 25, 2012
Messages
3,539
Location
Peachtree City, GA
Re: The Lone Beech Garage Build Thread (60x46)

SB: thanks for the tips on RODENT control and i think just feeding our cool cat less might just be the answer.

nice to see you have a good group to hang with on a yearly basis and good weather or not sounds like good times.

best of luck with all the LATHE AND MILL stuff you have going on or are you taking a break from it and working on a tractor or your Honey Do list or house now?

cheers

DrivesItFar,

A lot of family stuff (and taxes) this month culminating in my 40th wedding anniversary tomorrow.

I have been getting a little time in the LBG but it hasn't been as much as I would like.

There always seems to be something on the calendar.

Thanks for stopping by!

Best regards,

Scott
 
OP
S

sbosecker

Well-known member
Joined
Sep 25, 2012
Messages
3,539
Location
Peachtree City, GA
Re: The Lone Beech Garage Build Thread (60x46)

Saturday - February 24, 2018

Lot's of stuff's been going on this month so my time in the shop has been just dribbles and drabs. I'll do a catch-up post in the near future but for tonight I'll just cover a little project I worked on today.

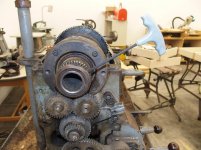
The 1956 Delta/Rockwell 11-inch Metal Lathe had a few modifications on it from the previous owner. I've removed most of these oddities but I've still got a couple more to go. Today I worked on one of the weirder items.


20180224-01.jpg

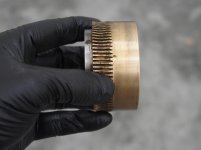
On the Headstock of this lathe somebody had added a piece of brass(?) with teeth around its perimeter (Black Arrow). The purpose of this piece is unknown and it wouldn't really hurt anything to leave it there. Still I wanted to see if I could remove it and get the lathe back to its original condition.

To remove the brass piece, I need to remove the Rear Collar Retainer (Red Arrow); the Spindle Change Gear (Blue Arrow) & a Spacer (Green Arrow).


20180224-02.jpg 20180224-03.jpg

Removing a set screw allowed the Rear Collar Retainer to be screwed off the Spindle.


20180224-04.jpg

With the Rear Collar Retainer out of the way I used a puller to remove the Spindle Change Gear. I was pretty careful with this operation as I didn't want to damage the gear.


20180224-05.jpg

Removing this #404 Hi-Pro Key gave me more fits than any other part of this operation. Eventually, I got it out with damaging anything ...I think.


20180224-06.jpg 20180224-07.jpg

With the Key out of the way, the Spacer and the toothed, brass modification could be slid off the Spindle.


Continued in next post...
 
Last edited:
OP
S

sbosecker

Well-known member
Joined
Sep 25, 2012
Messages
3,539
Location
Peachtree City, GA
Re: The Lone Beech Garage Build Thread (60x46)

Continued...


20180224-11.jpg 20180224-12.jpg 20180224-13.jpg

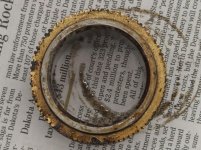
The brass piece modification appears to be pressed onto the Spacer. The Spacer is a part that needs to be returned to the Lathe's Spindle after the brass item is removed...

...but how to remove it?

I've been thinking a little about this. I've done a little research and brass expands almost twice as much as steel when heated or cooled. I'm wondering if I sat this part onto a cookie sheet and placed it into a very hot oven for an hour or so if the brass part would expand enough for the two parts to separate.

A little more research to be done before I determine if my theory is correct about the different rates of movement for the two metals. If I'm right about this I wouldn't be surprised if this wasn't the method used to put these two parts together.

Also, I think I'll wait until after tomorrow (my 40th wedding anniversary) to ask my bride if I can borrow a cookie sheet.

Ha!

Scott
 
Last edited:

Lotusnut

Well-known member
Joined
Aug 23, 2012
Messages
114
Location
Cambridge Ontario, Canada
Re: The Lone Beech Garage Build Thread (60x46)

A little more research to be done before I determine if my theory is correct about the different rates of movement for the two metals. If I'm right about this I wouldn't be surprised if this wasn't the method used to put these two parts together.

Also, I think I'll wait until after tomorrow (my 40th wedding anniversary) to ask my bride if I can borrow a cookie sheet.

Scott

I suspect you will find the brass gear is on there with more of an interference fit than you think. If I was doing this mod and wanted to be sure it did not shift after being placed I would not only heat the brass to 550*F, I would also cool the steel as cold as I could get it. If they had some dry ice or liquid nitrogine the parts would almost slip together and be unmoveable when the temperatures equalized. If this is the case they will not come adrift with just heating to 550*F.

My guess is the gear is designed to have a worm gear driving to index the head very accurately the same way a rotary table works internally. I personally would leave the brass gear where it is as it could be of use in the future if not for you maybe the next guy (your son?).

Also I would suggest you get your own cookie sheet and oven as I have come close to being mortally wounded for heating car parts in the oven. :lol_hitti

They don't seem to like it somehow.:dunno:


Rob
 

Bob Heine

ALLIANCE MEMBER
Joined
Oct 24, 2009
Messages
10,709
Location
Boca Raton, Florida
Re: The Lone Beech Garage Build Thread (60x46)

Scott, if you want to save the brass gear, the heating and cooling thing would be a great solution. If you just want it gone, how about milling a slot in the brass down to the steel spacer and pry it off or two slots and have it fall off?
 

jimreed2160

Well-known member
Joined
Aug 7, 2016
Messages
3,589
Location
Tallahassee FL
Re: The Lone Beech Garage Build Thread (60x46)

Drives--Try decorating the engine compartment with a few mothballs. I'll bet the rodents will move to another squat.
 

AZpilot

Well-known member
Joined
Sep 29, 2012
Messages
413
Location
Mesa, AZ
Re: The Lone Beech Garage Build Thread (60x46)

AZpilot,

Lies?!? That's an ugly word!

"Artistic license" is a more correct and appropriate description!

The guy on the far left has a PhD in Aeronautical Engineering and the other two work for the John Hopkins University Applied Physics Laboratory. Probably a little different discussion - OK, OK ...lies - taking place over our beers than most of the other tables.

Ha!

Best regards,

Scott


Sorry, Maybe "Sea Story" is more appropriate.
 

Lotusnut

Well-known member
Joined
Aug 23, 2012
Messages
114
Location
Cambridge Ontario, Canada
Re: The Lone Beech Garage Build Thread (60x46)

that looks like a speedometer or lube pump drive gear to me.

The concave shape of the teeth is for use with a worm gear. A worm gear/ring gear can only drive in one direction and if the worm gear is engaged the head would be locked solid and would only move when the worm gear turned.

Rob
 
OP
S

sbosecker

Well-known member
Joined
Sep 25, 2012
Messages
3,539
Location
Peachtree City, GA
Re: The Lone Beech Garage Build Thread (60x46)

Scott
I suspect you will find the brass gear is on there with more of an interference fit than you think. If I was doing this mod and wanted to be sure it did not shift after being placed I would not only heat the brass to 550*F, I would also cool the steel as cold as I could get it. If they had some dry ice or liquid nitrogine the parts would almost slip together and be unmoveable when the temperatures equalized. If this is the case they will not come adrift with just heating to 550*F.

My guess is the gear is designed to have a worm gear driving to index the head very accurately the same way a rotary table works internally. I personally would leave the brass gear where it is as it could be of use in the future if not for you maybe the next guy (your son?).

Also I would suggest you get your own cookie sheet and oven as I have come close to being mortally wounded for heating car parts in the oven. :lol_hitti

They don't seem to like it somehow.:dunno:


Rob


Rob,

When asked if an pan or old cookie sheet was available, my spouse was pretty accommodating. I also explained what I had in mind with the oven.

She didn't flinch.

She's a keeper. Ha!

Best regards,

Scott
 
OP
S

sbosecker

Well-known member
Joined
Sep 25, 2012
Messages
3,539
Location
Peachtree City, GA
Re: The Lone Beech Garage Build Thread (60x46)

Scott, if you want to save the brass gear, the heating and cooling thing would be a great solution. If you just want it gone, how about milling a slot in the brass down to the steel spacer and pry it off or two slots and have it fall off?

Bob,

Without a doubt this would be Plan B if I absolutely had to remove the brass gear.

Best regards,

Scott
 
OP
S

sbosecker

Well-known member
Joined
Sep 25, 2012
Messages
3,539
Location
Peachtree City, GA
Re: The Lone Beech Garage Build Thread (60x46)

that looks like a speedometer or lube pump drive gear to me.

The concave shape of the teeth is for use with a worm gear. A worm gear/ring gear can only drive in one direction and if the worm gear is engaged the head would be locked solid and would only move when the worm gear turned.

Rob

Ole Slewfoot & Rob,

The oddest thing about the "brass gear" is it pressed onto a spacer. The spacer has no key to lock it to the spindle. The Spindle Gear seems to have had enough friction between it and the spacer to cause the spacer (and brass gear) to rotate with the spindle.

Yet the spacer spins pretty freely on the spindle after the spindle gear was removed from the spindle. If there was much of a load on the "brass gear" I don't think the "brass gear" would continue to rotate at the same rate as the spindle as it's a pretty loose fit.

Best regards,

Scott
 
To avoid these ads, REGISTER NOW!
OP
S

sbosecker

Well-known member
Joined
Sep 25, 2012
Messages
3,539
Location
Peachtree City, GA
Re: The Lone Beech Garage Build Thread (60x46)

Monday - February 26, 2018

Today I returned to the shop to remove the "brass gear" from the 1956 Delta Rockwell 11-Inch Metal Lathe's Spindle Spacer.


20180226-01.jpg

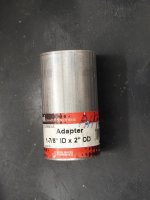
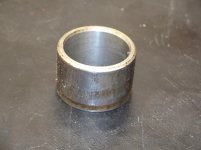
The first order of business was to find a suitable item to use to attempt to drive the Spacer out of the "brass gear". I took a short drive to a local AutoZone and found a piece of exhaust tubing adapter that seemed to be exactly suited for the task.


20180226-03.jpg 20180226-02.jpg

Before I started heating things up in the oven, I wanted to get a good idea of how I was going to set this up when I attempted to remove the spacer.

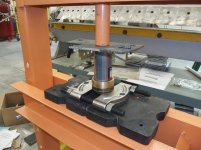
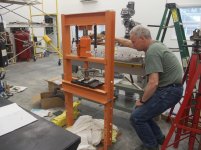
I got a large bearing splitter out of the tool chest and set it up on my Harbor Freight 20-Ton Shop Press. The exhaust tube adapter was placed in position and then I set a piece of scrap steel on top the adapter.

With everything lined up I decided to see how the setup reacted to a little hydraulic force. To my complete surprise when the ram touched the top of the setup the spacer started moving. No bangs or straining... just an immediate movement of the spacer down through the "brass gear" with no heat added.

Click HERE to see a video of the "brass gear" being removed.


20180226-04.jpg

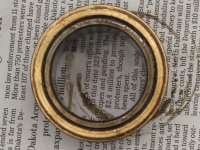
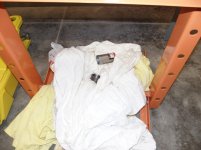
The Spacer and exhaust tube adapter fell into a pile of old sheets under the press.


20180226-05.jpg 20180226-06.jpg 20180226-07.jpg

I have to say... that was a LOT easier than I expected.


Continued in next post...
 
Last edited:
OP
S

sbosecker

Well-known member
Joined
Sep 25, 2012
Messages
3,539
Location
Peachtree City, GA
Re: The Lone Beech Garage Build Thread (60x46)

Continued...


So getting the "brass gear" off the spindle spacer was today's effort. I promised I do a little catch-up on the small things that happened in February - and a little prior.


20180226-11.jpg

In January, just prior to attempting to do some work with the JET Mill, I lubricated it per the Operator's Manual.

When I added oil to the Spindle Bearing Oil Cup (Upper Black Arrow) oil started dripping out of the Quill Lock Lever (Lower Black Arrow) at a reasonable rate. I'll be curious if anyone that has experience with "Bridgeport Clones" has any thoughts on this. I do need to ask JET's Technical Support about this soon.


20180226-12.jpg 20180226-13.jpg

The Thursday before last (Feb 16th) the recently added electrical circuits received their final inspection. The Inspector signed off on everything without any issues.

Shortly after he left, I finished wiring up the Variable Frequency Drive (VFD) to the 1966 Metal Lathe.


20180226-14.jpg 20180226-15.jpg

Late last week I drilled another hole in the VFD's enclosure. I needed to add some 3/8-inch Flexible Metal Conduit that signal wires from the lathe's existing drum switch (Forward/Stop/Reverse control) & for a (future) potentiometer to provide speed control.

This project is still a work in progress.


Scott
 
Last edited:

drivesitfar

Well-known member
Joined
Oct 23, 2013
Messages
36,082
Location
Pacific Northwest
Re: The Lone Beech Garage Build Thread (60x46)

SB: i'm betting all the thinking and prep work you did is why that spacer removal worked so well. CONGRATS.

that VFD box and set up looks great. keep up the great work and i hope that the NEW JET MILL starts working like it was meant to soon so maybe you can actually start using it.

do you have a dedicated SHOP OVEN or maybe an old stove in there or are you maybe using the stove inside your home cause I can't recall seeing one, but you do have a huge shop/garage?

good luck
 

matt_i

Well-known member
Joined
Mar 14, 2008
Messages
10,758
Location
SE Michigan
Re: The Lone Beech Garage Build Thread (60x46)

Hi Scott

I've been away for awhile, just caught up. In regards to the chuck wrench, the cutter looks abit large. Typically I don't like to use more than a 1/2" dia endmill in a Bridgeport mill on steel, I do this at lowest speed in "open belt" which is ~500rpm. Sometimes you have no choice to run a 3/4" dia cutter but then its back gear, like 100 rpm just scraping off tiny twisted slivers. The multi-flute cutter can be problematic for two reasons, each spiral tooth needs pressure to keep it cutting, and the additive forces can develop to make life hard. Generally for steel I use 2 flute endmills, and definitely for big cutters. Multi-flutes or multi-teeth generally end up in more rigid CNC machines or horizontal mills.

Tangential, but I think you can eliminate AC interference with a VFD speed reference pot if you twist the pair of wires. Alternatively, I think Home Depot sells an 18ga "security wire" with an inner metallic shield.

Regarding your press-work, armed with the lathe you can now quickly make pins and bushings which are under/over sized to your specific needs. Very helpful to have full support around whatever you are pressing. I have a drawer of parts that had one such use and are ready for their next use :)

I am not knowledgeable about the internal lube passages in the milling head to advise you, I oil probably once every 6 months or so.

Things are looking good, looks like you are getting a lot of shop time :)
 
OP
S

sbosecker

Well-known member
Joined
Sep 25, 2012
Messages
3,539
Location
Peachtree City, GA
Re: The Lone Beech Garage Build Thread (60x46)

SB: i'm betting all the thinking and prep work you did is why that spacer removal worked so well. CONGRATS.

that VFD box and set up looks great. keep up the great work and i hope that the NEW JET MILL starts working like it was meant to soon so maybe you can actually start using it.

do you have a dedicated SHOP OVEN or maybe an old stove in there or are you maybe using the stove inside your home cause I can't recall seeing one, but you do have a huge shop/garage?

good luck


DrivesItFar,

Luck favors the prepared I suppose. Still, I thought the Shop Press would have to put more muscle into it than it took.

Thanks for the kind words on VFD enclosure. I got lucky on the eBay find.

No dedicated shop oven... yet. We'll see what the future holds.

Best regards,

Scott
 
OP
S

sbosecker

Well-known member
Joined
Sep 25, 2012
Messages
3,539
Location
Peachtree City, GA
Re: The Lone Beech Garage Build Thread (60x46)

Hi Scott

I've been away for awhile, just caught up. In regards to the chuck wrench, the cutter looks abit large. Typically I don't like to use more than a 1/2" dia endmill in a Bridgeport mill on steel, I do this at lowest speed in "open belt" which is ~500rpm. Sometimes you have no choice to run a 3/4" dia cutter but then its back gear, like 100 rpm just scraping off tiny twisted slivers. The multi-flute cutter can be problematic for two reasons, each spiral tooth needs pressure to keep it cutting, and the additive forces can develop to make life hard. Generally for steel I use 2 flute endmills, and definitely for big cutters. Multi-flutes or multi-teeth generally end up in more rigid CNC machines or horizontal mills.

Tangential, but I think you can eliminate AC interference with a VFD speed reference pot if you twist the pair of wires. Alternatively, I think Home Depot sells an 18ga "security wire" with an inner metallic shield.

Regarding your press-work, armed with the lathe you can now quickly make pins and bushings which are under/over sized to your specific needs. Very helpful to have full support around whatever you are pressing. I have a drawer of parts that had one such use and are ready for their next use :)

I am not knowledgeable about the internal lube passages in the milling head to advise you, I oil probably once every 6 months or so.

Things are looking good, looks like you are getting a lot of shop time :)

matt_i,

Thanks for the useful input regarding the milling operation. I will put your suggestions to use in the near future.

With the Flexible Metal Conduit (FMC) in place, I'm sort of past V1 on the signal wires to the VFD so I'll run them through the FMC. I do have some twisted pair wire that I will use for this.

I was wishing the lathe(s) was operational for exactly the functions you described. Not there yet but trying to move closer. I still need to find a source of stock to be able to use for "pins & bushings".

The JET Mill manual calls for that oil cup to be serviced "daily". The way it was dripping out, I'd say that was an understatement. I posted a query regarding this on the Hobby-Machinist site and one fellow indicated that this was a normal situation.

Hard to believe. Ha!

Thanks for stopping by!

Best regards,

Scott
 
OP
S

sbosecker

Well-known member
Joined
Sep 25, 2012
Messages
3,539
Location
Peachtree City, GA
Re: The Lone Beech Garage Build Thread (60x46)

Tuesday - February 27, 2018

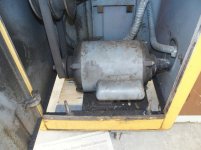
Today I realized it was time to get the Lawn Tractor out of the house basement and up to the LBG to prep it for the upcoming mowing season. As in the past, I positioned it over the Tornado Shelter and started draining the oil. I will allow this to drain overnight.

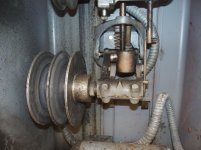
This evening I retuned to the shop and tried to move forward on the 1956 Delta Rockwell Metal Lathe. One of the (many) issues I'm troubleshooting is the Variable Speed pulley system called a Reeves Drive. Often referred to on the Internet as "the problematic Reeves Drive". Ha!

My issue was that I was turning the speed handle but the speed seemed to be remaining constant. I could see a vertical geared shaft turning but nothing was happening. I assumed that the threads in the "barrel" this vertical shaft passed through were shot.


20180227-01.jpg 20180227-02.jpg

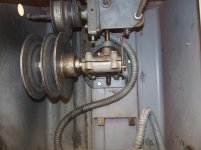
The first thing to do was to get the belts off the two big aluminum pulleys that make up the Reeves Drive. With the belts out of the way I was able to evaluate the condition of those now bare pulleys. The center part of the pulley system moved back and forth on the shaft without much effort so that seemed to be OK.


20180227-03.jpg 20180227-04.jpg

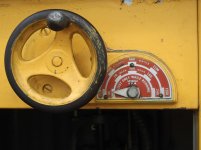
I turned the Speed Selector Wheel and was surprised to see the shaft and linkage moving as they should. Also, the Speed Indicator on the outside of the cabinet moved as it should. I ran the linkage down about as far as it could go and the Speed Indicator was showing it at the slow end of the speed range.

One thing that did seem wrong was the position of the "barrel" in the linkage. It was about as far to the left as it could be. It looked like something was out of alignment.


20180227-05.jpg 20180227-06.jpg

I turned the Speed Selector Wheel in the opposite direction and the internal linkage started moving upward. I turned the wheel until the linkage appeared to be at the upper end of its travel. The Speed Indicator followed this movement and showed that the speed, at this point, would be at the high end of the speed range.

The "barrel" looks to be pretty much centered when the linkage is in this position.

I'm going to post this information on the Rockwell Lathe Yahoo Group and see if anyone has any ideas as to what's going on with my machine.


Scott
 
Last edited:
OP
S

sbosecker

Well-known member
Joined
Sep 25, 2012
Messages
3,539
Location
Peachtree City, GA
Re: The Lone Beech Garage Build Thread (60x46)

Wednesday - February 28, 2018

A continuation of the evaluation of the 1956 Delta Rockwell 11-Inch Metal Lathe's "Issues".

This lathe has a Switch Box with 3 momentary push buttons (Forward, Reverse, Stop) that control the motor.

It has been noted previously that when the Forward button is pushed the motor only runs as long as that button is held down.

When the Reverse button is pushed and released, the lathe motor operates correctly. The motor operates in reverse until the Stop button is pushed.

I opened the Reverse Starter box - the one that had the 2 long dead (presumably electrocuted) mice in it - and took a video of the relays working.

My son is operating the buttons and the video records us talking back and forth as I'm down below the lathe filming the relays moving.

Click HERE for the video.

The video shows the Reverse Starter Relays functioning:

My son pushed the Forward button and held it in. The Relay on the right functions properly as long as the Forward button is depressed.

He releases the Forward button and the relay breaks contact. I ask him to push the Stop button just to see if anything else moves when that happens. I see no action as a result of the Stop button being pushed.

We let the motor spin down and then my son momentarily pushes the Reverse button. The relay on the right side makes contact and holds it - the motor runs in reverse. My son pushes the Stop button and the contact is broken causing the motor to spin down.

Obviously the left relay is working to some degree. It does move and transmits power across its contacts... What causes the relay to "hold" itself in the "up - in contact" position? The search terms I've used to Google this issue have resulted in mostly information on automobile starter problems.

(It should be noted that on one of my computers the video and audio have stopped being synched: the audio continues in real time but the video hesitates in a couple of places causing the relays to appear to be moving at inappropriate times.) This may just be a glitch on one of my computers but I thought I should mention it since the whole point of the video is to show the relays moving in conjunction with off camera button pushing.

Scott
 

drivesitfar

Well-known member
Joined
Oct 23, 2013
Messages
36,082
Location
Pacific Northwest
Re: The Lone Beech Garage Build Thread (60x46)

SB: if we don't have a thread ALL ABOUT LATHES or LATHES 101 in the vintage tools section or something like that I bet that would be a good one to start. I know a lot of members that have an old lathe in their shop/garage so maybe they have had a similar issue with relays and gears.

good luck and thanks again for all the detail cause maybe some day i'll use a lathe cause at the moment even if i owned one i don't have a place to put one.
 

gilr

Well-known member
Joined
Jul 26, 2008
Messages
300
Location
Richmond, VA
Re: The Lone Beech Garage Build Thread (60x46)

The type of relay is one that is either electrically held by one of the contacts on the run relay or magnetically held, and if the "hold" contact is burned you will see the symptom you have. You can look at the contacts and check to see if one is burned, and you may be able to clean it with very fine sandpaper. If not, I'd look for a replacement. The fact the motor runs while holding the start button down says the relay is at fault, unless the mice bit through a wire in the box. It may also jsut be mouse dirt under the contact that holds the relay energized. The relay drops out by the Stop button interrupting the power to the run relay. Should be easy to diagnose.

It should go without saying, but be sure the power to the lath is off before sticking your hands in the box!

Good luck,

Gil
 
Last edited:

wbrian63

Well-known member
Joined
Mar 31, 2010
Messages
843
Location
Houston, TX
Re: The Lone Beech Garage Build Thread (60x46)

The term for the type of relay you're using is "latching relay" - that will help in your search. Typically, latching relays have a coil that uses the same voltage as the circuit being switched and when contact is made, the electricity flowing through the contacts keep the relay energized. Typically, contact is broken by applying voltage to another pin on the relay which causes the coil to disengage. It could also be that the stop switch is a normally-closed unit and is how the common lead feeds the coils (both the forward and reverse relays could be fed together - interrupting the common lead to a relay that isn't energized has no effect), and when you press the switch, you interrupt the common side of the coil and it "drops out".

Or there are magnetically held versions as well.
 

Lotusnut

Well-known member
Joined
Aug 23, 2012
Messages
114
Location
Cambridge Ontario, Canada
Re: The Lone Beech Garage Build Thread (60x46)

Obviously the left relay is working to some degree. It does move and transmits power across its contacts... What causes the relay to "hold" itself in the "up - in contact" position? The search terms I've used to Google this issue have resulted in mostly information on automobile starter problems.

Scott

As there are only 2 relays and there does not seem to be a separate stop relay I am assuming that both relays get their ground for the coil through the stop button. If I am correct the stop button is normally closed button and opens when you push it. If you check and the stop switch opens continuity when you press it then the relays are electrically latching once activating and should stay latched until power is taken away either from removing the power or taking away the ground.

This is done by the upstream side of the coil having 2 sorces of power. The first source is pushing the appropriate button to provide power and move or activate the relay once the relay has activated on there will be 2 wires that come from the downstream side of the relay contacts. One will go to power the motor the other will go to the upstream side of the coil. This effectively electronically latches or holds the relay even after you release the button because there is a second source of power once the relay latches.

If I am correct the second wire from the downstream side of the contacts to the upstream side of the coil is open circuit on the forward direction relay.

Hope this is clear and helps it should be an easy fix.

Rob
 
OP
S

sbosecker

Well-known member
Joined
Sep 25, 2012
Messages
3,539
Location
Peachtree City, GA
Re: The Lone Beech Garage Build Thread (60x46)

Thanks guys...

I should have loaded these pictures of the inside of the Reversing Switch's enclosure with my post...


20180228-01.jpg 20180228-02.jpg 20180228-03.jpg

I'll be reviewing these diagrams in conjunction with the various comments that have been posted.

This is all very helpful!

Thanks again!

Scott
 

gilr

Well-known member
Joined
Jul 26, 2008
Messages
300
Location
Richmond, VA
Re: The Lone Beech Garage Build Thread (60x46)

The diagram indicates that the relay has a contact that is bypassed by the Forward or Reverse buttons and the Stop button is a normally closed contact that interrupts the power when pressed. The contact that is holding the relay energized is likely burnt or the wire is broken at the relay. The Forward button is effectively shorting across the relay contact until the relay energizes and keeps it "on" until the stop button is pressed and causes the relay to drop out. Should be easy enough to determine the problem. Feel free to ask any questions if you need help.

Gil
 
OP
S

sbosecker

Well-known member
Joined
Sep 25, 2012
Messages
3,539
Location
Peachtree City, GA
Re: The Lone Beech Garage Build Thread (60x46)

The diagram indicates that the relay has a contact that is bypassed by the Forward or Reverse buttons and the Stop button is a normally closed contact that interrupts the power when pressed. The contact that is holding the relay energized is likely burnt or the wire is broken at the relay. The Forward button is effectively shorting across the relay contact until the relay energizes and keeps it "on" until the stop button is pressed and causes the relay to drop out. Should be easy enough to determine the problem. Feel free to ask any questions if you need help.

Gil

Gil,

It took me a little while to trace out how this all worked:
From before the FWD button was pushed;
To just as the FWD button was pushed but the relay's contacts had not yet moved;
To after the FWD button was pushed and released.

Then I could see what you were trying to tell me ...or at least I think I've got it figured out. Ha!


20180228-04.jpg

I think the highlighted contact in schematic is not working - for whatever reason.

Did I get it right?

Scott
 
Last edited:

gilr

Well-known member
Joined
Jul 26, 2008
Messages
300
Location
Richmond, VA
Re: The Lone Beech Garage Build Thread (60x46)

Yep, you have the identified contact correct, if the armature is not moving, the relay is bad, if it moves, likely the contact is burned, pitted, or just dirty. you are zeroing in on the problem. The Forward contact bridges or "shorts" across the relay contact long enough to activate the relay and then it "holds" itself energized until the stop button is pressed and removes the current path from the relay and it drops out, shutting off the power to the relay and subsequently to the motor itself.
 

matt_i

Well-known member
Joined
Mar 14, 2008
Messages
10,758
Location
SE Michigan
Re: The Lone Beech Garage Build Thread (60x46)

The basic ladder logic is this for a stop-start circuit that use momentary buttons. I think you will find more specific help referring to this as a "seal" circuit. A latching relay is a mechanically latched contact that will be held for the next 3000 years with no credence to power on or power off until the unlatch signal is sent to release the mechanical latch. There's a PLC function that mimics the -(L)- and -(U)- function, but that's not what is going on with two ice-cube relays.

3_wire_control_01.jpg


If you ever wanted, here is a way to apply a jog pushbutton.

3_wire_control_02.jpg


Typically the forward and reverse are interlocked electrically...still searching for this ladder diagram...but the idea is a normally closed contact on one relay inhibits the coil on the opposite relay. Especially important in 3phase motor control as there's going to be a phase-to-phase dead short if they both are allowed to close at the same time.
 
OP
S

sbosecker

Well-known member
Joined
Sep 25, 2012
Messages
3,539
Location
Peachtree City, GA
Re: The Lone Beech Garage Build Thread (60x46)

Thursday - March 1, 2018


With the help of several GJer's I managed to locate on a schematic where the problem might lie with my 1956 Delta-Rockwell 11-Inch Metal Lathe's FWD button problem.


20180301-01.jpg

I went out to the LBG and flopped down on the floor so that I could look up at the bottom of the set of visible contacts associated with the FWD button. Sure enough, there appeared to be a small amount of fried mouse meat on one of the contacts (White Arrow).


20180301-02.jpg 20180301-03.jpg

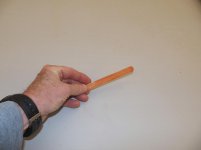
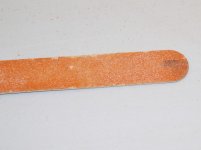
I took an emery board and scuffed that contact with it. The second picture shows the small amount of material on the emery board that was removed.

I really hadn't spent that much time cleaning that contact but I thought I'd plug in the lathe and try the switch.

Click HERE to see the results.

She runs! Not only does she run... she runs correctly!

Thanks to all who helped with troubleshooting this issue!


The mail arrived with a package today


20180301-04.jpg 20180301-05.jpg

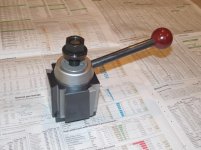
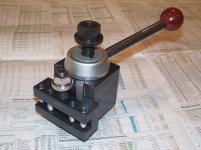
It was a Phase II AXA Quick Change Tool Post & 5 Tool Holders!


20180301-06.jpg 20180301-07.jpg

This get me one step closer to using one of the Metal Lathes as a tool.


A pretty good day today!


Scott
 
Last edited:

gilr

Well-known member
Joined
Jul 26, 2008
Messages
300
Location
Richmond, VA
Re: The Lone Beech Garage Build Thread (60x46)

Congratulations! A mouse will do it every time! Glad it worked.

Gil
 
To avoid these ads, REGISTER NOW!
Top Bottom