To avoid these ads, REGISTER NOW!

ZMotorsports Shop Projects 2.0

To avoid these ads, REGISTER NOW!
OP
Z

zmotorsports

ALLIANCE MEMBER
Joined
Oct 20, 2009
Messages
21,441
Location
Northern Utah
Well that explains it...towards the end of last week I was thinking where is Mike? Was going to start checking the Obits tonight...LOL...


Thanks for thinking of me Pat. It was nice to get away with the wife and relax.

Although reality slaps ya right back in the face when ya get home from a vacation.
 
OP
Z

zmotorsports

ALLIANCE MEMBER
Joined
Oct 20, 2009
Messages
21,441
Location
Northern Utah
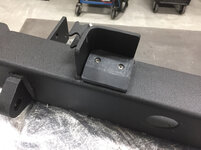
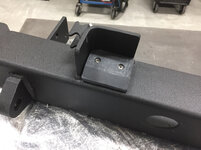
I arrived home from a week in Monument Valley with the wife and got right back to work. Picked up the bumper from the powder coater after a ten hour day at work then settled in for 4+ hours in the shop finishing up this TJ bumper and tire carrier so the owner can come and pick it up.

After unwrapping it.
06777b736617285ec9cec5994511b24c.jpg

9e4f5f7473cd24b3af2b53e15f262d07.jpg

Fabricated a small guide block from UHMW and drilled & tapped a couple of holes to fasten it in position.
4e9fafab0e63fbb64439e91607625903.jpg

Bumper installed, trailer plug wired in and ready to accept the carrier.
91624f19d188178e501fcad688364744.jpg

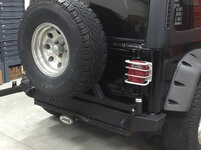
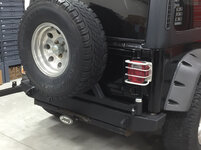
Carrier installed after pressing the races in and packing the bearings with grease.
deecde37de9b937b40033419eba2988b.jpg

Completed.
35772324e350b8fff1e0da4698b4da05.jpg

2483e75b8447696076a1a5cfd1ebdd7e.jpg

Thanks for looking.
 

Attachments

  • 06777b736617285ec9cec5994511b24c.jpg
    06777b736617285ec9cec5994511b24c.jpg
    722.1 KB · Views: 5
  • 2483e75b8447696076a1a5cfd1ebdd7e.jpg
    2483e75b8447696076a1a5cfd1ebdd7e.jpg
    664.3 KB · Views: 3
  • 9e4f5f7473cd24b3af2b53e15f262d07.jpg
    9e4f5f7473cd24b3af2b53e15f262d07.jpg
    749.6 KB · Views: 1
  • 4e9fafab0e63fbb64439e91607625903.jpg
    4e9fafab0e63fbb64439e91607625903.jpg
    750.6 KB · Views: 0
  • 35772324e350b8fff1e0da4698b4da05.jpg
    35772324e350b8fff1e0da4698b4da05.jpg
    686.3 KB · Views: 0
  • 91624f19d188178e501fcad688364744.jpg
    91624f19d188178e501fcad688364744.jpg
    677.7 KB · Views: 0
  • deecde37de9b937b40033419eba2988b.jpg
    deecde37de9b937b40033419eba2988b.jpg
    675 KB · Views: 1
Last edited:

Duker

Well-known member
Joined
Sep 25, 2010
Messages
10,861
Location
Livingston, TX
I don’t know Mike..... that spare tire just doesn’t look quite befitting enough for the that custom bumper & tire carrier... ! As always, great job!


Sent from my iPad using Tapatalk Pro
 
OP
Z

zmotorsports

ALLIANCE MEMBER
Joined
Oct 20, 2009
Messages
21,441
Location
Northern Utah
I don’t know Mike..... that spare tire just doesn’t look quite befitting enough for the that custom bumper & tire carrier... ! As always, great job!


Sent from my iPad using Tapatalk Pro

Thanks Duke. I keep joking with him that he needs to put a couple more inches of lift under it but he likes it the way it is.

To be honest, this particular Jeep TJ is pretty cool overall. He purchased it wrecked in 1999. It was a rollover and he rebuilt it, then about 5 years ago he tore it back down and repainted it as he had some of the usual spot welds popping loose and he asked me to address them. He is a pretty good mechanic as that is what he did for 50+ years but body work and welding are not his strong traits. I repaired a few of the welds on the doors and tailgate for him and his brother shot the black paint on it after addressing a couple of small rust spots.

The Jeep has nearly 200k miles on it and is still in very good mechanical condition but he did tell me he needs to address a small oil leak and a squeaky u-joint that just crept up. He installed a Webasto pre-heaters system to the Jeep about 15 years ago that is pretty cool. He can activate it with a remote key fob that starts the small burner and heats up the cooling system and circulates it so when he gets in to turn the key the engine is already warm and blowing hot air out the heater and defrost. I had one similar on my 1986 Suburban that I installed right after he did his.

We installed them so when we would get off work our vehicles would already be warmed up and ready to drive to alleviate the cold start conditions but an added benefit to my Suburban was when we were snowmobiling all of those years. We would pull into the parking lot after a long day of sledding, I would hit the key fob to ignite the burner and by the time the wife had here bibs and coat off she could jump in a nice warm vehicle while my son and I loaded the sleds and the truck was already warm as we were heading down off the mountain.:D Pretty slick setup but I don't really think it took off on the market as I have never talked to anyone else who had one. I did get a lot of comments on mine and my cousin said he would have a lot of people inquire about his as well but I don't think they sold very many.
 

aka Larry

Well-known member
Joined
May 2, 2012
Messages
8,086
Location
Eastern, NC
Looks awesome just like all the rest of your work Mike.

Do you mind commenting on the total cost? You can PM me if you'd rather not post it, or just say it's "NOYB", and that would be fine too.
 
OP
Z

zmotorsports

ALLIANCE MEMBER
Joined
Oct 20, 2009
Messages
21,441
Location
Northern Utah
Looks awesome just like all the rest of your work Mike.

Do you mind commenting on the total cost? You can PM me if you'd rather not post it, or just say it's "NOYB", and that would be fine too.

The parts I have been using such as the spindle kit, push pin, latch and D-ring mounts I have been purchasing from either A to Z fabrication or RuffStuff Specialties over the past couple of years and have gotten good quality components and pricing from both. Most of the hard parts used run around the $175-$200 range for a rear bumper. Powder coating usually runs around $150-175 depending on if I have more pieces such as Rotopax mounts or Hi-Lift jack mounts. Steel will generally run ~$250 per bumper/carrier, a little less for a front bumper as I don't have the square tubing for the carrier but I bulk up where the winch mounts.

Total for supplies usually run $575-$650 range for a rear bumper, $475-$550 for a front bumper. I then will generally charge around $600-$750 for labor depending on how elaborate the owner wants to go.

You can see how I actually price myself out of the market as most mass produced bumpers are in the $900-$1300 range. While I don't do many bumpers I do have a small clientele that actually prefer the one-off style that I offer and they can add their own personal touches to the design so no two are alike. To some people that is more important than actual cost, and those are the people I like to cater to. Even where I don't have my business any longer I still enjoy doing work for people when I have time and these bumpers are fun to do and it seems I learn something new or better way of building them with each one.

Thanks for your comments and for taking the time to follow along.
 

aka Larry

Well-known member
Joined
May 2, 2012
Messages
8,086
Location
Eastern, NC
You can see how I actually price myself out of the market as most mass produced bumpers are in the $900-$1300 range.

ALL your work is TOP NOTCH, and worth every penny you charge IMO. Since I'm not into the Jeep stuff, I just had no idea what one of your masterpieces would cost. Thanks for your response to what I'll admit was a nosey inquiry.
 
OP
Z

zmotorsports

ALLIANCE MEMBER
Joined
Oct 20, 2009
Messages
21,441
Location
Northern Utah
ALL your work is TOP NOTCH, and worth every penny you charge IMO. Since I'm not into the Jeep stuff, I just had no idea what one of your masterpieces would cost. Thanks for your response to what I'll admit was a nosey inquiry.

Thank you very much for your comments. I'm happy to share, no trade secrets or anything to hide here, what I can buy the components for is the same cost someone else can, although maybe steel and powder coating costs may vary slightly from area to area. We aim to be transparent as we are all here to try to help one another.

Again, thank you for taking the time to follow along and your comments are welcomed.
 
OP
Z

zmotorsports

ALLIANCE MEMBER
Joined
Oct 20, 2009
Messages
21,441
Location
Northern Utah
I posted up a video of the bumper/carrier build to my youtube channel last night if anyone is interested in seeing more detail.

Thanks for looking.
 
OP
Z

zmotorsports

ALLIANCE MEMBER
Joined
Oct 20, 2009
Messages
21,441
Location
Northern Utah
Welcome back Mike and nice work on the custom bumper, turned out very nicely.

Paco

Thanks Paco, I appreciate that. Took me a bit longer than I expected on this one but I didn't put in the late nights like I have in the past. Either way I'm glad it's out of the shop and the owner is happy so I can move on to the next project.:D
 

b-dog

Well-known member
Joined
Apr 24, 2015
Messages
241
Location
Lakewood, CO
You can see how I actually price myself out of the market as most mass produced bumpers are in the $900-$1300 range.

You're simply in a different market, custom. I run into this all the time with making or machining stuff. Some people expect making onesie twosie parts to compete with mass production, it just isn't going to happen. I tell people, if you can buy it then I'm not interested in making it. :beer:
 
OP
Z

zmotorsports

ALLIANCE MEMBER
Joined
Oct 20, 2009
Messages
21,441
Location
Northern Utah
You're simply in a different market, custom. I run into this all the time with making or machining stuff. Some people expect making onesie twosie parts to compete with mass production, it just isn't going to happen. I tell people, if you can buy it then I'm not interested in making it. :beer:

I couldn't agree more. I have people all the time tell me I should refine my process and start mass producing things, whether they are the bumpers I've built, Watts Link for my Monaco coach or down to the Chapstick lid that I machined for my wife.:bounce: Even back when I was fabricating custom ATV sand drag quads, I had people calling me to buy a standard chassis. I would tell them I have no "standard" chassis, all are custom and unique and if you want me to build one I would be happy to sit down and discuss it with them. I would have a very small percentage of people actually call me back and set up an appointment, most just wanted to make a phone call, get the cheapest price and have a chassis delivered to their doorstep. They didn't like it when I would tell them I would rather build the complete quad from the ground up including building the chassis, motor, all of the suspension, small custom touches and then painting the chassis and final assembly as a complete package vs. just selling a run of the mill chassis.

I would tell them that I have no desire to mass produce things and try to compete with those companies that do. Many of those companies are good at what they do, they produce a nice product and should be paid accordingly for their product development and production, granted there are also just as many companies that produce junk that I would never endorse but unfortunately there are a large group of people that are shopping with price and price only in mind. I am not nor am I ever going to attract those people, and for the most part I really don't want to.

Like you, I've carved out a niche for myself that although there isn't much I can't do in my shop, I like variety and working on various projects and solving various problems or issues. I like the problem solving aspect of machining and fabrication just as much as the profit aspect.

I am grateful that all those years ago that I made my mind up to be the one stop shop that never sacrifices safety or quality over price and I have been fortunate to have been able to stick to that mindset still.

Thanks for the comments and for stopping by.
 
OP
Z

zmotorsports

ALLIANCE MEMBER
Joined
Oct 20, 2009
Messages
21,441
Location
Northern Utah
The wife just called and said the sunroof on her Acura shattered on the way to work this morning.

Looks like I have my work cut out for me removing the headliner and mechanism to vacuum all of the glass out and replace the glass.
1cf82006fb134ee0aca07016dd014286.jpg

Looks like there goes any profit I made over the past two weeks of building a bumper.:mad:
 

Attachments

  • 1cf82006fb134ee0aca07016dd014286.jpg
    1cf82006fb134ee0aca07016dd014286.jpg
    581.6 KB · Views: 11
Last edited:
To avoid these ads, REGISTER NOW!

yaidunno

Well-known member
Joined
Feb 10, 2011
Messages
1,336
Location
WI
The Jeep bumper came together very nicely Mike! It looks right at home.

I don't envy your sunroof project though.
 

C_F

ALLIANCE MEMBER
Joined
Jan 21, 2005
Messages
9,675
Location
Utah...SNOW BLOWS!
Aw man, that ***** about the sunroof. How did that happen?

I have two vehicles with sunroofs, and the thought of one getting broken pops into my head pretty much every time my windshield gets hit with a big rock on the freeway.
 

GRN96WS6

Well-known member
Joined
Dec 23, 2012
Messages
2,249
Location
SOMD
I've never seen a sunroof shatter, wow. That *****, can you just get the glass?
 
OP
Z

zmotorsports

ALLIANCE MEMBER
Joined
Oct 20, 2009
Messages
21,441
Location
Northern Utah
Aw man, that ***** about the sunroof. How did that happen?

I have two vehicles with sunroofs, and the thought of one getting broken pops into my head pretty much every time my windshield gets hit with a big rock on the freeway.


I think that’s exactly what happened, a rock. My wife said she saw it bounce in front of the car and thought it hit the windshield then heard the pop and had glass on her.

She said she didn’t think the rock was that big. I told her if it was big enough to see coming at you, it was bigger than you think.
I’m just thankful she didn’t get hurt or get in an accident. The car can be fixed.
 
OP
Z

zmotorsports

ALLIANCE MEMBER
Joined
Oct 20, 2009
Messages
21,441
Location
Northern Utah
I've never seen a sunroof shatter, wow. That *****, can you just get the glass?


Yes, I was able to purchase just the glass, as expensive as it was I’m glad I didn’t have to buy anything more. The glass alone would have only been about a fifteen minute job, there’s only four screws holding the glass assembly to the carriage. However, with all of the shards of glass I wanted to completely disassemble the headliner as well as the track system to ensure I get all of the pieces of glass vacuumed up and none get lodged in the track or somewhere it can cause damage.
 
OP
Z

zmotorsports

ALLIANCE MEMBER
Joined
Oct 20, 2009
Messages
21,441
Location
Northern Utah
It hasn’t been a great day around the zmotorsports shop and home. I moved my son’s Jeep outside so I could pull the wife’s car into the front bay. It started and ran perfectly, then when my son went to start it and move it to the other bay after cleaning up it wouldn’t stay running. We diagnosed it and discovered the IAC motor took a ****.

I guess I should count my blessings that it crapped out in the back yard and not out somewhere that I would have gone and rescued him from.

It’s been a hell if a day. I told my wife some days your the windshield, some days your the bug. Today I was the bug. [emoji15]
 
OP
Z

zmotorsports

ALLIANCE MEMBER
Joined
Oct 20, 2009
Messages
21,441
Location
Northern Utah

ttpete

Well-known member
Joined
Mar 8, 2011
Messages
6,737
Location
Dearborn, MI
Thanks Kevin, I've seen quite a few similar threads on various forums so I just chalked it up to the car being at the exact right place at the exact right time for the rock to hit the sunroof.:mad:

My new Explorer Platinum came with TWO sunroofs. I think I'll stash a piece of plastic and a roll of masking tape in the spare well just in case.
 
OP
Z

zmotorsports

ALLIANCE MEMBER
Joined
Oct 20, 2009
Messages
21,441
Location
Northern Utah
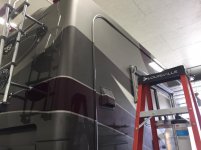
On to more damage control or repair if you will. Two weeks ago when the wife and I were on vacation in Monument Valley and southern Utah we had one night outside of Kayenta, AZ and then the drive to Torrey, skirting around Lake Powell through Hanksville, that we experienced some HELLACIOUS winds, sandstorm is actually more accurate. Anyways it seemed to have scratched our coach a bit so tonight I started polishing out the paint. Holy **** that’s a lot of real estate to polish.

I don’t know if will show or not but it’s a bit dull with some scratches.
IMG_3337.jpg


I started with 3M Finesse It II with a yellow polishing pad followed by 3M Machine Glaze and a foam pad.
IMG_3338.jpg

After both steps on the rear half of the curbside of the coach.
IMG_3339.jpg

IMG_3340.jpg

Now to continue around the coach over the next few nights. Up and down the ladder wore me out tonight.
 
Last edited:

bmxdad

Well-known member
Joined
Feb 18, 2014
Messages
2,539
Location
Puyallup, WA
On to more damage control or repair if you will. Two weeks ago when the wife and I were on vacation in Monument Valley and southern Utah we had one night outside of Kayenta, AZ and then the drive to Torrey, skirting around Lake Powell through Hanksville, that we experienced some HELLACIOUS winds, sandstorm is actually more accurate. Anyways it seemed to have scratched our coach a bit so tonight I started polishing out the paint. Holy **** that’s a lot of real estate to polish.

I don’t know if will show or not but it’s a bit dull with some scratches.


Now to continue around the coach over the next few nights. Up and down the ladder wore me out tonight.

Curious if this is removing the top clear coat, or burnishing it. How often can you do this before your cutting into the paint?
 
OP
Z

zmotorsports

ALLIANCE MEMBER
Joined
Oct 20, 2009
Messages
21,441
Location
Northern Utah
Curious if this is removing the top clear coat, or burnishing it. How often can you do this before your cutting into the paint?

There's a lot of clear on this and a long way from the paint. Think of it in terms of the clearcoat not being just a single layer but more of in terms of mil thickness, this will help to visualize it.

That is unless you catch a corner or edge wrong then you can get down to primer rather quickly. It takes some practice but after a short while you can get the feel for your buffer, the angle, speed and direction. You begin to get as comfortable as the feel of your own _____, but you get my point.

You also want to ensure that the surface is clean before you even begin with the machine polish or you will just imbed the grit into the clear. Whenever I would cut & buff paint jobs that I had completed I felt better about it because I was the one that had the gun in his hand and knew how much clear was going onto the vehicle. I have to be a little more cautious on one that I didn't actually spray.

Luckily I didn't have to sand any of this as the scratches were not that severe, just enough that you could detect them in the lighting. I skipped over the course 3M Microfinishing Compount and went right to the Finesse It polish with a yellow wool pad. That's what did the most work, then I followed it with 3M's Machine Glaze and a foam pad that removed the swirl marks from the previous step.
 
OP
Z

zmotorsports

ALLIANCE MEMBER
Joined
Oct 20, 2009
Messages
21,441
Location
Northern Utah
I also thought it might be worth mentioning that with urethane clear coat there is a balancing act as far as heat goes. For the first compounding stage you have to create enough heat when buffing to get the clear to do what you want but not so much that it removes it or takes it down to the color, or worse the primer or bare steel. To control this heat on the first step I generally keep a water bottle handy to spritz the surface as I'm buffing to help control that heat. Not enough to get the pad wet or saturated, just enough to keep the surface from heating up too much.

I generally don't worry too awfully much about the heat on the next couple of steps because I cover a larger area and ensure I'm working the surface in a manner than controls the heat by machine only. Things like keeping the buffing wheel running off a panel vs. coming back onto a panel are key. Again, once you get the feel for your machine it becomes intuitive or second nature where you don't even think about it, you just flow with the machine and watch the surface. The final step with the machine is just using a glaze to remove the swirl marks and create a uniform lustrous finish that looks about 3' thick.
 

ttpete

Well-known member
Joined
Mar 8, 2011
Messages
6,737
Location
Dearborn, MI
There's a lot of clear on this and a long way from the paint. Think of it in terms of the clearcoat not being just a single layer but more of in terms of mil thickness, this will help to visualize it.

That is unless you catch a corner or edge wrong then you can get down to primer rather quickly. It takes some practice but after a short while you can get the feel for your buffer, the angle, speed and direction. You begin to get as comfortable as the feel of your own _____, but you get my point.

You also want to ensure that the surface is clean before you even begin with the machine polish or you will just imbed the grit into the clear. Whenever I would cut & buff paint jobs that I had completed I felt better about it because I was the one that had the gun in his hand and knew how much clear was going onto the vehicle. I have to be a little more cautious on one that I didn't actually spray.

Luckily I didn't have to sand any of this as the scratches were not that severe, just enough that you could detect them in the lighting. I skipped over the course 3M Microfinishing Compount and went right to the Finesse It polish with a yellow wool pad. That's what did the most work, then I followed it with 3M's Machine Glaze and a foam pad that removed the swirl marks from the previous step.

Don't know if you have found them, but the 3M Finesse-It microfiber cloths are the best and softest I've found. I use Hand Glaze on the bikes and use the cloths to buff it out.
 
To avoid these ads, REGISTER NOW!
Top Bottom