To avoid these ads, REGISTER NOW!

ZMotorsports Shop Projects 2.0

OP
Z

zmotorsports

ALLIANCE MEMBER
Joined
Oct 20, 2009
Messages
21,441
Location
Northern Utah
Don't know if you have found them, but the 3M Finesse-It microfiber cloths are the best and softest I've found. I use Hand Glaze on the bikes and use the cloths to buff it out.

I'll have to try theirs, I have been using some microfiber towels that I purchased elsewhere and still have quite a few left.

I too have used the Imperial Hand Glaze, it used to be the last step right before I handed the keys back over to the owner but lately after the Machine Glaze, I've been putting a good liquid carnauba wax or sealant down, depending on what it is. For anything show related I would still use the Hand Glaze though. That was all I used to use on my street rods/musclecars and paint always had that wet look, loved it.
 
To avoid these ads, REGISTER NOW!
OP
Z

zmotorsports

ALLIANCE MEMBER
Joined
Oct 20, 2009
Messages
21,441
Location
Northern Utah
What another long *** day. I was able to sneak out of work a bit early and upon arriving home I jumped right in and picked up where I left off yesterday polishing the paint on the coach. My arms feel like Jello tonight.

Here is the last step, 3M Machine Glaze with a foam pad at around 1000 RPM and very light pressure to remove the slight swirl marks from the previous step.
IMG_3343.jpg

Here are a couple of close ups. Pretty damn good depth and reflection if I do say so myself.
IMG_3344.jpg

IMG_3345.jpg

Looking down the curb side.
IMG_3342.jpg

Thanks for looking.
 
Last edited:

slodat

ALLIANCE MEMBER
Joined
Feb 6, 2010
Messages
3,682
Location
Central-ish, WA
You're simply in a different market, custom. I run into this all the time with making or machining stuff. Some people expect making onesie twosie parts to compete with mass production, it just isn't going to happen. I tell people, if you can buy it then I'm not interested in making it. :beer:

Exactly this! Guys at my day job know I have a shop full of equipment. I often get asked if I can "make them something", only to find out they can buy it for a hundred bucks..
 

Bob Heine

ALLIANCE MEMBER
Joined
Oct 24, 2009
Messages
10,708
Location
Boca Raton, Florida
What another long *** day. I was able to sneak out of work a bit early and upon arriving home I jumped right in and picked up where I left off yesterday polishing the paint on the coach. My arms feel like Jello tonight.
Mike, have you considered getting a light weight variable speed buffer? I can't imagine buffing the sides of a coach with that B&D monster. I bought a Flex L3403 variable speed buffer that weighs 4.8 pounds and works great with 6-inch pads. It isn't powerful enough to run 7- or 9-inch pads but the lighter weight means I can use it one-handed for a much longer time before Jello arm sets in.

Flex also makes a more powerful model (PE 14-2 150) that weighs 5 pounds but is limited to 8" pads. I think Griot, Rupes and Torq also offer lightweight buffers but I have no experience with them.

I suspect one of your friends, customers or one of the businesses you deal with has one you could try out.
 

Bob Heine

ALLIANCE MEMBER
Joined
Oct 24, 2009
Messages
10,708
Location
Boca Raton, Florida
Exactly this! Guys at my day job know I have a shop full of equipment. I often get asked if I can "make them something", only to find out they can buy it for a hundred bucks..
Steven, are they as eager to pay for the tooling to do their job? A spare router or a roll of stainless MIG wire? I'm guessing NOT!
 
OP
Z

zmotorsports

ALLIANCE MEMBER
Joined
Oct 20, 2009
Messages
21,441
Location
Northern Utah
Mike, have you considered getting a light weight variable speed buffer? I can't imagine buffing the sides of a coach with that B&D monster. I bought a Flex L3403 variable speed buffer that weighs 4.8 pounds and works great with 6-inch pads. It isn't powerful enough to run 7- or 9-inch pads but the lighter weight means I can use it one-handed for a much longer time before Jello arm sets in.

Flex also makes a more powerful model (PE 14-2 150) that weighs 5 pounds but is limited to 8" pads. I think Griot, Rupes and Torq also offer lightweight buffers but I have no experience with them.

I suspect one of your friends, customers or one of the businesses you deal with has one you could try out.

Thanks for chiming in Bob.

I won't give up my large 9" pads or heavy duty variable speed buffer as I don't feel you get the same results with the smaller DA style. Like I mentioned above, I have a good feel for my buffer and don't even have to think about how or where to move it as I have done so many vehicles with it over the years. I think standing on the ladder was more tiring than actually using the buffer because I get so tense while standing on a 3" wide rung of a ladder and I already don't like heights. When I painted my previous coach I actually borrowed some scaffolding from a friend and that helped immensely. I would rather do several street rods or muscle cars compared to a full size coach, but I don't trust anyone else to do it right.:dunno:

As for the smaller, lighter 6" units, I have the Griots DA unit, which is a nice quality Da and is much lighter than my B&D. It is well balanced and has a fairly nice tight pattern that is smooth and doesn't induce much fatigue but I feel that it isn't up to the task that I required. The Griots DA (and similar units) really shines at applying a liquid wax or sealant and not the best suited for scratch removal or oxidation removal, for those tasks I will stick to my heavy old B&D.:D

I appreciate the comments and for following along Bob.
 

bmxdad

Well-known member
Joined
Feb 18, 2014
Messages
2,539
Location
Puyallup, WA
I also thought it might be worth mentioning that with urethane clear coat there is a balancing act as far as heat goes. For the first compounding stage you have to create enough heat when buffing to get the clear to do what you want but not so much that it removes it or takes it down to the color, or worse the primer or bare steel. To control this heat on the first step I generally keep a water bottle handy to spritz the surface as I'm buffing to help control that heat. Not enough to get the pad wet or saturated, just enough to keep the surface from heating up too much.

I generally don't worry too awfully much about the heat on the next couple of steps because I cover a larger area and ensure I'm working the surface in a manner than controls the heat by machine only. Things like keeping the buffing wheel running off a panel vs. coming back onto a panel are key. Again, once you get the feel for your machine it becomes intuitive or second nature where you don't even think about it, you just flow with the machine and watch the surface. The final step with the machine is just using a glaze to remove the swirl marks and create a uniform lustrous finish that looks about 3' thick.

So your not actually removing clear coat but ... softening it, then resmoothing? Hope that made sense .... thanks for the info too.
 
OP
Z

zmotorsports

ALLIANCE MEMBER
Joined
Oct 20, 2009
Messages
21,441
Location
Northern Utah
So your not actually removing clear coat but ... softening it, then resmoothing? Hope that made sense .... thanks for the info too.

You are correct for the most part. When color sanding and the first course compounding step you are actually removing a small amount of mil thickness of the clear coat. The next couple of steps, although a very small amount may be removed, it is more a balancing act of creating just enough heat that the clear is being smoothed out and the scratches from the previous step are being filled/leveled.

I hope that translated or come across the way it did in my head.:D
 

C_F

ALLIANCE MEMBER
Joined
Jan 21, 2005
Messages
9,675
Location
Utah...SNOW BLOWS!
Mike, I'm glad you posted your thoughts on the Griot's DA unit. I am going to be buying their machine very soon, due to my old "Wax Master" machine dying on me last fall. I've heard lots of positive feedback on the Griots unit, so one more bit of positive is good. :)

BTW, I have a BD unit much like yours, that I've owned for probably 25 years. The first couple polish jobs I did with it, I discovered in a hurry how much material it will remove if you put too much pressure on it. :lol: Woops!
 

bmxdad

Well-known member
Joined
Feb 18, 2014
Messages
2,539
Location
Puyallup, WA
You are correct for the most part. When color sanding and the first course compounding step you are actually removing a small amount of mil thickness of the clear coat. The next couple of steps, although a very small amount may be removed, it is more a balancing act of creating just enough heat that the clear is being smoothed out and the scratches from the previous step are being filled/leveled.

I hope that translated or come across the way it did in my head.:D

Ahh ... got it. Thanks!!
 
OP
Z

zmotorsports

ALLIANCE MEMBER
Joined
Oct 20, 2009
Messages
21,441
Location
Northern Utah
Mike, I'm glad you posted your thoughts on the Griot's DA unit. I am going to be buying their machine very soon, due to my old "Wax Master" machine dying on me last fall. I've heard lots of positive feedback on the Griots unit, so one more bit of positive is good. :)


BTW, I have a BD unit much like yours, that I've owned for probably 25 years. The first couple polish jobs I did with it, I discovered in a hurry how much material it will remove if you put too much pressure on it. :lol: Woops!


I think you’ll be pleased with the Griots DA.

My B&D buffer is also about 25 years old and still going strong, it’s never failed me. You definitely have to be mindful of the amount of pressure you apply. For me I’ve found that it varies from body panel shape, where at on the panel (middle vs edge) and what step in the buffing/polishing step I’m on with what compound.

Buffing and polishing is one of those things that you really can’t explain without breaking a few eggs, or burning a few edges rather[emoji12]. When first starting out painting about 35 years ago, and after going through to basecoat or primer, I would tape the opposing edges to prevent burning until I really developed a feel for it. I don’t do much painting at all these days but on occasion I will take on a detailing job on a classic for a friend.
 
OP
Z

zmotorsports

ALLIANCE MEMBER
Joined
Oct 20, 2009
Messages
21,441
Location
Northern Utah
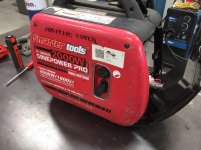
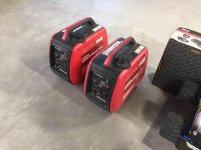
My electrician buddy that helped me on my shop called me yesterday asking if I had time to look at a couple of small 2k watt generators that they use on the job site that had been sitting for a while and not running right. He dropped them off today while I was at work so I tore into them and got them up and running tonight.

They are a little import generator that have the Yamaha MZ80 engine.
IMG_3347.jpg

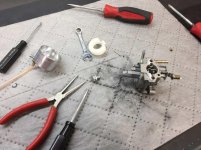
Side cover off and removing the carburetor.
IMG_3348.jpg

Carburetor disassembled on the bench for cleaning.
IMG_3349.jpg

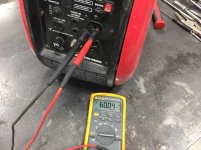
The thing to remember with generators is to pay more attention to voltage and frequency and be less worried about RPM.

I generally set them around 122-123VAC with no-load.
IMG_3350.jpg

And approx. 60-62 Hz no-load but this one seems to hold well right at 60Hz even under load so I left it at 123 volts and 60 Hertz
IMG_3351.jpg

Both done and ready for him to come and pick them up.
IMG_3352.jpg
 
Last edited:
OP
Z

zmotorsports

ALLIANCE MEMBER
Joined
Oct 20, 2009
Messages
21,441
Location
Northern Utah
They're adjustable? I though that was built into them.

Yes and no. They have what I would call a course adjustment based on the bracket that holds the actuator. This is on most of the newer stuff, anything older than about 10 years or so will be fully adjustable.
 
OP
Z

zmotorsports

ALLIANCE MEMBER
Joined
Oct 20, 2009
Messages
21,441
Location
Northern Utah
Today was “dig my *** out day” as I’ve been inundated with work lately and I want to clear my white board.

I’ve had this flywheel from a 1931 Ford Model A in the shop for nearly a month now and I’m sure the guy is getting anxious to get his car back together.

He wanted me to lighten the flywheel approx 12-14 pounds, emphasis on closer to 14 lbs.

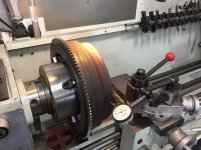
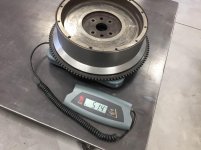
Started with a 62-pound flywheel.
IMG_3356.jpg

Had to remove the gap for this one.
IMG_3357.jpg

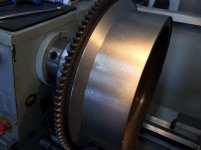
Dialing it in on the 8” four-jaw chuck.
IMG_3358.jpg

Outermost ring turned down.
IMG_3359.jpg

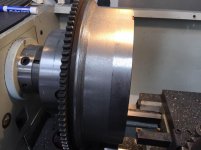
Next diameter turned off. I stopped each pass just shy of the previous pass to create a changer that I could come in and clean up later.
IMG_3361.jpg

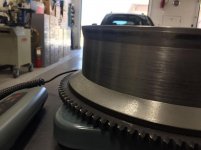
I turned my compound slide to cut a 30-degree chamfer outward towards the ring gear. With the Bork g bar upside down I turned the lathe backwards to cut the chamfer.
IMG_3363.jpg

Surface finish turned out great.
IMG_3364.jpg

Weighed it and got an idea of how much more to remove.
IMG_3365.jpg
 
Last edited:
OP
Z

zmotorsports

ALLIANCE MEMBER
Joined
Oct 20, 2009
Messages
21,441
Location
Northern Utah
Cut a step just down from the pressure plate mounting then cleaned up the chamfers on each step.
IMG_3368.jpg

Weighed it one last time and landed at 13.8 pounds removed. Perfect.
IMG_3367.jpg

Called the owner to come and get it and I moved on to the next item on the white board.

Thanks for looking.
 

Finallygotit

ALLIANCE MEMBER
Joined
Jul 6, 2013
Messages
4,096
Location
Tucson, AZ
Really nice job on the banger flywheel Mike! :thumbup: That should help it rev quicker.

Now you gotta clean up 14 pounds of cast iron chips from the lathe.

:beer:
 

LXCam

ALLIANCE MEMBER
Joined
Apr 23, 2013
Messages
19,177
Location
AZ
We have close to the same lathe Mike. There's been a couple of occasions where I needed to remove the gap bed to do a task but have chickened out every time. Thankfully I have an option of walking a couple properties down and using my buddies monster instead. Anyhow great job on the flywheel and I'm jealous of your detailing skills, the coach turned out awesome.
 
To avoid these ads, REGISTER NOW!

WhiffySpark

Well-known member
Joined
Oct 22, 2009
Messages
6,252
I used the rag shack for microfibers.

Collinite 845 is still one of my favorite sealants. I used meguairs and optium(I can't spell that for the life of me today). Lake county purple wool was one of my favorite pads
 
OP
Z

zmotorsports

ALLIANCE MEMBER
Joined
Oct 20, 2009
Messages
21,441
Location
Northern Utah
Thanks for the comments guys.

My cousin just picked up his flywheel and seemed pretty happy with it.

In all honesty, even though this was a very messy job and I don’t particularly care for machining cast iron, it was a fun job and had to make me think a bit.
 
OP
Z

zmotorsports

ALLIANCE MEMBER
Joined
Oct 20, 2009
Messages
21,441
Location
Northern Utah
We got home from breakfast this morning and I decided to tackle a little preventive maintenance and cleaning of our grille as my wife picked up some good looking steaks to grille for dinner.

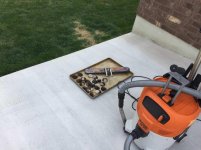
I disassembled the grille, removed and cleaned the ceramic briquettes, vacuumed the inside, cleaned the burner assembly then pressure washed the whole thing as well as the deck.
IMG_3378.jpg

IMG_3377.jpg

Now to sit back, relax and enjoy our Sunday afternoon before the work week begins again.
 
Last edited:

rmack898

Well-known member
Joined
Jan 23, 2007
Messages
3,196
Location
Honu Grove NE Florida
Mike,

I'm not too fond of turning cast iron on my lathe either, but when I do I try to control the swarf.
I have several welding magnets that put in plastic zip lock bags. I place the bagged magnets around the lathe and when the job is done, I just hold the bag/magnet over the garbage pail and remove the magnet from the bag. It does a pretty good job of keeping the CI out of the machine.
 
OP
Z

zmotorsports

ALLIANCE MEMBER
Joined
Oct 20, 2009
Messages
21,441
Location
Northern Utah
Mike,

I'm not too fond of turning cast iron on my lathe either, but when I do I try to control the swarf.
I have several welding magnets that put in plastic zip lock bags. I place the bagged magnets around the lathe and when the job is done, I just hold the bag/magnet over the garbage pail and remove the magnet from the bag. It does a pretty good job of keeping the CI out of the machine.

The magnet in a bag is a good idea Mac, thanks for that. I ended up holding the nozzle from the shop vac for some of it which helped. Usually with cast iron I lay shop rags out over the bed ways and carriage but this particular job was too big and not enough space between the work piece and the bed for rags.

Then afterwards lots and lots of vacuuming and wiping down of the lathe.
 
OP
Z

zmotorsports

ALLIANCE MEMBER
Joined
Oct 20, 2009
Messages
21,441
Location
Northern Utah
Where did that magic number come from Mike? Why not 16 or 18 lbs lighter? I know jack about it, just curious as my race car's (aluminum) flywheel is like 12 lbs total.

Don't know if there's anything magic about the number but that where the old timers that we talked to said to shoot for as far as weight reduction to strike a nice compromise between the OEM flywheel and the V8 flywheel. We will know soon enough.:D
 
OP
Z

zmotorsports

ALLIANCE MEMBER
Joined
Oct 20, 2009
Messages
21,441
Location
Northern Utah
mike....dont tell me you have not done anything for two weeks.hope your on vacation.

Yes, the wife and I have been on vacation for the past week and I was busy getting things ready for a few days prior. Sorry for my absence but thank you for noticing.:beer:

I have plans to redo some sections in my front yard this week but then I promise I will get back in the shop as I have a lot of projects lined out that need to be completed.

Thanks for checking in on my thread.
 
OP
Z

zmotorsports

ALLIANCE MEMBER
Joined
Oct 20, 2009
Messages
21,441
Location
Northern Utah
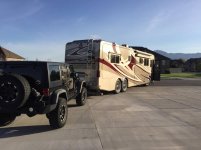
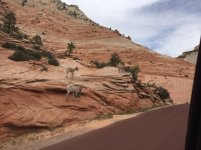
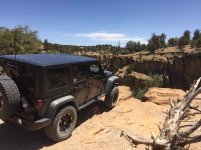
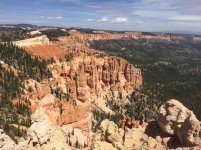
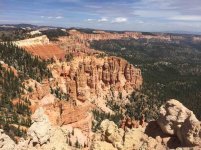
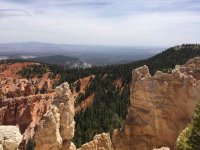
I thought I would post up a few pictures from mine and my wife’s trip last week. We met some friends in Kanab, UT to do some wheeling and the wife and I stopped off at Bryce Canyon NP for a few days on the return trip.

Hooked up and heading out.
IMG_3387.jpg

Some mountain sheep that crossed the road in front of us on highway 89.
IMG_3404.jpg

IMG_3400.jpg

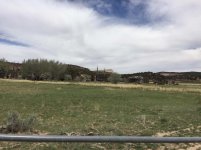
I’m sure this is going to be hard to make out but this was the set from the television show Gunsmoke. This was located in an area outside of Kanab in Johnson Canyon.
IMG_3407.jpg

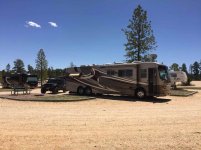
Our campsite at Ruby’s Inn just outside the park entrance to Bryce.
IMG_3414.jpg

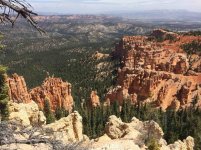
A pullout for lunch one day just above a large washed out canyon.
IMG_3416.jpg

IMG_3417.jpg
 

Attachments

  • IMG_3426.jpg
    IMG_3426.jpg
    165.7 KB · Views: 179

C_F

ALLIANCE MEMBER
Joined
Jan 21, 2005
Messages
9,675
Location
Utah...SNOW BLOWS!
Great photos, thanks for sharing. :thumbup: I haven't been to Bryce canyon since I was a kid. Seeing those photos kinda makes me want to go back for a visit.
 

dittle fart around

Well-known member
Joined
Jan 9, 2011
Messages
2,455
Location
Vancouver, Washington, USA
Lastly a few pictures from inside Bryce Canyon NP.


attachment.php

Took the family there on one of our trips from Portland, Or to Phoenix, Az. The older boys and I went to the bottom from one of the viewing areas. My wife and youngest stayed at the top.

Bryce Canyon's the most beautiful place we've seen, hoping someday to see the rest of the national parks in Utah and Arizona.
 
OP
Z

zmotorsports

ALLIANCE MEMBER
Joined
Oct 20, 2009
Messages
21,441
Location
Northern Utah
Great photos, thanks for sharing. :thumbup: I haven't been to Bryce canyon since I was a kid. Seeing those photos kinda makes me want to go back for a visit.


Yeah you really need to make an effort to go back. We’ve gone about 6 or 7 times over the past 15 years or so. It’s one of our favorite national parks. This last week was hands down the busiest we’ve ever seen it though. They are now running shuttle buses in and out like Zion NP.
 
OP
Z

zmotorsports

ALLIANCE MEMBER
Joined
Oct 20, 2009
Messages
21,441
Location
Northern Utah
Took the family there on one of our trips from Portland, Or to Phoenix, Az. The older boys and I went to the bottom from one of the viewing areas. My wife and youngest stayed at the top.


Bryce Canyon's the most beautiful place we've seen, hoping someday to see the rest of the national parks in Utah and Arizona.


It’s one of our favorite national parks as well John. Capitol Reef and Arches are two more of our favorite national parks in Utah.
 
OP
Z

zmotorsports

ALLIANCE MEMBER
Joined
Oct 20, 2009
Messages
21,441
Location
Northern Utah
Great pictures Mike. It's nice when you're on vacation, it makes it easier for me to catch up on your thread.


I hope you were able to get caught up Eric. Not much going on in the shop this week as I’m working in the yard but then I have some projects in the shop to get working on.
 
OP
Z

zmotorsports

ALLIANCE MEMBER
Joined
Oct 20, 2009
Messages
21,441
Location
Northern Utah
Today was the first day in two weeks that I’ve been able to work in the shop and it felt GREAT! The yard is finally DONE!

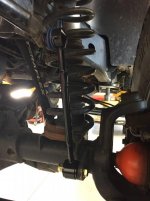
Last week while the wife and I were wheeling in Kanab I picked up a slight rattle in the front of our Jeep. I suspected sway bar links (again) and sure enough when I crawled under it I found slop in the link ends but with all of my yard work last week I haven’t had time to do anything about it until today.

I have had more issues with aftermarket sway bar links over the past several years between my Jeep and a few others that I’ve worked on. I’ve used BDS, JKS, Terafkex, Synergy and lastly ORE. I don’t get what is so difficult to manufacture a link that will live and live quietly. The ones I’ve had the best luck with are the ones that I fabricated about two years ago until one broke in the heat affected zone of one of my welds during our August 2017 trip to Ouray. They used a rubber encapsulated bushing are we’re very quiet for the couple of years and nearly 25k miles they were on my Jeep. I was going to merely repair them but when I built my Dynatrac Prorock 44 last year I just went ahead and bought a pair of the ORE (Off-Road Evolution) ones and they didn’t make it 8 months before they started rattling and carrying on. My wife said she could barely hear them last week but I heard them loud and clear and it drove me nuts most of the week during our vacation.

Most of the people we wheel with have so many noises and rattles they probably can’t detect any new noises anyways but mine is pretty tight so when a noise arises I hear it immediately. I don’t even run my clevis pins because I don’t like them banging and clanging around off road, I keep one handy next to my recovery strap so when I need one in a hurry it’s within easy reach but I don’t like them making noise hanging off my bumpers like most people on the trails.

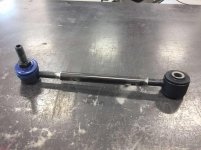
I decided I had really good success with the OEM style sway bar links on my last couple of Jeeps so I purchased two rear sway bar links yesterday from my local NAPA and just went ahead and cut & lengthened them to the correct length rather than keep trying different aftermarket ones. We’ll see how long these last.

Links measured about 8.75” and I need them to be 11” center of stud to center of bolt hole.
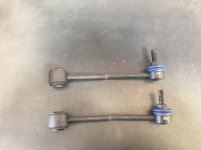
IMG_3467.jpg

I cut a couple pieces of .625” tubing by .065” wall thickness so it measured 1/2”ID which would allow the links to slip fit for welding. I’ll weld around the ends as well as drill a couple of holes for Rosette welds.
IMG_3468.jpg

Test fitting.
IMG_3469.jpg

Rosette welds done and letting cool before welding around the ends of the tubing.
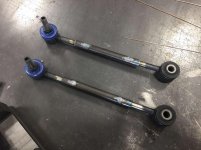
IMG_3470.jpg

Links completed and they measure exactly 11” on center.
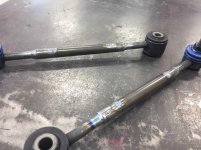
IMG_3473.jpg

Painted with Eastwood’s Semi-Gloss Extreme chassis black.
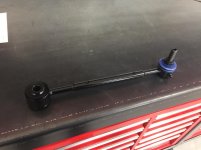
IMG_3474.jpg

Installed and job completed.
IMG_3475.jpg


The wife and I just returned from a Saturday afternoon drive and dinner and it is quiet as can be again.
 
Last edited:
OP
Z

zmotorsports

ALLIANCE MEMBER
Joined
Oct 20, 2009
Messages
21,441
Location
Northern Utah
While the wife and I were out cruising around yesterday a flatbed pickup blew past me and flipped a rock up putting a dime sized chip in the windshield. This morning before we went to breakfast I went out to the shop to repair it.

Mirror placed on the inside to watch the resin flow into the chip.
IMG_3477.jpg

Bridge in place with resin injected into the void.
IMG_3478.jpg

UV light in place to cure the resin.
IMG_3479.jpg

Completed. Thus one turned out pretty good. I’m slowly getting the hang of it for the fourth one I’ve repaired so far, although I would prefer to not have to fix rock chips.
IMG_3480.jpg

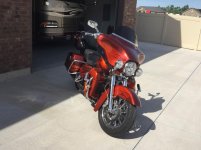
I then pulled the bike out and gave it a quick detail before heading to breakfast and a Sunday ride.
IMG_3481.jpg

IMG_3482.jpg

My son just put a new battery in his Street Bob yesterday so he was itching for a ride as well. He also informed my wife and I that he was going to put his up for sale as he has been looking at new bikes. He went and rode a couple yesterday as well as some of the ones we’ve worked on over the past couple of years and has it narrowed down to either a Road Glide or a Street Glide, leaning heavily towards the latter. I think it may have something to do with the young lady that’s been in his life the past several months and him wanting a bike a little more suited for two-up riding.
 
Last edited:
To avoid these ads, REGISTER NOW!
Top Bottom