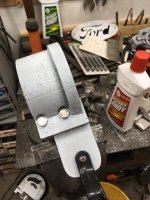
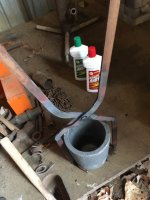
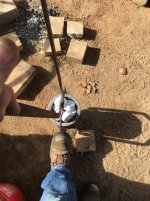
That top bracket looks anemic now!
 Yeah, hope it doesn't break.
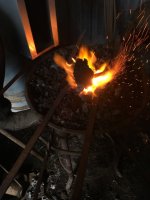
Good size to do hot stamping too.
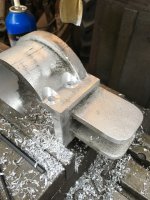
 And hot forming and cold forming. I hot punched the hinge holes on the fly press. Quick and easy, and by punching hot you spread the metal and have more left than drilling or cold punching.
Maybe some wider material for the arches. Say 2"-3" flatbar. Larger contact area on the crucible for better support and less chance of damage too. Put a very slight taper to them... either welded on at a slight angle or curved to form a subtle cone ie. stretch/thin the top edge of the material using the fly-press <- that right there is why I would really love a fly-press.
The crucibles are quite curved, and if you dish the support pads to fit they will only fit that crucible. I feel like the one inch pads are wide enough, they are cylindrical but are cocked to contact the crucible well.
I'm thinking you need a fly press. Have you looked locally? They do take a stout base well anchored. You've surely seen the guys on YT pounding a big piece of yellow steel with the fly press bouncing all around.
Someone has already cleaned up a lot, filling two large skips with rotting building rubble that was dumped there before we bought the place. Still some organising to do when someone finally gets additional discretionary funding approval. I bought the styrene for another purpose long since forgotten and it was just a good place to store it. Two large blocks of the stuff they put in the ground to stabilise it before putting down a concrete pad prior to building a house on top. Always wanted to make some concrete bench plinths and perhaps a large bowl fire pit or some planters. Would be a great way to use it up come to think about it.
I have some scrap aluminium t-slot to inlay in the table - some ideas for fixtures to do spinning and profile cutting I'd very much like to try some time. A bit like a vertical lathe arrangement. With all axis and connection points being adjustable.
Don't know if I posted my circle cutting jig. It's a square of plywood with a saw cut from on corner and a nail protruding just past the end of the sawcut. I put half scale marks along the sawcut, if I want a 2" circle I set the wire at the 2, which is 1" from the nail center. I use a fence to stop the jig but put the foam on the nail then push it into the wire until an index mark lines up with the matching mark on the fence and start turning the foam. Works pretty slick.
There is a very nice cutting wand idea that could be adapted to lathe tooling consisting of two metal rods bent 90 degrees like two back to back mirrored capital letter 'L'. The base legs are the powered rails to attach little sliding posts that hold a piece of wire shaped to the cutting profile - being able to slide and adjust for different size profiles a bit. Best supporting the wire. The upward leg each has a 4mm hole drilled on the end for a banana plug and both secured in an insulated handle - alternatively the handle can be made to hold the cutting plane on center in the lathe.
I need to get some heavier wire to make contours out of. Thinking 1/16" SS welding rod.
Picked such a great location for them as you can seem them from practically anywhere in the shop.

Poor cameraman keeps the Australian Ford logo nicely polished too.
Thank you, I guess I'll just leave them where they are. The Ford logo was prepolished 1/2-way and has maintained it's luster Guster.
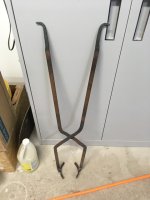
It definitely has that old style dual purpose animal husbandry utility look to it!