To avoid these ads, REGISTER NOW!

Above 1200 Sq/FT The Lone Beech Garage (60x46x16)

Wokspaces above 1200 squarefeet.
OP
S

sbosecker

Well-known member
Joined
Sep 25, 2012
Messages
3,539
Location
Peachtree City, GA
Re: The Lone Beech Garage Build Thread (60x46)

Saturday - May 12, 2018


20180512-01.jpg 20180512-02.jpg

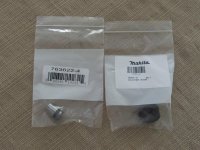
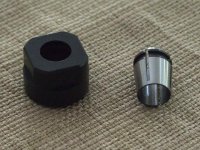
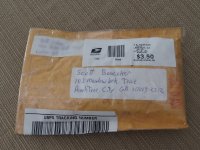
The parts for my Makita Router - Collet Nut & Collet - arrived via UPS today.


20180512-03.jpg

New & old - side by side.

I tried putting a bit into the new Collet and it slide in without issue. Quite different from the old, damaged Collet. The bit would not fit into the old Collet.


20180512-04.jpg

The Collet snapped into the Collet Nut similar to how an ER Collet works.


20180512-05.jpg

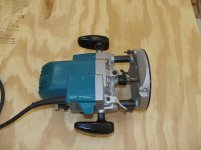
I inserted the same 1/2-inch bit into the repaired Router that I was using when the old Collet failed. I sat the Router on its side on the floor, put on a face shield and turned on the Router. No soft start on this 30+ year machine. Ha!

Everything seems to be working properly. I'm glad to have this old tool working again!

Repair parts were about $45.


Scott
 
Last edited:
To avoid these ads, REGISTER NOW!

drivesitfar

Well-known member
Joined
Oct 23, 2013
Messages
36,076
Location
Pacific Northwest
Re: The Lone Beech Garage Build Thread (60x46)

SB: nice save on fixing the old Makita and good to see it's working ok now.

I don't have a lot to say on your mill and lathe projects that you post a ton of information about, but I thank you for posting about them cause maybe one day I will or it's just fun to go out of my comfort zone and learn a few new things.

have a great Mother's day tomorrow and keep up the great work!!
 

dchance

Well-known member
Joined
Oct 3, 2016
Messages
614
Location
OKC
Re: The Lone Beech Garage Build Thread (60x46)

It was nice to hear the response with the request for the mounting hardware.

Dwight
 
OP
S

sbosecker

Well-known member
Joined
Sep 25, 2012
Messages
3,539
Location
Peachtree City, GA
Re: The Lone Beech Garage Build Thread (60x46)

SB: nice save on fixing the old Makita and good to see it's working ok now.

I don't have a lot to say on your mill and lathe projects that you post a ton of information about, but I thank you for posting about them cause maybe one day I will or it's just fun to go out of my comfort zone and learn a few new things.

have a great Mother's day tomorrow and keep up the great work!!

DrivesItFar,

The Makita Router has been a faithful part of my woodshop for a long time, I'm glad that she was repairable.

Still... during those dark days when her recovery was not assured I will admit to a wandering eye...

Triton... I think her name was Triton.

Ha!

On a more serious note; I hope that your recovering from your foot injury.

Best regards,

Scott
 
Last edited:
OP
S

sbosecker

Well-known member
Joined
Sep 25, 2012
Messages
3,539
Location
Peachtree City, GA
Re: The Lone Beech Garage Build Thread (60x46)

It was nice to hear the response with the request for the mounting hardware.

Dwight

Dwight,

I have to say I've had superior customer service from the folks at JET.

I'm looking forward to getting the hardware and finishing this installation.

Thanks for stopping by!

Best regards,

Scott
 
OP
S

sbosecker

Well-known member
Joined
Sep 25, 2012
Messages
3,539
Location
Peachtree City, GA
Re: The Lone Beech Garage Build Thread (60x46)

Sunday - May 13, 2018


Today a little automotive work in the LBG...

Last night my two children met their mother and I at a restaurant for a Mother's Day celebration. When my son arrived he indicated the 2002 Corolla he drives had stalled on him as he left work to join us. It started right up but then stalled again after a short distance. Again it started up without issue but for some reason he put the 3-speed Automatic Transmission in 2 instead of Drive and drove to the restaurant without further issue.

After we finished our meal, I walked out to the Corolla with him. He needed to return to work to insure the fix for the earlier trouble call had held up. He started the Corolla and put it into Drive. Everything seemed OK and he departed.

When he got home last night he told me the car had done the same thing when he left work the second time. Once again, when he put the Transmission in 2, the car allowed him to complete the 15 minute drive home.

Weird.

We walked out to the shop and got the Autel Scanner hooked up to the Corolla so that we could read the Diagnostic Codes.

There were none.

Weirder.

Spent some time today trying to research this and then my son and I took the Corolla out and tried to replicate the conditions from last night. We drove in our residential area for about 15 minutes without incident. Then we parked it for about 40 minutes and drove it again. [This is how my son remembered the lead up to what happened last night.] Again the car ran without a hitch.

Sigh.

The Interweb seemed to favor the EFI relay or a fuel pump issue for the sudden stall without generating a diagnostic code. The problem going away when driving with the Transmission in 2 appears to be a first for the Internet as I found nothing similar to that.

Ha! I'm inclined to believe that's a red herring but... it did work twice.

We shall see. So what to do in the meantime.


20180513-01.jpg 20180513-02.jpg

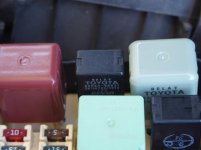
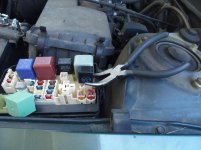
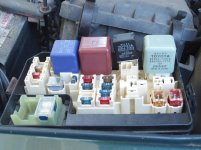
The EFI Relay is located in a plastic box (Driver's Side of the Engine Compartment) with other relays and fuses. The white arrows point to the EFI Relay and the Horn Relay.

Horn Relay?


20180513-03.jpg

During my research on the Internet it appeared that the EFI Relay and the Horn Relay were the same Toyota part number (90084-98031). My plan was to swap the two and see what happens.

I "tooted" the horn to make sure it actually functioned and then started working on removing the Horn Relay.


20180513-04.jpg 20180513-05.jpg

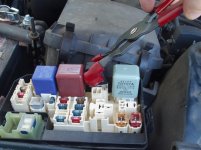
The trick was getting these relays - that had been fastened in their sockets for 16 years - free from their bonds. I had to remove the FAN No. 1 relay to give me enough room to get at the Horn Relay. Eventually, using a "bent" needle nose pliers and working one side then the other - I was able to free the Horn Relay.

I had been unable to see the Horn Relay's Part number until now. I was gratified to find it was indeed the same as the EFI Relay. I tried the horn again and it was now incapacitated.


20180513-06.jpg 20180513-07.jpg

I went with a Spark Plug Jacket Pliers to remove the EFI Relay. Again a bit of a fight but eventually out she came.


Swapped the Horn & EFI relay positions and reinstalled the FAN relay.

The horn now worked and the car started up.

We'll see what the future holds. If the car stalls again, I think we can eliminate the EFI Relay from the list of suspects.


Scott


Key Words: 2002 Corolla Automatic Transmission 2 stalls no diagnostic codes EFI Relay Horn Relay
 
Last edited:
OP
S

sbosecker

Well-known member
Joined
Sep 25, 2012
Messages
3,539
Location
Peachtree City, GA
Re: The Lone Beech Garage Build Thread (60x46)

Monday - May 14, 2018

Apparently the future holds a requirement for more troubleshooting.

Today my son returned home in the Corolla after driving (in Drive - Ha!) 15 minutes to his place of work. The trip was without incident.

On his way home he stopped by an apartment complex roughly half way between work and my house. As he drove through the complex he encountered a speed bump and (firmly) drove over it. When he did this, the Corolla died. It restarted without hesitation.

Thinking he had just had an "Ah Ha!" moment, he drove through the Apartment Complex, seeking out speed bumps, and driving over them - some aggressively. The Corolla shrugged all of this abuse off - the engine didn't flinch.

He drove home without any further stalling incident.

It should be noted that the "stalling" is reported to occur without any fanfare. According to my son, the engine just shuts down without any drama. Almost like it's being shut off.

Regardless, the EFI Relay appears to be off the list of "usual suspects".


Scott
 

drivesitfar

Well-known member
Joined
Oct 23, 2013
Messages
36,076
Location
Pacific Northwest
Re: The Lone Beech Garage Build Thread (60x46)

SB: was this the Toyota you were going to rebuild the engine or or did you do that and I just don't recall your posts about it? great to hear you are your kid's #1 ACE MECHANIC and hope he was watching and learning so someday he'll know how to fix it too.
great to hear you had all your kids around for Mother's day. our youngest 3 of 5 kids were in California, Montana and Missouri, but they all called their mom.
my toe is still bugging me and maybe I should miss a few workouts, but I'm just getting used to going to TRX one hour classes 3 times a week for an hour a day and don't want to start over. hopefully it will heal up quickly.

have a great day and keep up the good work!!
 

AZpilot

Well-known member
Joined
Sep 29, 2012
Messages
413
Location
Mesa, AZ
Re: The Lone Beech Garage Build Thread (60x46)

Maybe Adjustment on the neutral safety switch and that is why it runs in second and not drive.
 
OP
S

sbosecker

Well-known member
Joined
Sep 25, 2012
Messages
3,539
Location
Peachtree City, GA
Re: The Lone Beech Garage Build Thread (60x46)

SB: was this the Toyota you were going to rebuild the engine or or did you do that and I just don't recall your posts about it? great to hear you are your kid's #1 ACE MECHANIC and hope he was watching and learning so someday he'll know how to fix it too.

great to hear you had all your kids around for Mother's day. our youngest 3 of 5 kids were in California, Montana and Missouri, but they all called their mom.

my toe is still bugging me and maybe I should miss a few workouts, but I'm just getting used to going to TRX one hour classes 3 times a week for an hour a day and don't want to start over. hopefully it will heal up quickly.

have a great day and keep up the good work!!

DrivesItFar,

Yes this is the same Corolla that I hope to use like a Medical School Student's Cadaver and work on the engine to fix the oil consumption issue of this engine.

I will take gentle issue with the "Ace Mechanic" moniker. Thank you but I'm a student mechanic feeling my way along trying to learn how to do things that a real mechanic would knock out in an hour or so.

Mothers Day - good for your kids for calling home! This year I wasn't able to call my mom - but I was still able to talk to dad.

Anyway, I think we're close to my son buying a car to replace this Corolla. Once that new (to him) car is in place, I think the Corolla will become a tool for me to learn more about being a mechanic.

As you pointed out, this is the car he's having some "stalling" issues with. He drove some distance today (45 or so miles) to a job site and had a couple of the stalling issues on the way up and a couple more on the way back.

He did manage to note that his radio failed in conjunction with these incidents as well as failing one time without the engine immediately dying.

I believe this is the sort of thing the FBI would refer to as "a clue".

Best regards,

Scott
 
Last edited:
OP
S

sbosecker

Well-known member
Joined
Sep 25, 2012
Messages
3,539
Location
Peachtree City, GA
Re: The Lone Beech Garage Build Thread (60x46)

Maybe Adjustment on the neutral safety switch and that is why it runs in second and not drive.

AZpilot,

I'm inclined to believe that the ability to drive with the transmission in "2" is a red herring.

The Radio failing during today's incidents leads me to believe that I may be able to locate the common ground for the radio and something that would cause the engine to shut down.

I think I may have found that location via some research in the Corolla manuals. I will dig into the car in the next few days to see if I can access the grounding location that is shared by the radio and some Engine Control electronics.

Best regards,

Scott
 
Last edited:
OP
S

sbosecker

Well-known member
Joined
Sep 25, 2012
Messages
3,539
Location
Peachtree City, GA
Re: The Lone Beech Garage Build Thread (60x46)

Thursday - May 17, 2018


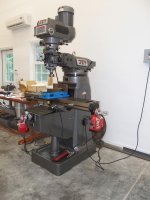
Recently, as I was installing the Z-Axis Powerfeed on the JET Mill, I realized that I hadn't properly lubed the X-Axis Powerfeed when I installed it.

Now the reason for that was the failure of the X-Axis Powerfeed to initially work properly as it was mounted to the JET Mill. When the X-Axis Powerfeed initially had issues, I suspended the installation and requested a replacement from JET.

When I started to install the Warranty replacement X-Axis Powerfeed, I found that the original had resolved whatever issues it had when it was installed.

As I was working on the Z-Axis Powerfeed, I realized that, due to the initial burps of the X-Axis installation, I had not lubed the X-Axis Powerfeed.

That needed to be done...


20180517-01.jpg

So it was time to lube the X-Axis Powerfeed as the instructions specified...


20180517-02.jpg 20180517-03.jpg

The X-Axis components were removed...


20180517-04.jpg

...once that was accomplished, the gear was lubed and the Powerfeed was reinstalled.


Scott
 
OP
S

sbosecker

Well-known member
Joined
Sep 25, 2012
Messages
3,539
Location
Peachtree City, GA
Re: The Lone Beech Garage Build Thread (60x46)

Friday - May 18, 2018


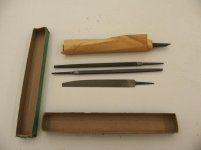
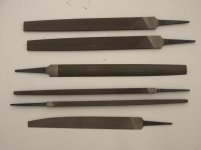
A few weeks ago I attended an Estate Sale and picked up a box of files.


20180518-01.jpg

Black Diamond Files: Made in Canada by the Nicholson File Company of Canada.


20180518-02.jpg 20180518-03.jpg 20180518-04.jpg

There were 6 files in the box. Five that probably came in the box and appeared to be unused. One Nicholson Knife File - used and probably thrown into the box by the folks running the Estate Sale.


So Father's Day is not that far away and my kids are always badgering me for gift ideas. I try to suggest items that aren't expensive and are pretty easy to obtain. The files I had just obtained at the Estate Sale gave me an idea.


20180518-05.jpg 20180518-06.jpg

Nicholson makes screw-on handles for their files. Their catalog indicates which handle will fit the tang on what file. I ordered a couple - two different sizes - to see how they worked and they arrived today.

They worked great! I screwed a PH5 Handle on one of the 10-Inch Flat Files and a PH4 onto one of the 10-Inch Square Files.

In addition to the files in the Estate Sale box, I have a couple more that need handles also. Now that I know that these Handles will work, I'll be passing along the information to my wife who will let my 2 kids know that I could use 3 file handles from each of them.

Scott
 
Last edited:
OP
S

sbosecker

Well-known member
Joined
Sep 25, 2012
Messages
3,539
Location
Peachtree City, GA
Re: The Lone Beech Garage Build Thread (60x46)

Friday - May 25, 2018


Back on May 11th I shared my discussion with JET Technical Support regarding the bracket for the JET Mill's Z-Axis Powerfeed Limit Switch.

That was a Friday. That following Monday, being aware of what often happens to newly initiated work over a weekend, I sent a gentle reminder email to Mary, my Technical Support contact.

Mary copied me on an email to another JET employee where she asked him to let me know the status of the Limit Switch Bracket.

I received no further communication from JET last week.

This past Monday I followed up with another email to Mary. She again copied me on another email to the same guy as the previous week. A few minutes later I got an email from that gentleman asking for shipping address information. I immediately provided that information.


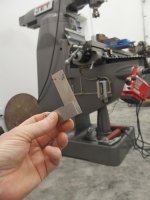
20180525-01.jpg 20180525-02.jpg

I've been gone on a trip the past few days (Madrid) so I was hoping to find a delivery when I returned last evening but no...

However, late this afternoon, UPS delivered a package containing the bracket hardware.

I fiddled with the hardware for a while trying to make it look like the pictures that I had been sent from JET Technical Support back on the 11th. The pictures were certainly helpful but were slightly out of focus which, coupled with the black on black of the parts, made it difficult for me see exactly what was going on.

The real problem was that I didn't immediately see the two threaded holes in the end of the rectangular part with the two slots. With that piece of the puzzle missing, I thought maybe a part was missing from the box.

Then I saw the holes. Hmmm... what size are they?


20180525-03.jpg 20180525-04.jpg

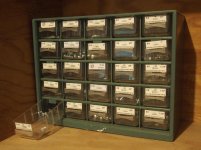
I went down to the basement of my house and rummaged around in one of my "smaller fasteners" 5x5 drawer organizers. A couple of 1/2-inch #10-24 screws were just what I needed for the bracket.

I went out to the shop and positioned the assembled bracket on the side of the JET Mill. It looked like it should do the trick!

I hope to make some progress on mounting the Z-Axis Limit Switch assembly this weekend.


Scott

Key Words: JET 350196 Powerfeed Power Feed Z-Axis Knee Limit Switch Bracket Hardware
 

ABSTIFFGS

Well-known member
Joined
Feb 4, 2014
Messages
304
Location
Twin Cities, MN
Re: The Lone Beech Garage Build Thread (60x46)

Scott, some thought about the Corolla issues. You may want to look into the ignition switch. I've seen cars do really weird things when the switch is failing. There are several different contacts inside the switch that do different things as the key is cycled through its paces. It could possibly have a "dead" spot in it.
 
OP
S

sbosecker

Well-known member
Joined
Sep 25, 2012
Messages
3,539
Location
Peachtree City, GA
Re: The Lone Beech Garage Build Thread (60x46)

Scott, some thought about the Corolla issues. You may want to look into the ignition switch. I've seen cars do really weird things when the switch is failing. There are several different contacts inside the switch that do different things as the key is cycled through its paces. It could possibly have a "dead" spot in it.


ABSTIFFGS,

Thanks... I agree.

I looked closely at the 2002 Toyota Corolla Electrical Wiring Diagram Manual that I purchased off eBay - along with a service manual - when the car was acquired.

IF the non-OEM radio currently installed in the car is wired as per the Electrical Diagram, there doesn't appear to be a common ground between it and anything that would shut down the engine. (Possible exception - the ground to the battery itself).

That leads to the power side and looking at that part of the wiring manual my finger started pointing at the Ignition Switch as that was the only thing I saw common to the radio and anything that would shut down the engine.

Some of the heat is off as my son just purchased his own car last weekend and will be moving into an apartment soon. The car has very little value and, while I do want to fix this issue, I don't want to just throw parts at it in an attempt to solve the problem.

Things to check before I purchase an Ignition Switch:

Non-OEM Radio: How is it electrically connected?
Battery Ground: Condition of same.
Ignition Switch: Remove enough dashboard plastic so as to access it and tap on same while the engine is running to see if that induces an engine shut-down.


Thanks for your thoughts!

Best regards,

Scott
 

Ole Slewfoot

Well-known member
Joined
Feb 22, 2016
Messages
5,098
Location
Freedom, CA
Re: The Lone Beech Garage Build Thread (60x46)

Carry some starting spray, if it will start on that when otherwise not working, you have a fuel problem.

I think those have a fusible link that feeds the power distribution box, give that a yank or 5 while running.

Do the signals work when the car has just died? if to, the ignition run part of the switch should be fine.
 
OP
S

sbosecker

Well-known member
Joined
Sep 25, 2012
Messages
3,539
Location
Peachtree City, GA
Re: The Lone Beech Garage Build Thread (60x46)

Carry some starting spray, if it will start on that when otherwise not working, you have a fuel problem.

I think those have a fusible link that feeds the power distribution box, give that a yank or 5 while running.

Do the signals work when the car has just died? if to, the ignition run part of the switch should be fine.


Ole Slewfoot,

Indeed more troubleshooting needs to be done

...but this Corolla is a low priority now that my son has purchased his own vehicle. I may get back to it next week some time.

Thanks for your thoughts!

Best regards,

Scott
 
OP
S

sbosecker

Well-known member
Joined
Sep 25, 2012
Messages
3,539
Location
Peachtree City, GA
Re: The Lone Beech Garage Build Thread (60x46)

Monday - May 28, 2018


Today I started the process of mounting the JET Milling Machine's Z-Axis Powerfeed's Limit Switch Bracket.


20180528-01.jpg

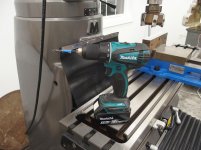
There isn't a lot of space between the One Shot Lubrication plumbing and the upper Z-Axis lock. I positioned the Bracket and used a transfer punch to locate the center of the upper mounting hole.


20180528-02.jpg 20180528-03.jpg 20180528-04.jpg

I used a center drill to give the #4 drill bit a chance to start in the correct position. I used a small machinist square to ensure I was drilling the hole perpendicular to the side of the Mill. The blue tape was wrapped around the drill bit to give me a reference for the depth of the hole.

The #4 bit was the correct bit for a 1/4"-20 tapped hole with a 60% thread depth.


20180528-05.jpg

I drilled the hole.


20180528-06.jpg 20180528-07.jpg

I used a 1/4-20 Taper Tap; followed by a Plug Tap and then a Bottoming Tap to prepare the hole to receive the upper machine bolt.


Continued in the nest post...
 
OP
S

sbosecker

Well-known member
Joined
Sep 25, 2012
Messages
3,539
Location
Peachtree City, GA
Re: The Lone Beech Garage Build Thread (60x46)

Continued...


20180528-11.jpg 20180528-12.jpg

The hole was finished. This is only the second time I've tapped a hole for a bolt. I have to admit I was a bit concerned about doing this on my JET Mill. Time to see if I did it right.


20180528-13.jpg

I screwed a 1/4"-20 machine bolt into the hole... Looks like it worked!


20180528-14.jpg

I mounted the bracket using this upper hole to allow me to locate the center of the bottom hole.


20180528-15.jpg

Once again, a transfer punch was used to locate the center of the hole.


20180528-16.jpg 20180528-17.jpg

The bottom hole was prepared as the upper was. I was pleased to find that everything lined up and the base of the Bracket assembly was mounted to the Mill.


Continued in next post...
 
Last edited:
To avoid these ads, REGISTER NOW!
OP
S

sbosecker

Well-known member
Joined
Sep 25, 2012
Messages
3,539
Location
Peachtree City, GA
Re: The Lone Beech Garage Build Thread (60x46)

Continued...


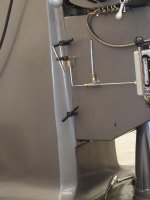
20180528-21.jpg 20180528-22.jpg

The first part of the Bracket assembly was mounted to the Mill. As the pictures show, there wasn't a lot of clearance between the plumbing & the locking bolt.

This was all I had time for today. I hope to complete the Limit Switch assembly before the end of the week.


Scott
 
Last edited:

matt_i

Well-known member
Joined
Mar 14, 2008
Messages
10,753
Location
SE Michigan
Re: The Lone Beech Garage Build Thread (60x46)

Hi Scott, just checking in, you have accomplished quite a bit! I really like the repurposing of old overhead cubicle "garages", amazing how when you get a new storage system up and running for the first time how much clutter it "eats".

Kurt vise is looking great, sometimes useful is a set of jaws which go well beyond the 6" overall width of the body. These can be found on ebay, or google searches. They don't have to be hardened to work correctly...you will see an assortment of 1018 cold rolled and 6061 aluminum jaws which are designed to be "carved" in CNC machines for repetitive setups, but can be drilled and tapped and welded for many other uses.

It is quite intimidating to drill into the casting of a precision machine with a (gasp) hand held tool...I've done this on a Bridgeport and a Monarch 10EE and both were sweaty moments!

You can do quite a lot of tapping on your mill (on other workpieces) by drilling the pilot hole and then chucking the tap's round body right into the drill-chuck. The spindle is perfectly aligned with the pilot hole at that point. In smaller holes, I place the Hi-Lo gear selector at the Neutral detent so the chuck can be spun by wrist power without having to back-drive the motor and belt. Also quite useful are "spiral point" or "gun taps" which push the curling chip ahead of the cutting edge. Ideal for thru-holes, they can be used in blind holes but there's the pesky problem of the curl stuck at the bottom of the hole. Various picks and screwdrivers and compressed air can free it up...or...simply drill the pilot deeper than needed and abandon the curl for another generation to find and fix LOL :D

If you have a big hole (let's just say greater than 3/8-16) to tap then most of us run out of arm and hand power to spin the tap via the slotting on the chuck body. I cannot state its exact name but its a spring-loaded tap alignment tool, it has a 60 degree V-point on one end and has a good 3/4" or more of linear travel on the point, backed by a spring. The idea is that this tool is chucked up, the quill pushed down until the V point engages the same V recess in the tap (it is the same between-centers hole that was used to grind the tap originally) and now the tap is held in alignment between the pilot hole and the spring-loaded V-point, you have approx 3/4" of travel before the Vs disengage. There is now clearance for a standard tap wrench to more easily apply the proper torque to turn the tap.

In arrears: Google will send you to the proper image of this device as: Spring Loaded Tap Guide, and save me thousands more characters of description :D

Looking forward to more updates!
 
OP
S

sbosecker

Well-known member
Joined
Sep 25, 2012
Messages
3,539
Location
Peachtree City, GA
Re: The Lone Beech Garage Build Thread (60x46)

Hi Scott, just checking in, you have accomplished quite a bit! I really like the repurposing of old overhead cubicle "garages", amazing how when you get a new storage system up and running for the first time how much clutter it "eats".

Kurt vise is looking great, sometimes useful is a set of jaws which go well beyond the 6" overall width of the body. These can be found on ebay, or google searches. They don't have to be hardened to work correctly...you will see an assortment of 1018 cold rolled and 6061 aluminum jaws which are designed to be "carved" in CNC machines for repetitive setups, but can be drilled and tapped and welded for many other uses.

It is quite intimidating to drill into the casting of a precision machine with a (gasp) hand held tool...I've done this on a Bridgeport and a Monarch 10EE and both were sweaty moments!

You can do quite a lot of tapping on your mill (on other workpieces) by drilling the pilot hole and then chucking the tap's round body right into the drill-chuck. The spindle is perfectly aligned with the pilot hole at that point. In smaller holes, I place the Hi-Lo gear selector at the Neutral detent so the chuck can be spun by wrist power without having to back-drive the motor and belt. Also quite useful are "spiral point" or "gun taps" which push the curling chip ahead of the cutting edge. Ideal for thru-holes, they can be used in blind holes but there's the pesky problem of the curl stuck at the bottom of the hole. Various picks and screwdrivers and compressed air can free it up...or...simply drill the pilot deeper than needed and abandon the curl for another generation to find and fix LOL :D

If you have a big hole (let's just say greater than 3/8-16) to tap then most of us run out of arm and hand power to spin the tap via the slotting on the chuck body. I cannot state its exact name but its a spring-loaded tap alignment tool, it has a 60 degree V-point on one end and has a good 3/4" or more of linear travel on the point, backed by a spring. The idea is that this tool is chucked up, the quill pushed down until the V point engages the same V recess in the tap (it is the same between-centers hole that was used to grind the tap originally) and now the tap is held in alignment between the pilot hole and the spring-loaded V-point, you have approx 3/4" of travel before the Vs disengage. There is now clearance for a standard tap wrench to more easily apply the proper torque to turn the tap.

In arrears: Google will send you to the proper image of this device as: Spring Loaded Tap Guide, and save me thousands more characters of description :D

Looking forward to more updates!


matt_i,

Thanks for stopping by! It's good to make some progress in the shop again.

Yes, poking holes into my shiny new JET Mill did make me pause a bit... but it needed to be done. My lack of experience was another reason to flinch...

Thanks for all the suggestions!

Best regards,

Scott
 
OP
S

sbosecker

Well-known member
Joined
Sep 25, 2012
Messages
3,539
Location
Peachtree City, GA
Re: The Lone Beech Garage Build Thread (60x46)

Wednesday - May 30, 2018


In addition to the recently discussed "engine shutdown" issues of the 2002 Corolla, my son also managed to hit a major pothole on the Interstate just prior to the purchase of his own car.


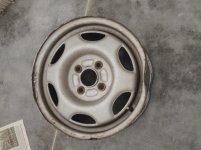
20180530-01.jpg

Not pretty... Last Friday I spent some time on the phone calling local Auto Salvage Yards to find a replacement wheel. I located one at Andrews Auto Salvage in Griffin Georgia for $25. The holidays kept me from picking up the wheel until today.


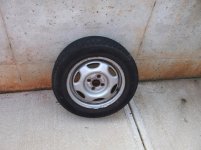
20180530-02.jpg

I went straight from Andrews Auto Salvage to a local tire store and had the old tire - miraculously it survived - mounted on the newly acquired wheel.


20180530-03.jpg

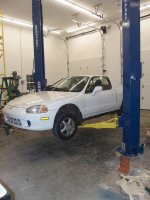
As Genesis's The Lamb Lies Down On Broadway played on my music box, I got the Corolla up on the 2-Post lift and rotated all the tires as I removed the space-saving spare.


20180530-04.jpg 20180530-05.jpg

My wife's del Sol's tires needed to be rotated as well so that was the next chore.

...I know this isn't all that exciting but sometimes that's what we do in the garage's we've built. The day-to-day stuff that has to be done in order for our vehicles to continue to provide reliable transportation for our family.

...and it's fun to do!

Scott
 
Last edited:

Pressingonward

Well-known member
Joined
Mar 9, 2016
Messages
522
Location
SW WA
Re: The Lone Beech Garage Build Thread (60x46)

Hi Scott,

A couple thoughts on your son's corolla. First, I would recommend finding a new tire. It may look fine, but a pothole hit strong enough to bend that rim means that the tire was pinched really hard between the rim and the pothole. I wouldn't trust the tire after that - a weak cord in the tire can fail with little warning.

And second, I think the ignition switch is a very likely culprit for the intermittent stall as you and another poster have said. I've seen similar behavior in other vehicles with bad ignition switches.

Your plan to rebuild it as a learning exercise is a great idea, I'm sure it will be educational and fun. Nothing like hands-on learning. I don't check this forum too terribly often, but you're welcome to send me a pm if you get stuck along the way and need some guidance. My former career was as an auto tech and now I'm a mechanical engineer so I have a bit of experience that might be of help if you get into one of those situations where the repair manual isn't clear.

I really enjoy seeing your various projects and appreciate the time you put into documenting them for all of us to enjoy :)
 

AZpilot

Well-known member
Joined
Sep 29, 2012
Messages
413
Location
Mesa, AZ
Re: The Lone Beech Garage Build Thread (60x46)

.I know this isn't all that exciting but sometimes that's what we do in the garage's we've built. The day-to-day stuff that has to be done

That is exactly why you have a nice shop like that. I was told last week that my 2 car garage is a pitiful place compared to another guys actual shop. Which is fine. I will have a shop one day.
 
OP
S

sbosecker

Well-known member
Joined
Sep 25, 2012
Messages
3,539
Location
Peachtree City, GA
Re: The Lone Beech Garage Build Thread (60x46)

Hi Scott,

A couple thoughts on your son's corolla. First, I would recommend finding a new tire. It may look fine, but a pothole hit strong enough to bend that rim means that the tire was pinched really hard between the rim and the pothole. I wouldn't trust the tire after that - a weak cord in the tire can fail with little warning.

And second, I think the ignition switch is a very likely culprit for the intermittent stall as you and another poster have said. I've seen similar behavior in other vehicles with bad ignition switches.

Your plan to rebuild it as a learning exercise is a great idea, I'm sure it will be educational and fun. Nothing like hands-on learning. I don't check this forum too terribly often, but you're welcome to send me a pm if you get stuck along the way and need some guidance. My former career was as an auto tech and now I'm a mechanical engineer so I have a bit of experience that might be of help if you get into one of those situations where the repair manual isn't clear.

I really enjoy seeing your various projects and appreciate the time you put into documenting them for all of us to enjoy :)


Pressingonward,

Thanks for the kind words and the very thoughtful post.

When I got the salvage yard wheel I was surprised to find that it had a tire on it that looked like it had had very little use. I considered just mounting it on the car as it was but decided, since I had bought a new set of Michelins after acquiring the Corolla 3 years ago, to make the tires match. I did keep the odd-ball tire though, just in case. Ha!

The Corolla will probably be semi-retired and will be seeing little use for the foreseeable future. If the tire fails, I shouldn't be too far from home.

As to the Corolla's stalling issue... I was out in the shop today to work on that issue and I may have found the culprit ...and it wasn't the ignition switch.


Best regards,

Scott
 
OP
S

sbosecker

Well-known member
Joined
Sep 25, 2012
Messages
3,539
Location
Peachtree City, GA
Re: The Lone Beech Garage Build Thread (60x46)

That is exactly why you have a nice shop like that. I was told last week that my 2 car garage is a pitiful place compared to another guys actual shop. Which is fine. I will have a shop one day.


AZpilot,

I'm not capable of fancy projects so the LBG is for routine maintenance and a place for YouTube shop class. Ha!

I hope to increase my mechanical knowledge by doing stuff and it's a great place to do that.

Thanks for dropping by and, although I'm sure your garage is fine, I hope you get a nicer shop sooner rather than later!

I must warn you, I hoped to have mine 25 years ago and this is when I was able to do it. Some times that's the way things work out.

Best regards,

Scott
 
OP
S

sbosecker

Well-known member
Joined
Sep 25, 2012
Messages
3,539
Location
Peachtree City, GA
Re: The Lone Beech Garage Build Thread (60x46)

Sunday - June 3, 2018

A couple of days ago I rearranged some things in the LBG due to the recent acquisition of the Cubical Overhead Bins.


20180601-01.jpg

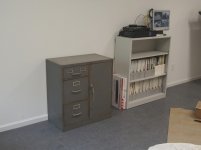
With the Bin Stacks on the walls, I decided to move this little cabinet up to the Mezzanine and out of the working shop spaces. I had thought that I might use this for tooling storage but I've abandoned that idea for the moment.


20180601-02.jpg

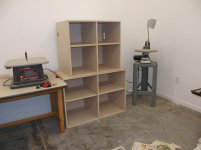
I was getting ready to post a free Craigslist Curb Alert for these items but then realized they could still be used in the Woodshop. I moved a table about 2 feet to the left and that made room for them.


20180603-01.jpg

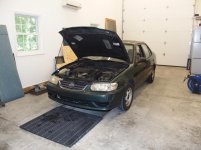
Today I brought the Corolla into the LBG to do a little troubleshooting on the intermittent engine dying issue. I positioned the Corolla over the Tornado Shelter to make access under the car easier should I want to quickly check something out.


20180603-02.jpg

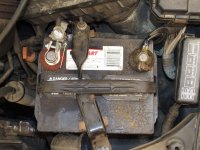
My goal today was to examine the main grounding point for the battery itself. I was poking around the engine compartment - near the battery - trying to see where the Negative Cable went. I was so focused on that I didn't immediately see a possible smoking gun (white arrow).

This battery (which is what was in the car when I bought it 3 years ago) is not the correct size for this car. As a result, the hold down bracket doesn't hold the battery securely.


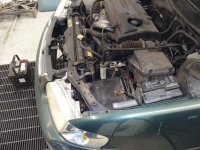
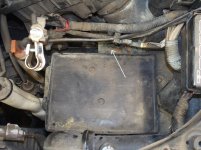
20180603-03.jpg 20180603-04.jpg 20180603-05.jpg

The hold down bracket (last picture) uses a bolt on one side and a J bolt on the other to secure the bracket to the car. That J-bolt had gotten out of its hole and was flopping loose.

The other bolt was loose. This allowed the hold down bracket to swing to and fro and sometimes, it appears, touch the positive terminal causing a short through the body.

Despite my son's urging (Ha!), I elected not to attempt to reproduce the "engine shutdown issue" by shorting out the battery with the bracket.

What say you GJ-er's? Could this cause the symptoms the Corolla has been experiencing?

I'm a little surprised this didn't cause a fire.


Scott
 
Last edited:

AZpilot

Well-known member
Joined
Sep 29, 2012
Messages
413
Location
Mesa, AZ
Re: The Lone Beech Garage Build Thread (60x46)

Might be. And I would stop pouring sand on top of the battery. :bounce:
 

Ole Slewfoot

Well-known member
Joined
Feb 22, 2016
Messages
5,098
Location
Freedom, CA
Re: The Lone Beech Garage Build Thread (60x46)

One of my friends had an old Honda Cvcc cars '83? with the battery in a notch on the firewall.

It turns out when the hold down rusts through, on your next big bump the battery flies up, but is restrained by the brake lines passing directly over it for a little while....then the car stalls with a puff of smoke and no brakes.
 

drivesitfar

Well-known member
Joined
Oct 23, 2013
Messages
36,076
Location
Pacific Northwest
Re: The Lone Beech Garage Build Thread (60x46)

SB: i'm still following along with your adventures, but sorry I don't have solutions for your Corolla issues. best of luck and hope you figure it out!!
 

ABSTIFFGS

Well-known member
Joined
Feb 4, 2014
Messages
304
Location
Twin Cities, MN
Re: The Lone Beech Garage Build Thread (60x46)

That broken hold down bracket find just may be your issue! Kinda bummed your son wasn't interested in testing your theory though. Where's his sense of adventure?
 
OP
S

sbosecker

Well-known member
Joined
Sep 25, 2012
Messages
3,539
Location
Peachtree City, GA
Re: The Lone Beech Garage Build Thread (60x46)

Might be. And I would stop pouring sand on top of the battery. :bounce:

Ha! I don't know what that stuff is... it's been there since I bought the car.


One of my friends had an old Honda Cvcc cars '83? with the battery in a notch on the firewall.

It turns out when the hold down rusts through, on your next big bump the battery flies up, but is restrained by the brake lines passing directly over it for a little while....then the car stalls with a puff of smoke and no brakes.

Sounds very similar!


SB: i'm still following along with your adventures, but sorry I don't have solutions for your Corolla issues. best of luck and hope you figure it out!!

Thanks for dropping by! With the hold down bracket as the prime suspect I'll try to come up with a cheap solution and then drive the car around a bit and see what happens.


That broken hold down bracket find just may be your issue! Kinda bummed your son wasn't interested in testing your theory though. Where's his sense of adventure?

Actually I was the wuss and my son wanted to "test the hypothesis". I guess he hasn't had the adventures I have had. Ha!

Thanks guys!

Best regards,

Scott
 
OP
S

sbosecker

Well-known member
Joined
Sep 25, 2012
Messages
3,539
Location
Peachtree City, GA
Re: The Lone Beech Garage Build Thread (60x46)

Saturday - June 9, 2018

I had to go to Munich so I've been away from the shop for the past few days.

Returning means dealing with a combination of jet-lag and catching up with whatever parade of horribles has occurred in my absence. Today I thought I'd be spending most of my available time mowing the grass but a mid-afternoon rain shower thwarted that plan.


20180609-01.jpg 20180609-02.jpg

I didn't have a lot of time to spend on fun stuff but I did think I could try to come up with something to secure the 2002 Corolla battery better. The first thing to do was to locate the "hole" for the bracket's J-Hook. I had fished around with the J-Hook to no avail when the battery was in place so I decided to removed the battery and see where the hole was.


20180609-03.jpg

The J-Hook hole could now be seen (white arrow).


20180609-04.jpg

With the battery out the damage caused by the bracket shorting out the positive terminal was a bit more apparent.


20180609-05.jpg 20180609-06.jpg

I used some scrap wood to allow the bracket to put some downward force on the battery. Not a particularly elegant solution but should suffice for now.

The dinner bell was ringing as I finished this little chore so that was it for today.


I hope to spend a lot more time in the shop this week but we'll see what happens.


Scott
 
Last edited:

1949 caddyman

Well-known member
Joined
Oct 5, 2010
Messages
1,778
Location
Arizona
Re: The Lone Beech Garage Build Thread (60x46)

Lucky you didn’t have a hydrogen gas explosion with that positive post shorting to ground, good find!
 
OP
S

sbosecker

Well-known member
Joined
Sep 25, 2012
Messages
3,539
Location
Peachtree City, GA
Re: The Lone Beech Garage Build Thread (60x46)

Lucky you didn’t have a hydrogen gas explosion with that positive post shorting to ground, good find!


1949 caddyman,

Well the car was fully insured...

…and on paper is worth quite a bit more than it would be in a buyer-seller negotiation.

I have joked that I hoped it would be parked someplace and get hit by a (very small) comet as it sat empty.

Just kidding; I'm glad nothing bad happened. I hope to use it as a teaching aid in the future.


Best regards,

Scott
 
OP
S

sbosecker

Well-known member
Joined
Sep 25, 2012
Messages
3,539
Location
Peachtree City, GA
Re: The Lone Beech Garage Build Thread (60x46)

Tuesday - June 12, 2018


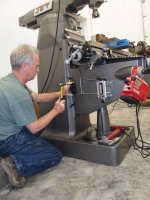
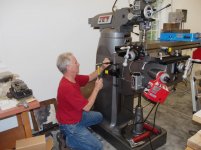
Today I had enough time available to continue working on the JET Milling Machine's Z-Axis Powerfeed Limit Switch installation.


20180612-01.jpg

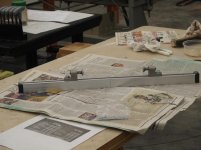
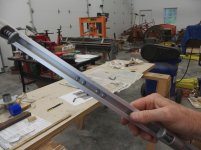
The Limit Switch Stops live in two pieces of aluminum channel.


20180612-02.jpg 20180612-03.jpg

The aluminum channel is held together with a bracket and 4 screws, washers & nuts.


20180612-04.jpg

With the aluminum channel assembled, I now combined the components of the Limit Switch Bracket. I then held the aluminum channel in various positions on the side of the Milling Machine's pedestal until I felt comfortable that I'd found a satisfactory operating location.


20180612-05.jpg

Using the upper standoff bracket as a guide, I used a transfer punch to locate the center of the aluminum channel's upper fastener.


20180612-06.jpg

Using a #22 drill bit, I drilled and tapped the hole for a #10-24 screw.


20180612-07.jpg

I tested it with a screw and all seemed to be well.


Continued in the next post...
 
Last edited:
OP
S

sbosecker

Well-known member
Joined
Sep 25, 2012
Messages
3,539
Location
Peachtree City, GA
Re: The Lone Beech Garage Build Thread (60x46)

Continued…


20180612-11.jpg

I mounted the aluminum channel to the Milling Machine using the top screw hole.


20180612-12.jpg

I used the transfer punch again to locate the bottom hole. I drilled and tapped the bottom hole as I had done the upper.


20180612-13.jpg

I mounted the aluminum channel by screwing the remaining fastener into bottom hole. I then located the stops at the upper and lower range of the Z-Axis.


20180612-14.jpg

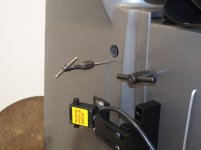
This pretty well completes the Z-Axis Powerfeed installation. All that remains is to drill a 5mm hole through the Z-Axis Powerfeed shaft (white arrow points to the location) and drive in a pin.

...I have to get some metric drill bits.


Scott
 
Last edited:
OP
S

sbosecker

Well-known member
Joined
Sep 25, 2012
Messages
3,539
Location
Peachtree City, GA
Re: The Lone Beech Garage Build Thread (60x46)

Wednesday - June 13, 2018


Readers of this thread may recall that I've got a couple of Delta/Rockwell 11-Inch Metal Lathes; one built in 1966 the other in 1956. I certainly don't need two of them but that's my situation as I try to determine which is the "keeper".

The 1966 Lathe's Tailstock was missing its Ram Clamp when I got it. I was considering attempting to make one but that all changed about a week ago.

A fellow on the Rockwell Metal Lathe Yahoo Group indicated that he had a 11-Inch Tailstock Ram to another member and this prompted me to ask if he had a Ram Clamp.

He did.


20180613-01.jpg 20180613-02.jpg

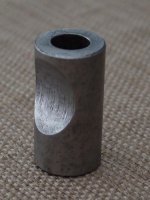
The price he quoted was agreeable and it arrived in the mail today.


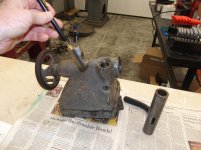
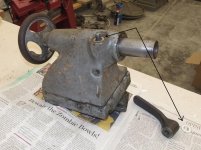
20180613-03.jpg 20180613-04.jpg 20180613-05.jpg

I took my prize out to the LBG and mounted it in the 1966 Lathe's Tailstock. The last picture shows the Ram Clamp in position and arrows pointing to it and a washer. The washer goes between the Tailstock Ram Clamp Handle and the Ram Clamp.

The washer is from the 1956 Lathe. I used it to check the operation of the newly acquired Ram Clamp and then I returned the washer to the 1956 Lathe.


Continued in the next post...
 
Last edited:
To avoid these ads, REGISTER NOW!
Top Bottom