To avoid these ads, REGISTER NOW!

ZMotorsports Shop Projects 2.0

To avoid these ads, REGISTER NOW!
OP
Z

zmotorsports

ALLIANCE MEMBER
Joined
Oct 20, 2009
Messages
21,454
Location
Northern Utah
Well done Mike. What brand repair kit is that your using, I know you mentioned it before but I don't remember.

Nice job on the sway bar links.
I am also interested in the repair kit brand.
I have a chip that needs repair too.

Thanks guys. I purchased a basic kit from Delta Kits but then added the 110VAC UV light as the one in the kit is battery operated and I didn't care for the results with it. The 110-volt UV light works much, much better.

I also added the upgraded pit resin and pit polish than what came in the kit.

I must admit, it was hard to spend a few hundred bucks on a windshield repair kit when most places will fix them for free but the convenience of having my own that I can repair when I need it and not have to swap vehicles around or make an appointment sure is nice. That alone is worth the cost of the kit.

Thanks for following along and for the interest guys.
 

stioc

Well-known member
Joined
May 2, 2005
Messages
1,317
Location
SoCal
Mike, the Model A flywheel job you did with the gap bed removed got me thinking (ok got me wanting a bigger lathe like your's lol). However, I'm guessing that the flywheel diameter where you removed the material still fell within the range of your cross slide/tool-post right which even on a 13x lathe is something like 6.5" or so - in other words 13" diameter limit right?
 
OP
Z

zmotorsports

ALLIANCE MEMBER
Joined
Oct 20, 2009
Messages
21,454
Location
Northern Utah
Mike, the Model A flywheel job you did with the gap bed removed got me thinking (ok got me wanting a bigger lathe like your's lol). However, I'm guessing that the flywheel diameter where you removed the material still fell within the range of your cross slide/tool-post right which even on a 13x lathe is something like 6.5" or so - in other words 13" diameter limit right?

Yes, that is correct.
 

sanddan

Well-known member
Joined
Jul 7, 2005
Messages
708
Location
Oregon
Hey Mike I have an RV question. Do you raise the tag when backing up? Someone on one of the boards mentioned that he always did that to reduce stress on the tag linkage. Hadn't heard that before so thought I'd ask an expert.

Too bad you don't live closer, I'd love to come by and check out the shop.
 
OP
Z

zmotorsports

ALLIANCE MEMBER
Joined
Oct 20, 2009
Messages
21,454
Location
Northern Utah
Hey Mike I have an RV question. Do you raise the tag when backing up? Someone on one of the boards mentioned that he always did that to reduce stress on the tag linkage. Hadn't heard that before so thought I'd ask an expert.

Too bad you don't live closer, I'd love to come by and check out the shop.


Dan, I don’t raise the tag when backing up as it isn’t a passive tag and therefore does not have the same pressures exerted on it. I only raise mine when making tight low speed turns on pavement. I also don’t raise it when in a campground on gravel as the when lightly braking the tag tires will lock up with little or no pressure on them and actually dig trenches around the campground. Don’t ask me how I know.[emoji12] Quick learning curve when I first bought the coach.

Anytime you’re in the area you are more than welcome to stop by. I’d love to show off the shop.
 
Last edited:
OP
Z

zmotorsports

ALLIANCE MEMBER
Joined
Oct 20, 2009
Messages
21,454
Location
Northern Utah
Didn't get much done last night as my son and I drove down to Provo to pick up a NP231-J transfer case for his WJ project. My son wanted to pick it up on Saturday morning but unfortunately the guy was heading out of town and if my son wanted it we had to pick it up last night so we ended up sitting in that damn Salt Lake and Utah County traffic for nearly 2 hours driving down last night. At least the drive home was a breeze.:)

It was actually kind of a nice to be able to have a nice long conversation with my son during our drive and not be distracted like we are sometimes in the shop where we are working on various projects. Just the two of us trapped in the cab of my truck talking. I found out quite a bit about his feelings for this young lady he has been seeing and it was very pleasant to be able to listen to him and view him from a different perspective as he looks to his future and seems to have a plan. He mentioned that in the past he was so focused on getting his degree and out of college then a career that now he can focus on his future and he thinks he may have found the one. I'm proud of him. I told him his mother and I would love whomever he does and welcome her into our family, I just want him to make wise choices and so far I feel like he has done so. My wife and I have been able to spend a little time with her over the past several weeks and think she is a wonderful young woman and look forward to spending more time with them as a couple. Looks like we will be taking off on a ride together this weekend as he wants to introduce her to the world of motorcycles so we'll see how that goes. They went helmet shopping the other night and he bought her a helmet so it must be serious.:lol_hitti

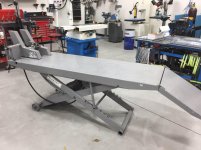
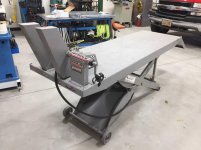
On the shop side, I have decided to sell my Direct Lift Pro Cycle motorcycle lift and purchase the new Handy S.A.M. 2 version so between last night and tonight I will be getting it out of my storage bay and getting it detailed and ready to sell. It is in pristine, like new condition but just has some dust on it and under it so I need to pressure wash and detail it before posting it up for sale this evening.
 
Last edited:
OP
Z

zmotorsports

ALLIANCE MEMBER
Joined
Oct 20, 2009
Messages
21,454
Location
Northern Utah
Tonight after work I drug my Direct Lift Pro-Cycle motorcycle lift table outside and pressure washed it and put it up for sale.

While I had the pressure washer out I figured I may as well pressure wash my Handy Lift and give it a little TLC including some lubrication.

It cleaned up pretty well for being 25 years old and has seen a lot of bikes, ATV’s and snowmobiles over those last 25 years.
IMG_3512.jpg

IMG_3513.jpg

She’s ready to go for another 25 years.
 
Last edited:
OP
Z

zmotorsports

ALLIANCE MEMBER
Joined
Oct 20, 2009
Messages
21,454
Location
Northern Utah
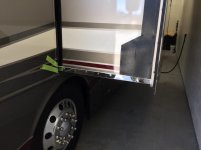
Went out in the shop this morning and started the next project on my coach, adding Guardian Plates to my slides.

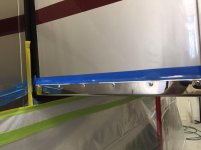
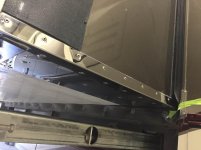
Monaco slides are a bit different than the industry standard where the lower corners of the slides are encapsulated with a trim cap. Monaco uses a small piece of extruded aluminum that actually sits on the floor and the side wall tucks in behind. I’m not sure why they did it this way but if you don’t keep up on the caulking around this lower corner joint you can end up with water intrusion and it will result in floor rot of the slide floor. I have been aware of this for many years and merely re-caulk mine about once a year or whenever I detect the caulking begin to crack or pull away. I have no issues with floor rot or water intrusion but I thought there had to be a better solution than caulking every year.

Talin Manufacturing came out with their Guardian Plates a few years back and I have been keeping my eye on them with great interest.

I had planned on installing them prior to having my coach painted but moving and building my new shop kind of interrupted my plans and I didn’t want to delay my paint job so I am installing them now.

IMG_3514.jpg

I had to trim the inside after a test fit.
IMG_3515.jpg

Removing the protective coating in preparation for final assembly.
IMG_3518.jpg

Front bedroom slide done.
IMG_3519.jpg

Rear bedroom slide plate with adhesive applied and ready for installation.
IMG_3521.jpg

Using 3M 5200 Marine Adhesive.
IMG_3522.jpg
 

Attachments

  • IMG_3523.jpg
    IMG_3523.jpg
    61.5 KB · Views: 205
Last edited:
OP
Z

zmotorsports

ALLIANCE MEMBER
Joined
Oct 20, 2009
Messages
21,454
Location
Northern Utah
Bedroom slide completed.
IMG_3523.jpg

IMG_3524.jpg

IMG_3525.jpg

All in all I think they turned out great and actually look very nice as well as being functional to seal off the corner and add stability and strength to the slide corners.
 
OP
Z

zmotorsports

ALLIANCE MEMBER
Joined
Oct 20, 2009
Messages
21,454
Location
Northern Utah
Ooohhh, shiny! :drool: Now you have one more area to polish off water spots when you clean it. :D


Yeah there is that but the added strength and less worry about water intrusion will definitely be worth the little extra polishing.

Thanks for checking in on my projects.
 
OP
Z

zmotorsports

ALLIANCE MEMBER
Joined
Oct 20, 2009
Messages
21,454
Location
Northern Utah
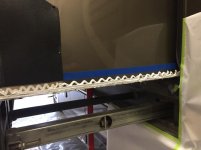
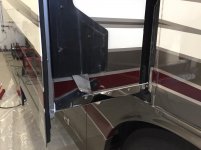
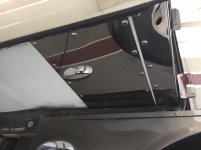
It’s been a long weekend work in the shop but I was able to finish up installing the Guardian Plates on the slides of our coach between Friday night and all day yesterday.

The corner trim cut off of the driver’s (streetside) slide, 3M 5200 Marine Adhesive applied to the corner as well as the plate and ready to install after test fitting and trimming.
IMG_3537.jpg

IMG_3538.jpg

IMG_3539.jpg

IMG_3541.jpg

A little more trimming and tweaking was required on the passenger’s (curbside) slide as there were a couple of braces.
IMG_3545.jpg

IMG_3542.jpg

IMG_3543.jpg

Now to let everything cure for the week and then I can finish it up with a little caulking and she’s ready to go again.

Lastly I had a guy come by the shop and purchase my Direct Lift Pro-Lift Motorcycle Lift Table today.

Thanks for looking.
 
To avoid these ads, REGISTER NOW!
OP
Z

zmotorsports

ALLIANCE MEMBER
Joined
Oct 20, 2009
Messages
21,454
Location
Northern Utah
Nice work Mike! :thumbup:


Whoever gets that coach after your tired of it will have one fine ride. WOW!!


:beer:

Thanks Dan. I sure hope the next owner can truly appreciate what has gone into it and what it takes to keep them in pristine condition. It's not for the faint of heart.:bounce:

Thanks for stopping by Dan.
 
OP
Z

zmotorsports

ALLIANCE MEMBER
Joined
Oct 20, 2009
Messages
21,454
Location
Northern Utah
I completed two quick little projects on the coach tonight after work. First off my shower floor has a bit more “flex” in it than I like and I’m a good size guy so before I have an issue with the shower insert I thought I would look into something on the underside to give it a bit more support.

From the factory they have a couple of 2x6’s stood on end with some shims glued in place for support. Having something glued permanent really isn’t a good option for the middle section because I want to keep access to the drain “P” trap accessible. I have not needed to disassemble it in the past 11 years we’ve owned the coach but one way to insure a problem would be to block it off.

I came up with a screw jack setup that will work perfectly yet still be easily removed if needs be. A 2x6 placed on top will be used to spread the load out.

A couple of 1/2” bolts welded to a square tube protruding through one side of a smaller square tube. One but to snug up the 2x6 under the shower floor and the other as a jam nut.
IMG_3553.jpg

Completed and in place.
IMG_3554.jpg

Lastly I cut about a foot off of my stinky slinky as I developed a pin hole last trip.


Sent from my iPhone using The Garage Journal mobile app
 
Last edited:
OP
Z

zmotorsports

ALLIANCE MEMBER
Joined
Oct 20, 2009
Messages
21,454
Location
Northern Utah
Nice work around Mike. So can I assume that the trampoline effect is now gone?


:beer:

Thanks Dan.

Yes the flexy feeling floor is a thing of the past. I didn't put a lot of pressure upward on it however, just enough to eliminate the downward flex in the floor and enough to keep the screw jack in place so it doesn't move around going down the road.
 

Finallygotit

ALLIANCE MEMBER
Joined
Jul 6, 2013
Messages
4,097
Location
Tucson, AZ
Mike, would it make sense to add a thin rubber mat material between the screw jack and the coach floor and shower tray? (two places) I was just thinking it might help isolate it and help keep it in place. I have no idea how much the coach flexes when traveling on the road.


:beer:
 
OP
Z

zmotorsports

ALLIANCE MEMBER
Joined
Oct 20, 2009
Messages
21,454
Location
Northern Utah
Mike, would it make sense to add a thin rubber mat material between the screw jack and the coach floor and shower tray? (two places) I was just thinking it might help isolate it and help keep it in place. I have no idea how much the coach flexes when traveling on the road.


:beer:

Dan, the coach doesn't flex much due to it being a semi-monocoque chassis design. I will keep the rubber idea in mind just in case it does decided to move at all as I don' have it tightened down too awfully tight pushing the shower floor upwards. I did bump it with my hand a few times from a few different directions before putting the cover back on and it didn't seem to want to move. The OSB floor and the rough texture of the fiberglass shower insert seem to create enough resistance that it doesn't want to move.

Thanks again for checking in and commenting on my projects thread.
 
OP
Z

zmotorsports

ALLIANCE MEMBER
Joined
Oct 20, 2009
Messages
21,454
Location
Northern Utah
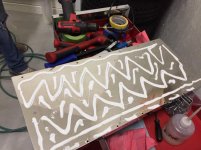
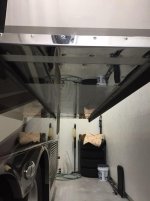
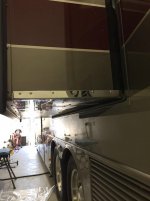
While I was in the shop this morning I decided to address a minor issue that I noticed when I installed my Guardian Plates the other day.

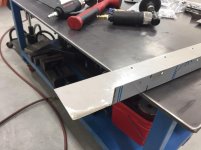
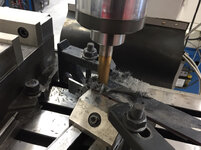
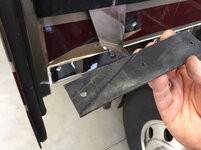
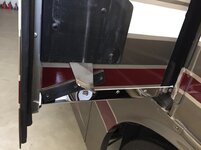
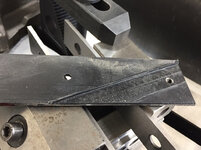
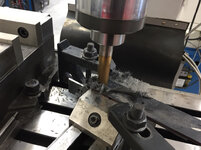
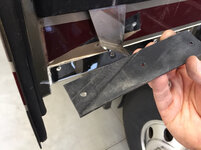
The UHMW wear bar that the slide lock mechanism rides against was pushed out away slightly due to the thickness of the stainless steel plates. I decided to remedy that and mill about .065” off a portion of the back of the wear bar so it would sit properly and not put side load or resistance on the lock mechanism.

Here you can see the gap due to the plate thickness.
914c55c9494e4a1d2b9f3f6b75ad3a53.jpg

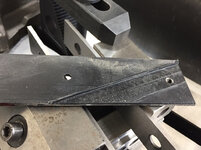
Wear bar removed after marking.
c381eda52f0043b90f9891a8105f1625.jpg

Measurements taken.
557589a72fe9ba5aa530eb852746f23c.jpg

Set up in the mill vise.
4f488c0594ebb87eb05c7d7652e79daf.jpg

Removing .065” of material.
3dbbee483bf2fb6012e03bb12de4e635.jpg

Ready for reinstallation.
23b94d4dd51271dab7f69e4190a25c24.jpg

e06b569dc78ea719c569315f56e3ac20.jpg

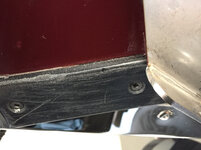
Reinstalled and gap gone.
48446d50256e7693f653719f86d6dfdf.jpg

Installation complete.
ba35c8e3673411c55e46a9e1394191f2.jpg
 

Attachments

  • 914c55c9494e4a1d2b9f3f6b75ad3a53.jpg
    914c55c9494e4a1d2b9f3f6b75ad3a53.jpg
    644.4 KB · Views: 7
  • ba35c8e3673411c55e46a9e1394191f2.jpg
    ba35c8e3673411c55e46a9e1394191f2.jpg
    641.8 KB · Views: 1
  • 48446d50256e7693f653719f86d6dfdf.jpg
    48446d50256e7693f653719f86d6dfdf.jpg
    704.5 KB · Views: 1
  • 23b94d4dd51271dab7f69e4190a25c24.jpg
    23b94d4dd51271dab7f69e4190a25c24.jpg
    783.4 KB · Views: 1
  • 3dbbee483bf2fb6012e03bb12de4e635.jpg
    3dbbee483bf2fb6012e03bb12de4e635.jpg
    699.8 KB · Views: 0
  • 4f488c0594ebb87eb05c7d7652e79daf.jpg
    4f488c0594ebb87eb05c7d7652e79daf.jpg
    706.4 KB · Views: 0
  • 557589a72fe9ba5aa530eb852746f23c.jpg
    557589a72fe9ba5aa530eb852746f23c.jpg
    649.7 KB · Views: 0
  • c381eda52f0043b90f9891a8105f1625.jpg
    c381eda52f0043b90f9891a8105f1625.jpg
    636.7 KB · Views: 0
  • e06b569dc78ea719c569315f56e3ac20.jpg
    e06b569dc78ea719c569315f56e3ac20.jpg
    680.6 KB · Views: 6
Last edited:

shelteredV

Well-known member
Joined
Sep 3, 2015
Messages
532
Location
The Rock
I think it's really good product sourcing on your part to use a marine bonding on an RV, that's something most folks wouldn't think to do. Being in a marine environment, I use it all the time along with other polyurethane products.
 
OP
Z

zmotorsports

ALLIANCE MEMBER
Joined
Oct 20, 2009
Messages
21,454
Location
Northern Utah
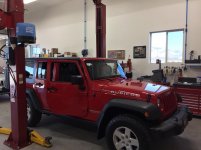
I’ve got a friend’s 2009 Jeep JKUR in the shop doing some more upgrades. This is the same Jeep I did the axle mods and gears in a few years ago and posted to my original Shop Projects thread.
IMG_3585.jpg

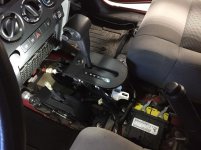
I recommended an upgraded transfer case shift cable and just in time I might add.

Center console removed.
IMG_3584.jpg

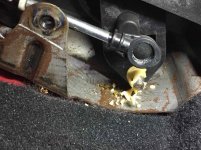
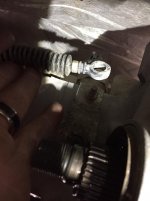
The bushing at the shifter was starting to deteriorate and crumble.
IMG_3586.jpg

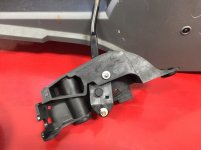
Shifter removed.
IMG_3587.jpg

Another view of the bushing at the shifter.
IMG_3588.jpg

The bushing as well as retaining clip was completely missing down on the transfer case lever.
IMG_3589.jpg

I buttoned up everything under the Jeep and will finish up the shifter and console tomorrow night.

Thanks for looking.
 
OP
Z

zmotorsports

ALLIANCE MEMBER
Joined
Oct 20, 2009
Messages
21,454
Location
Northern Utah
Why do you suppose it’s so hammered? That should have lasted quite some time even if that Jeep sees 4x4 frequently.

I don't know what it is about these plastic bushings and keepers on these JK's. I wonder if it is the heat as the cat is right near the area. This particular Jeep does not see a lot of offroad so not a lot of activity on the shifter and cable.

As for the bushings and keepers, I kept spares in my last Jeep even before I owned a Jeep JK because it seemed as though I was seeing them in RV parks and on the trails where the shifter cable had popped off.

The Advance Adapter's transfer case shifter cable upgrade was one of the first mods I did to my Jeep when I purchased it back in 2011 I was so nervous of it happening. Now I shift with confidence knowing if I shift it once or 20 times a day it is not going to fail. Even the feel of the shift is different as it is much more firm with the upgrade because it isn't just the cable that gets upgraded but the plastic block that the cable attaches to under the shifter is also upgraded with a machined aluminum block and bolts vs. smaller diameter pins and keepers.
 

Finallygotit

ALLIANCE MEMBER
Joined
Jul 6, 2013
Messages
4,097
Location
Tucson, AZ
Unfortunately the OEM is most probably using the wrong resin for the bushing application. The combination of heat/cold and exposure to hydrocarbons crazes and deteriorates the resin. I'm quite sure there are better resins out there for the application but it probably came down to the bean counters saving pennies.


I could probably turn up a bushing out of Ultem, PEEK or a glass filled Nylon that would outlast the current bushing by orders of magnitude.


YMMV


:beer:
 
Last edited:
OP
Z

zmotorsports

ALLIANCE MEMBER
Joined
Oct 20, 2009
Messages
21,454
Location
Northern Utah
Unfortunately the OEM is most probably using the wrong resin for the bushing application. The combination of heat/cold and exposure to hydrocarbons crazes and deteriorates the resin. I'm quite sure there are better resins out there for the application but it probably came down to the bean counters saving pennies.


I could probably turn up a bushing out of Ultem or a glass filled Nylon that would outlast the current bushing by orders of magnitude.


YMMV


:beer:

Agreed Dan. About 10 years ago after first seeing these JK's experiencing that and having a few fellow RV'rs having issues I started carrying a spare. When I bought the spare from my local Chrysler dealer I ended up turning a couple more out of Delrin that I had kicking around and those have actually held up quite well. Converting to the Advance Adapters cable and bracketry is still a much better option in my opinion.

Thanks for stopping by and commenting Dan. I am not up on the various molding processes so it is interesting.
 
OP
Z

zmotorsports

ALLIANCE MEMBER
Joined
Oct 20, 2009
Messages
21,454
Location
Northern Utah
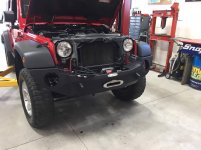
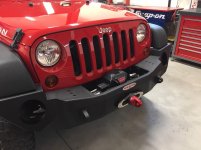
I finished up the Advance Adapters transfer case shifter upgrade tonight on my buddies JKUR then moved on to the bumper removal in preparation for the Rock Slide Engineering bumper and Warn Zeon 10k pound winch.

OEM bumper removed.
IMG_3590.jpg

New bumper installed and preparing to run the cables for the winch.
IMG_3591.jpg

Winch installed, grille installed, Warn winch I stalked and ready to install the synthetic rope.
IMG_3592.jpg

Front completed along with the Factor 55 thimble.
IMG_3593.jpg

Thanks for looking.
 

lilscorpion

Well-known member
Joined
Mar 15, 2010
Messages
3,600
Location
Colorado
zmotorsports said:
I don't know what it is about these plastic bushings and keepers on these JK's. I wonder if it is the heat as the cat is right near the area. This particular Jeep does not see a lot of offroad so not a lot of activity on the shifter and cable.


The Advance Adapter's transfer case shifter cable upgrade was one of the first mods I did to my Jeep when I purchased it back in 2011 I was so nervous of it happening. Now I shift with confidence...


There’s probably something to the Cat theory.

AA makes nice stuff. Their upgrades aren’t cheap but durable. Had a 3.8 atlas in my ‘95 for a few years and it never faltered. Had many other parts since then and never an issue. Probably order the shifter linkage tonight. Didn’t know it was an issue.


Sent from my iPhone using Tapatalk Pro
 

lilscorpion

Well-known member
Joined
Mar 15, 2010
Messages
3,600
Location
Colorado
zmotorsports said:
... moved on to the bumper removal in preparation for the Rock Slide Engineering bumper and Warn Zeon 10k pound winch.

Front completed along with the Factor 55 thimble.
IMG_3593.jpg

What kind of lights is it going to get?
 
Last edited:
To avoid these ads, REGISTER NOW!
Top Bottom