To avoid these ads, REGISTER NOW!

Building tube fenders for a jeep

zmotorsports

ALLIANCE MEMBER
Joined
Oct 20, 2009
Messages
21,436
Location
Northern Utah
Cam, that is an excellent idea. I never would have though to use the capillary action of soldering to fill the void. That will also ward off potential of corrosion and should withstand the heat from powder coating. Great idea.:bowdown:

I agree that after powder coating I would still apply a generous bead of seam sealer to the underside just to deter the build up of moisture and road spray/debris on the underside of the tube and sheet metal joint.

I will definitely have to file that away in my head for future.

Thanks for the idea.

Another reason this forum is so kick ***.:beer:
 
To avoid these ads, REGISTER NOW!
OP
L

LXCam

ALLIANCE MEMBER
Joined
Apr 23, 2013
Messages
19,170
Location
AZ
Cam, that is an excellent idea. I never would have though to use the capillary action of soldering to fill the void. That will also ward off potential of corrosion and should withstand the heat from powder coating. Great idea.:bowdown:

I agree that after powder coating I would still apply a generous bead of seam sealer to the underside just to deter the build up of moisture and road spray/debris on the underside of the tube and sheet metal joint.

I will definitely have to file that away in my head for future.

Thanks for the idea.

Another reason this forum is so kick ***.:beer:

Thanks again Mike :beer:

In all honestly I'm relieved that someone with you vast experience and expertise isn't seeing a shortcoming going this route. I can't think of one, but that doesn't mean much at times. I'll be the first to tell ya I can have my crafty moments, but I don't know everything.


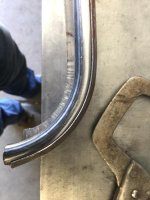
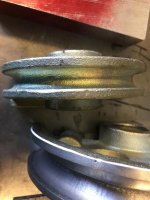
Well I fired off my LT where I stuck the pictures of what I had to modify on this cheap bender to get a decent product out of it. This kit is your typical budget minded all inclusive *********. Fortunately the core quality is actually pretty decent. I can tell you from first hand experience when machining the shoe that the casting is excellent all though the finish quality / outer coating is terrible. I did not see any porosity issues or flaws while or after re-cutting the radius. The steel was hard enough that with a 2 flute ball mill I could only plunge ten thou per cut. Then again a lot of that has to do with that crappy rotary table too. What I wish I had done was go two steps further and bored and sleeved the pivot then machined the shoe to really clean up the accuracy. But, it ain't bad right now.

As a electrical contractor I had the best of the best all the way up to 5" rigid benders. I took an insane amount of pride in how our projects turned out and when doing dozens to hundreds of conduits out of gear designed some really cool manifolds. My OCD would drive the guys insane. If I saw a guy installing pipe with a 6" torpedo, his *** was mine, anything less then a 4ft level and there better be a reason, string lines, plumb bobs, lasers, you name it I have/had it. I'd make them use gauges between conduits but when you'd drop back and look everything would look flawless. Yes, I can't live with myself if something is a 1/16th out, makes me crazy....:shocking:

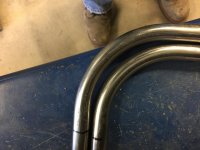
So guess how less then thrilled I was with the quality of the first bend right out of the box. I thought I had taken a picture of how cut up and dented the bend was with the stock die, but I can't find one and I tossed the first couple pieces already. I then took a die grinder with a 3/4" stone and cleaned up the major debris but found out two issues. First off the radius was still larger then I wanted and the bend had a wave/dip in it.

It wasn't until after squaring up and centering the rotary table and machining a mandrel did I identify all the problem areas. I should have used the lathe to first cut the outer shoulder of one side of the shoe, then flipping and bored the axis and sleeved it to reduce what I later discovered was a crappy ~.010 fit to the pivot post on the base. Then cut the radius of the shoe.

So what you'll see here is the 5/8" shoe which had a 1" smaller radius repurposed to 3/4". I've decided that as needed or if one day I'm really bored I'll do all of these in this fashion. It just means everything gets upsized one dimension......no big deal. But it will make for a very nice manual bender for future projects.

IMG_5508.jpg

IMG_5510.jpg

IMG_5513.jpg
 
Last edited:

aka Larry

Well-known member
Joined
May 2, 2012
Messages
8,070
Location
Eastern, NC
As a electrical contractor I had the best of the best all the way up to 5" rigid benders. I took an insane amount of pride in how our projects turned out and when doing dozens to hundreds of conduits out of gear designed some really cool manifolds.

Got any pics of your work? I love seeing this type of stuff. Reading this history helps explain why your bends on this project look so awesome.
 
OP
L

LXCam

ALLIANCE MEMBER
Joined
Apr 23, 2013
Messages
19,170
Location
AZ
Got any pics of your work? I love seeing this type of stuff. Reading this history helps explain why your bends on this project look so awesome.


I do but they're all on my old server which I mothballed after shutting down in 2010. The last time I went to fire up the system which consisted of my main server and a proxy server for our email system it enlightened me with a one finger salute. I'd need to have my old IT guy come out and figure out what's what. This is actually something I've been considering recently because of the thousands of pictures that exist on it. By the time I decided to close my doors after two decades of dedicating my life to that business I was so burned out I could have cared less, but now I'd like to recapture that past history so my kids know that dad didn't just talk ****, he walked in it daily. :lol_hitti

I think there's one picture in photobucket I took of the guys bending either a piece of 3" or 4" in shop one day and I used it as a joke picture for making custom intakes. Imagine trying to squeeze a 24" radius pipe under the hood.......haha.

I'll see what I can dig up Larry and thanks for following along.

WELL ****!!!, PB has me totally held hostage I can't even log in without them hitting me up for money. F them!!.
 
Last edited:
OP
L

LXCam

ALLIANCE MEMBER
Joined
Apr 23, 2013
Messages
19,170
Location
AZ
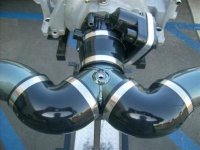
So Larry, I gave up on my lap top and then tried the direct link thru my phone. That got me into my albums and after coping these two pictures I once again was rewarded with another salute by the PB greed mongers. All though there weren't any construction projects in there I figured I'd show you one of my unique products I used to offer. I wish I'd have grabbed better pictures and had I known I'd get shut down I would have. Anyhow this one was set up for spray. The port is facing up only for the picture on my display stand. But after the install I ran the line under the manifold so it couldn't be seen and the solenoids were hidden as well for one of my buddies.

Btw these pics are 10yrs old now..gezzz time flys.

IMG_5612.jpg

IMG_5611.JPG


Side note for you gear heads. This guy back then was happy to run high tens with a 150 shot in a 4600lb charger. In time he finally got that 8 he'd been dreaming about with a two stage 500shot. He's now into the hell cat scene and after torching the motor going mid 9's is once again shooting for the 8's.
 

ddawg16

Well-known member
Joined
Jul 11, 2008
Messages
21,005
Location
S. California
Solder?......Hmmmmm.....now you have me thinking....

Looks like a great way to fill in voids between welds.....
 

Whiskeymike

Well-known member
Joined
Oct 31, 2013
Messages
775
Location
Austin, TX
Awesome build out. I’m looking to build similar fenders for my JK. I was planning on building a buck, but from what I see of your design that may not be needed. Looking forward to seeing the final outcome.

If you have pics from the bumper build, please share them. My daughter and I are about to work on some bumpers for her TJ so it would be great to get some pointers.
 
OP
L

LXCam

ALLIANCE MEMBER
Joined
Apr 23, 2013
Messages
19,170
Location
AZ
Solder?......Hmmmmm.....now you have me thinking....
Looks like a great way to fill in voids between welds.....

:pimpflash. So yesterday during our thunderstorm from hell I took a nice long break and caught the build off between the chicks and Lou/Jarad. The chicks were building a jeep and they had some one piece fender / body armor that the fender was made from a mandrel bent piece of 1" x 4" rectangular tubing.

Talk about a face palm moment........gezzzz I'd have been done a week ago :mad:

Awesome build out. I’m looking to build similar fenders for my JK. I was planning on building a buck, but from what I see of your design that may not be needed. Looking forward to seeing the final outcome.

If you have pics from the bumper build, please share them. My daughter and I are about to work on some bumpers for her TJ so it would be great to get some pointers.

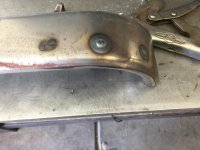
Thanks Mike. There isn't much reason for a buck because most of the radius shaping for the sheet metal is formed when shrinking the radius. Once that is matched to the tubing it tacks together easily. That mock up piece had a much tighter radius then the tubing which is why it had so many tac welds.

And you bet, my original pictures are extremely large and I can only post three at a time. I'll resize them in the next day or so and post them up.

Thanks for following along
 
Last edited:
OP
L

LXCam

ALLIANCE MEMBER
Joined
Apr 23, 2013
Messages
19,170
Location
AZ
So I took a couple days off from the shop. The day before yesterday it was 115 by the time I got home and then yesterday after getting other honey do's done we had a pretty damn good thunder shower that killed the idea of moving stuff outside....then again it was a great excuse to just relax too.


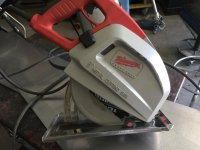
Ok so back on track. I haven't finished with the tubing frames yet but wanted to get the sheet metal cut and the shop cleaned up. I'll tell you what, it's imperative the outside finished edge be dead nuts on and I almost had my supplier shear them to size for me. But I decided to see just how good I could get it in house. I bought this saw probably a dozen years ago and the only time it gets used is for cutting plate. So I figured let's toss on a new blade and rig up a very accurate gauge and see how it turns out.

IMG_5632.jpg

IMG_5631.jpg

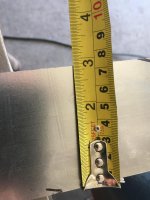
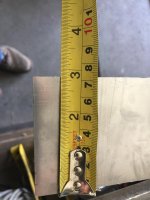
Now I got to admit I even impressed myself here. That is the scrap piece left over after taking three 7" pieces out of a 2' x 4' piece of sheet metal. It's only off by a 32nd of an inch.

The only real reason for showing this rhetorical step is to show you ya don't need thousands of dollars of specialized equipment to get a decent product in a small home shop scenario. But with just a couple good tools and taking your time it's not that hard to achieve the end goal

IMG_5630.jpg

IMG_5629.jpg
 
Last edited:
OP
L

LXCam

ALLIANCE MEMBER
Joined
Apr 23, 2013
Messages
19,170
Location
AZ
Whelp I'm gonna be honest with you guys. I've always said anytime cocky boy raises his head, no good can come from it. So after patting myself on the back about my in house metal cutting skills of that 16ga sheet metal, my 4ft finger brake gave me a big one finger salute bending it. I even spent a half dozen hours doing a major service dialing everything in. It just wasn't gonna do it :(

In my wallowing of pitty and self defeat I called up industrial metal supply and ordered the material sheared to size in 18ga. Yes I did confirm my pos brake could pull that off.

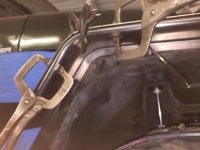
The upside being it was certainly much easier shrinking the radius. So at this point it's time to **** or get off the pot. I've got everything dialed in and ready to start welding with one exception. I want to make a gauge that allows me to clamp the sheet metal with the exact reveal I'm looking for. Between my eyesight going and all those clamps I can't see the line clearly. I also plan on trimming the excess on the radius after the fact so I don't short myself.


IMG_5645.jpg

IMG_5646.jpg

IMG_5647.jpg

IMG_5648.jpg

IMG_5649.jpg

IMG_5651.jpg

IMG_5639.jpg
 
Last edited:

zmotorsports

ALLIANCE MEMBER
Joined
Oct 20, 2009
Messages
21,436
Location
Northern Utah
Looks great Cam.

I don't have the ability to shrink the bends like you do, so I more than likely will cut out a back support that follows the contour of where I want to fasten the fenders to the body then I will weld the flat part of the fender to that inner support. I may even go a little thicker like .120" (or even .188") on the inner support then 16-gauge P&O for the sheet metal, haven't decided for certain yet.

I'm enjoying your fender build, keep the pics coming.
 
OP
L

LXCam

ALLIANCE MEMBER
Joined
Apr 23, 2013
Messages
19,170
Location
AZ
Looks great Cam.

I don't have the ability to shrink the bends like you do, so I more than likely will cut out a back support that follows the contour of where I want to fasten the fenders to the body then I will weld the flat part of the fender to that inner support. I may even go a little thicker like .120" (or even .188") on the inner support then 16-gauge P&O for the sheet metal, haven't decided for certain yet.

I'm enjoying your fender build, keep the pics coming.

It's a real toss up for me Mike. Build these with some give so when the day comes he tags something, it absorbs the impact and doesn't transfer the damage into the body. Or build a rock.

There's a couple Jeep's I run into a few times a week that have tube fenders built no different then what I'm doing. And all thought they look the part, it's hard to tell if they get used for what they were built to do or if they're just mall crawlers. I spent several years in the off road scene but other then some brush and tree limb scratches never took anything out. And there are guys like yourself that keep their rides pristine but do a lot of playing.

From a time perspective I wish I'd come across those body armor pieces with the rolled rectangular tubing before going this route. I'd have had my Fab shop buddy roll the tubing and I would have raduised the returns here like you stated and then welded them to some 11ga plate. I'd been done in a weekend :headscrat


Well at this point I'm dedicated so let's see how this turns out and once again thanks for the compliment.

Btw, last night I went to build a gauge and then it occurred to me I already had one. Well maybe I should say a simple start to one. I'll just clamp this to a square and call it good I think.

IMG_5652.jpg

I do have a question for you. I know how concerned you are about floor space. But with all the metal work you do I'm surprised you don't bit the bullet and have a finger brake and a shrinker/stretcher. The frame for my brake is roughly 2'x 5' and the S/S eats up maybe a 8"w x 24" deep slot. And the base doubles as storage for all my 2'x 4' sheet material. All though not the best stuff it sure gets 95% of my projects wiped out. So the question is, why not? Both these could easily store over in the RV side.


I'll tell you a story. I've been quit fortunate to have been exposed and worked in many trades. With my original profession choice right out of high school I got a fair amount of automotive machining training. My dad was one hell of a wood worker and had a complete WWn shop so I got all that growing up but once I was exposed to metal, I was hooked. So my goal for a couple decades was to have a mill and lathe. Back when I only had a highly modified 2 car garage as my shop I could have given Jack a run for his money. I finally bought a table top round column 2hp mill with power down feed and outfitted it with a 3 axis DRO and table feed. I mounted it to a welded up frame with two lista cabinets built in plus fabbed up an aluminum back (side) splash to keep the mess to a minimum. I made a lot of money off that simple machine over the last 20yrs. A few years ago I bought a used supermax knee mill (9x48). And all though a much more capable piece it ate up a huge chunk of precious floor space in my tiny shop. Regardless I still found myself using my old mill as everything was right at my finger tips. I finally ended up selling it at half price to one of my best buds just to gain back that 40sqft area. As you can see in the pictures I too play the Tetris game when I'm doing anything in here. This BS **** hole I call a shop was never meant to be one. It was only a temporary storage solution after I closed the contracting business and moved everything out of my building home. Just something to get me by for a few months.........that was 8yrs ago :lol_hitti
 
Last edited:

zmotorsports

ALLIANCE MEMBER
Joined
Oct 20, 2009
Messages
21,436
Location
Northern Utah
If I did more sheet metal work I would definitely have a finger brake and possibly a shrinker/stretcher but at this stage I am not finding that I do much sheet metal work these days. I keep an eye out locally for a good 48" brake and if the price was right I think I could easily talk myself into one but I'm not going to pay for a new one when it wouldn't get used much.

I have the SWAG finger press brake attachment that I use in my hydraulic press and it works very well on about 18" or less wide parts so that is what I have been using. I'm scared to start stacking more equipment into my shop because I know how bad it sucked not having room in my last shop and I'm a bit gun-shy of getting to that point again. My fear is I will have to end up parking the coach outside OR be down to a one car shop again and that is not going to happen so I'm trying to be selective on adding any more equipment to the shop.

Hope that makes sense, if I needed one more often I surely would have it though.
 
OP
L

LXCam

ALLIANCE MEMBER
Joined
Apr 23, 2013
Messages
19,170
Location
AZ
That makes all the sense in the world Mike. I get it, I can't live it (for now) but I certainly get it. ;).

We're heading out to Prescott to look at property the week after next. When I do this again whether it be buy or build I hope it'll be a different story.
 
OP
L

LXCam

ALLIANCE MEMBER
Joined
Apr 23, 2013
Messages
19,170
Location
AZ
Hellll ya, that's money. A couple minor adjustments and create an anvil at the striking area.....but that's money. :pimpflash


IMG_5654.jpg

IMG_5655.jpg

IMG_5656.jpg

IMG_5657.jpg

IMG_5658.jpg

IMG_5659.jpg
 

zmotorsports

ALLIANCE MEMBER
Joined
Oct 20, 2009
Messages
21,436
Location
Northern Utah
Hell ya!

That should work. Great idea on fabricating an anvil/jig.


As for the property, I didn't realize you were contemplating moving. I thought you were happy where you were at. Did something change?
 
To avoid these ads, REGISTER NOW!
OP
L

LXCam

ALLIANCE MEMBER
Joined
Apr 23, 2013
Messages
19,170
Location
AZ
Hell ya!

That should work. Great idea on fabricating an anvil/jig.


As for the property, I didn't realize you were contemplating moving. I thought you were happy where you were at. Did something change?

Thanks and hell nooo. We love our property and where we live but it stops there. If it wasn't for the grand kids we'd be gone. It's a long story like all stories but a couple weeks ago I said to the wife - wife if we had to leave tomorrow where'd you like to go. The Prescott area keeps us within an easy drive to the kids. So we're talking seriously about going all though we won't be going tomorrow. At best it'd take me a year to wind things down and be ready to move. But if we decide to do it, I can go into wind down mode pretty damnnn fast.

To answer your last ? Yup something changed in a big way recently. I need to have some wrenching done on me. So I handed off my work load and am taking the next couple months to get some outstanding projects done n gone and then go under the chainsaw. That's gonna have me laid up pretty good for a month or two but it's past time. Just like a damn car if you don't keep up the maintenance it's going to need a whole new suspension and a engine rebuild. I'm going to get two things done at once more or less to mitigate doubling up on my downtime. If I continue to put this off to a later date it will most like happen anyhow unexpectedly or inconveniently I should say.

As drives so aptly named his thread. It's time to get healthy so we can play with our tools longer.

Great idea!

Thanks BBG.
 
Last edited:
OP
L

LXCam

ALLIANCE MEMBER
Joined
Apr 23, 2013
Messages
19,170
Location
AZ
Not dead on yet, but damn close. So with that learning curve out of the way hopefully I can do better on the rest. I just had to see how it looks but it needs a better clean up still.

You guys ok with the style or does it look too old mannish :headscrat


IMG_5662.jpg

IMG_5663.jpg

IMG_5664.jpg

IMG_5666.jpg

IMG_5665.jpg
 
OP
L

LXCam

ALLIANCE MEMBER
Joined
Apr 23, 2013
Messages
19,170
Location
AZ
Much appreciated WM! I'm pretty happy with it. I know stuff like this is easy to a body pro, but I've never done anything like these fenders before. I had no idea if that much reveal could shrink enough and not cause some sort of distortion or ripple.

Ya gotta luv getting lucky :p
 
OP
L

LXCam

ALLIANCE MEMBER
Joined
Apr 23, 2013
Messages
19,170
Location
AZ
:beer: fellers. I've almost got enough coffee in me right now to clean up the excess tools and get rocking. Now that I got the steps sort of dialed in I might make some headway today. Plus it's only going to be in the low 90's which after last weeks temps feels like the Rockies in November....now where's my jacket. ;)
 
OP
L

LXCam

ALLIANCE MEMBER
Joined
Apr 23, 2013
Messages
19,170
Location
AZ
Coming from you three is definitely motivation material, thanks guys.

Finally back at it today and built a helper plus whipped out the cheap cheesy tools to get everything matched up as good as I can get.

I was fighting creating the bend while holding a 4ft long piece. On my first one I ended up with a slight roll that took a little extra effort to work out. I have a couple cheap adjustable roller stands that are 12" wide. I got tired of constantly moving it so I took an piece of pipe and welded on a couple tabs. It sure is nice not fighting it now ;)

IMG_5682.jpg

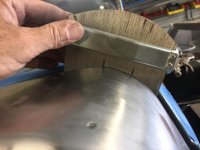
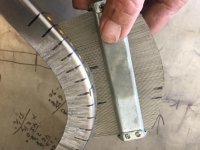
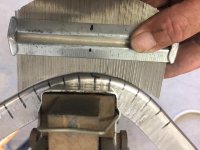
I bought the contour gauge a loooong time ago. It doesn't get used to often but when I need it, it's a gawd send. So much simpler while at the shrinker stretcher ironing out the details.

IMG_5683.jpg

IMG_5684.jpg

IMG_5685.jpg

IMG_5686.jpg

This flex ruler is the **** for identifying (in this case) my center points. I make an arbitrary mark on the straight piece, then form it to the radius. Mark the center of bend then lay it flat and transfer the center mark.

IMG_5688.jpg

IMG_5689.jpg

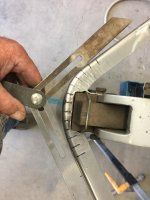
Youll see a bunch of hash marks I make at the radius point. I space those out so it gives me a focal point when using the SS. It really makes it nice detailing the bend like in the picture using the angle finder. I had t shrink the radius more and then had to straighten out the tail, sighting the third hash mark makes it a slam dunk to fix. :thumbup:
 
Last edited:
OP
L

LXCam

ALLIANCE MEMBER
Joined
Apr 23, 2013
Messages
19,170
Location
AZ
Man am I glad all the shrinking is done. And man oh man am I happy I had the right foot shot up with cortisone yesterday. Had I not this would have taken another couple days...gezz


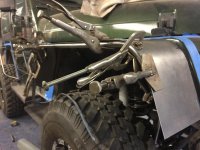
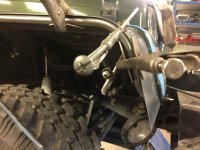
So the worst part is all fitted and I just need to weld the rear covers on. Then cut and weld on the filler panels, roll the edges and whip this out. If I can still walk tomorrow there's a darn good chance all this can go to PC Monday. That's sure make me happy :)

I mounted the other front fender but only did a rough cut to the curve. Once I get all the filler panels on I'll do all the final figment at once. Believe it or not, that's the hardest part for me making the reveal match.


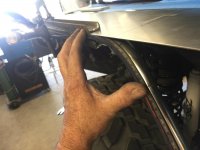
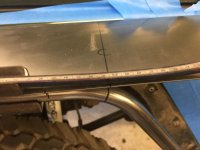
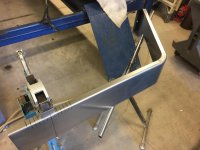
IMG_5690.jpg

IMG_5691.jpg

IMG_5693.jpg

IMG_5694.jpg
 
Last edited:

fnieto

Well-known member
Joined
Aug 27, 2013
Messages
1,401
Location
Tucson,Arizona
Damn Cam,
those up slope angles (bumper /fender) look fantastic. Some real love in this detailed project, well done!
 
OP
L

LXCam

ALLIANCE MEMBER
Joined
Apr 23, 2013
Messages
19,170
Location
AZ
Damn Cam,
those up slope angles (bumper /fender) look fantastic. Some real love in this detailed project, well done!


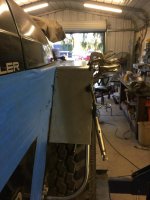
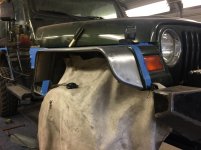
Thanks Paco! The front fenders had to be welded up mounted to the ride because of the odd shape. I've welded upside down and backwards before but never having to use a mirror, darn good thing I plan on seem sealing that inner area. :spit:

I'm sure you have some idea how happy I am the rears can be welded 100% on the bench. ;)

Man I wish it wasn't Sunday morning, I'd have been beating on some metal an hour ago. I'll give everyone a break till 7 and then all bets are off :pimpflash
 
Last edited:

manwithtools

ALLIANCE MEMBER
Joined
Aug 24, 2015
Messages
13,985
Location
Lebanon, TN
Hey you - keep it down over there - it's Sunday morning for God's sake!

Seriously, that's some top notch work there Cam. I wish I had the patience and the equipment to do sheet metal forming such as that. I think the Jeep owner is going to be very pleased - they will posses a one of a kind ride when you are done.

I'm going to have to look you up when I get to San Diego area near the first of the year. Did I mention I have a Jeep? :)
 
Last edited:
OP
L

LXCam

ALLIANCE MEMBER
Joined
Apr 23, 2013
Messages
19,170
Location
AZ
Hey you - keep it down over there - it's Sunday morning for God's sake!

Seriously, that's some top notch work there Cam. I wish I had the patience and the equipment to do sheet metal forming such as that. I think the Jeep owner is going to be very pleased - they will posses a one of a kind ride when you are done.

I'm going to have to look you up when I get to San Diego area near the first of the year. Did I mention I have a Jeep? :)


I was a good boy until 8:00. But that was hard I tell ya, damn hard. We got new neighbors who are obviously city folk and not meant for this area. Just wait till they have to live thru a SEMA crunch, that'll teach them to move into my hood. :shocking:

Thanks MWT, I really appreciate it. And hell ya when you get out this way let me know and we'll get together. All though Diego isn't right next door it's not far either. And one thing about me, my shop is always open to a buddy so if you ever need use of something I've got or we can do here don't hesitate to ask.

Cam
 

manwithtools

ALLIANCE MEMBER
Joined
Aug 24, 2015
Messages
13,985
Location
Lebanon, TN
Oh yes, I'm the same way. Tools for the most part are not in short supply - hence the screen name. If I've got it, you are welcome to use it, not much I don't have except dedicated sheet metal tools. Otherwise, I've likely got it - which is going to be a pain in the *** to move all the way to SoCal from TN.

It's going to be interesting finding the right place to move to that will accomodate my hobbies and interests.

It's great of you to share a project like this with all of us. Some folks would have no idea how much work and skill goes into such a project.
 
OP
L

LXCam

ALLIANCE MEMBER
Joined
Apr 23, 2013
Messages
19,170
Location
AZ
Oh yes, I'm the same way. Tools for the most part are not in short supply - hence the screen name. If I've got it, you are welcome to use it, not much I don't have except dedicated sheet metal tools. Otherwise, I've likely got it - which is going to be a pain in the *** to move all the way to SoCal from TN.

It's going to be interesting finding the right place to move to that will accomodate my hobbies and interests.

It's great of you to share a project like this with all of us. Some folks would have no idea how much work and skill goes into such a project.


Luck, you forgot luck, oh ya and clamps too-lotta clamps. Haha!

It used to be when I was on the car forums I shared an insane amount of detail. But that was when I was always in front of a computer all the time which made it easy. Here I don't share hardly anything since im almost always phone posting. But getting to know guys like Mike and Paco I'm so impressed by how they format their threads figured I'd give it a shot and see how that goes. It's very time consuming especially when I fat finger something and autocorrect kicks in...not good.


Anyhow back to your move. You'll have to find a rural area for certain. Most that live in the rural spots with acre plus property are either contractors or nut jobs like us with loud hobbies so everyone is used to the abuse. I know how bad it ***** commuting but out here there isn't a choice. Have you spied some areas to check out yet?
 

manwithtools

ALLIANCE MEMBER
Joined
Aug 24, 2015
Messages
13,985
Location
Lebanon, TN
Yep, I'm thinking Ramona. I've actually found an ideal place on 4 acres that I might actually be able to afford. I doubt it will still be there when I'm ready to move. But they did just reduce the price by 1.05%. They must be ******** desperate :)
 
Last edited:
To avoid these ads, REGISTER NOW!
Top Bottom