To avoid these ads, REGISTER NOW!

ZMotorsports Shop Projects 2.0

LXCam

ALLIANCE MEMBER
Joined
Apr 23, 2013
Messages
19,181
Location
AZ
Mike I love how indepth you go and thank you. And you're dead on about the amount of clean up it takes on the sheet metal not including having to work it a second time shrinking some of the areas. I went to .035 a couple decades ago simply because almost everything I used my 252 on as well as its red predecessor was 1/4 to 1/2" material. Since closing my construction company I rarely do that much thick stuff.

But you've given me an idea. I've got a Lincoln 140 here I use with flux core for field work on wrought iron and galv fencing. Maybe I'll switch it over and see how it does.

Thanks again for the info bud, much appreciated.
 
To avoid these ads, REGISTER NOW!
OP
Z

zmotorsports

ALLIANCE MEMBER
Joined
Oct 20, 2009
Messages
21,441
Location
Northern Utah
Mike I love how indepth you go and thank you. And you're dead on about the amount of clean up it takes on the sheet metal not including having to work it a second time shrinking some of the areas. I went to .035 a couple decades ago simply because almost everything I used my 252 on as well as its red predecessor was 1/4 to 1/2" material. Since closing my construction company I rarely do that much thick stuff.

But you've given me an idea. I've got a Lincoln 140 here I use with flux core for field work on wrought iron and galv fencing. Maybe I'll switch it over and see how it does.

Thanks again for the info bud, much appreciated.

Thanks Cam. Sometimes my lengthy answers turn people off so thanks for commenting.

I have a little Miller Passport machine that is a small suitcase style inverter welder that I used to take to the races and dunes with me because it used those small paint ball CO2 bottles. It works well on 120VAC and I could run it off of my generator on the coach and just plug it into a trailer receptacle and weld away. I had given some thought to using it with some .023" wire but it works great as a portable welder if I need to run to a friends house and weld something but I didn't want to use it in much more of a capacity than that. Actually I don't even think they make the Passport any longer as I don't think it sold well. I bought mine used from a friend who bought it to do one job and then a year later needed money and didn't see any further use for it but I thought it would be handy to throw in the trailer and take to the races. Ideally I wanted a little 140 machine like you have but the 20% duty cycle of any of those smaller 120 volt machines bothered me.

I have been eyeing the MM211 because on 240VAC it actually has a 40% duty cycle which will be much more conducive to my shop environment on various projects. I also liked the cast aluminum drive assembly on the Miller MM211 which is angled for a better feed angle off of the roll. Many of the import 120 volt welders use common plastic components and I wanted a more industrial machine even though this is still considered a "hobbyist" machine. My next decision was to use my larger 250CFH bottle on my MM251 and run a secondary hose over to the new MM211 or bite the bullet and get another tank setup so both are independent of each other. I opted on the latter and purchased a smaller 125CFH tank and talked my welding supply house into throwing in a cart so I truly will have two separate designated MIG welders for an even broader range of material thickness and yet still have the portability around the shop with them being separated machines.

If you decide to switch over that little Lincoln 140 I think you will be surprised how much you use it and like it for those projects that just seem a little too small for the big machine. I also think you will like the .030" wire so next time you run out of the .035" think of me and order yourself a roll of .030" and some contact tips and give it a try, I doubt you will go back my friend.:beer:
 

Bigblue&Goldie

Well-known member
Joined
Mar 12, 2009
Messages
10,714
Location
AZ
Yeah, thanks for the info. I pretty much only weld on automotive (off road) related stuff, and I have been feeling lately that .035 is often overkill. I notice I tend to gravitate more towards the tig on anything thinner than 3/16" as the mig is laying down a big bead. I too wouldn't mind having a smaller machine for sheet metal work.

I'm very conscious about the appearance of my welds as our circle is VERY critical of that stuff. I'm not the best at laying down a pretty mig weld, so I'd rather tig most things. On trailers and other stuff that is "mass produced", I'll break out the mig because it's convenient and my welds still look better than what come off an assembly line. I think the hard part of welding is knowing that your welds are essentially your signature, and are the first thing a person looks at. Nobody says "that weld looks strong" , they always say "that weld looks nice" or "that weld looks like bird ****". Also, when your welds are sitting next to a pro's, it really humbles you. The cars we race look like they were welded by NASA's crew; essentially flawless.

It's all time and practice, I'm just grateful we have superb internet resources that didn't exist when I started tig welding only 10yrs ago. My formal tig welding education was 3min of instruction on aluminum.....I've never welded aluminum since. I have ground a lot of tungsten since then while I've tried to figure it all out! :spit:
 
OP
Z

zmotorsports

ALLIANCE MEMBER
Joined
Oct 20, 2009
Messages
21,441
Location
Northern Utah
Yeah, thanks for the info. I pretty much only weld on automotive (off road) related stuff, and I have been feeling lately that .035 is often overkill. I notice I tend to gravitate more towards the tig on anything thinner than 3/16" as the mig is laying down a big bead. I too wouldn't mind having a smaller machine for sheet metal work.

I'm very conscious about the appearance of my welds as our circle is VERY critical of that stuff. I'm not the best at laying down a pretty mig weld, so I'd rather tig most things. On trailers and other stuff that is "mass produced", I'll break out the mig because it's convenient and my welds still look better than what come off an assembly line. I think the hard part of welding is knowing that your welds are essentially your signature, and are the first thing a person looks at. Nobody says "that weld looks strong" , they always say "that weld looks nice" or "that weld looks like bird ****". Also, when your welds are sitting next to a pro's, it really humbles you. The cars we race look like they were welded by NASA's crew; essentially flawless.

It's all time and practice, I'm just grateful we have superb internet resources that didn't exist when I started tig welding only 10yrs ago. My formal tig welding education was 3min of instruction on aluminum.....I've never welded aluminum since. I have ground a lot of tungsten since then while I've tried to figure it all out! :spit:

Very similar here. I have found myself using TIG on thinner items that I would probably have MIG welded had I had a smaller machine and wire setup. TIG definitely has its place and I love TIG welding but for some things it is just a bit too time consuming and a smaller wire/MIG machine will definitely fill that gap better.

If you are doing mostly off-road and automotive welding I highly recommend giving some .030" wire a shot. I think you will be pleased.

Funny you mentioned how tough your crowd is on welds. Back in the 90's when I made the move from street rods over to sand rails and sand ATV's I got quite a bit of **** from friends and fellow car club members who thought I was abandoning my roots. I said it couldn't have been further from the truth, I was merely expanding my world and needing a bit more challenge. They thought I was nuts until I told them that in a street rod there is so much to cover up poor workmanship, crappy welds, piss poor welds or down right ****** welds between body filler, carpet, etc. that I needed a bigger challenge because in a sand rail and ATV with EVERYTHING exposed and hanging out there for the whole world to see there really wasn't any way of hiding poor workmanship.:bounce: I said it in a somewhat joking manner but it really pissed a few people off and many haven't spoken to me since.:lol_hitti

Fast forward to a few years ago when my wife and I got heavily involved in Jeeping and went to a local Jeep event, a little show 'n shine. My Jeep was receiving quite a lot of attention because people wanted to know about my suspension and what brand my bumpers were but didn't believe me when I said I had fabricated them myself. There was a member of the Jeep group present that also works for a well known shop in the area that specializes in Jeeps, he was showing off his newly built Jeep. I walked over and checked it out and introduced myself and he really didn't give me the time of day when I was asking him questions about his build. I was told by several that his nickname is "Weldor ****" so I assumed that he must have been a hell of a weldor and fabricator. He had some neat ideas on his Jeep and the parts used were high end but the execution could have been a little better and the welds should have been much better from a guy with "Weldor" in his name but I didn't tell him that as I was trying to be very complimentary to those things I liked.

One of his buddies brought him over to our Jeep and was showing him a few items then they came back over to his Jeep where I was still looking around. He was trying to inquire as to what shop I worked for and I just told him I had a small shop at home and just tinkered in it. I was going to get his goat and tell him I just bought a welder a few months back and was trying out my welding skills :) but before I could his buddy nudged him and said "geez ****, with a name like Weldor **** your welds should look better than a nobody in a garage at home."

I know his buddy was just trying to get a rise out of him and it worked. He was pissed and walked away in a tizzy while his buddy laughed his *** off.

To my point, I completely agree that welds can be critiqued and critiqued hard in a crowd as some are down right brutal. We too have tough crowds and I want to have my welds stand out as my signature but in a good way, not like the other.:lol_hitti

All that being said, my welds are never as good as I want them to be but I guess I'll keep trying. Maybe one day I will be able to call myself a weldor and/or fabricator but until then I will just keep my amateur status.
 

aka Larry

Well-known member
Joined
May 2, 2012
Messages
8,086
Location
Eastern, NC
I've got a Lincoln 140 here I use with flux core for field work on wrought iron and galv fencing. Maybe I'll switch it over and see how it does.
FWIW Cam, I have a Lincoln 140 and run 0.025" wire in mine all the time. I'm using welding 1/8" plate, but it will do 3/16" just fine with proper edge prep.
 

LXCam

ALLIANCE MEMBER
Joined
Apr 23, 2013
Messages
19,181
Location
AZ
I'll take that advice to heart Mike. Darn shame I've still got over half a 30lb roll left in the 252.

FWIW Cam, I have a Lincoln 140 and run 0.025" wire in mine all the time. I'm using welding 1/8" plate, but it will do 3/16" just fine with proper edge prep.

Copy that Larry, since this machine already has the solenoid it'll be an easy swap.


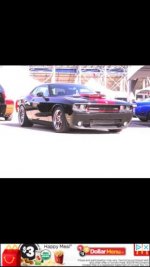
Mike, your story about Welder reminds me of the same kind of story that happened to me at Mopars in the Strip a few years back. I built a very special 08 SRT Challenger. A lot of what I did appeared to be bolt on except that was further from the truth. From the one off Kennebell super charger running my prototype stand alone drive system to all the major changes I made to the fascia for better cooling as well as all kinds of other stuff.

But the one mod I was the most proud off was the mini tub kit I developed for the LX and LC line up. It allowed fitment without any limitations if a 335 wide set of meats and looked badass if you looked from behind.

Anyhow Mr. Norms had their set up a couple vendors down from me. On the morning of the second day their main fabricator caught a glimpse of the back end and the next thing ya know everyone fromthat camp was gathered around the car really checking it out. This ended up culminating into a great time. Kicking with that crew and the CEO of Dr. Pepper drinking crown royal and DP cocktails every evening for the next couple evening not including a relationship with the new regime of Mr Norms for the past several years.


Sorry about the crappy pic but I have to take screen shots off PB for now. I got the car running literally one day before MOTS so I hadn't dialed in the front end yet.

IMG_5976.jpg
 
Last edited:
OP
Z

zmotorsports

ALLIANCE MEMBER
Joined
Oct 20, 2009
Messages
21,441
Location
Northern Utah
I'll take that advice to heart Mike. Darn shame I've still got over half a 30lb roll left in the 252.

Well I guess you had better start burning some steel then Cam. That .035" isn't going to weld itself.:lol_hitti

Great story by the way Cam. Agreed there can be great friendship's to be made sitting around kicking tires and swapping ideas. Unfortunately there can also be some bruised egos from those who think the rest of us are idiots.

Anymore when I go to our Jeep club meetings and events I seem to not open my mouth much and just enjoy the day/event. I have found that those that seem to run their mouths about how wonderful they are don't like it when you show them up. Then there's the other side that once people find out you are good at wrenching/fabricating I tend to get people asking me to do all of their work on their Jeeps or want me to solve their issues based on a sentence long description. I now just sit and listen to others as it seems to be the most relaxing and keeps me from getting volunteered for a bunch of work that I don't have the time to do.
 

LXCam

ALLIANCE MEMBER
Joined
Apr 23, 2013
Messages
19,181
Location
AZ
Ya I don't talk shop at events unless I'm prodded too and even then it's limited.
 

Finallygotit

ALLIANCE MEMBER
Joined
Jul 6, 2013
Messages
4,096
Location
Tucson, AZ
...........If you decide to switch over that little Lincoln 140 I think you will be surprised how much you use it and like it for those projects that just seem a little too small for the big machine. I also think you will like the .030" wire so next time you run out of the .035" think of me and order yourself a roll of .030" and some contact tips and give it a try, I doubt you will go back my friend.:beer:


Mike, thanks for the welding tips. I think I'm going to go buy a spool of .030" wire and give it a go. God knows I can use all the help I can get. :wtf:


:beer:
 

Firstram

Well-known member
Joined
May 16, 2017
Messages
1,392
Mike, you're going to love that 211! I have a MM251 that always has .035 (I do quite a bit of 1/4"+) and I picked up a 215 late last year that is loaded with .023. You are 100% correct with all of your comments especially about having to switch wire.

I have to say, I love my 251. Copper transformer with analog controls and digital display rocks but, the best thing about it is the power switch is on the front of the machine!
 

shortykorte

Well-known member
Joined
Sep 1, 2014
Messages
8,039
Location
Tallahassee, Fl
Aw man, I would have sold you my 10 yr. old Hobart 135 for half of what that Miller cost you. Lol.
...then I get to the end and a 110v isn’t a real welder. [emoji22]
Thank you the history and thought process on the various wire. I’ve been wanting to upgrade to a 220v idiot proof welder (I need it). Keeping the 135 for sheet metal/small wire might be a good idea. I’ve only welded about 20 linear feet so have a lot to learn and way more practice.


Sent from my iPhone using Tapatalk
 
OP
Z

zmotorsports

ALLIANCE MEMBER
Joined
Oct 20, 2009
Messages
21,441
Location
Northern Utah
Mike, you're going to love that 211! I have a MM251 that always has .035 (I do quite a bit of 1/4"+) and I picked up a 215 late last year that is loaded with .023. You are 100% correct with all of your comments especially about having to switch wire.


I have to say, I love my 251. Copper transformer with analog controls and digital display rocks but, the best thing about it is the power switch is on the front of the machine!


Thanks for your comments. Glad to hear I’m not crazy in my thinking. Well maybe, but that would mean you’re right there with me. [emoji23]

If I had one complaint so far about the Miller MM211 it would be that the power switch is not on the front panel, but I’ll get over it.

Thanks for following g along on my projects thread.


Sent from my iPhone using The Garage Journal mobile app
 
OP
Z

zmotorsports

ALLIANCE MEMBER
Joined
Oct 20, 2009
Messages
21,441
Location
Northern Utah
Aw man, I would have sold you my 10 yr. old Hobart 135 for half of what that Miller cost you. Lol.
...then I get to the end and a 110v isn’t a real welder. [emoji22]
Thank you the history and thought process on the various wire. I’ve been wanting to upgrade to a 220v idiot proof welder (I need it). Keeping the 135 for sheet metal/small wire might be a good idea. I’ve only welded about 20 linear feet so have a lot to learn and way more practice.


Sent from my iPhone using Tapatalk


Shorty, I meant no disrespect with my “real welder” comment. I was referring to duty cycle and I struggle with the ones that fall in the 20% range for any kind of moderate fabrication.

However, if you are looking at stepping up to a 240 volt machine, I would suggest giving some serious thought to keeping the smaller one just for using with smaller wire and lighter projects.

Thanks for following along and commenting Shorty.
 

BMW Rider

Well-known member
Joined
Apr 8, 2010
Messages
349
Location
Calgary, Alberta, Canada
I have the earlier (larger) Miller 211 and am very pleased with its performance and capability. I too use .030 for most of my work with anything over 1/8" thick. The nice thing is I can use the auto feed setting with the .030 which gets it right enough for most general welding. I have found though, that with thinner metal like sheet metal body panels, going down to .023 wire and switching to the 110v power supply makes it much better for heat control with far less burn through while still getting good welds.
 
OP
Z

zmotorsports

ALLIANCE MEMBER
Joined
Oct 20, 2009
Messages
21,441
Location
Northern Utah
I have the earlier (larger) Miller 211 and am very pleased with its performance and capability. I too use .030 for most of my work with anything over 1/8" thick. The nice thing is I can use the auto feed setting with the .030 which gets it right enough for most general welding. I have found though, that with thinner metal like sheet metal body panels, going down to .023 wire and switching to the 110v power supply makes it much better for heat control with far less burn through while still getting good welds.

Thanks for the comments and for following along.

I'm surprised that you can tell a difference on 110volt vs. 220 volt at the lower settings. I would think the output should be the same but due to yours being a transformer machine it may have something to do with the inductance. Mine may not be affected where it is an inverter based machine but I will definitely have to try it. My original plan was to just use it on 240VAC all of the time seeing as how I get a higher duty cycle and I have the outlets available around the shop.
 
OP
Z

zmotorsports

ALLIANCE MEMBER
Joined
Oct 20, 2009
Messages
21,441
Location
Northern Utah
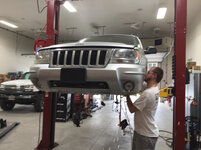
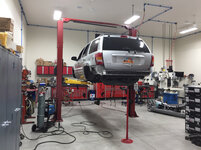
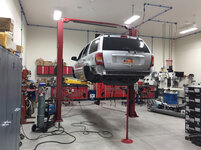
I was able to help my son get a little work done on his WJ project tonight.

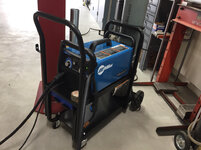
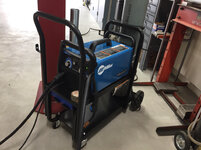
First off, I got my little Miller 211 setup on its cart and tank secured then wheeled into position next to the Jeep to start welding the steering gearbox support bracket.
76323af96c3812b91158d738a6b0ccfc.jpg

5eb816d02b6c653acbb0f992cbda0d37.jpg

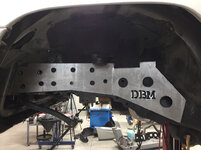
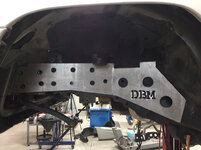
Next up was to test fit the driver’s front frame stiffener and marked it for a slight bend.
d9957e3f8b5131886223a9ef5ebe4da2.jpg

Mocked into position and marking the perimeter and speed holes so we can remove the paint and undercoating in preparation for welding.
232dbc92c27786025c2a745740e509c2.jpg

My son making sparks prepping the area.
c4315e1cf3d1e09fb62dd3831dceb000.jpg

eb0f787cd7a6594b5d614bfa134aee7f.jpg

Kind of made a bit of a mess in the shop tonight.
537d46da0db42aa56f6ce8efd4be4c3a.jpg

Thanks for looking.
 

Attachments

  • 537d46da0db42aa56f6ce8efd4be4c3a.jpg
    537d46da0db42aa56f6ce8efd4be4c3a.jpg
    776.1 KB · Views: 9
  • eb0f787cd7a6594b5d614bfa134aee7f.jpg
    eb0f787cd7a6594b5d614bfa134aee7f.jpg
    747.8 KB · Views: 3
  • c4315e1cf3d1e09fb62dd3831dceb000.jpg
    c4315e1cf3d1e09fb62dd3831dceb000.jpg
    701.9 KB · Views: 3
  • 232dbc92c27786025c2a745740e509c2.jpg
    232dbc92c27786025c2a745740e509c2.jpg
    671.6 KB · Views: 3
  • d9957e3f8b5131886223a9ef5ebe4da2.jpg
    d9957e3f8b5131886223a9ef5ebe4da2.jpg
    787.5 KB · Views: 3
  • 5eb816d02b6c653acbb0f992cbda0d37.jpg
    5eb816d02b6c653acbb0f992cbda0d37.jpg
    831.7 KB · Views: 2
  • 76323af96c3812b91158d738a6b0ccfc.jpg
    76323af96c3812b91158d738a6b0ccfc.jpg
    723.3 KB · Views: 2
Last edited:

C_F

ALLIANCE MEMBER
Joined
Jan 21, 2005
Messages
9,675
Location
Utah...SNOW BLOWS!
Kind of made a bit of a mess in the shop tonight.
I'm sorry pal, but that doesn't qualify as a mess. Now if you two had accidentally punched a hole in the ****** pan while welding & mixed 6 quarts of ATF into the metal bits on the floor, THAT would qualify as a bit of a mess. :bounce: Hehe :lol_hitti

I'm kinda surprised that the DBM frame brace didn't come pre-bent. I say this knowing absolutely zero about their stuff, maybe they are a small "one man band" type of deal & you finish the braces how you like? :)
 
OP
Z

zmotorsports

ALLIANCE MEMBER
Joined
Oct 20, 2009
Messages
21,441
Location
Northern Utah
I'm sorry pal, but that doesn't qualify as a mess. Now if you two had accidentally punched a hole in the ****** pan while welding & mixed 6 quarts of ATF into the metal bits on the floor, THAT would qualify as a bit of a mess. :bounce: Hehe :lol_hitti

I'm kinda surprised that the DBM frame brace didn't come pre-bent. I say this knowing absolutely zero about their stuff, maybe they are a small "one man band" type of deal & you finish the braces how you like? :)

Well let me preface by saying with the grinding dust and paint dust on the floor, it is a bigger mess than I like.:lol_hitti I also have some oil stains on the floor from various projects but they wipe up pretty well with a little brake cleaner and I built this shop to work in so I'm not too awfully upset over it. I'm sure there will be much more mess over the years to come.

As for the DBM frame stiffeners I think they came flat for shipping purposes although had I not had a brake a person would have to get a bit more creative to bend them as they are made of 10-gauge P&O. They are ok quality and the fitment is fair, we did have to trim and notch a couple small areas but not that big of a deal.

There is not much available for the WJ's as their unibody frame rails are supposed to be somewhere around 30% stronger than their predecessor the ZJ so most say that frame stiffeners on the WJ are not warranted but my son wanted to install some anyways. He was going to fabricate his own but I told him to look and see if there was anything available and when he found these on ebay for the cost I told him he probably would pay close to that for the steel alone so it didn't seem like a bad way to go to buy some pre-cut stiffeners.

Luckily his WJ isn't slathered in undercoating as well. There is some but mostly just the factory black paint which has been coming off fairly easily so far. We will use Upol Zinc Weld Thru Primer on the backside then once everything is in place and welded we will probably POR-15 and then undercoat the areas to protect them against corrosion as this will more than likely be his daily driver when done.

His welding has been getting pretty good lately but he had asked me to weld the stiffeners in place due to the difference in material thickness between the rails and the stiffeners and he being nervous to weld the thicker stiffeners to the thinner frame rail material. I think he will probably be welding most of the suspension components once we get to that point though. I'm just happy he is letting me help him on his project. I've been having fun hanging out with him working on it the past week or so.

Thanks for checking out the projects that I have going on.
 
OP
Z

zmotorsports

ALLIANCE MEMBER
Joined
Oct 20, 2009
Messages
21,441
Location
Northern Utah
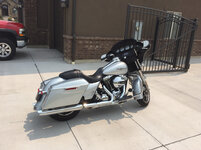
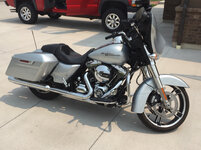
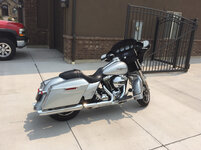
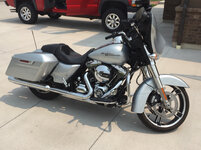
Yesterday I went with my son to pick up his new to him project bike.

2014 Street Glide.
4b1cab0a0386a1969d05cc2a56834e0a.jpg

8e77f9506b150f887d5d6cb669a12c96.jpg

b3cdc735f78b6046bdb3b7fcfe3cd2ba.jpg

He wanted a stock bike that no one had been into and found this one with only 13k miles. Pretty nice blank canvas and starting point. He probably won’t do too awfully much to it until winter as he is in the middle of his Jeep WJ build right now.

He’s going to get his 2012 Street Bob up for sale probably this week if anyone in the area is interested in a very clean Dyna.
 

Attachments

  • 4b1cab0a0386a1969d05cc2a56834e0a.jpg
    4b1cab0a0386a1969d05cc2a56834e0a.jpg
    759.8 KB · Views: 2
  • b3cdc735f78b6046bdb3b7fcfe3cd2ba.jpg
    b3cdc735f78b6046bdb3b7fcfe3cd2ba.jpg
    780 KB · Views: 2
  • 8e77f9506b150f887d5d6cb669a12c96.jpg
    8e77f9506b150f887d5d6cb669a12c96.jpg
    782.8 KB · Views: 2
To avoid these ads, REGISTER NOW!
OP
Z

zmotorsports

ALLIANCE MEMBER
Joined
Oct 20, 2009
Messages
21,441
Location
Northern Utah
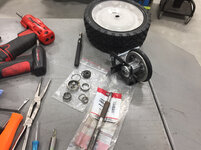
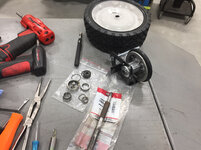
While mowing my lawn Friday night I had a bearing failure in the drive assembly so today I tore it apart so I can try to locate a couple of bearings. I’m not too terribly upset as this lawnmower is over 27 years old and these are original bearings. Also worth noting is this mower gets used twice a week so very good longevity.

This is the bearing that came apart.
cd619c3f9c9498da57a3a3efea5a16ae.jpg

Some of the bearing and the snap ring.
a4bbfae118d86abe160ed9a5f6a362e3.jpg

Disassembled and ready to reassemble after picking up some bearings. The outer one on the same shaft is questionable so I am planning on replacing it as well.
90415626d2603510ca56ded634aa5ab1.jpg

61b9c271ebbec36fe195004663e177b7.jpg
 

Attachments

  • a4bbfae118d86abe160ed9a5f6a362e3.jpg
    a4bbfae118d86abe160ed9a5f6a362e3.jpg
    893.4 KB · Views: 2
  • 90415626d2603510ca56ded634aa5ab1.jpg
    90415626d2603510ca56ded634aa5ab1.jpg
    770.1 KB · Views: 2
  • cd619c3f9c9498da57a3a3efea5a16ae.jpg
    cd619c3f9c9498da57a3a3efea5a16ae.jpg
    824.9 KB · Views: 1
  • 61b9c271ebbec36fe195004663e177b7.jpg
    61b9c271ebbec36fe195004663e177b7.jpg
    706.4 KB · Views: 1
Last edited:
OP
Z

zmotorsports

ALLIANCE MEMBER
Joined
Oct 20, 2009
Messages
21,441
Location
Northern Utah
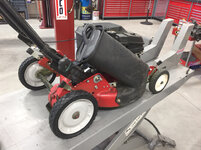
The parts for my old Snapper 21” mower showed up today so I was able to put it back together.

6c48fb168214a89bde3f96b6b8298aa0.jpg

The hex shaft was worn so I replaced it as well. I had almost talked myself into welding it up and milling the flats back down but for the $12~ish dollars for a new one and it was in stock I figured I would just replace it. [emoji12]
5ae64f6dcc59e901a7d546526f75edf8.jpg

Hub assembly ready to go back together.
6c6b41f0b78594ed28202074b9e0cc9e.jpg

Hex shaft installed and ready to accept the drive hub asssmbly.
49a62d7f062267e4f13ae23be9d26787.jpg

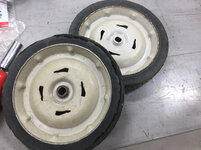
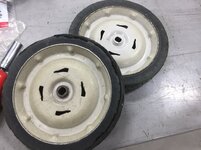
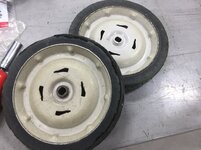
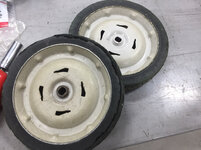
While I was ordering parts I figured I would replace the drive wheels. I think I got all the life out of them. [emoji23]
de0a9a861d533af081ce7560b1b01a5e.jpg

0081729360996cce5f896f1fb51bdee3.jpg

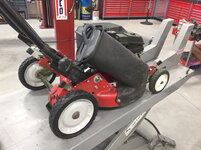
Done. Maybe I can get another 27 years out of it. [emoji41]
655de8d55327590dcc276e324749774e.jpg
 

Attachments

  • 655de8d55327590dcc276e324749774e.jpg
    655de8d55327590dcc276e324749774e.jpg
    810.9 KB · Views: 1
  • 0081729360996cce5f896f1fb51bdee3.jpg
    0081729360996cce5f896f1fb51bdee3.jpg
    751.6 KB · Views: 1
  • de0a9a861d533af081ce7560b1b01a5e.jpg
    de0a9a861d533af081ce7560b1b01a5e.jpg
    799.4 KB · Views: 1
  • 49a62d7f062267e4f13ae23be9d26787.jpg
    49a62d7f062267e4f13ae23be9d26787.jpg
    821.8 KB · Views: 1
  • 6c6b41f0b78594ed28202074b9e0cc9e.jpg
    6c6b41f0b78594ed28202074b9e0cc9e.jpg
    718 KB · Views: 1
  • 5ae64f6dcc59e901a7d546526f75edf8.jpg
    5ae64f6dcc59e901a7d546526f75edf8.jpg
    749.3 KB · Views: 0
  • 6c48fb168214a89bde3f96b6b8298aa0.jpg
    6c48fb168214a89bde3f96b6b8298aa0.jpg
    751.7 KB · Views: 1

LXCam

ALLIANCE MEMBER
Joined
Apr 23, 2013
Messages
19,181
Location
AZ
That's crazy how many years you've used that. I doesn't even look a year old and with you behind the handle have no doubt it'll last another 27.
 

Bigblue&Goldie

Well-known member
Joined
Mar 12, 2009
Messages
10,714
Location
AZ
I'm impressed parts are still available. Just goes to show that buying quality is cheaper in the long run. Glad to see it back in action instead of sitting on the curb.
 

Bob Heine

ALLIANCE MEMBER
Joined
Oct 24, 2009
Messages
10,708
Location
Boca Raton, Florida
As with all my new Miller welders, I replaced the cheap ground clamp with a Tweco clamp.
d40a614ace23b56a487e114fc46edd6f.jpg
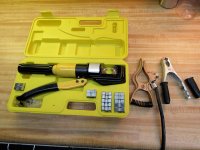
Mike, thanks for the pointer to the Tweco ground clamp. I put one on my cheap Chinese welder. The ground clamp I took off wouldn't even be acceptable on a jumper cable. I even got to use my hydraulic crimper to do the strain relief strap. Now that I know better I'll be replacing the ground clamps on the other two machines.

attachment.php
 

Attachments

  • Welder Ground 1.jpg
    Welder Ground 1.jpg
    94.9 KB · Views: 1,029
  • d40a614ace23b56a487e114fc46edd6f.jpg
    d40a614ace23b56a487e114fc46edd6f.jpg
    128.6 KB · Views: 2
OP
Z

zmotorsports

ALLIANCE MEMBER
Joined
Oct 20, 2009
Messages
21,441
Location
Northern Utah
That's crazy how many years you've used that. I doesn't even look a year old and with you behind the handle have no doubt it'll last another 27.

Thanks Cam. I hope it lasts another 27 years. It has a few scratches on the deck but for the most part is in pretty decent condition. I sharpen the blade, clean the deck and pressure wash it a couple times a year then change the oil in the fall after the last mow so it is ready to go for spring. Been doing that since season one and I think it has paid off.
 
OP
Z

zmotorsports

ALLIANCE MEMBER
Joined
Oct 20, 2009
Messages
21,441
Location
Northern Utah
I'm impressed parts are still available. Just goes to show that buying quality is cheaper in the long run. Glad to see it back in action instead of sitting on the curb.

Thank you for the comments. I found the parts on-line easy enough but what really shocked me was when I called my small engine supply house locally he told me he had everything in stock except the 9" diameter wheels. Those took a couple of days to come in.

It's funny how much **** I got from people, my dad included, when I bought this mower back in 1991 after purchasing our first home. I bought this mower and a 30cc Homelite line trimmer ( which is also still going I might add) and was ridiculed for spending so much on them. I paid about $750 for the mower and was told by friends to just go buy a cheap mower as none of them last anyways but I couldn't bring myself to buy junk.

After talking with my lovely wife and contemplating she said, "you've never sacrificed quality on tools, vehicles or anything else so don't start now, buy quality."

I will guarantee I would have had to purchase more than one of the cheap mowers to get 27 years of service. Especially figuring into the equation that this walk behind mower mowed our lawn at our last place twice a week every week and every year and so far I have used it twice a week at our new place for the past year plus now but I only go around once or twice at this place before hopping on the Toro ZTR mower to do the rest. Although once or twice around this place is about the same as half of my last yard.:bounce:

On a side note, I may have to purchase a new line trimmer next year as I have been having issues with finding a couple of parts for the old Homelite this year. I've been looking at a new Stihl line trimmer but will more than likely hold off until spring of next year and just nurse this one a little longer.
 
Last edited:
OP
Z

zmotorsports

ALLIANCE MEMBER
Joined
Oct 20, 2009
Messages
21,441
Location
Northern Utah
Mike, thanks for the pointer to the Tweco ground clamp. I put one on my cheap Chinese welder. The ground clamp I took off wouldn't even be acceptable on a jumper cable. I even got to use my hydraulic crimper to do the strain relief strap. Now that I know better I'll be replacing the ground clamps on the other two machines.

attachment.php

That is awesome Bob. Glad to see you were able to get a better ground clamp on their as well as use your new hydraulic crimper. Sweet.:thumbup:

Thanks for stopping by and checking in on projects Bob.:beer:
 

C_F

ALLIANCE MEMBER
Joined
Jan 21, 2005
Messages
9,675
Location
Utah...SNOW BLOWS!
While I was ordering parts I figured I would replace the drive wheels. I think I got all the life out of them. [emoji23]
de0a9a861d533af081ce7560b1b01a5e.jpg

0081729360996cce5f896f1fb51bdee3.jpg

I see you ran that one low on air pressure & blew out the sidewall. Tisk-tisk! :lol_hitti
 

Attachments

  • 0081729360996cce5f896f1fb51bdee3.jpg
    0081729360996cce5f896f1fb51bdee3.jpg
    117.1 KB · Views: 1
  • de0a9a861d533af081ce7560b1b01a5e.jpg
    de0a9a861d533af081ce7560b1b01a5e.jpg
    123.3 KB · Views: 1

Ohmthis

Well-known member
Joined
Jan 20, 2013
Messages
3,018
Location
Outside of Louisville KY
I’ve been away from this thread for a little while, I finally caught back up. Mike thanks for showing off your projects and the know how behind many of them. I’ve got my house done, next is to set up my shop, then maybe I can posts some projects :)
 
OP
Z

zmotorsports

ALLIANCE MEMBER
Joined
Oct 20, 2009
Messages
21,441
Location
Northern Utah
I’ve been away from this thread for a little while, I finally caught back up. Mike thanks for showing off your projects and the know how behind many of them. I’ve got my house done, next is to set up my shop, then maybe I can posts some projects :)

Thanks for taking the time to get caught up and I appreciate the comments. Glad to hear you were able to get your house done and can now work on the shop. Looking forward to seeing some of your projects.
 

HEEP

Well-known member
Joined
Nov 20, 2007
Messages
121
Location
Chattanooga, TN
My dad had a Snapper riding mower that has a similar drive system with the rubber wheel that rode on the plate turning the drive wheels. I remember him too cheap to buy the rubber wheel when it wore out and he would sit there with Plasti dip and layer it on there till he got it to the right thickness. He would have to do this about once a month as it would never last.
Miss him.
 
OP
Z

zmotorsports

ALLIANCE MEMBER
Joined
Oct 20, 2009
Messages
21,441
Location
Northern Utah
My dad had a Snapper riding mower that has a similar drive system with the rubber wheel that rode on the plate turning the drive wheels. I remember him too cheap to buy the rubber wheel when it wore out and he would sit there with Plasti dip and layer it on there till he got it to the right thickness. He would have to do this about once a month as it would never last.
Miss him.

My dad was much the same way. I like to think of myself as frugal rather than cheap however.:bounce: I did have to replace the rubber wheel on the drive hub about 10 or so years ago but if memory serves it was only like $10.00 so well worth replacing it when worn. I think Snapper is still using the same drive system even on their new mowers.
 

BMW Rider

Well-known member
Joined
Apr 8, 2010
Messages
349
Location
Calgary, Alberta, Canada
Yeah, that one didn't want to hold air causing the mower to list a little.:bounce: It should cut much more gooder now.:lol_hitti

That has me remembering a story from when I was a kid. Our neighbour came to ask my dad what was wrong with his new mower. He had mowed his sloped front yard and had adjusted the wheels to level out the mower deck as he went across the slope. His lawn looked like it had been terraced. :lol:
 
OP
Z

zmotorsports

ALLIANCE MEMBER
Joined
Oct 20, 2009
Messages
21,441
Location
Northern Utah
That has me remembering a story from when I was a kid. Our neighbour came to ask my dad what was wrong with his new mower. He had mowed his sloped front yard and had adjusted the wheels to level out the mower deck as he went across the slope. His lawn looked like it had been terraced. :lol:

That is one way of cutting a definitive design into the lawn.:lol_hitti

I haven't gotten that creative, I just like the striping from switching directions, nothing as elaborate as altering deck height.:bounce:
 
OP
Z

zmotorsports

ALLIANCE MEMBER
Joined
Oct 20, 2009
Messages
21,441
Location
Northern Utah
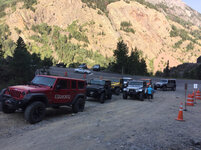
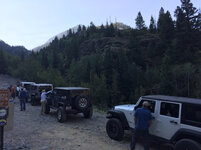
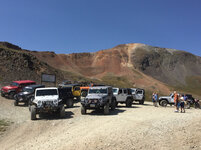
The wife and I have been on vacation and hosted our annual Jeep/RV Rally in Ouray, CO. We didn’t have as much participation this year with only about 13 couples/coaches. It was still fun though and we covered a lot of trails.

The area was much, much drier than we have seen it over the past eleven years that the wife and I have been going there.

It was also warmer than it has been in years past. This was the first time we had to run the A/C in the coach with temps well into the 90’s.

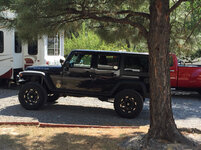
Our campsite.
044a9a889288e42667d8d82587548ee7.jpg

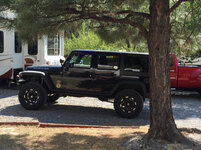
Black beauty itchin’ and ready to hit the trails.
07ba6cfdd84a38c4fff16d2ebb026906.jpg

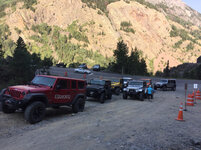
Our group airing down before running Poughkeepsie Gulch.
bc990d6265123e99dae7847d2f82f30a.jpg

419611bea1d765e2633b34e9dae90bc2.jpg

Group on top of Hurricane Pass another day.
d0ee712bf972a45cc7f2e42787a2ffdf.jpg

93a15d6f520ce6b6a2a45d1b7b4bba76.jpg

Our group coming down off the waterfall on Black Bear Pass on one day. I had never seen so many Jeeps backed up on Black Bear before. It was a freaking parking lot up on top and took us about an hour to get over the Ingram waterfall to the first switchback. The group in front of us was having a difficult time spotting people around that first switchback due to inexperience. I ended up spotting our group down then the group behind us asked me to spot them. The wife wasn’t happy as I had to have her keep pulling our Jeep forward and she was not happy to be behind the wheel with the drop off right there.
090a8cb8d34f4634cd4c3840dfe04545.jpg

4a2676f7b7e90e12af1df88e07457616.jpg
 

Attachments

  • 419611bea1d765e2633b34e9dae90bc2.jpg
    419611bea1d765e2633b34e9dae90bc2.jpg
    777.3 KB · Views: 1
  • d0ee712bf972a45cc7f2e42787a2ffdf.jpg
    d0ee712bf972a45cc7f2e42787a2ffdf.jpg
    804.8 KB · Views: 1
  • 93a15d6f520ce6b6a2a45d1b7b4bba76.jpg
    93a15d6f520ce6b6a2a45d1b7b4bba76.jpg
    876.6 KB · Views: 1
  • bc990d6265123e99dae7847d2f82f30a.jpg
    bc990d6265123e99dae7847d2f82f30a.jpg
    987.1 KB · Views: 1
  • 4a2676f7b7e90e12af1df88e07457616.jpg
    4a2676f7b7e90e12af1df88e07457616.jpg
    1.1 MB · Views: 1
  • 044a9a889288e42667d8d82587548ee7.jpg
    044a9a889288e42667d8d82587548ee7.jpg
    941.8 KB · Views: 1
  • 07ba6cfdd84a38c4fff16d2ebb026906.jpg
    07ba6cfdd84a38c4fff16d2ebb026906.jpg
    997.7 KB · Views: 1
  • 090a8cb8d34f4634cd4c3840dfe04545.jpg
    090a8cb8d34f4634cd4c3840dfe04545.jpg
    841 KB · Views: 10
Last edited:
To avoid these ads, REGISTER NOW!
Top Bottom