To avoid these ads, REGISTER NOW!

Going for a retro look eaves on new garage.

KevinA79

New member
Joined
Jan 15, 2014
Messages
3
I am just starting on a 24 X 30 garage. It will be behind my 1927 Sear Craftsman house that we are trying to keep as original as possible, so I would like the garage to have a similar look.

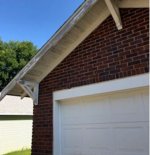
Here are some pix of a nice (yet neglected) garage down the alley from me.
I would like the eaves to look somewhat like this, but I already have the OSB bought to sheet the roof.

Any ideas? Could I put some type of bead board under OSB where the eaves will expose it and paint it?
 

Attachments

  • ga3.JPG
    ga3.JPG
    22.2 KB · Views: 148
  • ga1.JPG
    ga1.JPG
    27.7 KB · Views: 145
  • ga2.JPG
    ga2.JPG
    32 KB · Views: 146
To avoid these ads, REGISTER NOW!

Radix2

Well-known member
Joined
May 28, 2014
Messages
1,853
Location
the thumb!, MI
As you know, that style of construction is a maintainance burden - I think your idea of updating with modern materials is a good one.


But a single layer of OSB as an overhang is not a good idea.

OSB needs to be fully supported on a structure.

So, either build a framed out soffit and apply fake rafters and corbels below, or deck out with solid wood.

Going the fake route would let you do it out of low maintainance materials.
 
OP
K

KevinA79

New member
Joined
Jan 15, 2014
Messages
3
I forgot to mention, I would like to use corbels very similar to the ones pictured on the brick garage.

Also, to be clear, the little brick garage is not mine, I just posted those pics because I would like that "look" to my new garage.

My new garage will be 24' wide, so I was thinking about using at least 3 corbels made of 4X4 lumber, then a notched 2X6 to rest on the corbel? Would that be enough support for OSB?

Then I would have to find a way to cover the underside of the OSB for looks and low maintenance.
 

Kaizen

Well-known member
Joined
Jan 9, 2015
Messages
6,948
Location
New England
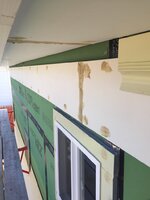
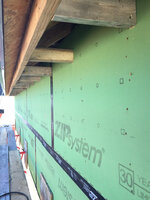
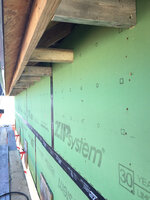
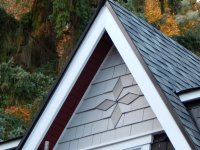
Overhangs are the key. Those look large. I was limited to one foot but am taking the time to do detail work. You can box it in and use bead on the bottom. Run sheathing past the end of trusses if you want crown molding.
607b3c0d2ef8254d942ac5da9cd0bde7.jpg
b05ce0c8efecf1f82125568759741d06.jpg
0ff3976e479ce0eb8a075cc97dc628ae.jpg
2a6677c59d2cbd70e546c655424608ad.jpg


Sent from my iPhone using Tapatalk
 

Attachments

  • b05ce0c8efecf1f82125568759741d06.jpg
    b05ce0c8efecf1f82125568759741d06.jpg
    837.8 KB · Views: 1
  • 0ff3976e479ce0eb8a075cc97dc628ae.jpg
    0ff3976e479ce0eb8a075cc97dc628ae.jpg
    693.4 KB · Views: 0
  • 2a6677c59d2cbd70e546c655424608ad.jpg
    2a6677c59d2cbd70e546c655424608ad.jpg
    770.8 KB · Views: 0
  • 607b3c0d2ef8254d942ac5da9cd0bde7.jpg
    607b3c0d2ef8254d942ac5da9cd0bde7.jpg
    617.9 KB · Views: 1

Kaizen

Well-known member
Joined
Jan 9, 2015
Messages
6,948
Location
New England
Corbels should be decorative only. That old dog they didn’t install a ladder so those are holding up the roof.


Sent from my iPhone using Tapatalk
 

High5

Well-known member
Joined
May 10, 2014
Messages
72
Location
Washington state
I am just starting on a 24 X 30 garage. It will be behind my 1927 Sear Craftsman house that we are trying to keep as original as possible, so I would like the garage to have a similar look.

Here are some pix of a nice (yet neglected) garage down the alley from me.
I would like the eaves to look somewhat like this, but I already have the OSB bought to sheet the roof.

Any ideas? Could I put some type of bead board under OSB where the eaves will expose it and paint it?

We used cedar tongue and groove for the eaves. Very expensive but well worth it. Pre-painted the material. Here's a photo.
 

Attachments

  • Rockaway Garage 013.jpg
    Rockaway Garage 013.jpg
    153.4 KB · Views: 71

K'ledgeBldr

Well-known member
Joined
Aug 22, 2011
Messages
1,925
Location
Johns Creek, GA
If the esthetic is that important- don't skimp!

Return the 7/16" OSB and get 5/8" OSB. The 5/8" is about the same nominal thickness as V-grove T&G. Do the perimeter with the T&G and then cover the field with the OSB. You may have to do some additional blocking but the end result will make all the difference in the world.

Make the corbels/brackets from western red cedar.
 

Kaizen

Well-known member
Joined
Jan 9, 2015
Messages
6,948
Location
New England
We used cedar tongue and groove for the eaves. Very expensive but well worth it. Pre-painted the material. Here's a photo.


Hard to see but assuming about four inch wide? Did you use eight footers with joint or long ones? I’m having an issue making my joints presentable


Sent from my iPhone using Tapatalk
 

yeldogt

Well-known member
Joined
Jan 2, 2012
Messages
18,184
Typically when you see this on an old building the roof was sheathed with pine boards and the bead-board would have been used where visible. Full along the eaves and partial up the rake. Some of the rake boards would have only spanned the open bay -- since the boards are T&G they interlock and every 4th board or so would go back into the roof another stud bay for support.

The corbels definitely are helping the roof structure -- go look at any old roof most sag w/o

I not sure why people think painting is such a problem -- while you may have to paint the facia in 5-6 years -- the paint on the understand will last a long time. Properly applied paint is long lived -- the problem is most don't get to it BEFORE it fails.

Also -- you prime and paint the Bead-board first -- then install. I don't see why you could not cheat and use some type of fake Beadboard as long as it's able to be used outside. The side against the building typically get a trim that hides that joint anyway -- it would be the cut along the facia that would need to be clean.

I know they make a fake porch ceiling material --maybe that would work ..it's a narrower look. True pine porch ceiling is expensive because it was typically clear grain and stained
 

High5

Well-known member
Joined
May 10, 2014
Messages
72
Location
Washington state
Hard to see but assuming about four inch wide? Did you use eight footers with joint or long ones? I’m having an issue making my joints presentable


Sent from my iPhone using Tapatalk

Sorry about that. It is hard to see. Total exposure to each section is 2-3/4". We used long ones. Joints were covered by trim boards.
 

Kaizen

Well-known member
Joined
Jan 9, 2015
Messages
6,948
Location
New England
yeldogt The corbels definitely are helping the roof structure -- go look at any old roof most sag w/o I[/QUOTE said:
To clarify. He should build to modern standards and use corbels as a decorative item imo


Sent from my iPhone using Tapatalk
 
To avoid these ads, REGISTER NOW!

yeldogt

Well-known member
Joined
Jan 2, 2012
Messages
18,184
To clarify. He should build to modern standards and use corbels as a decorative item imo


Sent from my iPhone using Tapatalk

What modern standards -- current style is none ... when they are done .... typically just plywood and still not as wide.

The corbels are part of the support when you get large overhangs -- sometimes the ridge and facia was extended -- but it's heavy look and the the center still needed something.
 

elvee

Well-known member
Joined
Nov 1, 2006
Messages
309
Location
Atlanta, GA
We did this on my garage and house. Two different builders, two different approaches. I liked the second method better - The framers cut 3/8" off the top of the rafter where it would overhand the roof and used 3/8" bead board ply in that area. The roof sheathing was then put over that from the tip of the rafter to the peak. We butted the bead board panels up on top of a rafter to hide the seam. We then used crown moulding to close the gap between the rafters at the top of the wall. It is also where we built in our attic venting.

On the front and rear overhangs they just shaved 3/8" off the whole rafter to get it to fit, and overlapped the roof sheathing to the edges.
 

yeldogt

Well-known member
Joined
Jan 2, 2012
Messages
18,184
We did this on my garage and house. Two different builders, two different approaches. I liked the second method better - The framers cut 3/8" off the top of the rafter where it would overhand the roof and used 3/8" bead board ply in that area. The roof sheathing was then put over that from the tip of the rafter to the peak. We butted the bead board panels up on top of a rafter to hide the seam. We then used crown moulding to close the gap between the rafters at the top of the wall. It is also where we built in our attic venting.

On the front and rear overhangs they just shaved 3/8" off the whole rafter to get it to fit, and overlapped the roof sheathing to the edges.

That's a good work around and saves the both the worry of mismatched sheathing thickness telegraphing through the asphalt shingles and having to fit any exposed seams
 
OP
K

KevinA79

New member
Joined
Jan 15, 2014
Messages
3
We did this on my garage and house. Two different builders, two different approaches. I liked the second method better - The framers cut 3/8" off the top of the rafter where it would overhand the roof and used 3/8" bead board ply in that area. The roof sheathing was then put over that from the tip of the rafter to the peak. We butted the bead board panels up on top of a rafter to hide the seam. We then used crown moulding to close the gap between the rafters at the top of the wall. It is also where we built in our attic venting.

On the front and rear overhangs they just shaved 3/8" off the whole rafter to get it to fit, and overlapped the roof sheathing to the edges.

I like the sounds of this, I will start looking for some bead board and see what my options are.
 

ddawg16

Well-known member
Joined
Jul 11, 2008
Messages
21,005
Location
S. California
Kevin, what part of the country are you in?

When I did my addition, I wanted to maintain the same look as the existing part of the house.

I use 1x6 T&G up to the wall...then 1/2" CDX plywood after that.

Personally, I'd never use OSB for roof sheathing....especially if you have rafters 24" OC.

On part of the addition roof, I nailed up short pieces to maintain the same orientation
 

Attachments

  • IMG-20120604-00114.jpg
    IMG-20120604-00114.jpg
    150.9 KB · Views: 34
  • P1200009.jpg
    P1200009.jpg
    116.1 KB · Views: 37

yeldogt

Well-known member
Joined
Jan 2, 2012
Messages
18,184
Kevin, what part of the country are you in?

When I did my addition, I wanted to maintain the same look as the existing part of the house.

I use 1x6 T&G up to the wall...then 1/2" CDX plywood after that.

Personally, I'd never use OSB for roof sheathing....especially if you have rafters 24" OC.

On part of the addition roof, I nailed up short pieces to maintain the same orientation

That's how I do it -- it's typically open on the eves around here (no facia) w/ 1/2 round gutters -- hung using strap hangers at the rafters. Galvanized gutter and downspout was usual. The OP's picture shows it w/o the gutters
 

homebuilt burner

Well-known member
Joined
Dec 8, 2014
Messages
1,763
Location
central Wisconsin
I was just looking at a recent copy of Fine Home Building magazine in the store yesterday. There was an article on exposed eaves and how to build/vent them. I suggest you maybe look for it.
 

428PI

Well-known member
Joined
Jul 14, 2018
Messages
1,976
Location
Peabody, KS
I love that look because that's what my house and garage have but alas, on my house we put a fascia board up and gutters (originally the gutters were a couple feet up on the roof). My garage is starting to rot at the end of the rafters but than again it's over 100 years old.
 

Firstram

Well-known member
Joined
May 16, 2017
Messages
1,394
We did this on my garage and house. Two different builders, two different approaches. I liked the second method better - The framers cut 3/8" off the top of the rafter where it would overhand the roof and used 3/8" bead board ply in that area. The roof sheathing was then put over that from the tip of the rafter to the peak. We butted the bead board panels up on top of a rafter to hide the seam. We then used crown moulding to close the gap between the rafters at the top of the wall. It is also where we built in our attic venting.

On the front and rear overhangs they just shaved 3/8" off the whole rafter to get it to fit, and overlapped the roof sheathing to the edges.

This is exactly how we do it around here. Depending on the budget, the notches are 3/4" and we use t&g under the ply. If you do use t&g be sure to pre paint it so the raw wood doesn't show when the boards move.
 

MushCreek

Well-known member
Joined
Jan 14, 2015
Messages
9,838
Location
Upstate South Carolina
On my house, the overhangs are 24". I made massive brackets out of rough-sawn cypress. They are decorative, but are hella strong, through-bolted with massive square head bolts (it's part of my 'look'). Since the 2X4 trusses are so wimpy, and would be prone to rot if left exposed, I went ahead and boxed them in, using bead board on the underside. Then. I made faux rafter tails out of pressure treated lumber, and attached them to the underside. It has the effect of exposed rafter tails without worrying about rot on the actual trusses.
 
To avoid these ads, REGISTER NOW!
Top Bottom