To avoid these ads, REGISTER NOW!

Girl's 18.5' x 20.5' Garage

GirlnAgarage

Well-known member
Joined
Jan 21, 2011
Messages
4,669
Location
Texas
The Start:
attachment.php


9\18:
attachment.php


11/18
attachment.php


3/19
attachment.php


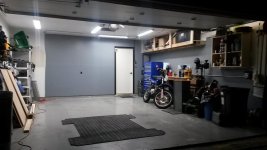
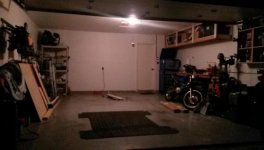
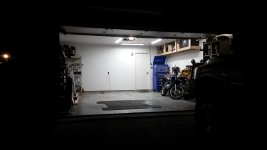
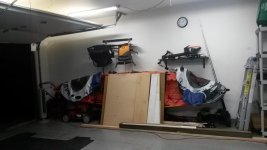
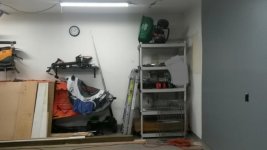
Hey GJ, back again. Welcome to my garage. Lots of life went on between Reorganization, it's like a renovation and now. I took a lot of the things I learned then and am applying them to life now. It's a pretty sweet thing, having experience.

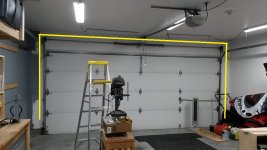
My garage: 18.5' w x 20.5' d x 8.3' h

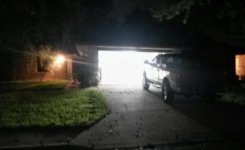
I purchased my home a couple years ago. Priority requirement during the house hunt was the truck must fit in the garage. I found that place with the help of my awesome realtor, Bruce. He knew how serious I was. He carried a tape measure to all our home visits and the first thing he did after unlocking the front door was measure the garage. If it didn't meet my requirements we bounced. I think I went through 60 homes and 6mths of looking. People, a great realtor works for you. Bruce, you're awesome.

I'm now getting around to feeling like getting the garage set up like I need. I've slowly worked back into toys and hobbies. It's a thing now, that I want to work in my garage without moving stuff or tripping over stuff to get to the stuff I need and working half blind under a terrible light. So I started doing something about it.

These days I kayak, fish, hike, camp, workout, ride a dirtbike, and work on my truck. My garage maintains the things I use to live life and this is the story of it.
 

Attachments
  • 2018-09-11 03.21.23.jpg
    2018-09-11 03.21.23.jpg
    51.7 KB · Views: 5,222
  • 20180918_195555.jpg
    20180918_195555.jpg
    82.6 KB · Views: 4,060
Last edited:
To avoid these ads, REGISTER NOW!
OP
G

GirlnAgarage

Well-known member
Joined
Jan 21, 2011
Messages
4,669
Location
Texas
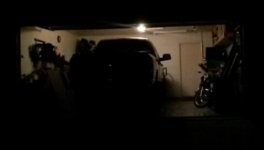
I should address the priority of the garage is that the truck must be parked in there every night. I wanted it safe from thieves, I wanted my privacy kept when going and coming, and I wanted the truck safe from inclement weather. Everything I do with and in the garage has this priority attached.

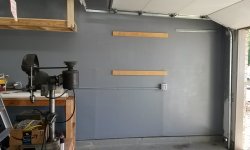
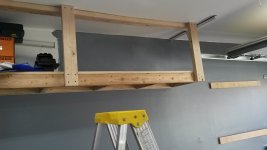
That said I'll bring you up to speed on where I'm at. I just finished installing (10) 4'LED lights and I'm midway through the wall paint. Over the last month I've slowly built a overhead shelf, installed surface mounted outlets via EMT conduit, got my workbench area started and purchased a couple new toolboxes. I still have a ways to go, but it's a good start. I need to finish wall paint, shelves, setup the workout area and get the yard stuff situated. I'm also in the process of improving the garage ventilation too. The garage is west facing and there's virtually no airflow. That must be remedied.

First project was the over head shelves on the work side. I used a 12' ledger board on the ceiling to tap into the truss then framed a simple 2x4 ladder (12'l x 18.25 w x 19"h). I screwed a vertical support from the ceiling ledger to the ladder frame. Then topped with 3/4" maple ply. The stuff stacked on the toy side shelves was sorted, purged and restocked onto the overhead shelf.

attachment.php
 

Attachments

  • 2018-09-11 03.45.16.jpg
    2018-09-11 03.45.16.jpg
    42.1 KB · Views: 5,043
Last edited:
OP
G

GirlnAgarage

Well-known member
Joined
Jan 21, 2011
Messages
4,669
Location
Texas
After getting the overhead shelf in place, I continued on the work side floor (the right side wall). I purchased a 26" Bottom and Top US General from Harbor Freight. I liked the blue, it matches my dirt bike. I used the coupons and got both for under $500. I offloaded and set them up asap. Up to this point I was digging my wrenches and sockets out of cardboard boxes I used from moving. That phase in life was terrible! I got my tools sorted, cleared a box from the floor and several from the floor standing 7'x2' workbench. Progress!

attachment.php


At that point I decided to get the workbench position and mounted to the wall. Again I went with the ladder frame and screwed it to the wall studs. Initially I threw diagonals under to support it but I have since added smaller under shelves so I just fabbed up some 4x4 post to support them and the workbench.

Next I went to working on some wall cabinets to pull the remaining toy-side shelf items from that side. I used 3/4"maple ply and pocket screw set up. Then I french-cleated the units to the workside wall. That pretty much cleared up the lubes, fluids, solvents and car wash items from the toy-side shelf.

Pro-tip: Don't support the workpiece with your leg. The Robertson bit will slip from the pocketscrew as the impact drives it. The drive bit will then drive through your pant leg, into your quad and gouge a nasty canyon into your leg meat. You will then bleed alot, feel woozy and later take yourself to the Urgent Care to update your Tetanus shot. But not before you finish the project :rocker:

Woven in there was I spackled, fixed and primed the walls with spckle stuff then some Kilz Premium and went over with some Glidden White latex. I think the paint will be changing again though, but that's ok. I'm a girl, we paint things to make them pretty whenever we feel like it.
 
Last edited:
OP
G

GirlnAgarage

Well-known member
Joined
Jan 21, 2011
Messages
4,669
Location
Texas
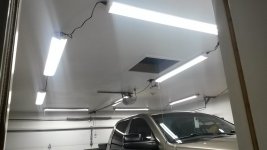
I said the last couple days I'd been working on the lights. I purchased some from Amazon the a suggestion I ran across fro Platonic Solid in a thread. I unpacked the first light, copied the mounting hole template onto a scrap piece of cardboard and went to work. I flush mounted the lights to the drywall via the supplied drywall inserts and screws. I didn't think too hard on sorting the linkable cords, so long as they reached each other. I'll deal with the cords in a bit. The priority was visibility, I sacrificed my OCD wiring neatness for it on this one.

I have three rows of 2 lights parallel to the bay. Then I have a 4 horizontals, one on each bay end front and back wall. It's freakin bright. I'll keep the horizontals off unless I need it. The lights are run off the switch so I ca run them independent of the garage door light.

Pictured is just half the lights. The rest are up but no photos of them yet, love the convenience of my phone camera but boy does it's quality ****. It's impressive how much difference just one new led light made though.

I'll try and get a better shot of the layout and what's been done. I know my presentation has been scatterred playing catch up. I'll tackle details and close ups soon to fill in build gaps. All for now, goodnight.
 

Attachments

  • 20180908_005209.jpg
    20180908_005209.jpg
    84.8 KB · Views: 526
  • 20180908_034244.jpg
    20180908_034244.jpg
    137 KB · Views: 477
Last edited:
OP
G

GirlnAgarage

Well-known member
Joined
Jan 21, 2011
Messages
4,669
Location
Texas
Ba-dump, bump lol

A little more about the lights. I bought these: https://www.amazon.com/gp/product/B076BN4XWZ/?tag=atomicindus08-20

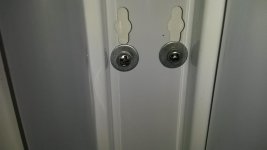
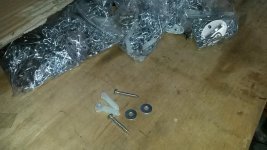
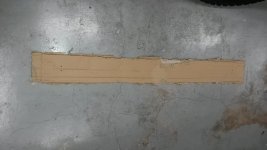
Super simple to put up. I flush mounted using the supplied dry wall anchors and screws. The lights are very lightweight and easy to hold up overhead. Like I said, traced a template of one of the lights onto the cardboard so I could consistently mark the mounting holes. Having the template made the layout very easy. I taped it to the ceiling, stepped off the ladder and eyeballed it's position. Then i took the punch and marked each mounting hole through the template. I removed the template, drilled my holes, inserted the anchors then held the lights up while tightening the screws. I did tape off my marking on the floor so I had my reference marks. I wasn't super precise on the ceiling though.

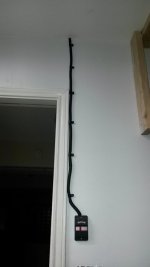
The last pic there is my garage door opener. I hated the ugly painted up clumpy wire running up the wall so I hid it. Used some 3/8" wire loom and plastic wire keeps that I screwed into the wall. Looks uniformed now.
 

Attachments

  • 20180911_124442.jpg
    20180911_124442.jpg
    26.4 KB · Views: 439
  • 20180911_123830.jpg
    20180911_123830.jpg
    63.2 KB · Views: 491
  • 20180911_125150.jpg
    20180911_125150.jpg
    66.8 KB · Views: 441
  • 20180911_125118.jpg
    20180911_125118.jpg
    39 KB · Views: 441
  • 20180911_125024.jpg
    20180911_125024.jpg
    117.8 KB · Views: 439
  • 20180911_124224.jpg
    20180911_124224.jpg
    80.1 KB · Views: 407
Last edited:
OP
G

GirlnAgarage

Well-known member
Joined
Jan 21, 2011
Messages
4,669
Location
Texas
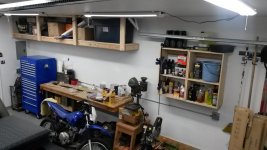
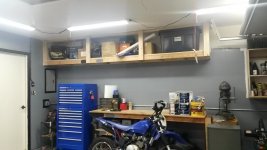
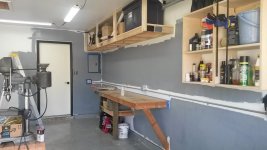
Ok on the right side is the work side of the garage. You can see the overhead shelves I did first. 12' 2x4 is easier to work with that I imagined.

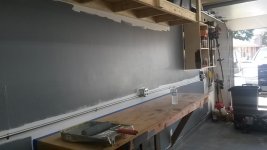
Then you can see the EMT conduit running along the wall just above the workbench. I tapped off the outlet at the front garage door. I used a new GFCI of course, mounted in a 4x4 box. I ran 1/2" conduit supported by straps screwed into the drywall. I have a 4x4 box along the work bench then the second 4x4 over under the wall cabinets. It's a 20a circuit on it's own so I have plenty of space for tools.

Above the workbench I'll be installing pegboard. I have a 2x4 piece and I have a larger, thicker 4x4 (6x6?) piece. Not sure which I'll use yet.

To te right of the workbench is the drill press. You can see the monster of a stand it sits on. That thing is heavy. I plan to extend the workbenchad mount the DP on it. This will open up the floor space and get rid of that stand. I'll be reinstalling my 4" vise on the bench as well. I miss it.

As for the miter saw, gorilla cart and UMX hauler, those will also get moved somewhere. After the DP is off the floor I'll have space under the workbench to put them away.

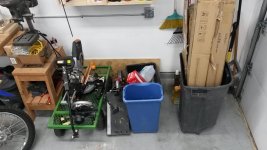
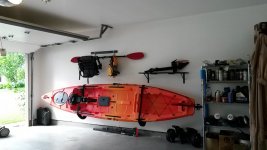
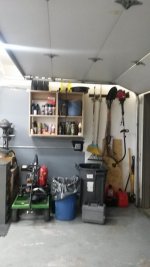
On the other side of the garage is the toy side. I plan to build shelves on the top half of the wall for my fishing/water gear. That will allow me to get rid of that horrible plastic shelf. Biggest things it holds is two boxes of extra wood flooring and the yard spreader. I have no clue where to put those things and they're taking up space. One that shelf is gone I might shift the kayak mounts back to set it up to that front wall.

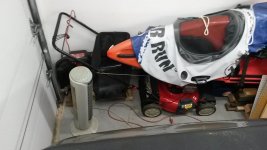
My floor jack, 10x10 popup tent and kayak tow hitch extender is currently on the floor along the wall under the kayak. Then there's the lawn mower. I hate that thing there. And the yard tool hanging on the wall on the other side. I'd like a shed out back but that comes with it's own issues. I'll deal with the yard tools once I get the shelving situation in place. I still have wall space on the front left side there that I might utilize for the yard stuff.

Eventually I'll have my stereo and speakers mounted, my wall art and still have the front wall to set up. There I'm leaning towards a workout wall. I'm looking at Rogues wall mount rack as the center piece: https://www.roguefitness.com/rogue-r-3w-fold-back-wall-mount-rack From there I'll of course have the barbell, plate dumbells, resistance bands and the plates in my workout range. Should take up much space. I use the gym at work right now so this set up doesn't need to do it all. Just the basics when I don't feel like goin in. I figure about a grand and it'll be good. Best part is that it won't eat up much space and my truck can still park.

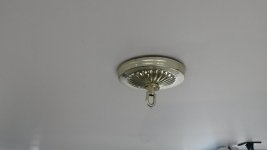
Last picture, anyone know what that round thing is on the ceiling? Up in the attic I pulled some tattered up low voltage wiring from it.
 

Attachments

  • 20180911_125331.jpg
    20180911_125331.jpg
    31.1 KB · Views: 2,072
  • 20180911_125353.jpg
    20180911_125353.jpg
    100.7 KB · Views: 618
  • 20180911_125318.jpg
    20180911_125318.jpg
    83.9 KB · Views: 635
  • 20180911_125253.jpg
    20180911_125253.jpg
    86.8 KB · Views: 647
  • 20180911_125233.jpg
    20180911_125233.jpg
    98.4 KB · Views: 785
Last edited:

Rag Roc

ALLIANCE MEMBER
Joined
Mar 11, 2011
Messages
297
Location
Central Florida
Pro-tip: Don't support the workpiece with your leg. The Robertson bit will slip from the pocketscrew as the impact drives it. The drive bit will then drive through your pant leg, into your quad and gouge a nasty canyon into your leg meat. You will then bleed alot, feel woozy and later take yourself to the Urgent Care to update your Tetanus shot. But not before you finish the project

Good to know! Hope your leg healed alright. Nice progress, and looking forward to more.
 

marty_p

Well-known member
Joined
Aug 1, 2008
Messages
1,411
Location
SE LoUiSiAna
You.
Go.
Girl.

Way to whip that place into shape quickly! :thumbup:

I hope I can find a Bruce as well in the next few months...
 
OP
G

GirlnAgarage

Well-known member
Joined
Jan 21, 2011
Messages
4,669
Location
Texas
Good to know! Hope your leg healed alright. Nice progress, and looking forward to more.

Thank you. Yup, healed up and good to go.


You.
Go.
Girl.

Way to whip that place into shape quickly! :thumbup:

I hope I can find a Bruce as well in the next few months...

Tell you what, progress is baby steps sometimes I wonder if I'm getting anywhere. Half the time it feels like I just shuffle stuff around and set it in a different place lol

So you'll be needing a Bruce soon huh? Big move or staying local?

I see you have some light in it now. Much better to see progress.

That is a big yes my friend. Lots of good light in there now. I'd like to get a good photo soon as I can figure out my camera setting. The difference is ridiculous, I love it.

Nice old drill press!:thumbup:

Garage looks good.

Thank you.

Yeah I got that DP back in '11 on CL (post #350). It's been a good one, still hums smooth. Eventually I'd like to refinish it and also get an XY vise for it.
 

markviii

Well-known member
Joined
Jan 25, 2010
Messages
1,310
Location
east central IL
I was glad to see you show up again on gj. Finding a siutable new place and ettling in takes time. And a new place always needs adjustments to our own organizational needs. Have fun!
 
To avoid these ads, REGISTER NOW!

rharman

Well-known member
Joined
Apr 22, 2012
Messages
8,879
Location
SoCal
Always enjoyed your posts and projects.

What have you been up to in your long absence?
 

RickP

Well-known member
Joined
Jan 15, 2013
Messages
1,554
Location
Annapolis, MD
Nice to see you getting another garage reorganization underway. I really like the new lights -- I've been wanting to pull the trigger on something like that for a while now.

The shelves and workbench are a great place to start for organizing and getting stuff off the floor. Nothing like a good bench for getting other projects done! Before building my first bench, I spent far too much time kneeling in my driveway working on stuff...
 
OP
G

GirlnAgarage

Well-known member
Joined
Jan 21, 2011
Messages
4,669
Location
Texas
I am sure when you work it out you will post it. :thumbup::)

Absolutely!

Looking forward to seeing the progress

Thank you much. Definitely more coming. On my weekends I have to pause to rest up or tend to other things needing tending. I could get lost for hours in the garage and neglect other things.

I was glad to see you show up again on gj. Finding a siutable new place and ettling in takes time. And a new place always needs adjustments to our own organizational needs. Have fun!

Aw thanks, glad to be back. I been doing a lot of work on the yard and truck. After a stint of projects and working on mine and friend's truck in the garage I knew it was time to get that space organized and functional.

Work keeps me busy. When I'm not there, trying to relax keeps me busy. I do a lot of fishing, hiking and camping. Got a kayak I like to take out and a dirt bike that if I can ever get running right I'll have it out again too.

I'll definitely have fun getting this stuff setup. I learned a lot from the last phase in life that I'm applying here. Nice to know things from experience, I'm less hesitant and I'm getting my drive back.

Always enjoyed your posts and projects.

What have you been up to in your long absence?

Thanks. In the current state I think the thing I miss the most of my previous projects is my workbench/toolbox. That thing was a beast and it had my garage squared away as far as tool storage and a huge work top. That's the one I wish I didn't let get away. I sold it and my 2x4 mobile workbench before my move. While I don't have space for that mobile bench now, I would love to have my workbench/toolbox.

In my GJ absence I been here the last couple of years, my focus was on work and friends. Had a lot of stuff going on there and with them that kept me out of the house and engaged. It's only been recently in the past 6mths/year that I've been able to stick around the house and enjoy my space whether it be the back porch and fire pit or the garage and working on something. Also this year I have the best looking lawn on the block :rocker: :D


Nice to see you getting another garage reorganization underway. I really like the new lights -- I've been wanting to pull the trigger on something like that for a while now.

The shelves and workbench are a great place to start for organizing and getting stuff off the floor. Nothing like a good bench for getting other projects done! Before building my first bench, I spent far too much time kneeling in my driveway working on stuff...

Thank you. You aren't kidding about the bench. My bony knees can't take it. The bench I put up was actually the one I had in my leather workshop at the other house. Since it was already framed and topped I pulled it off the wall and brought it with me. For being 7'x2' it's pretty slim and compact to move lol

The lights made a huge difference and they were easier than I thought they'd be. Honestly the hardest part was plunking down the cash to buy them lol Don't think too long on the lights, jump in and do it :thumbup:
 

Attachments

  • 20180130_132129.jpg
    20180130_132129.jpg
    160.2 KB · Views: 207
Last edited:

jimreed2160

Well-known member
Joined
Aug 7, 2016
Messages
3,589
Location
Tallahassee FL
That's some fast work. And done well. I love your lights--it would have been my first project also. Thanks for sharing your pictures and good luck organizing your new garage.
 
OP
G

GirlnAgarage

Well-known member
Joined
Jan 21, 2011
Messages
4,669
Location
Texas
That's some fast work. And done well. I love your lights--it would have been my first project also. Thanks for sharing your pictures and good luck organizing your new garage.

Thank you much. I hit it when I can.


That's some good organizational work you're doing there. Kudos for your healthy lifestyle interests as well.

Thanks.
One has got to have the fun outlets.
 

Attachments

  • 20170705_202039.jpg
    20170705_202039.jpg
    67.4 KB · Views: 392
  • 20170607_175058.jpg
    20170607_175058.jpg
    145.3 KB · Views: 416
  • 20170112_082159.jpg
    20170112_082159.jpg
    86.8 KB · Views: 428
  • 20170620_175020.jpg
    20170620_175020.jpg
    117.5 KB · Views: 398
  • 20170112_103655.jpg
    20170112_103655.jpg
    158.7 KB · Views: 387
  • 20161024_165055.jpg
    20161024_165055.jpg
    155.9 KB · Views: 402
  • 2018-09-14 02.55.59.jpg
    2018-09-14 02.55.59.jpg
    72.5 KB · Views: 604
Last edited:
OP
G

GirlnAgarage

Well-known member
Joined
Jan 21, 2011
Messages
4,669
Location
Texas
The stuff I do in the garage...

Pic1:
Changing 16k mi old hub Timken assembly I blew out arriving to a Friday night pool party with too much enthusiasm. The 263ft lb axle nut solidified the Dewalt 899 purchase. While I didn't have it for the repair, the struggle that occurred this day will not happen again. For shiggles I tried the 885 on the caliper and hub unit bolts but as brave as it was it didn't knock loose the hardware. I used a breaker bar, they were close to lug nut torque effort which is about 140ftlbs.

Pic 2:
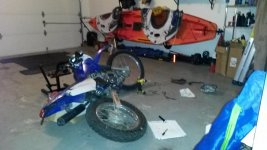
Installing Rekluse clutch unit in the TTR. The poor lighting made this job ****. With the new lighting, the future maintenance will be so much more pleasant.

Pic 3:
Install of Thuren springs, shocks, coil pads and end links. I was dumping the spacer system and stock spring. Worked in Dad's driveway not sure of the truck would fit in my garage up on the frame. Turns out it will. Future jobs like this will be done in the garage. We got caught in a torrential down poor and subsequently eaten alive by hordes of vicious pterodactyl-sized mosquitoes - worst truck work ever. But if you ever want to live a little, drop a big 3/4t diesel axle at your toes, you'll feel the rush.

Pic 4:
The water wall after a Suspenz rack install, Rubbermaid FastTrack and simple shelf for the pedal unit and gear. This wall will be edited next. Haven't decided to keep it mounted there or move back. My consideration is the two wall vents that vent to the outside of the brick exterior. I am thinking of keeping those clear to install small fans to pull cool outside air from the north facing wall. We shall see. That metal rack you see has been cleared of supplies that are now placed on the wall mounted cabinets on the work side wall.
 

Attachments

  • 20170523_182929.jpg
    20170523_182929.jpg
    83.9 KB · Views: 439
  • 20180122_215145.jpg
    20180122_215145.jpg
    88.2 KB · Views: 434
  • 20171003_144609.jpg
    20171003_144609.jpg
    127 KB · Views: 446
  • 20180716_145343.jpg
    20180716_145343.jpg
    80.2 KB · Views: 407
Last edited:
OP
G

GirlnAgarage

Well-known member
Joined
Jan 21, 2011
Messages
4,669
Location
Texas
Thanks guys!


I'm bored tonight....
 

Attachments

  • 20180917_203528.jpg
    20180917_203528.jpg
    66.1 KB · Views: 387
  • 20180917_203506.jpg
    20180917_203506.jpg
    46.4 KB · Views: 404
  • 20180917_203508.jpg
    20180917_203508.jpg
    48 KB · Views: 395
  • 20180917_203552.jpg
    20180917_203552.jpg
    74.3 KB · Views: 384
OP
G

GirlnAgarage

Well-known member
Joined
Jan 21, 2011
Messages
4,669
Location
Texas
That's all I'm doodling with tonight. Just threw swatches on and set a pattern.

Dark trim and grey all the way around.

I do need help deciding paint or not on the wood shelves and benches. On the bench is the black trim, a medium color and the lightest shade on the right is what is going on the walls. Amazing how the color looks so different on different backgrounds. I'm not painting the workbench tops or shelf bottoms. I like the contrast of that wood against any color in here.
 

Attachments

  • 20180917_222745.jpg
    20180917_222745.jpg
    75.9 KB · Views: 226
  • 20180917_222736.jpg
    20180917_222736.jpg
    70.5 KB · Views: 225
  • 20180917_222713.jpg
    20180917_222713.jpg
    39.6 KB · Views: 211
  • 20180917_222653.jpg
    20180917_222653.jpg
    69.3 KB · Views: 245

RickP

Well-known member
Joined
Jan 15, 2013
Messages
1,554
Location
Annapolis, MD
Interesting color palette -- I like it.

My vote is #3 on the walls, black trim and #2 on the shelf faces.
 
OP
G

GirlnAgarage

Well-known member
Joined
Jan 21, 2011
Messages
4,669
Location
Texas
The greys, blues and blacks are my favorite colors. Looking for a clean look. I'm sick of the white walls. They get dirty so easy too. I was leaving hand prints on everything, it was annoying.

The color scheme I'm leaning towards is the same as yours.

I'll get the walls and trim wrapped up and see how it looks. Then I'll tackle the shelving and benches.
 
OP
G

GirlnAgarage

Well-known member
Joined
Jan 21, 2011
Messages
4,669
Location
Texas
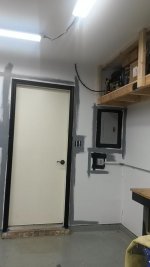
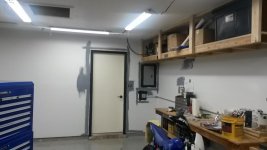
Well I painted today...took pics after I got started. The goal today was finish the front wall and work side wall. I accomplished that...mostly. Mostly is some touchups. Like I'll lose the black trim around the metal outlet boxes. I'll tidy up my edges around the conduit and straps. I have a crooked black corner on the electrical panel that didn't get base painted wide enough. But no biggies.

Over I love how the colors came out. And looking at the wood benches against the Grey wall I'm leaning towards leaving all of the exposed wood bare. The mismatch in Cedar posts tweaks my OCD though. Also I have to get rid of the paint swatches lol


And in true small garage that I have to park my truck in, after every project EVERYTHING pulled out has to get put away at night.
 

Attachments

  • 20180918_195615.jpg
    20180918_195615.jpg
    83.8 KB · Views: 332
  • 20180918_190247.jpg
    20180918_190247.jpg
    111.1 KB · Views: 357
  • 20180918_190230.jpg
    20180918_190230.jpg
    76 KB · Views: 351
  • 20180918_163703.jpg
    20180918_163703.jpg
    39.3 KB · Views: 347
  • 20180918_163722.jpg
    20180918_163722.jpg
    75.1 KB · Views: 345
  • 20180918_163605.jpg
    20180918_163605.jpg
    91.1 KB · Views: 384
OP
G

GirlnAgarage

Well-known member
Joined
Jan 21, 2011
Messages
4,669
Location
Texas
Here's a contrast with the toy side and house/yard **** corner that will get attention next. Again in small garage style and the I have a job and other obligations, the upgrades are done in increments.

I'll pull the cabinets off the French cleats, the tools and hooks off and paint behind them. I will install the third cabinet to the right of that paid and relocate the yard tool wall. Still need to get the bench extended and put the DP on it and lose the stand.

On the other side I found an outlet I had no idea I had. And that left side needs a complete go from the beginning with priming the walls. Paint. Then shelves.

I'll eventually put a new coat of white on the ceiling and touch up the entry door. Overall it's coming around.
 

Attachments

  • 20180918_190433.jpg
    20180918_190433.jpg
    51.4 KB · Views: 216
  • 20180918_195609.jpg
    20180918_195609.jpg
    51.8 KB · Views: 196
  • 20180918_195628.jpg
    20180918_195628.jpg
    70.2 KB · Views: 185
  • 20180918_163735.jpg
    20180918_163735.jpg
    26.4 KB · Views: 182
  • 2018-09-18 21.34.48.jpg
    2018-09-18 21.34.48.jpg
    39.3 KB · Views: 179
Last edited:
OP
G

GirlnAgarage

Well-known member
Joined
Jan 21, 2011
Messages
4,669
Location
Texas
Today was nice and sunny. A big change from the last weeks of dreary rainy blahhhh. I did mine and the neighbor's yard, got them all nice and squared away. Felt good to get some sun. I worked in the garage a little bit afterwards. Didn't feel like going full blown work, so I kept it easy.

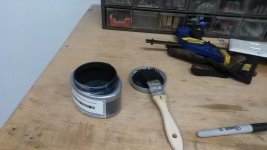
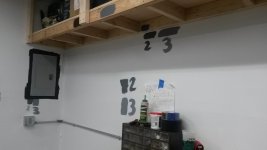
Painted a little more and finished off what was left in the first can of "Nevermore Grey". I pulled the cabinets off the walls and the yard tools and got behind those. I also got a piece of the wall behind the overhead shelf. I didn't feel like pulling the rest of the stuff off today, plus I would have had to open the 2nd can of paint. I'll save it for next paint day. It's a well known fact, and I know it too but didn't follow it this time -always always ALWAYS paint your walls before getting anything up.

I was looking at the garage door wall and it has the sensor wire stapled all the way around all gross and full of clumped paint. Since I plan to paint that section too I'll pull the wires down during painting. Then I'll install the black wire loom like I did at the front with the garage door opener on the wall. The color contrast will look nice and those wires will be stowed away. I'll need about 32' of the 3/8" stuff.

I also mostly finished up the 3rd wall cabinet I had cut and stacked on the bench. I still need to put the back supports, then cut and mount the french cleats. Not doing that today since I have to break out the Kreg jig and the circ saw and get things dirty. Again, nah. I'll save that for the day I put the DP wall bench up. Ill be cutting the 4x4 post and the top for it so the saw will be out.

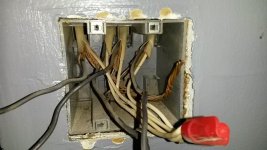
I pulled the cover on the light switches as I plan to change those out. But they made my brain hurt, I wasn't ready for the complication. I was use to wiring outlets in EMT, this this dohickey. I need to read then I'll get back to it
 

Attachments

  • workwall2.jpg
    workwall2.jpg
    117.2 KB · Views: 198
  • workwall3.jpg
    workwall3.jpg
    110.1 KB · Views: 194
  • bigdoor wall1.jpg
    bigdoor wall1.jpg
    121 KB · Views: 199
  • bigdoor2.jpg
    bigdoor2.jpg
    135.9 KB · Views: 1,096
  • cabinet3.jpg
    cabinet3.jpg
    59 KB · Views: 197
  • switch2.jpg
    switch2.jpg
    72.3 KB · Views: 220
  • switch1.jpg
    switch1.jpg
    66.8 KB · Views: 209
To avoid these ads, REGISTER NOW!
Top Bottom