To avoid these ads, REGISTER NOW!

26'x28' Shop Build. FINALLY!

HotWire

Well-known member
Joined
Mar 21, 2010
Messages
368
Location
Montana
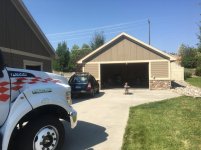
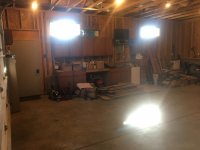
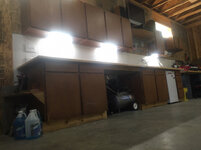
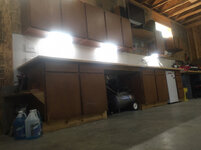
26'x28' Detached Shop Buildout. FINALLY!

Hi everybody!

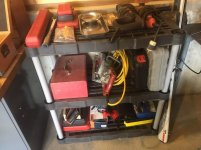
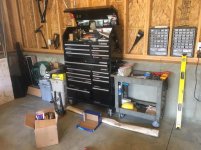
I've lurked on here for years and finally have a shop space of my own. I have a background in Bicycle, Automotive, and Industrial Maintenance and will be building a versitile metal and wood working space with the potential for a small music space down the road.

I've been following my Wife around during her medical training and we have only had attached garages until now. We just moved to Montana where we plan to stay for the foreseeable future.

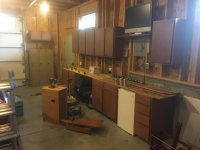
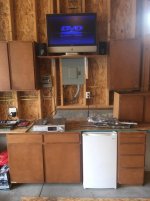
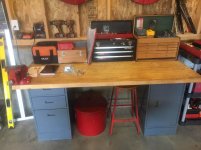
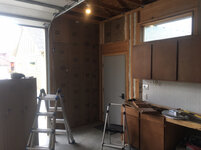
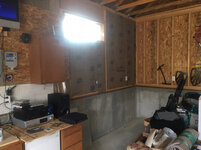
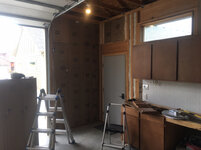
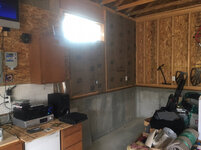
This will be a slow budget build, but Im excited! Previous owner left cabinets which I plan on keeping; I've hung them temporarily to plan the spacing. I sold my crappy home-owner quality tools 2 moves ago and will be buying up used industrial quality tools as I can afford.
 
Last edited:
To avoid these ads, REGISTER NOW!
OP
H

HotWire

Well-known member
Joined
Mar 21, 2010
Messages
368
Location
Montana
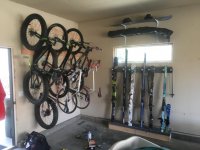
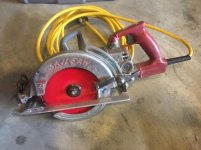
I picked up a worm-drive saw for $40 this evening to help build some storage into our attached garage which gets priority as it contains all of the family's recreational equipment. I've already hung 6 of the 11 bikes and will be building a ski rack, bench, and shelving unit for totes.IMG_5959.jpg
 
Last edited:

kjdhawkhill

Well-known member
Joined
Jan 19, 2015
Messages
822
Location
Flyover state #4
I sold my crappy home-owner quality tools 2 moveds ago and will be buying up used industrisl quality tools as I can afford.


Blasphemy! Only sell tools that are already replaced (waiting until they’re third string is best).

Good luck with the budget build- and I think buying quality used tools is probably a better idea than buying new entry level... especially if you only need to buy one or two per project... and the tools aren’t putting food on your table. (Same goes for bikes, but new bikes come with a BB no-creaky-warranty).


Sent from my iPhone using Tapatalk
 

kjdhawkhill

Well-known member
Joined
Jan 19, 2015
Messages
822
Location
Flyover state #4
I picked up a worm-drive saw this evening to help build some storage into our attached garage which gets priority as it contains all of the family's recreational equipment. I've already hung 6 of the 11 bikes and will be building a ski rack, bench, and shelving unit for totes.


Ha! Had a POS B&D circular saw replaced with a garage sale worm drive Skil circa 1990... it’s like they’re intended for different jobs.

Also, lemme see those hanging bikes. I’m still trying to figure out a layout for my 3, wife’s 1, chariot 2, strollers etc... but I’m in a 19x17 ish detached.


Sent from my iPhone using Tapatalk
 
OP
H

HotWire

Well-known member
Joined
Mar 21, 2010
Messages
368
Location
Montana
Blasphemy! Only sell tools that are already replaced (waiting until they’re third string is best).

You should've seen our moving truck! Im glad I purged what I did or we would have had to rent a 2nd truck and car dollys.
 

kjdhawkhill

Well-known member
Joined
Jan 19, 2015
Messages
822
Location
Flyover state #4
You should've seen our moving truck! Im glad I purged what I did or we would have had to rent a 2nd truck and car dollys.


Nah, I’ve moved often enough. I don’t need to see another moving truck, ever.

I’m in my death home now, even though the garage is too small and the trails are too far... and I don’t plan on dying for quite a while. even a free paid move is unlikely to move me for the next 15-20 years.


Sent from my iPhone using Tapatalk
 
OP
H

HotWire

Well-known member
Joined
Mar 21, 2010
Messages
368
Location
Montana
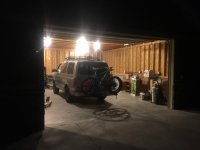
Here's a few.
 

Attachments

  • IMG_5513.jpg
    IMG_5513.jpg
    150.2 KB · Views: 1,930
  • IMG_5564.jpg
    IMG_5564.jpg
    91.9 KB · Views: 1,776
  • IMG_5730.jpg
    IMG_5730.jpg
    149.5 KB · Views: 1,754
  • IMG_5748.jpg
    IMG_5748.jpg
    121 KB · Views: 1,638
  • IMG_5840.jpg
    IMG_5840.jpg
    104.5 KB · Views: 1,739

kjdhawkhill

Well-known member
Joined
Jan 19, 2015
Messages
822
Location
Flyover state #4
Here's a few.


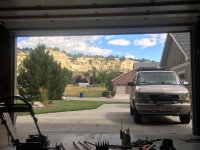
1. Love/hate the Astro/safaris... I don’t have the time to maintain one at this life stage, but if it runs well for you... yours at least looks good in its current configuration.

2. Gratuitous posts of vistas, views and sight lines from garages are worth it.

3. Get that puppy insulated. I heard Montana has real winters.

4. Ride now. Work inside later. (See #3).


Sent from my iPhone using Tapatalk
 
OP
H

HotWire

Well-known member
Joined
Mar 21, 2010
Messages
368
Location
Montana
I feel ya on all accounts. We've been riding a ton. Those rim rocks are part of the reason we moved here. Plenty of local trails through them. Insulation is planned for late fall/winter. And.....the Safari is back on my good side; just put a 3,000mi road trip on her through mountains!
 
OP
H

HotWire

Well-known member
Joined
Mar 21, 2010
Messages
368
Location
Montana
Also, lemme see those hanging bikes. I’m still trying to figure out a layout for my 3, wife’s 1, chariot 2, strollers etc... but I’m in a 19x17 ish detached.

Here are 6 of them. We are in the process of putting all our recreational equipment in the 3rd attached garage stall.IMG_5871.jpg
 

Attachments

  • IMG_5852.jpg
    IMG_5852.jpg
    143 KB · Views: 821
Last edited:
OP
H

HotWire

Well-known member
Joined
Mar 21, 2010
Messages
368
Location
Montana
I made a little progress this week.

For those just tuning in; I'm trying to make progress while waiting for the funds to insulate and put up wall board. My Wife has agreed to fund that before Winter, but we have some other expenses first. Soooooo.......

Continued unpacking boxes, mounted my small vice, and built a support frame to bridge the opening in my cabinet work surface.
IMG_5965.jpg
IMG_5954.jpg

I was also able to snag a nice pair of 1/2" Milwaukee Magnum drills, one hammer, one regular. They share a cord and aux handle. $63 for everything including a bunch of decent bits and original manual.
IMG_5958.jpg

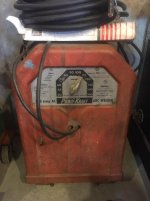
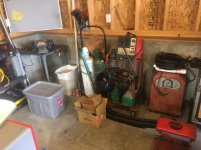
My Father-in-Law gave me his old welder as I have 220v in the shop and his welding days are over due to poor eyesight. It'll get a restoration like everything else once I get my priorities figured out.
IMG_5973.jpg

I also grabbed a small Dayton bench grinder for $10 that needed the cord replaced. Works great now, just needs paint! I'll be looking for a larger matching one soon so I can run fine and course brushes on one and fine and course stones on the other.
IMG_5957.jpg

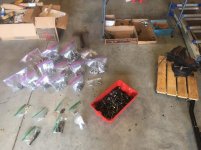
Of course I had to pick up a DVD player from GoodWill so I had something to watch while sorting that large bucket of random hardware! I can't wait to order my bins.
IMG_5966.jpgIMG_5970.jpg


Sent from my iPhone using The Garage Journal mobile app
 
Last edited:
OP
H

HotWire

Well-known member
Joined
Mar 21, 2010
Messages
368
Location
Montana
I've now leveled, and mounted the lower cabinets by anchoring them to the concrete wall with TapCons using my new Milwaukee HammerDrill.

Up next is insulation, wallboard, and pegboard for that area including behind the lockers.. I'll be pulling the upper cabinets then rehanging them after wallboard. Then I'll build a work surface the entire length of of the cabinets and adding a same-height work bench to the right. I've decide to make that end a bench to allow relocation later if/when the music space goes in.

I can't wait to get this finished so I can stop shuffling around the open boxes all over the floor. My plan is to organize all the small loose items into the upper and lower cabinets.
 

Attachments

  • IMG_6028.jpg
    IMG_6028.jpg
    94 KB · Views: 515
Last edited:
OP
H

HotWire

Well-known member
Joined
Mar 21, 2010
Messages
368
Location
Montana
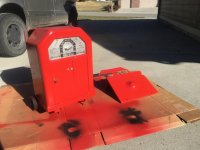
I gave the Tombstone a refresh with a cleaning and new paint. Next up are new cables and stinger.
 

Attachments

  • IMG_6080.jpg
    IMG_6080.jpg
    134.7 KB · Views: 481
To avoid these ads, REGISTER NOW!
OP
H

HotWire

Well-known member
Joined
Mar 21, 2010
Messages
368
Location
Montana
Ace had a sale on LED Flood Bulbs this week so while waiting to insulate I grabbed a set for the Shop.

I previously had Halogen and hated waiting for them to warm up. When I flip a switch I want light.

This is bank1 New Bulbs and bank2 Old Bulbs.
13e00dbf0173b54ad6080843f2c96f61.jpg

This is both banks New!
ed3e4a7e8f6b84c17d1bda1dbcb4fd1a.jpg

They also match the color of light from the windows.

I'm sure I'll be adding more fixtures before I finish the ceiling.

I also grabbed a full surround sound system for $30 yesterday. They will go up when I do the wallboard.

06a194ab600666c10edf47b72171b0e1.jpg
 

Attachments

  • 06a194ab600666c10edf47b72171b0e1.jpg
    06a194ab600666c10edf47b72171b0e1.jpg
    723.4 KB · Views: 17
  • ed3e4a7e8f6b84c17d1bda1dbcb4fd1a.jpg
    ed3e4a7e8f6b84c17d1bda1dbcb4fd1a.jpg
    813.3 KB · Views: 13
  • 13e00dbf0173b54ad6080843f2c96f61.jpg
    13e00dbf0173b54ad6080843f2c96f61.jpg
    813.3 KB · Views: 13
Last edited:
OP
H

HotWire

Well-known member
Joined
Mar 21, 2010
Messages
368
Location
Montana
Making a list and checking it twice! I have the go-ahead to buy materials for Stage 1 on Monday!

I'm pretty excited.

Stage 1:

The plan is to insulate the SE corner and S wall of the shop. I'll run white pegboard between the lower and upper cabinets with OSB behind the upper cabinets and lockers then up to the trusses.

I'll hang the upper cabinets permanently then add under cabinet task lighting. I will also add (2) 50A welding receptacles, center of N and S walls.

Speaker wire will be run from media center below the TV to jack plates in the W corners of the shop for additional speakers later.

Lastly I will be building the work surface along the entire row of lower cabinets. I'm not sure exactly what material I will use. I've used Masonite over plywood in the past. It held up well to light duty tasks. No welding or hammering will be done in this side of the shop.

Stage 2

Finish insulating the rest of the shop this Winter. Hopefully finishing the ceiling in White corrugated steel. Additional lighting and a hatch will be planned before ceiling is completed.

Stage 3

Complete wallboard and paint. Most likely Grey lower walls with White upper. Possibly fancy stripe in-between, but I'll wait to see how the OSB paints.

FYI, I hate drywall! The install, the mud, the patching.....repairs when touched.

acb3176a99eb07046f63628006b7e303.jpg


Sent from my iPhone using The Garage Journal mobile app
 

Attachments

  • acb3176a99eb07046f63628006b7e303.jpg
    acb3176a99eb07046f63628006b7e303.jpg
    799.6 KB · Views: 11
Last edited:
OP
H

HotWire

Well-known member
Joined
Mar 21, 2010
Messages
368
Location
Montana
I had just enough cash to grab some insulation, romex, and pegboard this afternoon after pulling the upper cabinets.

9326d30746fef90a158666d4595ab90f.jpg

3e58e99932c860ee4c3a296a47e2c933.jpg

First I'll run wire from the outlets up into the cabinets to power the under-cabinet lighting.

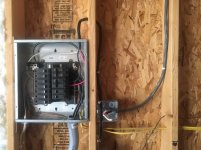
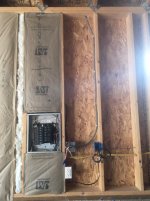
I also pulled the electrical panel out as it had been mounted flush.

f3ddb29f5c7b5e7f8e6ca0dc88e35385.jpg


Sent from my iPhone using The Garage Journal mobile app
 

Attachments

  • f3ddb29f5c7b5e7f8e6ca0dc88e35385.jpg
    f3ddb29f5c7b5e7f8e6ca0dc88e35385.jpg
    693.9 KB · Views: 9
  • 3e58e99932c860ee4c3a296a47e2c933.jpg
    3e58e99932c860ee4c3a296a47e2c933.jpg
    748.2 KB · Views: 9
  • 9326d30746fef90a158666d4595ab90f.jpg
    9326d30746fef90a158666d4595ab90f.jpg
    788.3 KB · Views: 13
OP
H

HotWire

Well-known member
Joined
Mar 21, 2010
Messages
368
Location
Montana
I made my first real progress today.

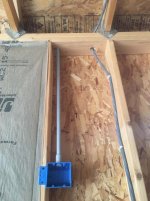
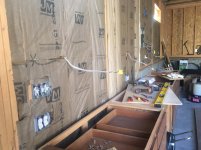
After running wire for our irrigation system weather station, I re-routed the irrigation control wires and added a box for them, tapped into the 220v run to the exterior RV hookup for adding a pair of welding outlets, and tied-in wires for under cabinet lights.

I also rigged piece of plastic conduit that I found for speaker wires as I couldn't find my roll of wire in the mess of moving and working in the shop, and I wanted to keep moving.

Then came insulation on the S wall behind the cabinets.


I'll be working on the pegboard, wallboard, and upper cabinets tomorrow.

IMG_6133.jpg
IMG_6136.jpgIMG_6137.jpgIMG_6141.jpgIMG_6138.jpg


Sent from my iPhone using The Garage Journal mobile app
 
OP
H

HotWire

Well-known member
Joined
Mar 21, 2010
Messages
368
Location
Montana
I was able to finish getting all the cabinets permanently mounted today. The entire S wall and SE corner are now insulated. I installed my under cabinet lighting and started clearing my floor of boxes by loading up the shelves.

A little progress at a time.

eba2c4de292003708f904c6b9f2608eb.jpge8fd5621d43dd63e5b3f0d6d7eb6c18d.jpg8210d3f860247861c5cd103937612ffd.jpg057bd0e5416628e52ce21ade231df8a1.jpg
 

Attachments

  • e8fd5621d43dd63e5b3f0d6d7eb6c18d.jpg
    e8fd5621d43dd63e5b3f0d6d7eb6c18d.jpg
    702.5 KB · Views: 10
  • eba2c4de292003708f904c6b9f2608eb.jpg
    eba2c4de292003708f904c6b9f2608eb.jpg
    777 KB · Views: 7
  • 8210d3f860247861c5cd103937612ffd.jpg
    8210d3f860247861c5cd103937612ffd.jpg
    785.1 KB · Views: 7
  • 057bd0e5416628e52ce21ade231df8a1.jpg
    057bd0e5416628e52ce21ade231df8a1.jpg
    747.7 KB · Views: 7
Last edited:

Carman

Well-known member
Joined
Aug 13, 2008
Messages
68
Location
Oregon
Looks like it’s coming along nicely! It will be great to see the improvements as you go!
 

Matias

Well-known member
Joined
Feb 28, 2015
Messages
616
Location
Finland
That's looking good! I was going to say that route the surround system wires before putting the walls up, but you had that covered. I like that you will that much desktop place. You can _never_ have enough of it!
 
OP
H

HotWire

Well-known member
Joined
Mar 21, 2010
Messages
368
Location
Montana
Great progress! Your plan with different stages is looking good, when are you going to start Stage 2?


Thanks! Hopefully before Spring.

Looks like it’s coming along nicely! It will be great to see the improvements as you go!

It's slow going, but I'll get there.

That's looking good! I was going to say that route the surround system wires before putting the walls up, but you had that covered. I like that you will that much desktop place. You can _never_ have enough of it!


Thanks! Yeah, the surround is temporary, I'll be throwing some larger speakers up in the corners at some point.


Sent from my iPhone using The Garage Journal mobile app
 
OP
H

HotWire

Well-known member
Joined
Mar 21, 2010
Messages
368
Location
Montana
I found a couple pieces of 3/4" oak ply in the rafters the perfect size for my work top. It saved me from buying 2 sheets of sanded ply instead of the one. $45 savings. I'm still deciding what to cover it with.

82f599c742a341e384cc53df07a7050d.jpg

0588b5ef81d3bb4433449b6589fecbc0.jpg

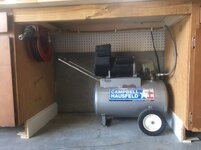
I also scrounged around and found enough fittings to hook up my compressor and reel in the opening. I have it setup with quick couplings so I can just pull it out whenever I need to.

77fefe81dde943debc476ca89f718c24.jpg


Sent from my iPhone using The Garage Journal mobile app
 

Attachments

  • 82f599c742a341e384cc53df07a7050d.jpg
    82f599c742a341e384cc53df07a7050d.jpg
    723.7 KB · Views: 6
  • 0588b5ef81d3bb4433449b6589fecbc0.jpg
    0588b5ef81d3bb4433449b6589fecbc0.jpg
    719.7 KB · Views: 5
  • 77fefe81dde943debc476ca89f718c24.jpg
    77fefe81dde943debc476ca89f718c24.jpg
    734.6 KB · Views: 5
Last edited:
OP
H

HotWire

Well-known member
Joined
Mar 21, 2010
Messages
368
Location
Montana
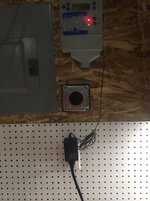
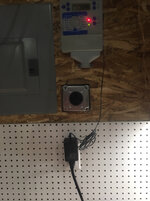
Snuck in some more work. Salvaged scraps to finish around the door and wire the first of my 2 230v 50a outlets.

I know the socket is upside down, but that was the only way I could got the wires; I even extended the box out. Those 6AWG wires and connectors are stiff!
5cac1efab2c34189a7fef0b9575f36a9.jpg
7f5f0b7172a91644c9e2397cecfa1b3c.jpg


Sent from my iPhone using The Garage Journal mobile app
 

Attachments

  • 7f5f0b7172a91644c9e2397cecfa1b3c.jpg
    7f5f0b7172a91644c9e2397cecfa1b3c.jpg
    691.4 KB · Views: 5
  • 5cac1efab2c34189a7fef0b9575f36a9.jpg
    5cac1efab2c34189a7fef0b9575f36a9.jpg
    685.3 KB · Views: 6
OP
H

HotWire

Well-known member
Joined
Mar 21, 2010
Messages
368
Location
Montana
I've decide to add a row of light fixtures then move the N and S fixtures out away from the new center row. This should give me m 50% more light for around $35.
IMG_6202.jpg

Also finished the Tombstone Welder rehab.

IMG_6200.jpg


Sent from my iPhone using The Garage Journal mobile app
 
Last edited:

rd65

Well-known member
Joined
Sep 29, 2017
Messages
2,818
Location
Granite Falls, WA
Making a list and checking it twice! I have the go-ahead to buy materials for Stage 1 on Monday!

I'm pretty excited.

Stage 1:

The plan is to insulate the SE corner and S wall of the shop. I'll run white pegboard between the lower and upper cabinets with OSB behind the upper cabinets and lockers then up to the trusses.

I'll hang the upper cabinets permanently then add under cabinet task lighting. I will also add (2) 50A welding receptacles, center of N and S walls.

Speaker wire will be run from media center below the TV to jack plates in the W corners of the shop for additional speakers later.

Lastly I will be building the work surface along the entire row of lower cabinets. I'm not sure exactly what material I will use. I've used Masonite over plywood in the past. It held up well to light duty tasks. No welding or hammering will be done in this side of the shop.

Stage 2

Finish insulating the rest of the shop this Winter. Hopefully finishing the ceiling in White corrugated steel. Additional lighting and a hatch will be planned before ceiling is completed.

Stage 3

Complete wallboard and paint. Most likely Grey lower walls with White upper. Possibly fancy stripe in-between, but I'll wait to see how the OSB paints.

FYI, I hate drywall! The install, the mud, the patching.....repairs when touched.

acb3176a99eb07046f63628006b7e303.jpg


Sent from my iPhone using The Garage Journal mobile app
In my area plywood isn't that much more expensive than osb. Might be worth checking out.
 

Attachments

  • acb3176a99eb07046f63628006b7e303.jpg
    acb3176a99eb07046f63628006b7e303.jpg
    111.4 KB · Views: 6

rd65

Well-known member
Joined
Sep 29, 2017
Messages
2,818
Location
Granite Falls, WA
I found a couple pieces of 3/4" oak ply in the rafters the perfect size for my work top. It saved me from buying 2 sheets of sanded ply instead of the one. $45 savings. I'm still deciding what to cover it with.

82f599c742a341e384cc53df07a7050d.jpg

0588b5ef81d3bb4433449b6589fecbc0.jpg

I also scrounged around and found enough fittings to hook up my compressor and reel in the opening. I have it setup with quick couplings so I can just pull it out whenever I need to.

77fefe81dde943debc476ca89f718c24.jpg


Sent from my iPhone using The Garage Journal mobile app
I used formica (free to me-brother had an accident with a Dremel redoing his kitchen lol). It cleans up nicely and I routed the edge flush/square. Works good for tearing sandpaper and such. In my new shop I am using solid core doors for counter tops. Thinking I will go the formica route again.
 

Attachments

  • 82f599c742a341e384cc53df07a7050d.jpg
    82f599c742a341e384cc53df07a7050d.jpg
    98.7 KB · Views: 7
  • 0588b5ef81d3bb4433449b6589fecbc0.jpg
    0588b5ef81d3bb4433449b6589fecbc0.jpg
    101.7 KB · Views: 5
  • 77fefe81dde943debc476ca89f718c24.jpg
    77fefe81dde943debc476ca89f718c24.jpg
    103 KB · Views: 5
OP
H

HotWire

Well-known member
Joined
Mar 21, 2010
Messages
368
Location
Montana
I finished moving the original 2 rows of lights outwards from the center of the shop and added a third row. Much better. I still plan on task lighting over the welding area in the NW corner.


0d603687b31bb177fe5415a68112cadf.jpg


Sent from my iPhone using The Garage Journal mobile app
 

Attachments

  • 0d603687b31bb177fe5415a68112cadf.jpg
    0d603687b31bb177fe5415a68112cadf.jpg
    853.1 KB · Views: 3
OP
H

HotWire

Well-known member
Joined
Mar 21, 2010
Messages
368
Location
Montana
It's been pretty busy around the house these past few weeks so not much going on as far as Shop build-out.

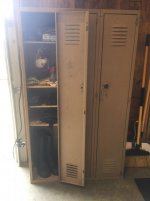
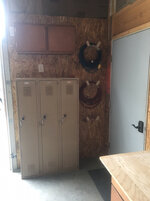
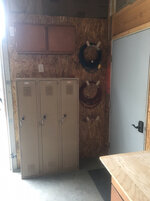
I did finish wallboard behind the lockers, mounted them to the wall and added some hose hooks my brother in-law gave me. 7658f4680e6235c1c2efcfc5003bdf11.jpg

I've also picked up a miter saw, oscillating tool, router, and orbital sander for ongoing house projects. Pics to follow.


Sent from my iPhone using The Garage Journal mobile app
 

Attachments

  • 7658f4680e6235c1c2efcfc5003bdf11.jpg
    7658f4680e6235c1c2efcfc5003bdf11.jpg
    655.2 KB · Views: 3
OP
H

HotWire

Well-known member
Joined
Mar 21, 2010
Messages
368
Location
Montana
First a pic of the new acquisitions!

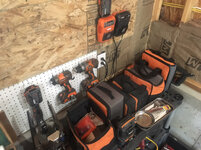
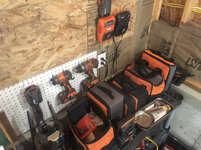
New cordless oscillating tool was needed to finish a shower surround re-grouting project. Then I picked up a orbital sander, router, and handheld belt sander for general use. Then I grabbed a 18 gauge finish nailer for building an organizer in our mudroom. Also picked up another cordless hammer drill with battery and charger combo in an after Christmas sale. I now have 4 batteries and 2 chargers.

I am very happy with Ridgid's quality to price ratio. Especially since I've bought most of them used.

379e9769cdab60b94137ec47bda2dcfe.jpg

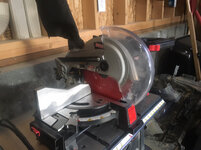
I also picked up a cheap Craftsman 10" compound miter saw from craigslist. This will be replaced along with the Craftsman tablesaw once I can find a good deal on industrial quality versions.

9fbf11d6da9244b00c2c21a5a91ab839.jpg
 

Attachments

  • 9fbf11d6da9244b00c2c21a5a91ab839.jpg
    9fbf11d6da9244b00c2c21a5a91ab839.jpg
    764.3 KB · Views: 2
  • 379e9769cdab60b94137ec47bda2dcfe.jpg
    379e9769cdab60b94137ec47bda2dcfe.jpg
    856.9 KB · Views: 2
Last edited:
OP
H

HotWire

Well-known member
Joined
Mar 21, 2010
Messages
368
Location
Montana
Now onto the shop updates.

I finished the final shelving layout for my AV system using some scrap of 3/4" plywood and leftover stain.

43c7db91409ff138c919219f1ace8d05.jpg

I had to build a new bases for my cabinets as the front baseboards had been destroyed when they were removed. I cut each piece to match the floor profile so that it supported the floor of the cabinets for more weight.

abcea671186c75b59e6174290acf4b9d.jpg

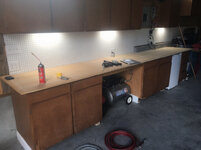
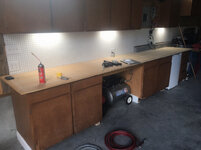
Next came the worksurface. I choose a simple hardboard with pine trim. The hardboard is glued with construction adhesive. And the trim is wood glued and nailed.

I've done this exact top at my parents farm and it held up many years. This is the clean/light duty side of my shop.

9301cb9af69d465fc54096d5364c7c8d.jpg

26e6261924fadfbf7d87a6020d93d784.jpg

I have also thrown together a paper towel holder out of scrap materials.

23fe76268d70bbfae506cf15c54b82fa.jpg


Sent from my iPhone using The Garage Journal mobile app
 

Attachments

  • 23fe76268d70bbfae506cf15c54b82fa.jpg
    23fe76268d70bbfae506cf15c54b82fa.jpg
    689.4 KB · Views: 2
  • 26e6261924fadfbf7d87a6020d93d784.jpg
    26e6261924fadfbf7d87a6020d93d784.jpg
    644.6 KB · Views: 1
  • 9301cb9af69d465fc54096d5364c7c8d.jpg
    9301cb9af69d465fc54096d5364c7c8d.jpg
    645 KB · Views: 1
  • abcea671186c75b59e6174290acf4b9d.jpg
    abcea671186c75b59e6174290acf4b9d.jpg
    673.9 KB · Views: 1
  • 43c7db91409ff138c919219f1ace8d05.jpg
    43c7db91409ff138c919219f1ace8d05.jpg
    718 KB · Views: 1
To avoid these ads, REGISTER NOW!
Top Bottom