To avoid these ads, REGISTER NOW!

New Southern CA Modern Garage & House Build

OP
D

dirtrunner0519

Well-known member
Joined
May 9, 2012
Messages
399
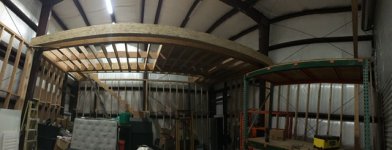
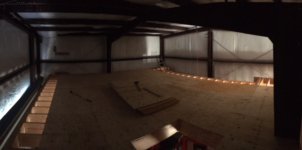
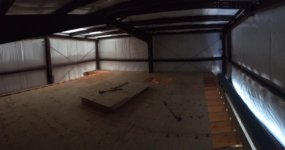
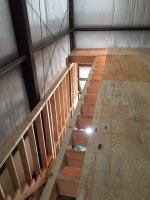
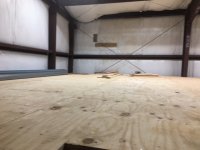
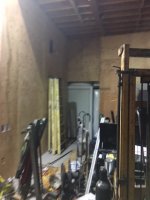
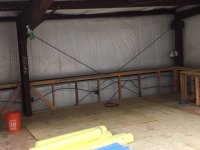
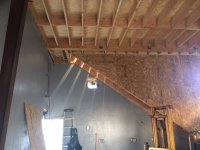
I had some more progress on the garage attic area.

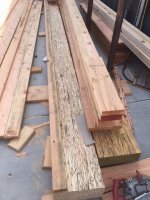
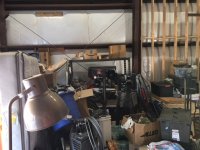
There is a ton of wood i have to use, and it is going so quickly.I had to first clean the area i was working in and move it into the other half of the garage for me to begin to frame the area. That took all of Friday, Saturday I did layout and removed reorganized the whole bundle of wood to get to the 2x6 that were buried even though i told them to put them on top I also frame the side walls and put the two giant beams up. I had some help with those and two lifts.

All I can say is progress, and my wife was out of town so i have been watching my 20 month old and working during nap and sleep time.

Let me know what you think. Also showing some toys I dug out.

Should have more progress today as my wife gets back in town.
 

Attachments

  • IMG_8400.JPG
    IMG_8400.JPG
    123.8 KB · Views: 97
  • IMG_8398.JPG
    IMG_8398.JPG
    118 KB · Views: 83
  • IMG_8396.JPG
    IMG_8396.JPG
    139.8 KB · Views: 82
  • IMG_8393.JPG
    IMG_8393.JPG
    106.5 KB · Views: 79
  • IMG_8383.JPG
    IMG_8383.JPG
    121.3 KB · Views: 96
  • IMG_8374.jpg
    IMG_8374.jpg
    54.3 KB · Views: 112
  • IMG_8368.JPG
    IMG_8368.JPG
    114.8 KB · Views: 86
To avoid these ads, REGISTER NOW!
OP
D

dirtrunner0519

Well-known member
Joined
May 9, 2012
Messages
399
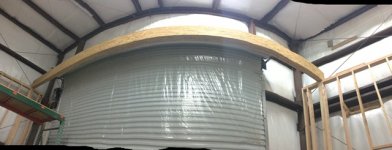
More progress...

I got the major Beams up with the help of some local guys I use for heavy work I cannot do myself.

Hopefully this week I can start running water etc. I also got myself a ProPex tool, if you have never used one, they are amazing.
 

Attachments

  • IMG_8416.JPG
    IMG_8416.JPG
    127.1 KB · Views: 124
  • IMG_8418.jpg
    IMG_8418.jpg
    56.9 KB · Views: 92
  • IMG_8419.JPG
    IMG_8419.JPG
    54.6 KB · Views: 88
  • IMG_8420.JPG
    IMG_8420.JPG
    102.8 KB · Views: 85
  • IMG_8421.JPG
    IMG_8421.JPG
    52.7 KB · Views: 88
OP
D

dirtrunner0519

Well-known member
Joined
May 9, 2012
Messages
399
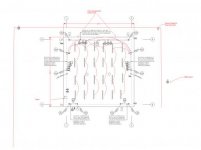
Here is a very rough sketch for my electrical plans. If anyone see's any holes in it let me know.
 

Attachments

  • Electrical Plan R1.jpg
    Electrical Plan R1.jpg
    18.8 KB · Views: 17
  • Capture.jpg
    Capture.jpg
    87.5 KB · Views: 55
Last edited:
OP
D

dirtrunner0519

Well-known member
Joined
May 9, 2012
Messages
399
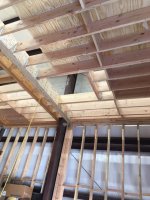
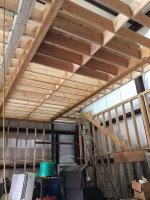
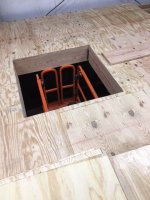
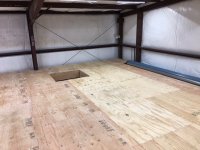
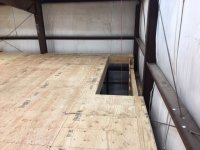
Here are some more photos of the floor joists and the plywood floor going down. Hoping to finish the rest today. Should have those up later.
 

Attachments

  • IMG_8458.JPG
    IMG_8458.JPG
    127.5 KB · Views: 43
  • IMG_8459.JPG
    IMG_8459.JPG
    129.8 KB · Views: 44
  • IMG_8460.JPG
    IMG_8460.JPG
    110.1 KB · Views: 45
  • IMG_8461.JPG
    IMG_8461.JPG
    136.4 KB · Views: 57
OP
D

dirtrunner0519

Well-known member
Joined
May 9, 2012
Messages
399
Here is a shot from the corners of the attic/mezzanine area.

I have installed most of the plywood sill need to do some around the corners and work on the stairs.
 

Attachments

  • IMG_8472.JPG
    IMG_8472.JPG
    47.2 KB · Views: 51
  • IMG_8473.JPG
    IMG_8473.JPG
    56.8 KB · Views: 62
  • IMG_8474.JPG
    IMG_8474.JPG
    110.3 KB · Views: 55
  • IMG_8475.JPG
    IMG_8475.JPG
    90.6 KB · Views: 50
OP
D

dirtrunner0519

Well-known member
Joined
May 9, 2012
Messages
399
Small update-

Only because I threw out my back picking up a pencil of all things.

Second layer of plywood is almost done. I have the edges to complete and some of the middle about 6 sheets of the 21 are left.

I started laying out the electrical boxes at 18" & 48" above FF. I picked up all the copper for the air line but i simply cannot install it with my back right now.

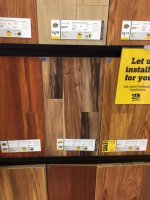
Here are some better updated photos. We also chose the flooring for the attic area, it is the one on sale for 79 cents.
 

Attachments

  • IMG_8492.JPG
    IMG_8492.JPG
    94.7 KB · Views: 50
  • IMG_8491.JPG
    IMG_8491.JPG
    78.9 KB · Views: 47
  • IMG_8489.JPG
    IMG_8489.JPG
    127.6 KB · Views: 53
  • IMG_8476.JPG
    IMG_8476.JPG
    123.4 KB · Views: 55
OP
D

dirtrunner0519

Well-known member
Joined
May 9, 2012
Messages
399
Did some more electrical work. About all i can do with the back right now. Bending is a major pain, but i managed.
 

Attachments

  • IMG_8500.JPG
    IMG_8500.JPG
    85.3 KB · Views: 36
  • IMG_8501.JPG
    IMG_8501.JPG
    85.1 KB · Views: 38
  • IMG_8502.JPG
    IMG_8502.JPG
    101.2 KB · Views: 37
OP
D

dirtrunner0519

Well-known member
Joined
May 9, 2012
Messages
399
Another Milestone reached-

All the floor plywood and hardware has been installed. I did the floor a little different. I decided to go with a little over 1/2" but two layers, ended up being more expensive but way more sturdy. It ended up being a alot more work in the layout to make sure seams never landed on seams, but worth it. The result no flex at all through out the floor, worked perfect.

I had to hire some help because of my back, but I had to direct them with what needed to be done. My end goal for this week is to have all the electrical roughed reviewed and then cover the walls with sheating.

Here is how the attic stands right now.
 

Attachments

  • IMG_8509.JPG
    IMG_8509.JPG
    100.5 KB · Views: 54
  • IMG_8508.JPG
    IMG_8508.JPG
    85.5 KB · Views: 58
  • IMG_8507.JPG
    IMG_8507.JPG
    118.1 KB · Views: 45
  • IMG_8506.JPG
    IMG_8506.JPG
    117.3 KB · Views: 47
  • IMG_8505.JPG
    IMG_8505.JPG
    110.4 KB · Views: 49

vrinner

Well-known member
Joined
Aug 29, 2006
Messages
1,078
Location
Placentia, CA
For your loft area...is it attached to the actual steel building or free floating? If attached/anchored...was the steel building engineered for it?

I ask because I have a 20X40 mezzanine that was engineered into the steel building but may want to put another loft area in another part of my building later.
 
OP
D

dirtrunner0519

Well-known member
Joined
May 9, 2012
Messages
399
For your loft area...is it attached to the actual steel building or free floating? If attached/anchored...was the steel building engineered for it?

I ask because I have a 20X40 mezzanine that was engineered into the steel building but may want to put another loft area in another part of my building later.

My loft area is not attached to the building at all. It is a free standing structure not tied in. After doing it this way I wish I paid the extra 25k for the mezzanine to be included in the building. However, the way I framed it has saved me almost 50% just been a PITA.
 
OP
D

dirtrunner0519

Well-known member
Joined
May 9, 2012
Messages
399
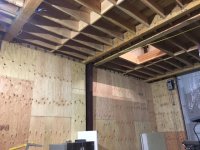
Here is an update on the garage-

Majority of the electrical has been roughed not yet terminated or put into the panel.
All the plumbing has been roughed considering it is not much no issue.
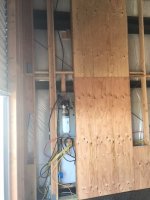
One full wall has been covered with struct-1.
Upstairs
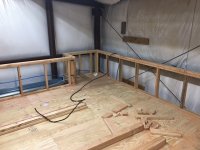
Small crib walls to frame area out have been rough framed.
Electrical feeder for small sub-panel has been roughed.
 

Attachments

  • IMG_8608.JPG
    IMG_8608.JPG
    110.7 KB · Views: 38
  • IMG_8607.JPG
    IMG_8607.JPG
    104.3 KB · Views: 36
  • IMG_8601.JPG
    IMG_8601.JPG
    145 KB · Views: 41
  • IMG_8600.JPG
    IMG_8600.JPG
    123.1 KB · Views: 39
  • IMG_8577.JPG
    IMG_8577.JPG
    86.1 KB · Views: 36
  • IMG_8564.JPG
    IMG_8564.JPG
    114.5 KB · Views: 34

LXCam

ALLIANCE MEMBER
Joined
Apr 23, 2013
Messages
19,200
Location
AZ
Looking great dr. Why didn't you go with 1-1/8" TnG subfloor glued and screwed? I understand how sturdy your way is but so is the other. I just had to redo a portion of my house (timber framed raised foundation) and after installing joist 16" oc between the beams verses what was 4' spans with 1-1/2" thick tg it's an absolute rock now. What a huge difference. But I gotta admit I'm dealing with some major back issues myself and considered doing exactly what you did because of it. Either way is effective I'm just wondering what drove this choice.
 

vrinner

Well-known member
Joined
Aug 29, 2006
Messages
1,078
Location
Placentia, CA
My loft area is not attached to the building at all. It is a free standing structure not tied in. After doing it this way I wish I paid the extra 25k for the mezzanine to be included in the building. However, the way I framed it has saved me almost 50% just been a PITA.

Thanks...adding the engineered mezzanine did add almost 25K to my base building price. I almost didn't go for it but knew that it would be worth it in the end. Thanks for the info.
 
OP
D

dirtrunner0519

Well-known member
Joined
May 9, 2012
Messages
399
LXcam- I was going to do the 1-1/8" but I decided to do 3/4" because it was just for a loft space. Engineer came out and failed it so I added another layer. It is rock solid though, I might do this is in the future to limit creaks. It helped lock in all the floor joists and nothing moves.
 
OP
D

dirtrunner0519

Well-known member
Joined
May 9, 2012
Messages
399
Some more progress yesterday happened. I cut in the two 16" exhaust fans for airflow. It has been 90 degrees out and the garage has been in the 70's so not too bad. We have a great ocean breeze so if i open the door and turn the fans on it will cool off the garage pretty quick.

Still need to clean up the panel area and finish the electrical rough in everywhere. I want to clean up the romex and just a general clean.

I am planning to go get my other toys from the desert this weekend or attempt. That means I get to install my lift again and get everything organized.

More to come... Promise it will start to get more interesting
 

Attachments

  • IMG_8622.JPG
    IMG_8622.JPG
    96.8 KB · Views: 29
  • IMG_8619.JPG
    IMG_8619.JPG
    95.8 KB · Views: 28
  • IMG_8594.JPG
    IMG_8594.JPG
    107.4 KB · Views: 30
OP
D

dirtrunner0519

Well-known member
Joined
May 9, 2012
Messages
399
Little up date on the garage.

All the shear walls are complete, bathroom has been rough framed to see how it looks in size. I need to build the stairs ASAP, I had to return the lift. An electrician is going to come help me on Friday and wire up the garage, I would have no problem doing it, but want someone to double check everything.

List remaining-
Install Flooring
Install Bathroom fixtures and rough plmbing
Install Upstairs sub-panel
Sheet short walls upstairs
Install all electrical upstairs (three tvs, golf simulator, and LV)
The list continues but that is the start
 

Attachments

  • IMG_8649.JPG
    IMG_8649.JPG
    104 KB · Views: 29
  • IMG_8650.JPG
    IMG_8650.JPG
    104.4 KB · Views: 33
  • IMG_8651.JPG
    IMG_8651.JPG
    118.1 KB · Views: 35
  • IMG_8652.JPG
    IMG_8652.JPG
    115.6 KB · Views: 31
  • IMG_8658.JPG
    IMG_8658.JPG
    95.5 KB · Views: 29
OP
D

dirtrunner0519

Well-known member
Joined
May 9, 2012
Messages
399
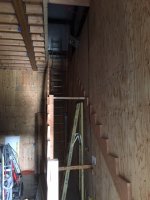
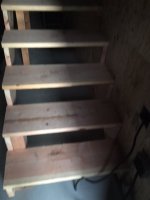
So i started the stringers. I need to add the actual tread. It is starting to look good.
 

Attachments

  • IMG_8665.JPG
    IMG_8665.JPG
    118.4 KB · Views: 34
  • IMG_8666.JPG
    IMG_8666.JPG
    106.7 KB · Views: 29
  • IMG_8667.JPG
    IMG_8667.JPG
    94.9 KB · Views: 29
OP
D

dirtrunner0519

Well-known member
Joined
May 9, 2012
Messages
399
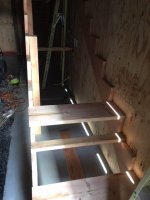
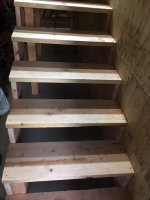
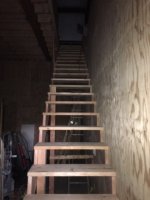
Stairs are done minus the hand rail. The architect put standard rail and to close the opening on the left. He mentioned I could change it as long as i meet the code. Any cool ideas out there.
 

Attachments

  • IMG_8671.JPG
    IMG_8671.JPG
    90.2 KB · Views: 23
  • IMG_8672.JPG
    IMG_8672.JPG
    89.9 KB · Views: 24
  • IMG_8673.JPG
    IMG_8673.JPG
    70 KB · Views: 23
  • IMG_8674.JPG
    IMG_8674.JPG
    82.6 KB · Views: 27
To avoid these ads, REGISTER NOW!
OP
D

dirtrunner0519

Well-known member
Joined
May 9, 2012
Messages
399
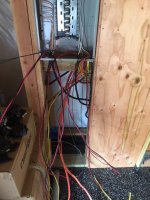
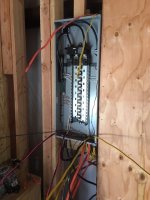
I finally got the time to start landing wires in the panel. It was 5 hours of grueling work, working with 6/3 romex is not always fun. For all those electricians out there, I have the utmost respect.

I did have help who was a licensed electrician. We did the feeders, sub panel, and 80% of the outlets.

I almost forgot to mention i got my truck from the desert to begin that project.
 

Attachments

  • IMG_8718.JPG
    IMG_8718.JPG
    97.9 KB · Views: 129
  • IMG_8720.JPG
    IMG_8720.JPG
    110.4 KB · Views: 97
  • IMG_8691.JPG
    IMG_8691.JPG
    122.9 KB · Views: 92
  • IMG_8688.JPG
    IMG_8688.JPG
    130.6 KB · Views: 75
  • IMG_8686.JPG
    IMG_8686.JPG
    107.4 KB · Views: 67
OP
D

dirtrunner0519

Well-known member
Joined
May 9, 2012
Messages
399
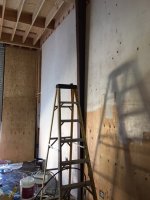
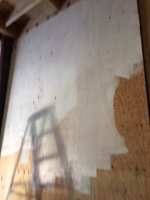
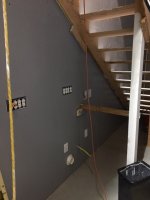
Finally got to paint the garage. Now all I have to do is finish the misc electrical items and put the face plates on. Slow and long process but getting there. I went with a simple grey, and it came out decent considering it was just Struc 1 and a little bit of sanding with a drywall sander.
 

Attachments

  • IMG_8744.JPG
    IMG_8744.JPG
    108 KB · Views: 38
  • IMG_8745.JPG
    IMG_8745.JPG
    70.9 KB · Views: 45
  • IMG_8750.JPG
    IMG_8750.JPG
    48.7 KB · Views: 60
  • IMG_8755.JPG
    IMG_8755.JPG
    117.2 KB · Views: 59
  • IMG_8756.JPG
    IMG_8756.JPG
    80.9 KB · Views: 63

LXCam

ALLIANCE MEMBER
Joined
Apr 23, 2013
Messages
19,200
Location
AZ
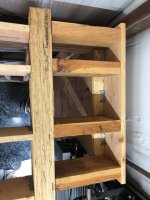
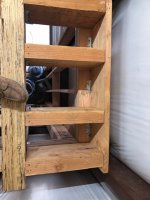
The finish turned out really good for structural grade. But I gotta ask about the brown thing. Is that a post and is it that far out of plumb or is it tapered? Being on a phone I can't tell exactly what's going on. I just know it's ******* my OCD meter ;)
 

jimmie jam

Well-known member
Joined
Oct 16, 2005
Messages
490
Location
fort lauderdale, fl
Wow, very nice progress! You have been hard at it. I found that the finish details and build out are REALLY time consuming and damn near as expensive as the shell.
 
OP
D

dirtrunner0519

Well-known member
Joined
May 9, 2012
Messages
399
The finish turned out really good for structural grade. But I gotta ask about the brown thing. Is that a post and is it that far out of plumb or is it tapered? Being on a phone I can't tell exactly what's going on. I just know it's ******* my OCD meter ;)

The beam is a tapered beam and is the moment frame for the whole garage structure. I cannot recall exact dimensions but it goes from 15-28" roughly, don't quote me on that.
 
OP
D

dirtrunner0519

Well-known member
Joined
May 9, 2012
Messages
399
Jimmie Jam- I keep getting reminded by the better half, "Honey it is a garage." Over all it came out alot better then i was expecting. Just need to add the cove base in case i want to hose down the garage.
 

LXCam

ALLIANCE MEMBER
Joined
Apr 23, 2013
Messages
19,200
Location
AZ
The beam is a tapered beam and is the moment frame for the whole garage structure. I cannot recall exact dimensions but it goes from 15-28" roughly, don't quote me on that.

Interesting, I can't say I've ever seen anything like that in residential construction nor in wood.
 
OP
D

dirtrunner0519

Well-known member
Joined
May 9, 2012
Messages
399
It is for the metal building. The attic is a stand alone structure and built out of wood. It is also the only bolting connection that required a deputy inspector.
 

LXCam

ALLIANCE MEMBER
Joined
Apr 23, 2013
Messages
19,200
Location
AZ
It is for the metal building. The attic is a stand alone structure and built out of wood. It is also the only bolting connection that required a deputy inspector.


Oh **** that's right. I forgot you had a red iron structure. Duhh
 
OP
D

dirtrunner0519

Well-known member
Joined
May 9, 2012
Messages
399
Haha yeah. Not much more progress. My wife and I have been building a garbage truck for our son, so we have been a little *******. Hopefully going to get that done shortly.
 
OP
D

dirtrunner0519

Well-known member
Joined
May 9, 2012
Messages
399
We have been busy so not much other then paint and some rough electrical going on.

Check out the finished grey wall.
 

Attachments

  • IMG_8749.JPG
    IMG_8749.JPG
    73.4 KB · Views: 35
  • IMG_8755.JPG
    IMG_8755.JPG
    117.2 KB · Views: 33
  • IMG_8758.JPG
    IMG_8758.JPG
    79 KB · Views: 32
  • IMG_8757.JPG
    IMG_8757.JPG
    78.1 KB · Views: 35
  • IMG_8756 (1).JPG
    IMG_8756 (1).JPG
    80.9 KB · Views: 35
  • IMG_8756.JPG
    IMG_8756.JPG
    80.9 KB · Views: 38
OP
D

dirtrunner0519

Well-known member
Joined
May 9, 2012
Messages
399
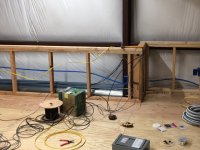
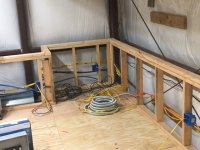
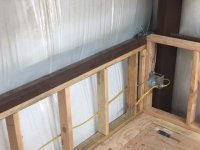
Here are some photos of the rough electrical up stairs. Yes it is awkward looking on one wall because of the x bracing and any rubbing issues.
 

Attachments

  • IMG_8846.JPG
    IMG_8846.JPG
    100.5 KB · Views: 51
  • IMG_8847.JPG
    IMG_8847.JPG
    89.5 KB · Views: 39
  • IMG_8848.JPG
    IMG_8848.JPG
    119.6 KB · Views: 39
  • IMG_8869.JPG
    IMG_8869.JPG
    122.3 KB · Views: 38
  • IMG_8871.JPG
    IMG_8871.JPG
    86.6 KB · Views: 41
OP
D

dirtrunner0519

Well-known member
Joined
May 9, 2012
Messages
399
Nope, He was however interested on all the birds walking on the metal roof.

I was kind of surprised he actually came up to hang out with me. I guess he was tired since it was almost 1am.
 
OP
D

dirtrunner0519

Well-known member
Joined
May 9, 2012
Messages
399
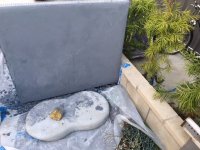
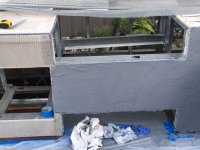
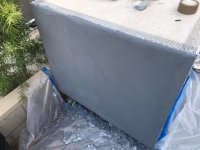
Not much done in the garage this weekend. We took our son to go see Thomas the Tank Engine in Perris, CA. I did start the island plaster, take a look and let me know what you guys think. It is a grey with a modern smooth but not perfect finish.
 

Attachments

  • IMG_8894.JPG
    IMG_8894.JPG
    136.6 KB · Views: 71
  • IMG_8895.JPG
    IMG_8895.JPG
    136.5 KB · Views: 78
  • IMG_8892.JPG
    IMG_8892.JPG
    113.5 KB · Views: 73
OP
D

dirtrunner0519

Well-known member
Joined
May 9, 2012
Messages
399
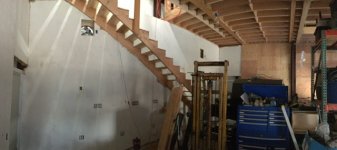
I finally finished the wall for the stairs in the garage. Came out decent, I am going to clear coat the wood with an epoxy resin or something along those lines. I saw it at a OSH and loved the look.

I should be done doing the panel upstairs then going onto finish the little walls and other misc items. I should have a bunch more photos tomorrow, been busy with work.
 

Attachments

  • IMG_8911.JPG
    IMG_8911.JPG
    112.6 KB · Views: 61
  • IMG_8910.JPG
    IMG_8910.JPG
    99.9 KB · Views: 65
To avoid these ads, REGISTER NOW!
Top Bottom