HOTFR8
Banned
Chevrolet Orange would be my 3rd choice. What ever you finish with Rian you are the person in the end that has to like the end result.

Winner winner, chicken dinner, orange is the new black.
Thats the one for me.
Hurry up I can't wait.
Steve
Chevrolet Orange would be my 3rd choice. What ever you finish with Rian you are the person in the end that has to like the end result.


Grizz1963;7477677 Note said:hmmm... not convinced. I suspect photoshoping of thongs. Just sayin'

Rian I would luv to come over and give you a hand.
hmmm... not convinced. I suspect photoshoping of thongs. Just sayin'
Be right there!


This is a great thing to read Rian!!!!
Bret


I thought that was the plan.Work carefully, I think you're going to screw up your plywood before you're done.
This is a great thing to read Rian!!!!
Bret
Rian, I am also glad you have your mojo back but according to the label, you should refrigerate it after opening.
Yep sure is great to hear
Work carefully, I think you're going to screw up your plywood before you're done.
I thought that was the plan.
Sent from my SM-G930T using Tapatalk


Thank you Gentlemen
It feels good, now just need to find a sensible, rich woman to take care of me.
")
Bahahahahahahaa........ Wait, were you serious?
That's like finding a unicorn jumping over a rainbow.
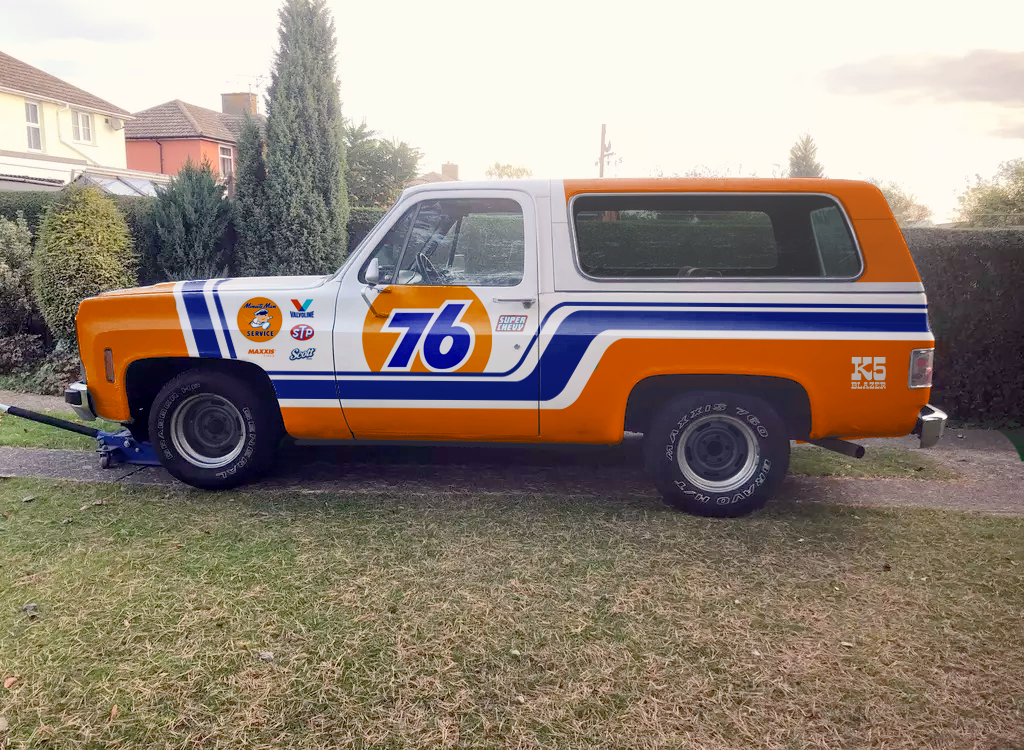
Those original tailights will look so much better. Besides they are key signature part of a squarebody. Those euro taillights should be banned!
Bret
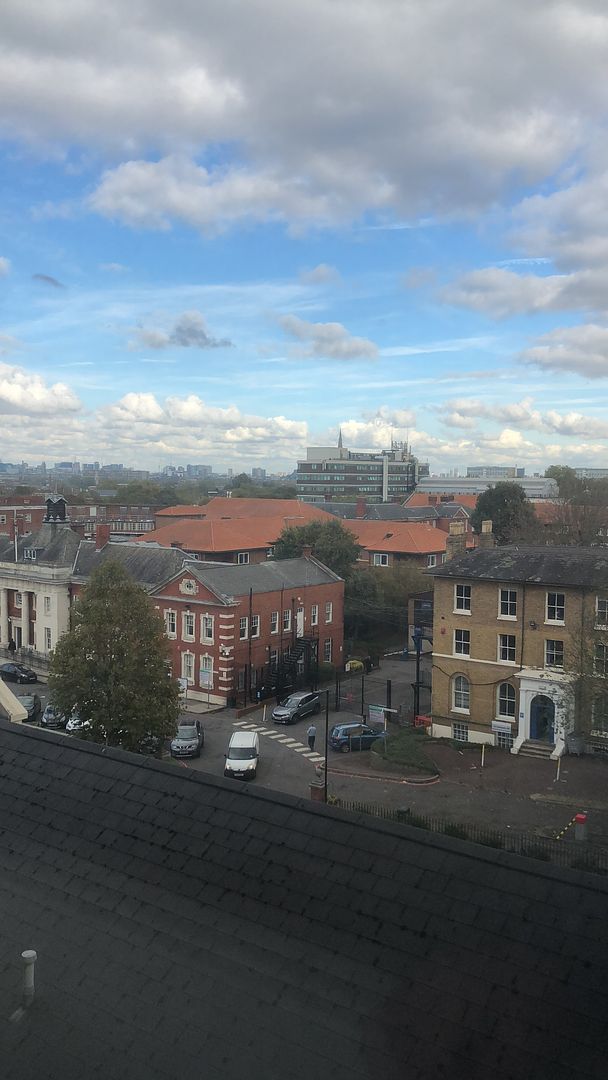
Worked in London today, doing a lecture in Kings College Hospital to the Stroke team, before I started, this view greeted me, sometimes there are bonuses attached to earning your keep.
Towbar update in a bit.


Great progress Rian
Just a tip on the seam sealer. You should never apply it directly to bare steel, it has no corrosion resistance and should only go over pre-primed metal. It will fail early done this way.
The correct way to do it is 1 light coat of etch primer, 2 more coats of primer, then seam sealant. Then finish with top coat and underbody protection of choice.
Keep up the good work
Thank you Gentlemen
It feels good, now just need to find a sensible, rich woman to take care of me.
Wait- did I miss something ? Are you single again ?
Great work on the truck and love those tail lights.