To avoid these ads, REGISTER NOW!

ZMotorsports Shop Projects 2.0

LXCam

ALLIANCE MEMBER
Joined
Apr 23, 2013
Messages
19,206
Location
AZ
You had to heat setup bearings to install them? Or was the heater used for the real McCoy once the desired setup was determined?

I shouldn't answer for Mike but. Yes the heater is used for the final bearing. Getting it to around 250 degrees allows you to just drop it on and not fight pressing it on with potential damage to the case. Rule of thumb is for every 100 degrees is .001 or growth forevery inch if I remember correctly. So on an assembly that has 2-3 thou of press fit, this makes it butter. The set up bearings are ground away on the ID so you don't need to press them on or off. It makes dialing everything in much easier. Personally I just use my hot plate with a spacer the same diameter as the inner race and keep an eye on the temp with a IR gun.
 
Last edited:
To avoid these ads, REGISTER NOW!
OP
Z

zmotorsports

ALLIANCE MEMBER
Joined
Oct 20, 2009
Messages
21,477
Location
Northern Utah
Great job on the diff assembly! I hate to think about all the ones I’ve done over the years. Guys I worked with would give me grief on how much time I spent setting them up. I never had one come back but rebuilt some they sent down the road in less than 20K miles. I never had to do any Dana axles until they moved production to Mexico. The pinion bearings would get loose due to the housing moving together, then the seal would leak. Ford tech school said we were no longer to use the spreader according to Dana. I always thought the Ford 9” was the best to set up. I hated the Spicer 135, the pinion nut torque was 900 ft/lb and if the rotational torque was off you had take back apart and sand the shim if it was loose and start over with new thicker shim if it was tight. Enjoy all your endeavors in your shop! I hope your son realizes what great things you’re teaching him!


Thank you. I appreciate the comments and for following along. Sounds like you have quite a lot of gear experience as well, probably more than I do.


Sent from my iPhone using Garage Journal
 
OP
Z

zmotorsports

ALLIANCE MEMBER
Joined
Oct 20, 2009
Messages
21,477
Location
Northern Utah
You had to heat setup bearings to install them? Or was the heater used for the real McCoy once the desired setup was determined?


The heater was used on the new bearings for final assembly. The setup bearings have just enough material removed to install and remove by hand yet not change dimensions.

Thanks for stopping by my projects thread.
 
OP
Z

zmotorsports

ALLIANCE MEMBER
Joined
Oct 20, 2009
Messages
21,477
Location
Northern Utah
I shouldn't answer for Mike but. Yes the heater is used for the final bearing. Getting it to around 250 degrees allows you to just drop it on and not fight pressing it on with potential damage to the case. Rule of thumb is for every 100 degrees is .001 or growth forevery inch if I remember correctly. So on an assembly that has 2-3 thou of press fit, this makes it butter. The set up bearings are ground away on the ID so you don't need to press them on or off. It makes dialing everything in much easier. Personally I just use my hot plate with a spacer the same diameter as the inner race and keep an eye on the temp with a IR gun.


Agreed. Thanks for answering Cam. I didn’t see this until now. The high techy techy way is using an IR gun, the low techy techy way is just using a temperature crayon for the desired temperature
 

jackson1701

Well-known member
Joined
Jan 13, 2015
Messages
157
Location
Jarrettsville, MD
Mike, I've been through your videos quite a bit. I really like the review on your PM lathe. I was hooked on getting the same set up but now I see that they sell a PM-1236-T 12″X36″ ULTRA PRECISION LATHE. Do you have any experience with that machine? Steve
 
OP
Z

zmotorsports

ALLIANCE MEMBER
Joined
Oct 20, 2009
Messages
21,477
Location
Northern Utah
Mike, I've been through your videos quite a bit. I really like the review on your PM lathe. I was hooked on getting the same set up but now I see that they sell a PM-1236-T 12″X36″ ULTRA PRECISION LATHE. Do you have any experience with that machine? Steve


Sorry Steve, no personal experience with the Taiwanese 12x36 but I understand it is from the same factory and to the same specs as the 1340GT just a tad smaller. I’m told the fit & finish is the same as the 1340GT.


Sent from my iPhone using Garage Journal
 
OP
Z

zmotorsports

ALLIANCE MEMBER
Joined
Oct 20, 2009
Messages
21,477
Location
Northern Utah
My wife and I had some vacation we had to use or lose so we took the week off and rather than hop in the coach and take off we opted to stay around home. This was something new to me as usually I can’t wait to hop in the coach and take off when on vacation. I think the new home has something to do with it because she loves our home so much she said she doesn’t feel like she needs to go anywhere. I told her not to get used to it because I like to travel via RV too much. We decided to do a couple of day trips and just enjoy being together.

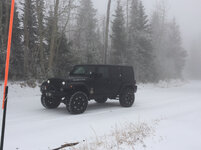
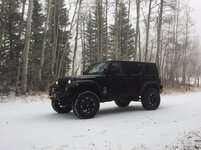
On Tuesday we took off up to the nearby mountains to do some wheelin.
f44f8f8cd40629c5094c4b67c313d7f9.jpg

57c3ea78a8bbe62bd890e957a670b856.jpg

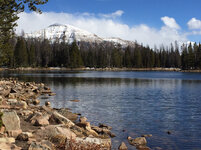
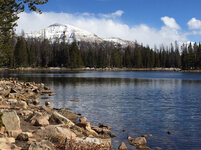
We stumbled across this beautiful lake about ten miles back in off the highway.
17941991caf356e4be27fc266f12d887.jpg

6b4b43edcc747edf7052a21d3d14bbc0.jpg

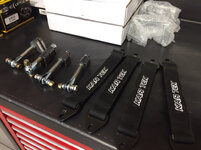
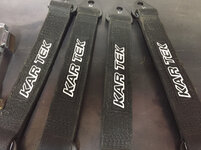
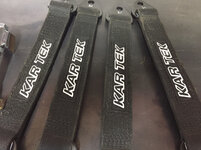
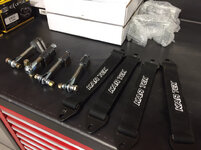
Wednesday I spent a little time in the shop. The Kartek limiting straps showed up and we can get them installed as soon as we mock the axles back in place.
abe9f780ff8399a6caba4c1d23842d4c.jpg

911a26b2facf0643c3260b025452a84e.jpg

1b3870bee1f1771aa32e3f9b33b011f6.jpg

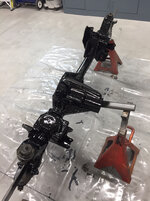
My son prepped and painted the front axle so it can be assembled now.
32f0276f7949d44a663b89e474b00d6c.jpg

165cf55a87ac9715993720f51d4f109b.jpg

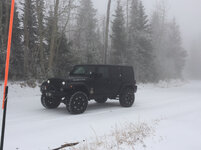
On Thursday my wife and I took off on another drive and found ourselves in one hell of a snowstorm in the mountains above Ogden. We traveled back in on Curtis Creek road about six or eight miles until visibility turned to nearly zero then decided to follow our tracks back out to the pavement.
2ba350f046b5df61da3bb7e71d13399f.jpg

27b749a315530f29621321824d843fc8.jpg

8e40e18cd0f6442b15ef03893d8f340b.jpg

dee6543eb00a6349e70f92e664e7ad8a.jpg

88cdb908c155f8839aebeb8f414056df.jpg

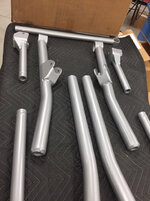
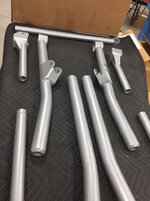
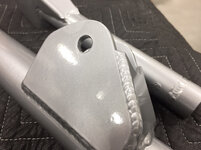
Today I received a call saying my son’s suspension links were done so I went and picked them up from the powder coater.
0b897d605f279e6b2d0d99822fcf8631.jpg

40888e9510eb9caac2800a05f03fdb55.jpg

2163c2ad8a9210df7ca8fde358fc993d.jpg

8b548bf80177e9e21e5384f50260ce60.jpg

bd3d49f61a6da23f54856e8cd472cba2.jpg

The powder coater did a great job as usual and these will look awesome under his WJ.

Thanks for looking.
 

Attachments

  • dee6543eb00a6349e70f92e664e7ad8a.jpg
    dee6543eb00a6349e70f92e664e7ad8a.jpg
    759.4 KB · Views: 0
  • bd3d49f61a6da23f54856e8cd472cba2.jpg
    bd3d49f61a6da23f54856e8cd472cba2.jpg
    762.8 KB · Views: 0
  • 40888e9510eb9caac2800a05f03fdb55.jpg
    40888e9510eb9caac2800a05f03fdb55.jpg
    637.8 KB · Views: 0
  • 32f0276f7949d44a663b89e474b00d6c.jpg
    32f0276f7949d44a663b89e474b00d6c.jpg
    725.8 KB · Views: 0
  • 165cf55a87ac9715993720f51d4f109b.jpg
    165cf55a87ac9715993720f51d4f109b.jpg
    724.1 KB · Views: 0
  • 2ba350f046b5df61da3bb7e71d13399f.jpg
    2ba350f046b5df61da3bb7e71d13399f.jpg
    583.5 KB · Views: 0
  • 27b749a315530f29621321824d843fc8.jpg
    27b749a315530f29621321824d843fc8.jpg
    676.6 KB · Views: 0
  • 8b548bf80177e9e21e5384f50260ce60.jpg
    8b548bf80177e9e21e5384f50260ce60.jpg
    694.1 KB · Views: 0
  • 2163c2ad8a9210df7ca8fde358fc993d.jpg
    2163c2ad8a9210df7ca8fde358fc993d.jpg
    743.1 KB · Views: 0
  • 8e40e18cd0f6442b15ef03893d8f340b.jpg
    8e40e18cd0f6442b15ef03893d8f340b.jpg
    809.1 KB · Views: 0
  • 0b897d605f279e6b2d0d99822fcf8631.jpg
    0b897d605f279e6b2d0d99822fcf8631.jpg
    767.5 KB · Views: 0
  • 88cdb908c155f8839aebeb8f414056df.jpg
    88cdb908c155f8839aebeb8f414056df.jpg
    814.9 KB · Views: 0
  • 1b3870bee1f1771aa32e3f9b33b011f6.jpg
    1b3870bee1f1771aa32e3f9b33b011f6.jpg
    803.5 KB · Views: 0
  • 911a26b2facf0643c3260b025452a84e.jpg
    911a26b2facf0643c3260b025452a84e.jpg
    718.4 KB · Views: 0
  • abe9f780ff8399a6caba4c1d23842d4c.jpg
    abe9f780ff8399a6caba4c1d23842d4c.jpg
    693.5 KB · Views: 0
  • f44f8f8cd40629c5094c4b67c313d7f9.jpg
    f44f8f8cd40629c5094c4b67c313d7f9.jpg
    825.2 KB · Views: 0
  • 57c3ea78a8bbe62bd890e957a670b856.jpg
    57c3ea78a8bbe62bd890e957a670b856.jpg
    1 MB · Views: 1
  • 17941991caf356e4be27fc266f12d887.jpg
    17941991caf356e4be27fc266f12d887.jpg
    969.3 KB · Views: 1
  • 6b4b43edcc747edf7052a21d3d14bbc0.jpg
    6b4b43edcc747edf7052a21d3d14bbc0.jpg
    919.9 KB · Views: 1
Last edited:

LXCam

ALLIANCE MEMBER
Joined
Apr 23, 2013
Messages
19,206
Location
AZ
Ooohhh boy, time for final assembly. That's always the best part. So now that you had a wonderful fun filled week with the miss's. And now that there's light at the end of the tunnel on your sons ride.

Tell us something......


What's in the box??!! :p
 
OP
Z

zmotorsports

ALLIANCE MEMBER
Joined
Oct 20, 2009
Messages
21,477
Location
Northern Utah
Ooohhh boy, time for final assembly. That's always the best part. So now that you had a wonderful fun filled week with the miss's. And now that there's light at the end of the tunnel on your sons ride.

Tell us something......


What's in the box??!! :p


Thanks Cam, and stay tuned we’re getting closer my friend. [emoji12]
 
OP
Z

zmotorsports

ALLIANCE MEMBER
Joined
Oct 20, 2009
Messages
21,477
Location
Northern Utah
Going to be one nice suspension. Guesstimate $1k plus and 100+ hrs.


Sent from my iPhone using Tapatalk


Sure feels like it Shorty. Although I think we may have well surpassed the 100 hour mark a bit ago. What surprised me time wise was adding the frame stiffeners. Their fitment wasn’t exact (not even close) so trimming, fitting, bending and tweaking them before even breaking out the welder took more time than expected.

Oh well, I feel it will be well built and no corners were cut. It should provide for a very nice daily driver and weekend wheeler when done.

Thanks for following along Shorty.
 

customh

Well-known member
Joined
Feb 18, 2013
Messages
562
Location
East Bethel, MN
Really enjoy the videos. They're a nice complete wrap to what we see in the thread here. Thanks for putting the time into making them.
 
OP
Z

zmotorsports

ALLIANCE MEMBER
Joined
Oct 20, 2009
Messages
21,477
Location
Northern Utah
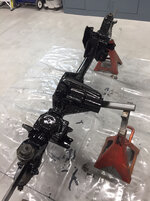
Today we got the front axle done as well as the bushings pressed into the links and Johnny Joints threaded into them in preparation for installation.
3ce63a03c3e178cd3e3b32f54aaafc82.jpg

682eb9c1b37105d0c243135033d579f4.jpg

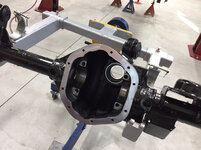
Housing cleaned.
0dd631326b2dced41e47e9e144a99bf7.jpg

Pressing the seals into the housing.
8c59de8d0a2663063a7e13726f289015.jpg

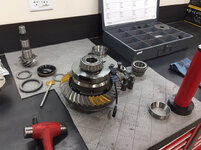
It took a total of four times together and apart before we got the correct pinion depth and pattern.
9dbea74bb8d63406b68803f5e5736678.jpg

Final assembly with new bearings. Ended up @ .044” pinion shim, 25 in/lbs pinion preload, .008” backlash and plus 11 in/lbs of carrier preload.
f23398bc765c2eec1be2490fa30eecb5.jpg

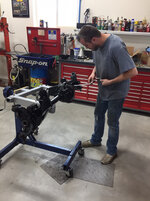
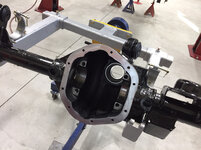
My son installing the ARB differential cover and buttoning it up.
2b8f72bed4191682e10bd38cfbdc379b.jpg

Axles at the ready for last mock-up.
78c62b009ac58dc48f0b2ab9b8ad404f.jpg

Ten Factory chromoly axle shafts installed.
51c7ef774478cd7c9de5c9eb0001669d.jpg

b0993e4ea0727ae95013ff1594906de2.jpg

4292ba28fff3eb919bd8d863c2f4372f.jpg

Thanks for looking.
 

Attachments

  • 4292ba28fff3eb919bd8d863c2f4372f.jpg
    4292ba28fff3eb919bd8d863c2f4372f.jpg
    746 KB · Views: 0
  • b0993e4ea0727ae95013ff1594906de2.jpg
    b0993e4ea0727ae95013ff1594906de2.jpg
    692.4 KB · Views: 0
  • 51c7ef774478cd7c9de5c9eb0001669d.jpg
    51c7ef774478cd7c9de5c9eb0001669d.jpg
    637.7 KB · Views: 0
  • 78c62b009ac58dc48f0b2ab9b8ad404f.jpg
    78c62b009ac58dc48f0b2ab9b8ad404f.jpg
    756.1 KB · Views: 0
  • 2b8f72bed4191682e10bd38cfbdc379b.jpg
    2b8f72bed4191682e10bd38cfbdc379b.jpg
    754.4 KB · Views: 0
  • f23398bc765c2eec1be2490fa30eecb5.jpg
    f23398bc765c2eec1be2490fa30eecb5.jpg
    689.2 KB · Views: 0
  • 9dbea74bb8d63406b68803f5e5736678.jpg
    9dbea74bb8d63406b68803f5e5736678.jpg
    718.5 KB · Views: 0
  • 8c59de8d0a2663063a7e13726f289015.jpg
    8c59de8d0a2663063a7e13726f289015.jpg
    755.8 KB · Views: 0
  • 0dd631326b2dced41e47e9e144a99bf7.jpg
    0dd631326b2dced41e47e9e144a99bf7.jpg
    701.9 KB · Views: 0
  • 682eb9c1b37105d0c243135033d579f4.jpg
    682eb9c1b37105d0c243135033d579f4.jpg
    730.5 KB · Views: 0
  • 3ce63a03c3e178cd3e3b32f54aaafc82.jpg
    3ce63a03c3e178cd3e3b32f54aaafc82.jpg
    706.6 KB · Views: 0
Last edited:
To avoid these ads, REGISTER NOW!

Bigblue&Goldie

Well-known member
Joined
Mar 12, 2009
Messages
10,734
Location
AZ
Really enjoy the videos. They're a nice complete wrap to what we see in the thread here. Thanks for putting the time into making them.

I attempted to pause the video to see if I could read the label on the crate......but too many beers were working against me! The rest of the "receiving area" looked quite impressive as well. I think after seeing all those boxes, it's obvious what's next after the WJ gets buttoned up. :thumbup:

I'm always impressed at how fast you get stuff done while still holding down a job and maintaining such a kept house. Pat and Cam are the other guys that knock out quality and a fast pace. :beer:
 
OP
Z

zmotorsports

ALLIANCE MEMBER
Joined
Oct 20, 2009
Messages
21,477
Location
Northern Utah
I attempted to pause the video to see if I could read the label on the crate......but too many beers were working against me! The rest of the "receiving area" looked quite impressive as well. I think after seeing all those boxes, it's obvious what's next after the WJ gets buttoned up. :thumbup:

I'm always impressed at how fast you get stuff done while still holding down a job and maintaining such a kept house. Pat and Cam are the other guys that knock out quality and a fast pace. :beer:

Thank you for the comments. I am flattered to even be mentioned in the same sentence as Cam and Pat. Those guys rock and do amazing work, way out of my league.:bowdown:

Thanks for following my projects, I hope they don't disappoint.
 
OP
Z

zmotorsports

ALLIANCE MEMBER
Joined
Oct 20, 2009
Messages
21,477
Location
Northern Utah
My son and I decided to see if we could make a little progress today as we usually don’t make it a habit of working on Sundays. I think he is getting excited to drive his Jeep and I am excited to move on to my project.

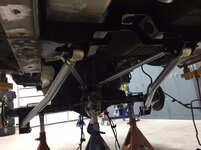
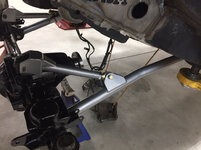
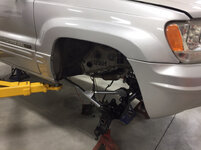
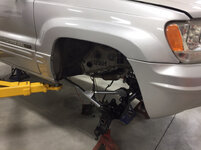
We bolted the suspension into the Jeep for what I hope is the last mock-up before final assembly.
41b6ee91af86c27d546f9375b7e6f0ec.jpg

8759c0110be79a64ec62379659dcd011.jpg

9827d21e6fce0aff1c509abc8b84ce6f.jpg

30b4cfb3fdbd598189fd255228f6b382.jpg

7c17887c586e44abbf50cd7008be1ca0.jpg

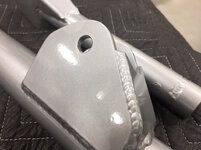
Next up was to weld in the upper mounts for the Kartek limiting straps. They will reside between the shock and the coils spring and allow enough droop yet stop about 1.5” before the shock reaches maximum extension.
3f2a0a1771582a7e2e49b71c80a1aeb8.jpg

Once the front straps were taken care of we moved around to the rear. We didn’t care for the orientation of the rear upper shock mounts nor the thin material they were made of. For a stock WJ with only a few inches of travel I’m sure they are adequate but with the amount of flex this Jeep now has I think it will be too weak.

We cut some upper shock mounts out of 1/4” mild steel after making cardboard templates. I love using my RotoKut cutters for projects like this. Perfectly round holes and clean cut. Just use plenty of cutting fluid and don’t force them, let the cutters eat and they cut through easily.
464a1ab0110d85bb746dbb105b0804d9.jpg

2c3ea1a826fc9c92c55ca03f95fe70a1.jpg

063e4438d312ffd321c93f5d5396c39d.jpg

9fbbe611b7f522159fb902fe07fc2a77.jpg

ef78649984d9c80fd0923f3ae1bb81b5.jpg

Thanks for looking.
 

Attachments

  • 9827d21e6fce0aff1c509abc8b84ce6f.jpg
    9827d21e6fce0aff1c509abc8b84ce6f.jpg
    678.3 KB · Views: 0
  • 8759c0110be79a64ec62379659dcd011.jpg
    8759c0110be79a64ec62379659dcd011.jpg
    703 KB · Views: 0
  • 30b4cfb3fdbd598189fd255228f6b382.jpg
    30b4cfb3fdbd598189fd255228f6b382.jpg
    614.8 KB · Views: 0
  • 7c17887c586e44abbf50cd7008be1ca0.jpg
    7c17887c586e44abbf50cd7008be1ca0.jpg
    624.6 KB · Views: 0
  • ef78649984d9c80fd0923f3ae1bb81b5.jpg
    ef78649984d9c80fd0923f3ae1bb81b5.jpg
    838.2 KB · Views: 0
  • 9fbbe611b7f522159fb902fe07fc2a77.jpg
    9fbbe611b7f522159fb902fe07fc2a77.jpg
    782.5 KB · Views: 0
  • 063e4438d312ffd321c93f5d5396c39d.jpg
    063e4438d312ffd321c93f5d5396c39d.jpg
    796.4 KB · Views: 0
  • 2c3ea1a826fc9c92c55ca03f95fe70a1.jpg
    2c3ea1a826fc9c92c55ca03f95fe70a1.jpg
    793.9 KB · Views: 0
  • 464a1ab0110d85bb746dbb105b0804d9.jpg
    464a1ab0110d85bb746dbb105b0804d9.jpg
    748.5 KB · Views: 0
  • 3f2a0a1771582a7e2e49b71c80a1aeb8.jpg
    3f2a0a1771582a7e2e49b71c80a1aeb8.jpg
    717.7 KB · Views: 0
  • 41b6ee91af86c27d546f9375b7e6f0ec.jpg
    41b6ee91af86c27d546f9375b7e6f0ec.jpg
    656.8 KB · Views: 0
Last edited:

shortykorte

Well-known member
Joined
Sep 1, 2014
Messages
8,039
Location
Tallahassee, Fl
Mike
Watched your shop tour video again and have a couple of questions.
On the cherry picker, I assume the legs slide out?
What size and TPI bandsaw blade do you typically use for cutting metal? Horizontal and vertical.
Can you expand on what your preferred cutting methods are over plasma?
Please explain the lathe soft stop.
Do you have any dust issues with bench grinder and disc/belt sander being close to the lathe?
Thanks in advance.


Sent from my iPhone using Tapatalk
 

4 FN 27

ALLIANCE MEMBER
Joined
Oct 19, 2015
Messages
4,635
Location
Minnesnowta
I'm always impressed at how fast you get stuff done while still holding down a job and maintaining such a kept house. Pat and Cam are the other guys that knock out quality and a fast pace. :beer:

What? It takes me forever so it seems to get things done in my eyes...LOL...

I am flattered the same as Mike.

I think if all of us lived in the same neighbor hood we could start our own reality TV show.

Mike I am going to pick your brain when I start my Jeep M715 Project. I have never dabbled in the world of off roading and could use a few pointers. Based on your work and experience "you're the guy"...

That WJ is going to be awesome!!!
 
OP
Z

zmotorsports

ALLIANCE MEMBER
Joined
Oct 20, 2009
Messages
21,477
Location
Northern Utah
Mike
Watched your shop tour video again and have a couple of questions.
On the cherry picker, I assume the legs slide out?
What size and TPI bandsaw blade do you typically use for cutting metal? Horizontal and vertical.
Can you expand on what your preferred cutting methods are over plasma?
Please explain the lathe soft stop.
Do you have any dust issues with bench grinder and disc/belt sander being close to the lathe?
Thanks in advance.


Sent from my iPhone using Tapatalk


I’d be happy to answer those Shorty.

The cherry picker’s (engine hoist) legs do in fact extend to three different positions as does the boom portion of the engine hoist.

I run a variable pitch (10-14 TPI) bi-metal blade on both of my bandsaws. The vertical bandsaw is 1/2” wide by .025” thick and the horizontal is 3/4” wide by .035” thick. I’ve been running Lennox blades from bandsawbladesdirect.com with excellent results for the past eight years or so now.

Although I have a very nice ESAB plasma cutter, I’m not particularly fond of using it for cutting when building brackets and such. I feel it is a bit crude and prefer to use my bandsaws for cutting even though they are a bit slower. I like the more precise cut and less cleanup they require for fit up. Don’t get me wrong, the plasma cutter has its place but I don’t use mine much.

The softstop on my lathe is something I saw years ago that was an option on the Hardinge lathes. It is parallel to the bed and when I need to either make repeatable passes or need to move the carriage a specific amount it is quick and always at the ready. I merely machined a block of steel that is bolted to the head of the lathe and then use a thumbscrew for quick adjustments and locking the drill rod down that the dial indicator is affixed to. I have also seen people merely use a dial indicator with a magnetic base but I prefer my solidly mounted indicator.

Lastly, I know people cringe when they see my fabrication equipment so close to my lathe and mill but I have not had any adverse issues in this shop nor my last shop. I will admit I am cautious to not grind with sparks directed at the equipment but I find it quite easy to keep them clean and free if debris. I like having all of my machining and fabricating tools/equipment in one section.

I hope I haven’t missed anything.

Thanks again for showing interest and taking the time to watch my shop tour video, not once but twice even.
 

LXCam

ALLIANCE MEMBER
Joined
Apr 23, 2013
Messages
19,206
Location
AZ
Boy oh boy is that turning out just stellar Mike. Your son is going to have a very capable ride when it's wrapped up.

But I got a question, what are you going to do about a diaper changing station. Hitch mount or a fold down brush guard. Us GP's need a solution :p

And thank you for the compliment. It's totally unwarranted but appreciated and humbling nonetheless.
 
OP
Z

zmotorsports

ALLIANCE MEMBER
Joined
Oct 20, 2009
Messages
21,477
Location
Northern Utah
Boy oh boy is that turning out just stellar Mike. Your son is going to have a very capable ride when it's wrapped up.

But I got a question, what are you going to do about a diaper changing station. Hitch mount or a fold down brush guard. Us GP's need a solution :p

And thank you for the compliment. It's totally unwarranted but appreciated and humbling nonetheless.

I hadn't thought about the whole baby part of this build, that is something he will have to work out and make adjustments for.:lol_hitti

He did inform me that is the biggest reason he went back to a Grand Cherokee vs. his LJ. He didn't think the LJ was as practical, especially when wife and kids came into the picture. Looks like he was thinking.

I'll have to make sure I point that out to him this evening while working in the shop.:thumbup:
 
OP
Z

zmotorsports

ALLIANCE MEMBER
Joined
Oct 20, 2009
Messages
21,477
Location
Northern Utah
Awesome. Everything is so clean and dialed.

Thank you, I appreciate that. I think it will be a nice ride when done. Last night after installing the suspension we cycled everything again and it should provide some nice flex and ride. Just have a few more little details to iron out yet then move on to painting the frame and final assembly.

Thanks for following along on my various projects.
 
OP
Z

zmotorsports

ALLIANCE MEMBER
Joined
Oct 20, 2009
Messages
21,477
Location
Northern Utah
Sorry Steve, no personal experience with the Taiwanese 12x36 but I understand it is from the same factory and to the same specs as the 1340GT just a tad smaller. I’m told the fit & finish is the same as the 1340GT.


Thanks Mike, I appreciate you getting back to me.

You're very welcome, sorry I couldn't have provided more information.
 

jalbrecht55

Active member
Joined
Jun 5, 2011
Messages
41
Location
Silverdale, WA
Mike, I see your son is using Ten Factory axles; do you have any thoughts or preferences on brands for alloy axles? (I'm looking to upgrade the shafts in my 2006 LJ rubicon).

Oh as an LJ owner I can sympathize with his thoughts on family usefulness! I did daily drive mine for a year with two little kiddos and daycare/etc everyday. It is workable but not ideal. However in summer with just a bikini top on the kids love to climb up the tires /flares and drop into their car seats. We did a 1000 mile backcountry family adventure this summer in eastern Washington--four doors would have been nice but it worked out just fine--better than I expected. Since it was going to be dusty and hot I put on the hard top. As the only family in the group with working AC and a top and (working) windows my jeep was the luxury limo of the bunch. ;)
 
OP
Z

zmotorsports

ALLIANCE MEMBER
Joined
Oct 20, 2009
Messages
21,477
Location
Northern Utah
Mike, I see your son is using Ten Factory axles; do you have any thoughts or preferences on brands for alloy axles? (I'm looking to upgrade the shafts in my 2006 LJ rubicon).

Oh as an LJ owner I can sympathize with his thoughts on family usefulness! I did daily drive mine for a year with two little kiddos and daycare/etc everyday. It is workable but not ideal. However in summer with just a bikini top on the kids love to climb up the tires /flares and drop into their car seats. We did a 1000 mile backcountry family adventure this summer in eastern Washington--four doors would have been nice but it worked out just fine--better than I expected. Since it was going to be dusty and hot I put on the hard top. As the only family in the group with working AC and a top and (working) windows my jeep was the luxury limo of the bunch. ;)

I've used several different axles over the years and have had good results from Ten Factory. I have had them in my 2011 JKUR for nearly 90k driven miles and another approx. 25k flat towed miles with zero issues. My son also had them in his 2004 LJ for about 15k miles and had zero issues although he really didn't play on the rocks as much as I do. Even now I don't crawl on the rocks as much as I used to, I've tamed a bit.:)

I used some Alloy USA on an older CJ7 that I built for a guy a few years ago as they were one of the only ones to offer chromoly axle shafts for the two piece AMC Model 20 at the time and they worked well, although now most have one-piece shafts out for them. I did have had a minor issue with Superior front axles on my son's LJ a few years ago but nothing serious. It was a spline fitment issue but they were good to work with on exchanging, just frustrating at the time. I don't think I would have an issue again but I have just been using Ten Factory for the past several years now with fantastic results and no reason to change.

I'm learning to be understanding about why he sold his LJ, although I still can't believe the amount of time we put into that thing to see someone else enjoy it after only a couple of years on the trail. We built it while he was in college and I really enjoyed wheeling with him but could also see with little ones it not being ideal.

I can relate to having the A/C and everything working properly and being comfortable either on or off the pavement. That seems to be one of my pet peeves, not having things working properly and I see it all too often. People think because they have an off-road vehicle that they should just "settle" for not having all of the creature comforts working. I disagree. I pride myself on my Jeep getting to the back country and having all of my comfort systems working and enjoying them. Actually I don't think I would want to deal with my wife if they weren't.:lol_hitti

Glad to hear you had a good trip and enjoyed your long family trip. Thanks for checking in.
 
Last edited:

jalbrecht55

Active member
Joined
Jun 5, 2011
Messages
41
Location
Silverdale, WA
Thanks for the insights mike, I appreciate it and your thread as well. Looking forward to seeing what's in that box ;). Great job on the WJ too; seriously very professional work.
 

lilscorpion

Well-known member
Joined
Mar 15, 2010
Messages
3,600
Location
Colorado
zmotorsports said:
I'm learning to be understanding about why he sold his LJ, although I still can't believe the amount of time we put into that thing to see someone else enjoy it after only a couple of years on the trail. We built it while he was in college and I really enjoyed wheeling with him but could also see with little ones it not being ideal.

I can relate to having the A/C and everything working properly and being comfortable either on or off the pavement. That seems to be one of my pet peeves, not having things working properly and I see it all too often. People think because they have an off-road vehicle that they should just "settle" for all of the creature comforts working. I disagree. I pride myself on my Jeep getting to the back country and having all of my comfort systems working and enjoying them. Actually I don't think I would want to deal with my wife if they weren't.:lol_hitti


It’s a Jeep thing! LOL

I think we go through stages and he’s likely in transition. For me it was a combination of needing the creature comforts for my wife and kids and needing to agree (both emotionally and financially) with my wife when I got rid of my YJ (similar situation as your son with his LJ). Now that my kids are older, they actually enjoy riding around in the Jeep and don’t seem to care much about being a little hot or cold. When they’re infants or toddlers...there’s nothing cool about it for anyone. Not a fight worth having. Can’t even pretend to picture trying to get a baby seat into the back.

If he’s like me, and he had some time to think about it, he wish there was a way he could put it in moth balls until this phase were to pass. In adult terms, you shoulda bought it from him until he was ready to buy it back.

Agree with you on having your cake and eat it too. My LJ is a 2006 and it might as well be a 1990’s vehicle interior-wise with really good heat and fairly good AC. I drive it all week to work and I’ve caught myself thinking - this ain’t so bad. Then I drive the JK. HUGE difference in experience. JK to JL transition is equally dramatic.
 
OP
Z

zmotorsports

ALLIANCE MEMBER
Joined
Oct 20, 2009
Messages
21,477
Location
Northern Utah
It’s a Jeep thing! LOL

I think we go through stages and he’s likely in transition. For me it was a combination of needing the creature comforts for my wife and kids and needing to agree (both emotionally and financially) with my wife when I got rid of my YJ (similar situation as your son with his LJ). Now that my kids are older, they actually enjoy riding around in the Jeep and don’t seem to care much about being a little hot or cold. When they’re infants or toddlers...there’s nothing cool about it for anyone. Not a fight worth having. Can’t even pretend to picture trying to get a baby seat into the back.

If he’s like me, and he had some time to think about it, he wish there was a way he could put it in moth balls until this phase were to pass. In adult terms, you shoulda bought it from him until he was ready to buy it back.

Agree with you on having your cake and eat it too. My LJ is a 2006 and it might as well be a 1990’s vehicle interior-wise with really good heat and fairly good AC. I drive it all week to work and I’ve caught myself thinking - this ain’t so bad. Then I drive the JK. HUGE difference in experience. JK to JL transition is equally dramatic.

I had discussed buying his LJ from him and keeping it in the family until he was ready for it again but he insisted he is a Grand Cherokee guy and always will be, the LJ was a phase according to him.

My wife and I went on a run with our local Jeep club in June and many had their tops and doors off, which is appealing but after seeing what the passengers looked like when we returned to camp after a day in the dirt both my wife and I said we like the top and doors on and being comfortable. Holy ****, those people were filthy, all you could see where their eyes due to having goggles on. Other than that they were covered in dirt and dust from head to toe and doubtful the Jeep would ever be clean again inside. I love off-roading and get dirty at times but that just isn't me. I guess I'm a bit of a prude that way.:bounce:

If I'm not leading the trail I prefer to be tailgunner so we can hang back a bit and stay out of the dust as much as possible. I was the same way when we were riding dirt bikes and ATV's although sand duning not so much because the sand was actually fairly clean compared to offroading in the dirt.
 
OP
Z

zmotorsports

ALLIANCE MEMBER
Joined
Oct 20, 2009
Messages
21,477
Location
Northern Utah
We came up with a plan for my son’s rear sway bar and finally got around to implementing it tonight. He mentioned (eluded rather)that a lot of the lifted WJ’s around weren’t running rear sway bars but I told home it would be a cold day in hell before I let that thing leave our shop without a rear sway bar, especially as high as he’s lifted. Off-road benefits, yes, but as a daily driver and an emergency maneuver and he’ll have his hands full trying to keep it under control with all of that body roll. NO WAY will I allow that. I told him I realize it is his Jeep but my shop, my rules and I couldn’t live with myself if I allowed that and he or his eventual family were injured.

The stock sway bar was mounted on the axle with links going upward to the frame. I’m not a fan of axle mounted sway bars in an off road application, on a hot rod of course but they seem to be more in the way on a 4x4 that will see off road use.

The fuel tank on the WJ is directly behind the axle and quite low. We will be performing a tank lift in phase two of his build but even then it will still be in the way and not conducive to the placement of a sway bar. My son has perused several Grand Cherokee and Cherokee forums in search of what others have done and there have been a few that have gone through the unibody’s frame rails with an Antirock sway bar but this makes the links attach at a steep angle.

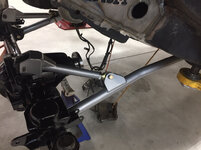
We had a heavy duty JK rear sway bar kicking around and after playing around with it we determined that if we run it in front of the rear axle sweeping to the rear it will basically wrap around the springs just like on a JK. The task then became coming up with a mounting solution after we had determined general location.

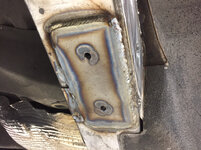
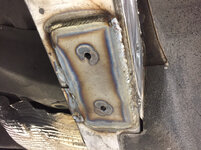
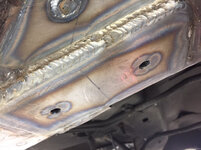
We used some 3”x6”x1/4” plate, drilled and tapped for 3/8”-16 bolts and threaded nuts on the backside before welding them and creating a nut plate.
341eecd96f7bbf87ee8d17bcd2bc6c65.jpg

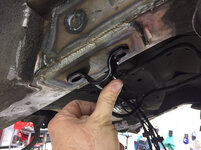
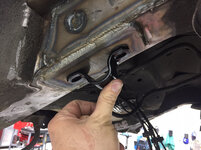
We then drilled a couple of 3/4” holes in the bottom of the frame for clearance of the welded nuts and allow the plate to sit flat. We then welded the plates creating a flat, strong mounting surface for the sway bar bushings and mounting brackets.
138c3491b022c54ee3fc0c2f75de4776.jpg

672e70204b99643b25178894b730b3f9.jpg

dedf22f3fe25ed625a442b33162fc4d8.jpg

Lastly before closing up the shop my son fabricated some reinforcing plates for the inside of the frame in which to mount the rear upper limiting straps to.
6cab388f192a9981029538762fbbc007.jpg

5ed33e0b2a1544d4b68663bae7f85676.jpg

Tomorrow night we will knock the undercoating off and weld the upper limiting strap brackets in place and that should about complete the fabrication aspect of phase one of this build.

I ordered his driveshafts today so they should be ready for pickup either tomorrow or Thursday. Hopefully over the weekend he can get the frame painted and we can begin final assembly.

One last thing we will have to address is the connection of the WJ emergency brake cables to the JK’s rear brakes. I have an idea but will have to do some more measuring once we get the rear axle in place for the last time. We could have custom cables made easy enough but for a daily driver I prefer to use OE parts as much as possible.

Thanks for looking.
 

Attachments

  • 5ed33e0b2a1544d4b68663bae7f85676.jpg
    5ed33e0b2a1544d4b68663bae7f85676.jpg
    860.3 KB · Views: 0
  • 6cab388f192a9981029538762fbbc007.jpg
    6cab388f192a9981029538762fbbc007.jpg
    833.5 KB · Views: 0
  • dedf22f3fe25ed625a442b33162fc4d8.jpg
    dedf22f3fe25ed625a442b33162fc4d8.jpg
    726.1 KB · Views: 0
  • 672e70204b99643b25178894b730b3f9.jpg
    672e70204b99643b25178894b730b3f9.jpg
    828.3 KB · Views: 0
  • 138c3491b022c54ee3fc0c2f75de4776.jpg
    138c3491b022c54ee3fc0c2f75de4776.jpg
    788.1 KB · Views: 0
  • 341eecd96f7bbf87ee8d17bcd2bc6c65.jpg
    341eecd96f7bbf87ee8d17bcd2bc6c65.jpg
    789.6 KB · Views: 0
Last edited:

NASTYZEN

Well-known member
Joined
Jun 11, 2010
Messages
2,823
Location
St-Colomban,Que. Canada
Project is coming along great Mike.:thumbup: You know, I had no idea diffs were so much work! I know what to do if I ever run across one. Send it to someone like you.
I see you've been using CAD!


2c3ea1a826fc9c92c55ca03f95fe70a1.jpg
 

Attachments

  • 2c3ea1a826fc9c92c55ca03f95fe70a1.jpg
    2c3ea1a826fc9c92c55ca03f95fe70a1.jpg
    144.5 KB · Views: 0
OP
Z

zmotorsports

ALLIANCE MEMBER
Joined
Oct 20, 2009
Messages
21,477
Location
Northern Utah
Project is coming along great Mike.:thumbup: You know, I had no idea diffs were so much work! I know what to do if I ever run across one. Send it to someone like you.
I see you've been using CAD!


2c3ea1a826fc9c92c55ca03f95fe70a1.jpg

Thanks Claude.

Yes, I am still using the old school CAD (Cardboard Aided Design).:lol_hitti
 
To avoid these ads, REGISTER NOW!
Top Bottom