Thanks Mike!
I should say your input has been invaluable to me on this project. Being I don't have any local jeep buddies to run stuff past it's been an honor to get some real world input from "the man"
")
.
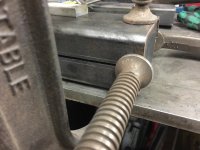
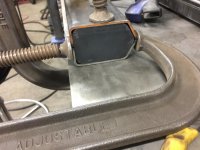
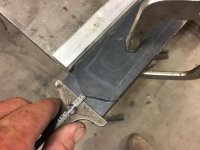
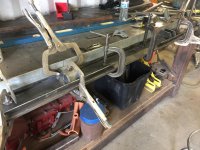
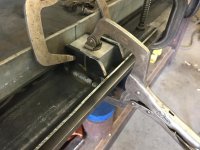
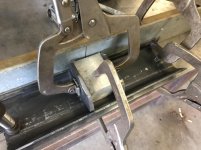
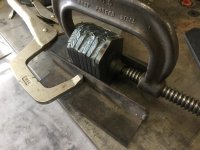
And with my lips placed firmly on your behind hate to ask this but need too. The owner hit me up about axles. So we had a long talk about gearing, spline count, lockers you name it. I told him before we go any further to let me inspect the difs and confirm the gearing. Sure as **** he's got 3:07's but he's also got other issues with the rear. Yesterday I pulled the covers and sure as the stars sparkle in the nights sky found these neat little pieces of hardened metal.


Sooo I was wondering if I could hit you up once again for a down and dirty list of whose components you'd use and more importantly a good place to source it from. I doubt we're going to do this right now but that also depends on what I find was the source of those bits.
Thanks again brother.

Damn, that doesn't look good Cam.
As for components, what exactly does he want to run? Does he want selectable lockers or limited slips? What size tires is he running? How aggressive does he drive? Any power adders?
Here is my down and dirty. I see that it is in fact a TJ (1997-2006) so I'm assuming he has the 4.0 I6 engine, which is a very good engine. I'm also assuming he is running the automatic transmission so I will give recommendations on those assumptions.
For axle shafts I have had very good results with Ten Factory's axle shafts in both the TJ's as well as the JK's. I have also used some Superior and Alloy USA but I seem to be able to buy the Ten Factory brand more readily and slightly better deals. Also when out of town I seem to "pop" in to local shops and inquire as to what they stock and run. Call me crazy but when I vacation I like to check out the local shops/parts houses as a barometer as to the local Jeep culture. My wife just rolls her eyes when I say "hey, I'm going to go pop into this shop real quick."
Next up for carriers. If he wheels aggressively and truly wants a selectable locker that he has control over and wants to engage when he wants and in total control I have two favorites, the ARB and the Eaton ELocker. I've really been leaning to the ELocker on most of the last builds as they are strong, durable and running electrical is easier and less costly than air plus some of my clients don't care for having to run the compressor. Personally either one is a great option and the compressor runs minimally when using for the lockers, not like airing up a tire.
If he wants a limited slip and just wants to drive his Jeep without having to operate a switch or think about when to turn his locker on or off and wheels in a manner that doesn't have a tire in the air much then I am a very big advocate of the Eaton/Detroit TrueTrac. This particular limited slip is freaking awesome with helical cut gearing rather than clutches to limit slipping. No additives are needed and no clutches to get grabby or pop when they slip or release. Especially nice in a lighter short wheelbase vehicle like a Jeep. I've personally run the TrueTrac in both of my ZJ's, my son ran it in front and rear of both his ZJ and his LJ and will be running it in the rear of his WJ. They work well in most all off-road applications as long as he isn't the kind of driver that consistently has a wheel in the air. Even then with a little driver finesse one can slightly apply braking to present enough resistance that the RPM differential will allow the helical cut gears to engage and assist with moving the vehicle. I even like them on snow packed roads as they allow enough traction yet still not locked and allow one wheel to grip the road while the other drives. In my opinion the TrueTrac is about the perfect setup for no off-roading to even moderate off-roading driving styles. Acts and feels like an open differential on pavement yet provides extra traction off-road when the need is there.
I am not a fan of the Detroit Locker, or any automatic locker for that matter in a short wheelbase, fairly light vehicle. They have their place but I'm not a particular fan, they are finicky on slick roads and make driving off-camber on a side hill very touchy. On a light and short wheelbase like a Jeep they can cause jerking and severe popping and banging when the clutches finally slip and release. To the point the driver thinks something broke and can be annoying to drive. If you are desert racing and need that they have their place but for a driver/weekend wheeler and one that will see quite a bit of highway driving I suggest steering clear. I've had them in longer wheelbase, heavier full-sized trucks and they are fair as the weight tames them substantially but even then I feel there are better options.
Lastly gearing. On a I6 Jeep TJ running 33" tires I would suggest going with 4.88 gears, 35's I suggest 5.13's if he's heavy and wants a little snappier feel, otherwise if he does a lot of highway driving and not super heavy the 4.88 gears work well with a 35" tire as well as most measure closer to 34 inches anyways. I prefer to stay with the 4.88's if possible because the pinion gets quite small when stepping to the 5.13 gears. As far as brands there are only a few company's that pretty much manufacturer most of the gear sets these days. I've run Motive, Superior, Alloy USA and Yukon and really haven't had any issues with any of them as they are probably all made by the same company overseas. However, I have found Yukon to be easy to deal with, have a wide selection and are readily available from multiple sources.
Whatever option, just ask the owner to be honest in his needs and go from there. I've found the few times someone has been unhappy with a setup was because they were not honest with the shop and especially themselves on what they wanted and needed out of their vehicle. They want it built to be the baddest off-road Jeep with the most ground clearance and traction imaginable for the 2 times a year it goes off road then they hate driving it on the pavement to work.

I see it more often than you realize.
Again Cam, these are only my opinion and will more than likely be debated. Hope this helps some bud.