
You are using an out of date browser. It may not display this or other websites correctly.
You should upgrade or use an alternative browser.
You should upgrade or use an alternative browser.
1966 F100 EcoBoost Engine Swap (EcoBoosted)
- Thread starter TimeWarpF100
- Start date
- Status
- Not open for further replies.
 speaking of freezing...try this on for size this morning.
MP&C
Well-known member
coming along Randy… awesome!
Boosted1
Well-known member
Looking Good TimeWarp!
OP
TimeWarpF100
Well-known member
Re: 1966 F100 EcoBoost Engine Swap & 1966 427 Project
Thanks all for the comments!
App does not allow multi quote.
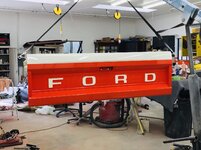
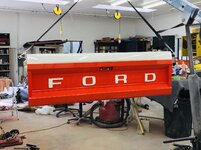
Tailgate now done! Pretty pleased how it turned out. Hoping to install tomorrow along with rear bumper. Tailgate gotta go on before bumper.
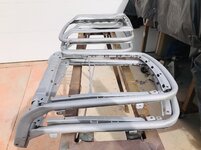
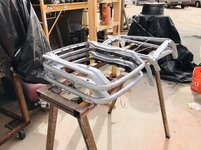
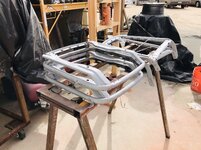
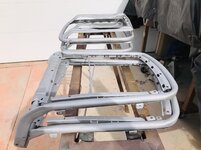
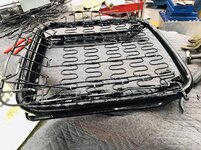
Still not sure on seat(s) I will use but needed to blast bumper brackets & while blasting stuff all out it was only a 15 min job to blast the seat frames. Mixed up remaining Black Urethane and shot the frames.
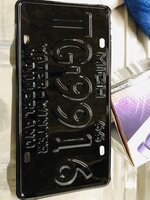
While black was mixed shot some on the 1966 Michigan Plate. This evening will shoot some silver then if time allows in morning will sand letters to black and shoot a bit of clear.
Now Color Sand n Buff the hood then in morning install it. For sure down to the wire!
May end up towing it as pinion angle too far off to drive. Still waiting on throttle cable too.
Still need:
Run wire harness to taillights
Install taillights no time for bezel
Still box for side trim
Install trim
Somehow get throttle to work the new cable a no show
Pinion shims a no show gotta fix that pinion angle.
Needs major cleanup as been dust collector.
Undersides need wipe down
Wipers
Antenna
Clean/Polish Wheels
Still on default tune a day or so in itself just tuning.
Need seat(s)
Horn Button
Underdash wiring
Wire Tach
Wire OVerDrive
Wire turn signal switch

Sent from my iPhone using The Garage Journal mobile app
Thanks all for the comments!
App does not allow multi quote.
Tailgate now done! Pretty pleased how it turned out. Hoping to install tomorrow along with rear bumper. Tailgate gotta go on before bumper.
Still not sure on seat(s) I will use but needed to blast bumper brackets & while blasting stuff all out it was only a 15 min job to blast the seat frames. Mixed up remaining Black Urethane and shot the frames.
While black was mixed shot some on the 1966 Michigan Plate. This evening will shoot some silver then if time allows in morning will sand letters to black and shoot a bit of clear.
Now Color Sand n Buff the hood then in morning install it. For sure down to the wire!
May end up towing it as pinion angle too far off to drive. Still waiting on throttle cable too.
Still need:
Run wire harness to taillights
Install taillights no time for bezel
Still box for side trim
Install trim
Somehow get throttle to work the new cable a no show
Pinion shims a no show gotta fix that pinion angle.
Needs major cleanup as been dust collector.
Undersides need wipe down
Wipers
Antenna
Clean/Polish Wheels
Still on default tune a day or so in itself just tuning.
Need seat(s)
Horn Button
Underdash wiring
Wire Tach
Wire OVerDrive
Wire turn signal switch
Sent from my iPhone using The Garage Journal mobile app
Attachments


Stuart in MN
Well-known member
The tailgate looks good. Did you sand down the red to expose the white letters underneath like you mentioned earlier, or did you just tape them off and paint more white over the top? On my '66 I just went with the vinyl decals you can get from the various old Ford truck parts houses, but then again it's not in the same league as your truck. 
edit: The parts houses also sell a polished stainless steel tailgate latch handle that would look real nice on that truck, instead of the cad plated original.
edit: The parts houses also sell a polished stainless steel tailgate latch handle that would look real nice on that truck, instead of the cad plated original.
OP
TimeWarpF100
Well-known member
The tailgate looks good. Did you sand down the red to expose the white letters underneath like you mentioned earlier, or did you just tape them off and paint more white over the top? On my '66 I just went with the vinyl decals you can get from the various old Ford truck parts houses, but then again it's not in the same league as your truck.
edit: The parts houses also sell a polished stainless steel tailgate latch handle that would look real nice on that truck, instead of the cad plated original.
Yes I applied white first then the orange then sanded orange until white showed took a bit of finesse to get near perfect crisp edges.
And yes I had a NOS latch assy but was old looking so ordered one of the polished stainless versions.
Quite the long day as was in shop working before 4am.
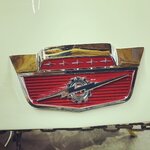
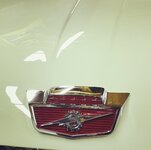
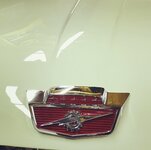
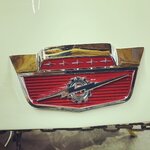
Hood now ready for install. Sneak peek!
NOS badge
Yes it’s got 6 cylinders under hood!
Sent from my iPhone using The Garage Journal mobile app
OP
TimeWarpF100
Well-known member
Re: 1966 F100 EcoBoost Engine Swap & 1966 427 Project
Sent from my iPhone using The Garage Journal mobile app
Sent from my iPhone using The Garage Journal mobile app
Attachments
Stuart in MN
Well-known member
Hood now ready for install. Sneak peek!
NOS badge
Yes it’s got 6 cylinders under hood!
As soon as you start the engine, I don't think anyone is going to be fooled by the lightning bolt badge.
(I have always thought they were neater looking, though.)
OP
TimeWarpF100
Well-known member
As soon as you start the engine, I don't think anyone is going to be fooled by the lightning bolt badge.
(I have always thought they were neater looking, though.)
Hmmm, it does have 6 cylinders tho!
Sent from my iPhone using The Garage Journal mobile app
OP
TimeWarpF100
Well-known member
Re: 1966 F100 EcoBoost Engine Swap & 1966 427 Project

Last day left b4 GoodGuys!
Quite the list left of things to do!
I need a 50 person crew that has a clue!
Sent from my iPhone using The Garage Journal mobile app
Last day left b4 GoodGuys!
Quite the list left of things to do!
I need a 50 person crew that has a clue!
Sent from my iPhone using The Garage Journal mobile app
Attachments

OP
TimeWarpF100
Well-known member
Re: 1966 F100 EcoBoost Engine Swap & 1966 427 Project
Still waiting on parts..
Sent from my iPhone using The Garage Journal mobile app
Still waiting on parts..
Sent from my iPhone using The Garage Journal mobile app
Boosted1
Well-known member
Truck looks great. You have made great progress against your timeline.
So don't stress too much about the final details at this point.
Next week you are going to be able to take a deep breath and really enjoy where you are and addressing the remaining details on a more reasonable schedule.
Congrats. I have really enjoyed your thread and seeing your updates.
So don't stress too much about the final details at this point.
Next week you are going to be able to take a deep breath and really enjoy where you are and addressing the remaining details on a more reasonable schedule.
Congrats. I have really enjoyed your thread and seeing your updates.
If more than a few hr job I would just remove cab. Tensioner a bit complicated especially if one is not familiar of sequence. Procedure.
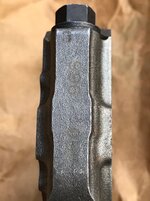
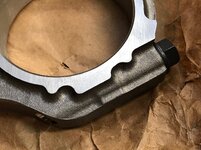
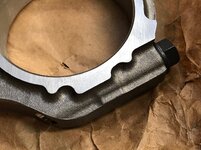
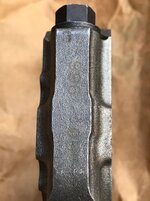
Here is a new Rod for a 2018 3.5 Raptor engine. They cost 11.00 each. The steel crankshaft good for 1000hp cost me a bit over 100.00 new from Ford. Compare that to the 429/460 crank I have at 3500.00.
That’s why I like the eco engines so much. Very cheap to fix if need be make great power and go a long time if you keep good care of them. Mostly oil changes by 5000 mi with good oil.
Sent from my iPhone using The Garage Journal mobile app


I own a 2014 f150 EcoBoost and I want the motor to last as long as possible.
What oil and filter do you recommend? I currently change the oil every 3000-3500 miles with Ford synthetic blend and ford filter. Is that my best option or something better I should be using?
Not sure if it matters but motor is stock besides a 93 octane tune...
Thanks
Attachments


OP
TimeWarpF100
Well-known member
I own a 2014 f150 EcoBoost and I want the motor to last as long as possible.
What oil and filter do you recommend? I currently change the oil every 3000-3500 miles with Ford synthetic blend and ford filter. Is that my best option or something better I should be using?
Not sure if it matters but motor is stock besides a 93 octane tune...
Thanks
I would stick with exactly what you are doing? I have found new engines will do well under 5k miles using ford oil n filter.
Sent from my iPhone using The Garage Journal mobile app
OP
TimeWarpF100
Well-known member
Truck looks great. You have made great progress against your timeline.
So don't stress too much about the final details at this point.
Next week you are going to be able to take a deep breath and really enjoy where you are and addressing the remaining details on a more reasonable schedule.
Congrats. I have really enjoyed your thread and seeing your updates.
Thanks! I do really appreciate all the comments and hanging around for the build! Lost a lot of people during the drama days. I have been told I post too often.
20+ hr day yesterday but did make a few major steps. Just not ready for GG today. It starts @ 8 am. Going to shoot for early tomorrow morning instead.
Looking for parts yesterday (been apart since early 2008) really slowed progress along with the major anxiety. Just not the confidence in myself I guess.
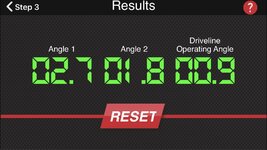
A huge factor in driving it there was the horrid pinion angle after changing shackle length to clear the box (aftermarket lowering shackle) 8:30 pm a friend who stopped by after work said he wanted to be home @ 9. I figured we should attempt to add a 4 deg pinion shin as that was estimated amount to correct angle. The shins finally showed yesterday after a delay.
Using late model scissor jacks he started to jack up to take load off springs while I started on u-bolt nuts leaving tires in place but blocked.
Pulled shackles and springs, clamped spring, removed center bolts, added shin and re-installed springs!
When back together I asked world record 30 min? He said nope, only 15 minutes! Not exactly sure how we pulled that off but s much needed break!
Using my suspension angle app on phone it was BINGO nailed it. It did take a few more minutes to torque nuts and let down jacks.


While I was installing side trim friend Blake was removing anodizing from trim.

Hoping to get this pile of trim polished and on today.
Sent from my iPhone using The Garage Journal mobile app
Attachments


OP
TimeWarpF100
Well-known member
Re: 1966 F100 EcoBoost Engine Swap & 1966 427 Project
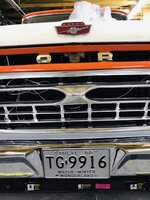
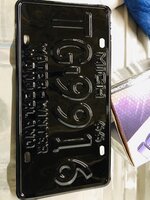
Somewhere in the fray late in day finished up the 1966 Michigan plate to put on front. (Grew up in Michigan spent first 29 yrs there)

Before

After it’s same color as front valance and very similar to rear 1966 Az plate.
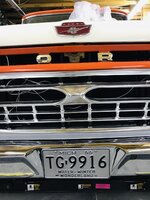
Kinda blends in. Plate was a 60th birthday gift from a friend. I have another I will do in Wimbledon white with orange letters.
Same method as tailgate. Very difficult with such tiny misshaped letters. Couple places went thru black so touched with magic marker then cleared entire plate.

Sent from my iPhone using The Garage Journal mobile app
Somewhere in the fray late in day finished up the 1966 Michigan plate to put on front. (Grew up in Michigan spent first 29 yrs there)
Before
After it’s same color as front valance and very similar to rear 1966 Az plate.
Kinda blends in. Plate was a 60th birthday gift from a friend. I have another I will do in Wimbledon white with orange letters.
Same method as tailgate. Very difficult with such tiny misshaped letters. Couple places went thru black so touched with magic marker then cleared entire plate.
Sent from my iPhone using The Garage Journal mobile app
Attachments


OP
TimeWarpF100
Well-known member
Re: 1966 F100 EcoBoost Engine Swap & 1966 427 Project

Where I left off yesterday.

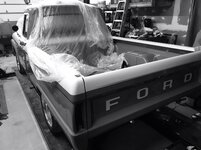
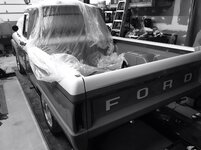
Tailgate on also but need to do all hardware today.
Rear Bumper brackets on need to install bumper.
Sent from my iPhone using The Garage Journal mobile app
Where I left off yesterday.
Tailgate on also but need to do all hardware today.
Rear Bumper brackets on need to install bumper.
Sent from my iPhone using The Garage Journal mobile app
Attachments


OP
TimeWarpF100
Well-known member
Re: 1966 F100 EcoBoost Engine Swap & 1966 427 Project
Staying motivated has been most difficult part of this entire job. G-J, local friends and progress have kept me going the last few weeks. Even a week ago it seems IMPOSSIBLE to even entertain the idea this could get done enough to drive to show. I do not recall any other time in my life I have pushed myself this hard or been able to.
Still a lot to do so better get busy! Hoping some type help shows again as friends they know who they are have made this possible. No way could I have begun to do it without support & to my dear Wife for putting up with it!
Sent from my iPhone using The Garage Journal mobile app
Staying motivated has been most difficult part of this entire job. G-J, local friends and progress have kept me going the last few weeks. Even a week ago it seems IMPOSSIBLE to even entertain the idea this could get done enough to drive to show. I do not recall any other time in my life I have pushed myself this hard or been able to.
Still a lot to do so better get busy! Hoping some type help shows again as friends they know who they are have made this possible. No way could I have begun to do it without support & to my dear Wife for putting up with it!
Sent from my iPhone using The Garage Journal mobile app
OP
TimeWarpF100
Well-known member
Re: 1966 F100 EcoBoost Engine Swap & 1966 427 Project


Sent from my iPhone using The Garage Journal mobile app
Sent from my iPhone using The Garage Journal mobile app
Attachments


Stuart in MN
Well-known member
The aluminum trim and grill polished up nice!
gasgas17
Well-known member
Beautiful truck! Can't wait to see it finished.
C_F
ALLIANCE MEMBER
Man, that truck is looking fantastic!! Even if you don't get it finished in time, you should still drive it there & put a "not finished" sign on it.
OP
TimeWarpF100
Well-known member
The aluminum trim and grill polished up nice!
Grille is NOS with 1966 date code!
Sent from my iPhone using The Garage Journal mobile app
OP
TimeWarpF100
Well-known member
Beautiful truck! Can't wait to see it finished.
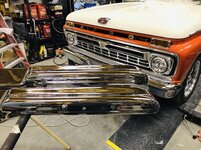
Thanks! Doing what I can but yet another expensive snag. The rear bumper I bought for big $$ yrs ago (rechromed Ford) is exactly like a ‘66 but mounting holes for wider frame!


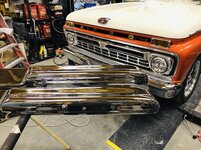

Found proper one in town but now no arms or legs left. Not much I could do but get it. Did not want to drill extra holes in back or display plate in back window.
Sent from my iPhone using The Garage Journal mobile app
Attachments



OP
TimeWarpF100
Well-known member
Man, that truck is looking fantastic!! Even if you don't get it finished in time, you should still drive it there & put a "not finished" sign on it.
Problem is that it’s not driving yet. They do not allow trailers. Friend left his ‘18 150 here for me to use but gotta govin under its own power.
Not looking good for tomorrow morning either.
Lots of wasted time today just trying to get the basics done.
Now shooting for Saturday afternoon evening for Scottsdale
Pavilions for first outing.
After rear bumper install I took the AZ plate from inside cab then wandered off to find mounting screws/bolts did not find ones I was looking for but others. Then took well over an hour to find license plate!
Better get busy!
C_F
ALLIANCE MEMBER
Glad you were able to find another bumper on short notice. That other one must be for a bumpside truck? Or maybe a dentside? I know they used that bumper style for quite a few years.
Speaking of NOS grilles, I have one too...but the box mine came in got mashed during the trip. The "double V" area at the top is pushed in & flattened a bit. I haven't tried to straighten it for fear of making it worse.
Keep at it, you're making great progress!
Speaking of NOS grilles, I have one too...but the box mine came in got mashed during the trip. The "double V" area at the top is pushed in & flattened a bit.
I haven't tried to straighten it for fear of making it worse. Keep at it, you're making great progress!
OP
TimeWarpF100
Well-known member
Glad you were able to find another bumper on short notice. That other one must be for a bumpside truck? Or maybe a dentside? I know they used that bumper style for quite a few years.
Speaking of NOS grilles, I have one too...but the box mine came in got mashed during the trip. The "double V" area at the top is pushed in & flattened a bit.
Keep at it, you're making great progress!
Bumper must be 73-79 with wider frame.
1965-72 appears to be the same.
Sent from my iPhone using The Garage Journal mobile app
OP
TimeWarpF100
Well-known member
Re: 1966 F100 EcoBoost Engine Swap & 1966 427 Project
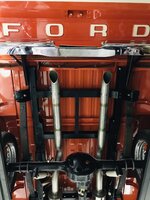
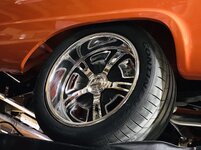
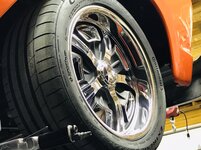

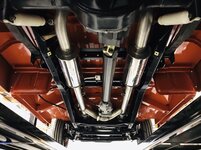
Sent from my iPhone using The Garage Journal mobile app
Sent from my iPhone using The Garage Journal mobile app
Attachments
-
 91d1fe8abb73bcd28a9778ff627564da.jpg557.3 KB · Views: 0
 -
 f144ac4c7d5944f4ea8f544197a92f0d.jpg486.7 KB · Views: 0
 -
 6b6179262cc7c118519135ada1f57b28.jpg445.7 KB · Views: 0
 -
 6fa83f4af7436b3419a167064051e010.jpg497.1 KB · Views: 0
 -
 3b60c16631a5ac6c6a96f9fa6ea304a6.jpg609.6 KB · Views: 0
 -
 50ea9773cf43e58876c28e2e0df9aa7a.jpg529.1 KB · Views: 0
 -
 016f3ab11db8545986706c42ac8751d7.jpg483.5 KB · Views: 0
Stuart in MN
Well-known member
Bumper must be 73-79 with wider frame.
1965-72 appears to be the same.
I thought the rear bumper on my 66 was actually a 73 - 79, but there was enough slop in the bolts and brackets that I was able to get it to fit. Is there that much difference between the two? Maybe I've had the right one all along.
OP
TimeWarpF100
Well-known member
I thought the rear bumper on my 66 was actually a 73 - 79, but there was enough slop in the bolts and brackets that I was able to get it to fit. Is there that much difference between the two? Maybe I've had the right one all along.
2” minimum difference
Sent from my iPhone using The Garage Journal mobile app
Boosted1
Well-known member
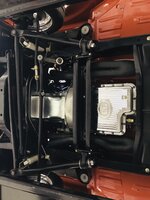
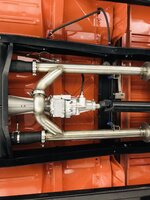
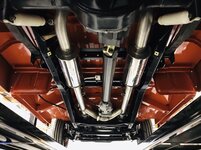
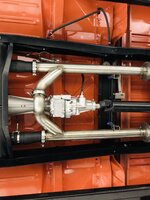
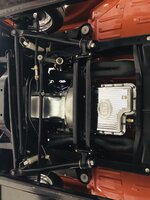
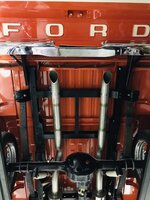
Man that's looking good! Love the shots of underside. So clean and tidy.
Kirmet
Well-known member
Such amazing work! I really admire your talent and skills.
That undercarriage is ****.
That undercarriage is ****.
Horror Business
Well-known member
- Joined
- Apr 19, 2014
- Messages
- 514
Your skill set is amazing! Such talent.
JonBoehman
Well-known member
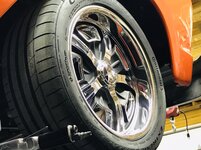
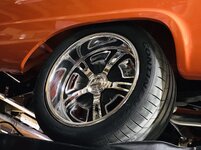
That is a beautiful truck. I love those wheels
OP
TimeWarpF100
Well-known member
Re: 1966 F100 EcoBoost Engine Swap & 1966 427 Project


Sent from my iPhone using The Garage Journal mobile app
Sent from my iPhone using The Garage Journal mobile app
Attachments
-
 f3dccaae66475abe503976cb7fedf80a.jpg752.2 KB · Views: 0
 -
 483d61b04a28394fc22688ed96f5aeee.jpg714.4 KB · Views: 0
 -
 ca93108ae0d8cba061964e4ec265a4ad.jpg604.2 KB · Views: 0
 -
 4837a05c589f44eb424d83b6fd0b1669.jpg599.3 KB · Views: 0
 -
 abda2944a98d96c3a6d6f939133e3027.jpg676.3 KB · Views: 0
 -
 ce3bece1ec3e1223286e9a1465718f1f.jpg1,023.8 KB · Views: 0
 -
 e48debd735996203f4e95d5a79602cbe.jpg911.1 KB · Views: 0
 -
 3a569b61f5ac4b7ece16467cfa6f4a9b.jpg638.7 KB · Views: 0
 -
 249d60cd5d5c33f4f2fb6470890c14d9.jpg1 MB · Views: 0
OP
TimeWarpF100
Well-known member
Re: 1966 F100 EcoBoost Engine Swap & 1966 427 Project

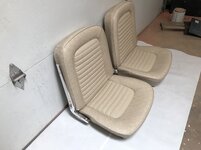


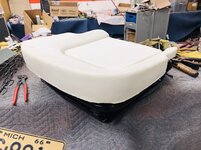
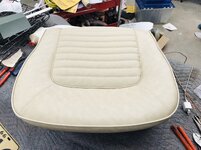
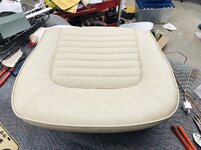
Seats DONE!
More later gotta run! I mean get truck to run. Throttle cable seized.
Sent from my iPhone using The Garage Journal mobile app
Seats DONE!
More later gotta run! I mean get truck to run. Throttle cable seized.
Sent from my iPhone using The Garage Journal mobile app
Attachments



OP
TimeWarpF100
Well-known member
Re: 1966 F100 EcoBoost Engine Swap & 1966 427 Project

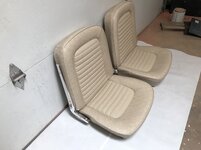
Passenger seat under bright skylight. Makes it look lighter.
Sent from my iPhone using The Garage Journal mobile app
Passenger seat under bright skylight. Makes it look lighter.
Sent from my iPhone using The Garage Journal mobile app
Attachments

OP
TimeWarpF100
Well-known member
Man that's looking good! Love the shots of underside. So clean and tidy.
Such amazing work! I really admire your talent and skills.
That undercarriage is ****.
Your skill set is amazing! Such talent.
That is a beautiful truck. I love those wheels
Thanks to all for the comments and following along! After getting so close to make it with just the throttle cable left I powered it up to find the battery down to 4 volts. I guess over time the EFI slowly drained the battery. Being a AGM battery after getting so low it would not take a charge. Around 11:30 last night I simply walked out of shop and called it a no go.
A lot got done in last week especially but it just was not to be.
Still a lot to do to have it complete like a few moldings. The truck had never been cut n buffed etc. I also had not installed a brake pedal switch which would be needed. Could not imagine stopping and have person behind me not able with no brake lights.
I gave it my best shot but failed . .
lorne
Well-known member
Lots of progress the past two weeks. Just because you missed the show, don't let that fact kill motivation. You're so close now.
OP
TimeWarpF100
Well-known member
Lots of progress the past two weeks. Just because you missed the show, don't let that fact kill motivation. You're so close now.
Still motivated to finally see the 40+ yr dream a reality. Just winding down a bit today maybe more relaxed less stressed come Monday.
I still hope to get Eco2 done by May 2019. A tall order yes but it’s been long enough now. It’s pretty far along.
Plan is to take it on lower 48 state trip in May.
Sent from my iPhone using The Garage Journal mobile app
- Status
- Not open for further replies.