To avoid these ads, REGISTER NOW!

ZMotorsports Shop Projects 2.0

OP
Z

zmotorsports

ALLIANCE MEMBER
Joined
Oct 20, 2009
Messages
21,441
Location
Northern Utah
I know I have not commented before but I'm following along for years now. Most has been said but I'd like to add one more thing: "You're a great dad! And a great role model. Realize that whenever the darkside calls you again."

Thank you, I appreciate that very much. I hope some day my son will realize just how fortunate he is and has been growing up. Right now I don't think it even crosses his mind because what we do in the shop is just second nature to him. I never had the opportunity to spend this much time with my dad working on projects because for one he wasn't interested in many of the same things I was and secondly because he always had so much work to do on the farm that there wasn't time to just work on fun things together.

I appreciate your comments and thank you for following along all these years, I really appreciate it. I will try to remember that when my mind starts to wander to that dark place when I get frustrated.
 
To avoid these ads, REGISTER NOW!
OP
Z

zmotorsports

ALLIANCE MEMBER
Joined
Oct 20, 2009
Messages
21,441
Location
Northern Utah
SUCCESS!!!

We assembled the axle under my son's WJ last night and made a few adjustments then the road test. Solid as can be on the road and vibration free.

After a small amount of tweaking we landed at 8* of caster and about half a degree of pinion to driveshaft angle. We could probably adjust down to 7.5* of caster with zero driveshaft to pinion angle but it handles so damn nice right now I don't think we want to remove any caster, especially how high his center of gravity is I think I would rather have it more stable on the highway with just a little heavier steering feeling at slower speeds and off-road. Plus I don't think that half a degree less of caster will really make any noticeable difference in the steering feeling anyways.

We took it out and drove it at 35 MPH back roads then 45 MPH secondary roads and finally on the interstate at speeds between 65 and 80 MPH and I felt that it was rock solid and handled very well. We ran back to the shop and had to make a very slight tweak to the drag link as the steering wheel was a few degrees off to the right but then my son took it for a drive and he was grinning ear to ear. Very slight tire hum at high speeds but other than that it is quiet and smooth.

I was finally able to get a good night's sleep.:lol_hitti
 

LXCam

ALLIANCE MEMBER
Joined
Apr 23, 2013
Messages
19,179
Location
AZ
Kickass Mike! I got a dumb question. With so much tilt in the housing have you ever seen issues with lubrication of the pinion bearing or is there a need to compensate for that with additional oil?
 
OP
Z

zmotorsports

ALLIANCE MEMBER
Joined
Oct 20, 2009
Messages
21,441
Location
Northern Utah
Nice recovery, well done!

Kickass Mike! I got a dumb question. With so much tilt in the housing have you ever seen issues with lubrication of the pinion bearing or is there a need to compensate for that with additional oil?

Hallelujah:beer:

Thanks guys.

Cam, as for pinion bearing, I just added a bit extra lube to compensate. Also, if you look at the actual differential it may sound like a lot of tilt but the housing doesn't look at much different of an angle. At least not compared to some of the ones I've seen on the trail.

We did have to order some longer Johnny Joints as we only have about 1/2" of engagement on the upper link and I like to have much more engagement than that. I ordered them this morning and when they arrive I think I may adjust out another degree or so of caster just to avoid any adverse handling issues. I would like to get more to around 7-7.5 degrees and closer to the factory setting. Eight degrees to me just seems a bit high and I can still tilt the pinion a small amount and be just fine within the range.

Thanks again for all of the positive support guys.
 
OP
Z

zmotorsports

ALLIANCE MEMBER
Joined
Oct 20, 2009
Messages
21,441
Location
Northern Utah
Do you go to Colorado to get your joints. Lol.
Good to hear the mods straighten out the ride. Note to self: send Tahoe to Mike’s house.


Sent from my iPhone using The Garage Journal mobile app

I haven't tried those joints from Colorado Shorty. Seen a lot of places that sell them while I've been there but have no personal experience so I'll stick to the joints that I am comfortable with.:lol_hitti
 

LXCam

ALLIANCE MEMBER
Joined
Apr 23, 2013
Messages
19,179
Location
AZ
I haven't tried those joints from Colorado Shorty. Seen a lot of places that sell them while I've been there but have no personal experience so I'll stick to the joints that I am comfortable with.:lol_hitti


One thing about those CO joints. You'll never get anything done, but you'll never be bored either.
 
OP
Z

zmotorsports

ALLIANCE MEMBER
Joined
Oct 20, 2009
Messages
21,441
Location
Northern Utah
WOO-HOO!! :thumbup:


Now, start on yours. I'm waiting somewhat patiently. :bounce:


:beer:

I actually asked my son last night if he was happy with his enough that I could maybe start on my project.:spit: He reluctantly agreed to allow me to start mine so tonight I plan on pulling mine in the shop so I can start swapping my gears out and adding my hydro-assist steering parts.

I debated on starting on it or not because next week will be hectic with corporate people in from out of state but I said the hell with it and I am going to start it and try to get done what I can. I just know my days at work will be longer than normal next week. It never fails, corporate people fly in and think that because they have nothing better to do than work and go back to their hotel that the rest of us don't have anything pressing going on either.:headscrat
 
OP
Z

zmotorsports

ALLIANCE MEMBER
Joined
Oct 20, 2009
Messages
21,441
Location
Northern Utah
Glad to hear that all that extra work paid off for you, way to go! :beer:

Thank you. It was definitely worth tearing it back apart and clocking the knuckles for the proper pinion angle and caster. Otherwise I think it would have taken away from the entire build.

Thanks for following along.
 

Finallygotit

ALLIANCE MEMBER
Joined
Jul 6, 2013
Messages
4,096
Location
Tucson, AZ
........I debated on starting on it or not because next week will be hectic with corporate people in from out of state but I said the hell with it and I am going to start it and try to get done what I can. I just know my days at work will be longer than normal next week. It never fails, corporate people fly in and think that because they have nothing better to do than work and go back to their hotel that the rest of us don't have anything pressing going on either.:headscrat


Mike, glad you decided to get started. Try and look at it this way, when the corporate guys are flapping their jaws just to hear themselves talk, you can go to your happy place and be thinking about the layout of the hydro-assist and gear swap. Just remember to keep smiling and nod every now and again. :D

BTDT


:beer:
 

csp

Well-known member
Joined
Mar 23, 2010
Messages
5,720
Location
Franktown, CO
The u-joint on the axle is not binding but it is at ~10* angle to the driveshaft. As for who cares about u-joints at such slow speeds, the slow speeds are not what I am concerned about, at slow speeds it's fine, at freeway speeds is where we are picking up the vibrations and that is with minimal caster.

My comment about "who cares" was in reference to a suggestion for lockouts.

It's not relevant now that you have it rebuilt though.

I'm not a fan of these front axles that rotate the innerds and front driveshafts 100% of the time. Yeah it's convenient, but the compromise between caster and pinion angle isn't worth it IMO.
 
OP
Z

zmotorsports

ALLIANCE MEMBER
Joined
Oct 20, 2009
Messages
21,441
Location
Northern Utah
Mike, glad you decided to get started. Try and look at it this way, when the corporate guys are flapping their jaws just to hear themselves talk, you can go to your happy place and be thinking about the layout of the hydro-assist and gear swap. Just remember to keep smiling and nod every now and again. :D

BTDT


:beer:

Agreed Dan, I will definitely go to my happy place while they are talking to hear themselves talk.
 
OP
Z

zmotorsports

ALLIANCE MEMBER
Joined
Oct 20, 2009
Messages
21,441
Location
Northern Utah
My comment about "who cares" was in reference to a suggestion for lockouts.

It's not relevant now that you have it rebuilt though.

I'm not a fan of these front axles that rotate the innerds and front driveshafts 100% of the time. Yeah it's convenient, but the compromise between caster and pinion angle isn't worth it IMO.

I agree having parts not turning that don't need to be turning is a waste and having lockout hubs would correct that but to be perfectly honest in all of the Jeeps I have had now over the past nearly 25 years I have yet to experience any bearing or u-joint failure. I even added the Warn lockout system to a clients Jeep a few years back as he wanted to tow his 2010 Jeep behind his RV as well as get better fuel economy and we really saw no difference in fuel economy with the lockout hubs vs. the OE system. That makes it hard to justify a ROI on.

If a person was doing it to not have to settle or compromise between caster and pinion angle I guess they could make a case for it but cutting and clocking the C's is just as effective, and it cost me less than lockout hubs would have.

All that being said, I would love to have lockout hubs on my Jeep as 85% of the time I am in 2WD and would not need to be spinning my front axle but I just can't justify them at this point. I also have RCV front axle shafts which add to the cost and difficulty to add lockout hubs. There are several companies now making kits to convert the unit bearing front axle over to a bolt on spindle and lockout hubs. I believe Warn, Spyntec, Alloy USA, Yukon and now Teraflex all offer kits but none of them directly support RCV shaft, they all advice calling for support. I believe it is because they have to replace the outer stub shaft and then you are mixing RCV inner shaft and joint with some other brand of outer stub shaft. This would make parts obtaining spare parts much more troublesome than I would like also. I love my RCV shafts on the trail as you don't get that speeding up and slowing down of the u-joint when the steering wheel is turned and IF I ever have an issue with one out of town obtaining a new shaft would be fairly easy. If I had custom axle shafts replacements out on the trail or out of town would be much more problematic.

For now the unit bearing and CV front shafts work perfectly for my setup and use. Thanks for following along and commenting. I definitely don't know everything and hearing other's insights is beneficial to everyone.
 
OP
Z

zmotorsports

ALLIANCE MEMBER
Joined
Oct 20, 2009
Messages
21,441
Location
Northern Utah
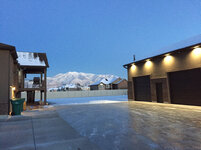
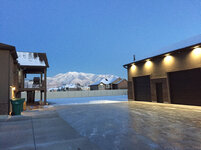
I had about an inch of snow to shovel on Monday night before getting to work on my son’s WJ. I finished just barely before the sun went down and the water started freezing.

Yesterday I arrived home to begin pulling my front axle. In the picture below you can see where the shop shaded a large section of my back drive because the definitive line where the ice melted yet in the shade from the shop it did not. Unfortunately it never made it above freezing yesterday. Look at how crystal clear and blue that sky is and how pretty those mountains are. I hope it at least gets into the mid-30’s today so my driveway will melt off.
9655209bb1be9cca7fe5f55735b95efe.jpg

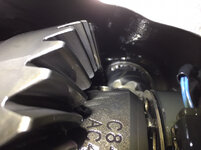
I pulled my front diff cover to drain my gear oil while I was removing brakes and other components in preparation to drop my front axle and had to snap a picture of my front gears. This is why it pays off to take your time setting up gears properly or pay someone to set them up properly if you don’t want to do them. Don’t cheap out on gearing as they won’t last. These gears have 90k driven miles on them and at least another 35k of being flat towed and they still look perfect.
603804e2b235104ed36c1783d07aee18.jpg

5e1fdcf10436c8a59c2677589945dc39.jpg

Backlash and wear pattern were perfect. Also maintenance intervals and proper level and quality of lube is important which all lead to long life out of your components. There is no sludge buildup from heat or water intrusion as well as no metal. Thus lube had about 22k miles on it and drained out nice and clean. These pictures were taken when the cover was removed and oil drained on its own, no solvent of any kind had been used to clean the components. That is still oil residue on the components and you can get a visual of how clean the oil was and how easily it is draining off of the parts.
 

Attachments

  • 5e1fdcf10436c8a59c2677589945dc39.jpg
    5e1fdcf10436c8a59c2677589945dc39.jpg
    620 KB · Views: 0
  • 603804e2b235104ed36c1783d07aee18.jpg
    603804e2b235104ed36c1783d07aee18.jpg
    756.1 KB · Views: 0
  • 9655209bb1be9cca7fe5f55735b95efe.jpg
    9655209bb1be9cca7fe5f55735b95efe.jpg
    803.1 KB · Views: 1
Last edited:
To avoid these ads, REGISTER NOW!

Duker

Well-known member
Joined
Sep 25, 2010
Messages
10,861
Location
Livingston, TX
Note to self.... plan vacations to Utah around vehicle maintenance schedule... pay Mike whatever he wants! [emoji1531]


Sent from my iPhone using Tapatalk Pro
 
OP
Z

zmotorsports

ALLIANCE MEMBER
Joined
Oct 20, 2009
Messages
21,441
Location
Northern Utah
Note to self.... plan vacations to Utah around vehicle maintenance schedule... pay Mike whatever he wants! [emoji1531]


Sent from my iPhone using Tapatalk Pro

:headscrat I didn't see where that was mentioned in there Duke. Maybe I mis-represented myself.:lol_hitti

Thanks for the vote of confidence however.:thumbup:
 

Duker

Well-known member
Joined
Sep 25, 2010
Messages
10,861
Location
Livingston, TX
:headscrat I didn't see where that was mentioned in there Duke. Maybe I mis-represented myself.:lol_hitti


Thanks for the vote of confidence however.:thumbup:


Mike, it was sad attempt at humor to highlight your meticulous level of work especially when it comes your vehicles. I think I have accomplished a lot when changing my own oil and vacuuming out my truck but I pale in comparison. When it comes to cars... I have some skill at painting and body work.... that’s it! Maybe I will help Shorty paint his Mercedes so we can both feel like we accomplished something!


Sent from my iPad using Tapatalk Pro
 
OP
Z

zmotorsports

ALLIANCE MEMBER
Joined
Oct 20, 2009
Messages
21,441
Location
Northern Utah
Mike, it was sad attempt at humor to highlight your meticulous level of work especially when it comes your vehicles. I think I have accomplished a lot when changing my own oil and vacuuming out my truck but I pale in comparison. When it comes to cars... I have some skill at painting and body work.... that’s it! Maybe I will help Shorty paint his Mercedes so we can both feel like we accomplished something!


Sent from my iPad using Tapatalk Pro

I gotcha Duke, just had to give you a little **** back in return. Again, I appreciate the compliment. I guess maybe I need to get better at accepting them.
 

C_F

ALLIANCE MEMBER
Joined
Jan 21, 2005
Messages
9,675
Location
Utah...SNOW BLOWS!
What brand of gear lube do you use, Mike? I'm guessing from the color, it's Royal Purple, but maybe that color is simply from an additive.
 
OP
Z

zmotorsports

ALLIANCE MEMBER
Joined
Oct 20, 2009
Messages
21,441
Location
Northern Utah
What brand of gear lube do you use, Mike? I'm guessing from the color, it's Royal Purple, but maybe that color is simply from an additive.


You guessed it, I’ve been running Royal Purple for the last 22k. I’ve also run the synthetic Valvoline 75W-140 with excellent results which is probably what I’ll put in it next as it seems to be a little more readily available throughout our travels.
 
OP
Z

zmotorsports

ALLIANCE MEMBER
Joined
Oct 20, 2009
Messages
21,441
Location
Northern Utah
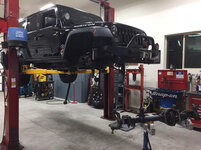
Tonight after work I had to shovel another 1/2” of snow off of my driveway. I know a 1/2” doesn’t sound like much but covering over 7500 ft/2 of concrete and it takes a while.

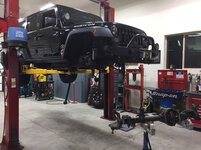
After finishing the snow removal I dropped the axle out from under my Jeep.
af06ff750f82209a2f3ccf11f9bee2be.jpg

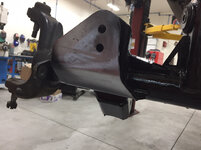
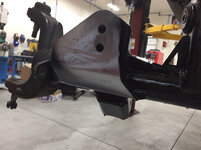
I then took the plasma cutter and removed the track bar mount from my ProRock 44 in preparation to weld on my raised track bar mount from Artec Industries which will hold my hydraulic steering ram.

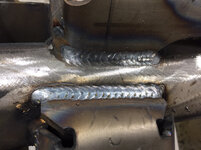
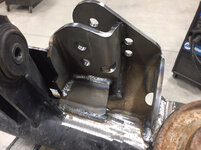
I added some additional gussets to the track bar mount while I was at it even though Artec has designed their bracket stout enough to handle the forces applied by the hydraulics. A little extra protection.
41eb2ff206d557dd143919bdd1935fc3.jpg

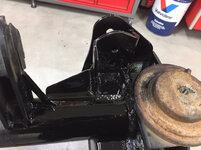
I also added some skids under my lower control arm mounts.
eb1c061d1f16b9550cd0cf059eaf2217.jpg

4e0833f2dade6daaf71cbc2a1198b49c.jpg

46889058ff8c0e62bdcaa4f1d22b8b1c.jpg

5b29827d157e0f92498370aa57ffd7f1.jpg

4ba5ed3accefffb565f3115bb471239b.jpg

15144f96a154dad9005ed2dbb8cd4fa7.jpg

Thanks for looking.
 

Attachments

  • 4e0833f2dade6daaf71cbc2a1198b49c.jpg
    4e0833f2dade6daaf71cbc2a1198b49c.jpg
    771.8 KB · Views: 0
  • 41eb2ff206d557dd143919bdd1935fc3.jpg
    41eb2ff206d557dd143919bdd1935fc3.jpg
    714.2 KB · Views: 0
  • eb1c061d1f16b9550cd0cf059eaf2217.jpg
    eb1c061d1f16b9550cd0cf059eaf2217.jpg
    790.3 KB · Views: 0
  • 46889058ff8c0e62bdcaa4f1d22b8b1c.jpg
    46889058ff8c0e62bdcaa4f1d22b8b1c.jpg
    764.2 KB · Views: 0
  • 5b29827d157e0f92498370aa57ffd7f1.jpg
    5b29827d157e0f92498370aa57ffd7f1.jpg
    734.3 KB · Views: 0
  • 4ba5ed3accefffb565f3115bb471239b.jpg
    4ba5ed3accefffb565f3115bb471239b.jpg
    684.5 KB · Views: 0
  • af06ff750f82209a2f3ccf11f9bee2be.jpg
    af06ff750f82209a2f3ccf11f9bee2be.jpg
    724.2 KB · Views: 0
  • 15144f96a154dad9005ed2dbb8cd4fa7.jpg
    15144f96a154dad9005ed2dbb8cd4fa7.jpg
    719.2 KB · Views: 0
Last edited:

cweidert03

Well-known member
Joined
Oct 19, 2015
Messages
417
Location
New Castle, IN
I wish I had your motivation! By the time I get home, feed my boys and myself it’s hard to get out to the garage!! The boys are 6 and 3.. I guess in a few years they can feed themselves and then “help” me. My 3 year old loves to help. And I usually let him when it’s an option.


Your sons Jeep looks great! And I’m excited to see your jeeps transformation! I’ll be looking at the New Jeep Gladiator once it arrives next year!


Sent from my iPhone using Tapatalk
 
OP
Z

zmotorsports

ALLIANCE MEMBER
Joined
Oct 20, 2009
Messages
21,441
Location
Northern Utah
I wish I had your motivation! By the time I get home, feed my boys and myself it’s hard to get out to the garage!! The boys are 6 and 3.. I guess in a few years they can feed themselves and then “help” me. My 3 year old loves to help. And I usually let him when it’s an option.


Your sons Jeep looks great! And I’m excited to see your jeeps transformation! I’ll be looking at the New Jeep Gladiator once it arrives next year!


Sent from my iPhone using Tapatalk

Thanks. As far as motivation, mine has dropped off since our move and building my new shop. I took a new position at work a couple of years ago and it is much more stressful and also requires longer days than I had before and by the time I get home many times I am emotionally and mentally taxed. If I sit down and relax for a moment when I get home, I'm done, I cannot get motivated after that. I have to get home, change clothes and immediately get out in the shop and get going or I won't get a thing accomplished.

When I built my last shop back in the early 90's I built it with the intent of making money with it. Making money working on other people's stuff for the purpose of funding my racing and buying tools and equipment. It served its purpose well but with this shop I wanted it to be more for working on and maintaining my own assets, not focused on making money and relaxing when working on my projects so I think my mindset reflects that in my lack of motivation at times.

As far as with younger kids, I know it's difficult because their safety is the highest priority and we have a lot of things in our shops that can injure a young child especially if we take our eyes off of them for even a second. My son started coming out in the shop with me at a very young age but when I couldn't focus on him the entire time we generally did other things after work/school and did not go into the shop or I did something else specifically with him in the shop until I could focus on what I needed to do. I was in a similar situation as you as when I arrived home I had several hours where I was watching our son before my wife arrived home from work. It definitely was not ideal but I made it work. I actually think it attributed to our tight relationship now as we spent so much one on one time when he was younger and I have also been blessed because as my son got older he actually wanted to be out in the shop with me tinkering on things and still does, although he is slowing working on creating his and his future wife's life together and has started and pulling back from shop time a bit.

Thanks again for following along on my projects.
 

csp

Well-known member
Joined
Mar 23, 2010
Messages
5,720
Location
Franktown, CO
cutting and clocking the C's is just as effective, and it cost me less than lockout hubs would have.

Definitely the most relevant argument for taking the route you chose. I'm always shocked by the prices these aftermarket companies charge for their lockout conversions.

Seeing your pictures reminded me of doing the same exercise on a kingpin Dodge Dana 60 once. I'll never buy another Dodge D60 as a result. ;)
 
OP
Z

zmotorsports

ALLIANCE MEMBER
Joined
Oct 20, 2009
Messages
21,441
Location
Northern Utah
Definitely the most relevant argument for taking the route you chose. I'm always shocked by the prices these aftermarket companies charge for their lockout conversions.

Seeing your pictures reminded me of doing the same exercise on a kingpin Dodge Dana 60 once. I'll never buy another Dodge D60 as a result. ;)

Yeah, I've scratched my head at the prices as well. $1500 plus for two stub shafts, spindle, bearings and some lockout hubs. That seems a bit high even to me.

I sure see a lot of them on the trail but I just can't see the case for swapping over as there is such a small gain, if any.
 

lilscorpion

Well-known member
Joined
Mar 15, 2010
Messages
3,600
Location
Colorado
Yeah, I've scratched my head at the prices as well. $1500 plus for two stub shafts, spindle, bearings and some lockout hubs. That seems a bit high even to me.

I sure see a lot of them on the trail but I just can't see the case for swapping over as there is such a small gain, if any.


I‘m not sure the front conversion alone makes enough of a difference. Do the front and the rear and maybe...but not for $3k, just save it for the next Jeep.
 
OP
Z

zmotorsports

ALLIANCE MEMBER
Joined
Oct 20, 2009
Messages
21,441
Location
Northern Utah
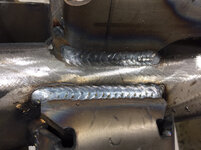
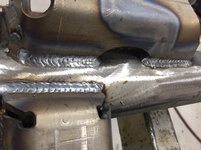
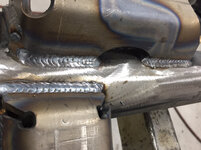
Thanks for the compliments guys. My welds are something I seem to never quite be satisfied with, even though I think they’ve come a long ways over the years. Thank you all for the kind words about them and for following along.
 
OP
Z

zmotorsports

ALLIANCE MEMBER
Joined
Oct 20, 2009
Messages
21,441
Location
Northern Utah
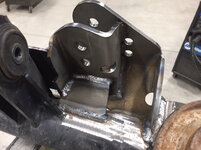
Saturday’s work consisted of adding a couple of gussets to the track bar mount on the axle which will also hold the hydraulic steering ram.
cd6e7311386ebb3cacc49fbf6eaa6696.jpg

8de4588203119d45a6ebfaf1b7efcedd.jpg

6a27da1b720779955d85a4dcef10fe02.jpg

Seems like I was just here doing gears. My 5.38’s removed. They served me well for the past 90k plus driven miles and probably close to another ~30k flat towed miles.
a738635895c246de5f5943fd870991f3.jpg

52d5e573f6b13f7fcd06081623d893ff.jpg

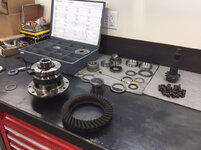
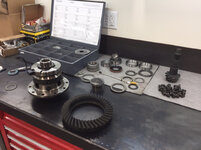
New 4.56 gears being prepped for installation. I recommend using a mill file or stone to make certain there are no burrs or nicks to impede the seating of components.
48892e4823c830aefd4a7b9dd85a8dd0.jpg

Carrier being prepped to accept the new ring gear and new bearings.
c7a5e24c8f8373575ffd273e5b6b3f62.jpg

b2c4034d2d8a486c0ede91a37c17005d.jpg

New larger pinion (4.56) on the left and the smaller (5.38) pinion that I just removed on the right.
8ad2c9354694dd0338e6a490d54ba844.jpg

New ring gear left, old ring gear on the right.
ecaba9f021b7f513c20dc4715d70238d.jpg

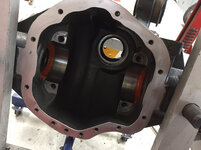
Case thoroughly cleaned and prepped for test fitting with new pinion races installed.
b12e2f67306c7b62d475ffd2bef40f35.jpg

Ring gear painted and ready for initial fitment test.
8e95b0e5f0e006cb2004db6690fa29cc.jpg

The initial test fit was close but I ended up removing a few thousandths of pinion shim and bingo, great gear pattern. Also shifted a few shims around to get my backlash right at .007”.
cefd5907904f8cef2c21b6bcf50d8fc2.jpg

Cover installed after pinion preload set and everything torqued to proper specs.
bb5d93af1f37c320e8f114cf0ecd22db.jpg

Next up is to swap out my PSC Big Bore XD II gearbox with my ported and prepped OEM gearbox and hydraulic steering ram then I can reinstall my front axle.

Thanks for looking.
 

Attachments

  • 52d5e573f6b13f7fcd06081623d893ff.jpg
    52d5e573f6b13f7fcd06081623d893ff.jpg
    703.8 KB · Views: 0
  • a738635895c246de5f5943fd870991f3.jpg
    a738635895c246de5f5943fd870991f3.jpg
    634.5 KB · Views: 0
  • c7a5e24c8f8373575ffd273e5b6b3f62.jpg
    c7a5e24c8f8373575ffd273e5b6b3f62.jpg
    715.2 KB · Views: 0
  • 48892e4823c830aefd4a7b9dd85a8dd0.jpg
    48892e4823c830aefd4a7b9dd85a8dd0.jpg
    720.1 KB · Views: 0
  • b2c4034d2d8a486c0ede91a37c17005d.jpg
    b2c4034d2d8a486c0ede91a37c17005d.jpg
    690.6 KB · Views: 0
  • 8ad2c9354694dd0338e6a490d54ba844.jpg
    8ad2c9354694dd0338e6a490d54ba844.jpg
    669 KB · Views: 0
  • ecaba9f021b7f513c20dc4715d70238d.jpg
    ecaba9f021b7f513c20dc4715d70238d.jpg
    784.5 KB · Views: 0
  • b12e2f67306c7b62d475ffd2bef40f35.jpg
    b12e2f67306c7b62d475ffd2bef40f35.jpg
    672.3 KB · Views: 0
  • 8e95b0e5f0e006cb2004db6690fa29cc.jpg
    8e95b0e5f0e006cb2004db6690fa29cc.jpg
    786.8 KB · Views: 0
  • cefd5907904f8cef2c21b6bcf50d8fc2.jpg
    cefd5907904f8cef2c21b6bcf50d8fc2.jpg
    764.8 KB · Views: 0
  • 6a27da1b720779955d85a4dcef10fe02.jpg
    6a27da1b720779955d85a4dcef10fe02.jpg
    661 KB · Views: 0
  • 8de4588203119d45a6ebfaf1b7efcedd.jpg
    8de4588203119d45a6ebfaf1b7efcedd.jpg
    637.3 KB · Views: 0
  • cd6e7311386ebb3cacc49fbf6eaa6696.jpg
    cd6e7311386ebb3cacc49fbf6eaa6696.jpg
    708.1 KB · Views: 0
  • bb5d93af1f37c320e8f114cf0ecd22db.jpg
    bb5d93af1f37c320e8f114cf0ecd22db.jpg
    742.2 KB · Views: 0
Last edited:

Bodj Built

Well-known member
Joined
Feb 3, 2016
Messages
1,167
Location
Moorpark, CA
Thanks for the compliments guys. My welds are something I seem to never quite be satisfied with, even though I think they’ve come a long ways over the years. Thank you all for the kind words about them and for following along.

I think that's the sign of a good welder... always looking for ways to improve and perfect it. It's harder when you have to fabricate the pieces before welding. A lot of the instagram guys are just cranking out welds all day so they've got an advantage. I think half the fun is making the pieces, though!
 
OP
Z

zmotorsports

ALLIANCE MEMBER
Joined
Oct 20, 2009
Messages
21,441
Location
Northern Utah
Mike what is the square bracket attached to center section?
Nice gear mesh up.


Sent from my iPhone using The Garage Journal mobile app

Shorty, I'm assuming your are talking about the grey fixture that is surrounding the center section? That is my case spreader. It spreads the case slightly to allow for the proper amount of carrier shims to be installed in order to achieve the right amount of carrier preload. It is made by OTC and I've had it for over 20 years now and it's seen a lot of use over those years.

Thanks for following along Shorty.
 
To avoid these ads, REGISTER NOW!
Top Bottom