To avoid these ads, REGISTER NOW!

ZMotorsports Shop Projects 2.0

To avoid these ads, REGISTER NOW!
OP
Z

zmotorsports

ALLIANCE MEMBER
Joined
Oct 20, 2009
Messages
21,477
Location
Northern Utah
Mike, great to see you got it running! I like the wheel & Tire combo too. Will you have to raise the Jeep anymore to prevent rubbing?


Sent from my iPhone using Tapatalk

Thank you. I should be fine on suspension. On the JK/JKU you can get away running 37's with only about 3" of lift and I have a 4" lift but has actually only netted me about 3.5" due to how heavy the Jeep is. I did add a couple inches of bumpstop to the front when I had the front axle out though to prevent contacting at full stuff. I've also cut my rear pinch seam back when I originally built the Jeep in 2011 so the rear should be good.

Amazing!

I assume you retained the AC? Do you charge that yourself or farm out?

Yes, all OEM Jeep A/C lines were used and I will bring it up to my buddies shop and recharge my A/C once I get some test miles on it.

Great news Mike! So where will her first maiden voyage be?


Sent from my iPad using Tapatalk Pro

Thanks Duke, not sure where the first trip will be but once she's road worthy I will just get some break in miles on it and then determine where we'll go first. Our local Jeep club was heading down to St. George, UT next weekend for the annual Winter 4x4 Jamboree and we were originally planning on going but as 2018 grew closer to being over I realized that there was no way I was going to be ready. The Jeep will probably be on the road by next weekend but I'm not pulling it out of the shop and heading on a big off-road trip until I have some testing miles on it.

Wow! Record time on the swap! The wheels look fantastic!

Thanks BB&G, I appreciate that.


So can your foot hit the Chrysler pedal or do you have to reach down and use it to reset oil monitor?

I cut the Jeep pedal back far enough that I can't reach it with my foot. My thinking was I didn't want to see it from when looking down at the pedals from outside the Jeep and didn't want to draw any attention to it so by cutting it back further than necessary it will be hidden from view yet when the time comes to reset my oil life monitor it is not big deal to turn my key on and reach down with my hand and push the pedal stem three times to reset.
 
Last edited:
OP
Z

zmotorsports

ALLIANCE MEMBER
Joined
Oct 20, 2009
Messages
21,477
Location
Northern Utah
Awesome news! Wheel/tires look right at home.

Thanks. Back in September when I purchased the new wheels the wife didn't think I needed new wheels because there wasn't anything wrong with my ATX's. Yesterday when she saw them next to the Jeep she commented on how much she liked them and how nice the tire/wheel combo looked and gave it a fresh look.
 

Bob Heine

ALLIANCE MEMBER
Joined
Oct 24, 2009
Messages
10,709
Location
Boca Raton, Florida
Now here’s according to my wife my first “senior moment”. She said she can tell me that now that I’m 50-years old.

I’m not gonna lie, that upper bolt was a ***** to get the nut installed. Between being high up on the firewall and trying to squeeze my big *** up under the dash it was a PITA to say the least. I couldn’t get both hands up there at the same time which complicated reinstallation of the pedal and bracket.
Mike, I shouldn't be laughing but for the first time I feel a little sorry for you. From my 24 years of experience, that won't be your last "senior moment."

I also shouldn't be laughing at your handicap -- the inability to fit two hands into a small space. Never happens to me! :lol_hitti

All kidding aside, that is an amazing swap. Your research and planning really paid off and made it look easy. Instead of days troubleshooting the oil life monitor, you included it in the plan. The hundreds of other problems your planning avoided is outstanding.
 

mh70ss

Active member
Joined
May 7, 2014
Messages
27
Location
Bensalem, PA
Mike, what an awesome build and documentation. The Jeep looks great. Can't wait to see some video of it out on the trails. Thanks for taking us along.
 
OP
Z

zmotorsports

ALLIANCE MEMBER
Joined
Oct 20, 2009
Messages
21,477
Location
Northern Utah
Mike, I shouldn't be laughing but for the first time I feel a little sorry for you. From my 24 years of experience, that won't be your last "senior moment."

I also shouldn't be laughing at your handicap -- the inability to fit two hands into a small space. Never happens to me! :lol_hitti

All kidding aside, that is an amazing swap. Your research and planning really paid off and made it look easy. Instead of days troubleshooting the oil life monitor, you included it in the plan. The hundreds of other problems your planning avoided is outstanding.

I think maybe you could have done a better job than I did on that particular bolt Bob. I'm definitely not as skilled using only one hand as some.:lol_hitti

Thanks for following along and sharing your humor.
 
OP
Z

zmotorsports

ALLIANCE MEMBER
Joined
Oct 20, 2009
Messages
21,477
Location
Northern Utah
Man, you are moving FAST on this project! Very very nice.

Mike, what an awesome build and documentation. The Jeep looks great. Can't wait to see some video of it out on the trails. Thanks for taking us along.

Nice work! I figured it'd be knocked out right quick :D

Thanks guys, I appreciate the comments.

I really should be out there working on it today but I said the hell with it and took the day off to relax and hang out with my wife, son and his fiancé.

I should be able to wrap it up during the following week if all goes as planned.
 

LXCam

ALLIANCE MEMBER
Joined
Apr 23, 2013
Messages
19,209
Location
AZ
Damn mike you make that look far too easy. And the new shoes look great. Congrats bud!
 

jbmatth

Well-known member
Joined
Jun 3, 2013
Messages
5,692
Location
Northern Ok.
I'm with the others, you move really fast. It took me longer than that to go from a dirty engine to a clean engine with a cam swap. Looking forward to some reviews on how you like it after the swap and newfound power.

JB
 
OP
Z

zmotorsports

ALLIANCE MEMBER
Joined
Oct 20, 2009
Messages
21,477
Location
Northern Utah
Damn mike you make that look far too easy. And the new shoes look great. Congrats bud!

Thanks Cam. Don't know about the easy part but in all honesty it wasn't the most difficult engine swap that I've done. I like the way it has turned out thus far though, I'll have a better feel once she's on the road.

Mike great to see it running. Appreciate the documentation you provided

Dwight

Thank you Dwight, I appreciate you following along.


I'm with the others, you move really fast. It took me longer than that to go from a dirty engine to a clean engine with a cam swap. Looking forward to some reviews on how you like it after the swap and newfound power.

JB

Thanks JB. Starting out with a clean motor helped I guess.:lol_hitti
 

LXCam

ALLIANCE MEMBER
Joined
Apr 23, 2013
Messages
19,209
Location
AZ
Thanks Cam. Don't know about the easy part ti

That's not what I said. I said you made it look easy. ;)

A sign of a true professional bud, I know there wasn't anything easy about it. I think the worst of it is yet to come. And not from the jeep but from all your jeep buddies. They're gonna see the ride was only out of commission for a couple weeks and drive you nuts thinking they could pull that off as well. You're gonna be explaining the details and fending off work for years to come. :spit:
 
OP
Z

zmotorsports

ALLIANCE MEMBER
Joined
Oct 20, 2009
Messages
21,477
Location
Northern Utah
That's not what I said. I said you made it look easy. ;)

A sign of a true professional bud, I know there wasn't anything easy about it. I think the worst of it is yet to come. And not from the jeep but from all your jeep buddies. They're gonna see the ride was only out of commission for a couple weeks and drive you nuts thinking they could pull that off as well. You're gonna be explaining the details and fending off work for years to come. :spit:

Gotcha Cam. Thank you.

Funny you mention about the Jeep buddies. I have already been approached by three from the local club that either want me to do an LS swap for them and many more that have so many questions that they want to come over and bend my ear. I've had to tell people I'm not available for the time being just so I can get it done and on the road or my shop would be overrun. I've had several contact me asking if they could come over and help or watch which is definitely not something I want to start doing. I've told them I would be willing to answer any questions at next month's club meeting but fear there will be a lot of ongoing questions, which I'm okay with to a certain extent. The problem lies when people want you to solve EVERY issue with one conversation. They don't realize that I have been planning this in my head and researching for over 4 years now and the answers can't be had overnight.
 
OP
Z

zmotorsports

ALLIANCE MEMBER
Joined
Oct 20, 2009
Messages
21,477
Location
Northern Utah
It's quite clear you thoroughly did your homework A-Z and cross checked it twice before even starting.

Well done!
Thank you. I tried to research and address any and all possible issues but as we all know it's the ones we don't think of that usually bite us in the ***. Thankfully I haven't had one of those, yet.:)
 
OP
Z

zmotorsports

ALLIANCE MEMBER
Joined
Oct 20, 2009
Messages
21,477
Location
Northern Utah
Major milestone on the project last night.

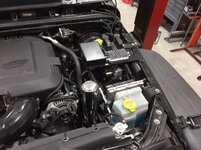
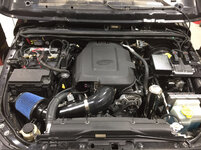
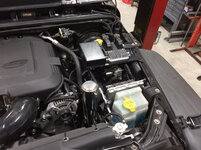
Everything in the engine bay is complete as well as the interior and interior all put back together. To the untrained eye this thing pretty much looks factory, which was the exact visual affect I was going for.

I wasn’t able to get my air intake duct sitting where I was happy with it so I had to make a slight alteration to engine placement. I loosened the motor mounts and transmission mount and slid the entire powertrain rearward about 3/4” and that was the ticket. Everything now fits much better, my intake duct now clears the power steering pulley with ease as well as clears the upper radiator hose and I still have about 3/4" between the passenger side head and the firewall for clearance. I did however have to relocate the large connector for the radiator fan but I like where I now have it almost better as it is lower and not seen at all.

Once I got the intake duct sitting properly and fan wiring relocated I moved to the interior to tidy up the wiring, install my momentary switch for tapshift, wiring and mounting standoff for my Aeroforce gauge then reinstalled my dash and lower panels.

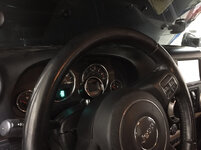
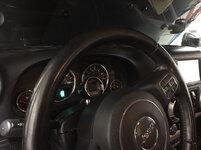
Interior appears stock with the exception of the A-pillar gauges I installed about seven years ago and the Aeroforce gauge I just installed in my column.
c27ddb9556efdff67cdb2f10afd3d567.jpg

With the interior complete I moved back to the engine bay to resecure the motor mount fasteners that I had loosened earlier then set out to finish up my accessory wiring and install my new fuse block.

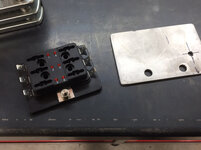
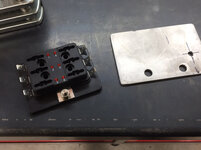
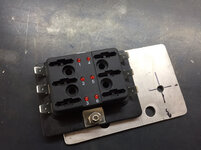
Once the mounting location was determined I found a piece of 1/8” thick aluminum that would work perfect.
1bdf2eb1328828c91d9771003db10b04.jpg

Transfer punched mounting holes for the fuse block.
0e94258cc71d74afe2062be4e3a0087d.jpg

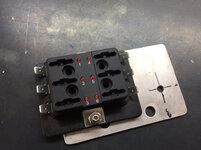
Drilled & tapped the mounting holes, bead blasted and painted the plate and it was ready for installation.
09dfbc993eb2977c90f5e219845752fd.jpg

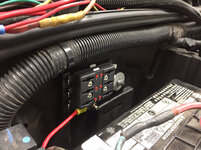
Fuse block mounted.
c830c64ec6f58fc0dec13d8b9ecb4b75.jpg

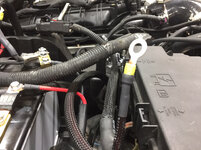
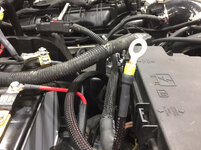
Eight gauge wire feeding the fuse panel covered in abrasion proof sleeve.
5def33a8a2c6dbc1a7b7f7a6c115fd13.jpg

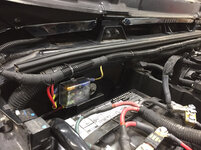
Accessory wiring completed and loom in place.
bf54771350a56371448783b2c670ffac.jpg

Another small item on my list was to machine a couple of 1" diameter by .375” thick spacers for the upper transmission cooler mounting. The cooler was up against my A/C condenser when I installed the radiator & condenser package so I stacked up some washers temporarily but wanted something a little nicer so this was one more item marked off the list.
a586509351aef627d4ecf4ecefe5c00e.jpg

Now there is a good 1/8”-3/16” gap between the trans cooler and condenser fins.
f96ea108f35471c932562a3292efd1e4.jpg

Passenger side engine bay shot. I still have to connect winch cables and 10-gauge wires for ARB compressors under the passenger’s seat to the battery.
1a81dec20e917395ab13843fe86c12d5.jpg

Driver’s side of engine bay.
4ca7852717f90eaa2514b3147abff118.jpg

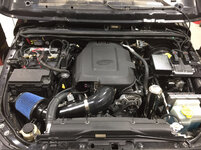
Overall shot of the completed engine bay, other than a 4” T-bolt style hose clamp for the air filter that I need to pick up today on the way home.
4482bae70a335ca0ea649bb79604bfd5.jpg

All that is remaining at this point is the exhaust system and to reassemble the wiring at the left taillight and it’s ready for test drive and hopefully many, many miles and years of trouble free service.

Thanks for looking.
 

Attachments

  • bf54771350a56371448783b2c670ffac.jpg
    bf54771350a56371448783b2c670ffac.jpg
    780.7 KB · Views: 1
  • 4ca7852717f90eaa2514b3147abff118.jpg
    4ca7852717f90eaa2514b3147abff118.jpg
    766.5 KB · Views: 1
  • 1a81dec20e917395ab13843fe86c12d5.jpg
    1a81dec20e917395ab13843fe86c12d5.jpg
    740.8 KB · Views: 1
  • f96ea108f35471c932562a3292efd1e4.jpg
    f96ea108f35471c932562a3292efd1e4.jpg
    749.1 KB · Views: 1
  • a586509351aef627d4ecf4ecefe5c00e.jpg
    a586509351aef627d4ecf4ecefe5c00e.jpg
    753.6 KB · Views: 1
  • 1bdf2eb1328828c91d9771003db10b04.jpg
    1bdf2eb1328828c91d9771003db10b04.jpg
    680 KB · Views: 1
  • 0e94258cc71d74afe2062be4e3a0087d.jpg
    0e94258cc71d74afe2062be4e3a0087d.jpg
    702.9 KB · Views: 0
  • 5def33a8a2c6dbc1a7b7f7a6c115fd13.jpg
    5def33a8a2c6dbc1a7b7f7a6c115fd13.jpg
    758.8 KB · Views: 0
  • c830c64ec6f58fc0dec13d8b9ecb4b75.jpg
    c830c64ec6f58fc0dec13d8b9ecb4b75.jpg
    802.9 KB · Views: 0
  • 4482bae70a335ca0ea649bb79604bfd5.jpg
    4482bae70a335ca0ea649bb79604bfd5.jpg
    809.8 KB · Views: 0
  • c27ddb9556efdff67cdb2f10afd3d567.jpg
    c27ddb9556efdff67cdb2f10afd3d567.jpg
    676.5 KB · Views: 0
  • 09dfbc993eb2977c90f5e219845752fd.jpg
    09dfbc993eb2977c90f5e219845752fd.jpg
    714.8 KB · Views: 7
Last edited:

LXCam

ALLIANCE MEMBER
Joined
Apr 23, 2013
Messages
19,209
Location
AZ
Looks great! With the 3/4" move backwards will you need the driveshaft shortened or is there enough play to allow this? Or have they even started making it yet.
 
To avoid these ads, REGISTER NOW!

protegeV

Well-known member
Joined
Apr 18, 2018
Messages
13,363
Location
DFW
Wow, that is a CLEAN install. Other than the intake and filter you would swear that the truck came exactly that way from the factory. :thumbup:
 
OP
Z

zmotorsports

ALLIANCE MEMBER
Joined
Oct 20, 2009
Messages
21,477
Location
Northern Utah
:bowdown: Sorry, no words can express my thoughts. :bowdown:


:beer:

Thanks Dan, I appreciate the sentiment.


Looks great! With the 3/4" move backwards will you need the driveshaft shortened or is there enough play to allow this? Or have they even started making it yet.


Thanks Cam. That small amount won't have any affect on the driveshafts, there is ample allowance for that amount.

Wow, that is a CLEAN install. Other than the intake and filter you would swear that the truck came exactly that way from the factory. :thumbup:

Thank you. I would have liked to keep everything in an OEM style air box but there just simply isn't enough room. Maybe one day I will play around wit fabricating something but the open element will work. I also bought two pre-filters so I can run one when we hit the dusty trails and have a spare for those long weeks of wheeling I can swap out a dirty one for a clean one.
 

4 FN 27

ALLIANCE MEMBER
Joined
Oct 19, 2015
Messages
4,635
Location
Minnesnowta
Hey Mike...looking awesome!!! Coming along nicely!!!

Send that snow towards Minnesota...I don't ever recall having ZERO snow on the ground here in mid January...
 

LXCam

ALLIANCE MEMBER
Joined
Apr 23, 2013
Messages
19,209
Location
AZ
Hey Mike...looking awesome!!! Coming along nicely!!!

Send that snow towards Minnesota...I don't ever recall having ZERO snow on the ground here in mid January...


Wtf is wrong with you Pat??? I knew you were a bit off but asking for that white stuff, now I know you're certifiable. :lol_hitti
 
OP
Z

zmotorsports

ALLIANCE MEMBER
Joined
Oct 20, 2009
Messages
21,477
Location
Northern Utah
Hey Mike...looking awesome!!! Coming along nicely!!!

Send that snow towards Minnesota...I don't ever recall having ZERO snow on the ground here in mid January...

Thanks Pat, and YES, you can have ALL the snow that you want. I'm ready for spring and my green lawn back.

Wtf is wrong with you Pat??? I knew you were a bit off but asking for that white stuff, now I know you're certifiable. :lol_hitti

I know, I had to read that twice to see if what I thought he said was actually what he said. I've never had anyone want that **** before.:lol_hitti
 

4 FN 27

ALLIANCE MEMBER
Joined
Oct 19, 2015
Messages
4,635
Location
Minnesnowta
Wtf is wrong with you Pat??? I knew you were a bit off but asking for that white stuff, now I know you're certifiable. :lol_hitti

Dude...I love Snow...I love the cold...the challenge...I'll take 20 below all day long over 90+.

This past weekend I drove 231 miles north to find the only "deep" snow in the state. Inland from the lake about 10 miles we found 40-60 inches...had a blast.

I like my 4 seasons in Minnesota:

Season 1: Road Construction
Season 2: Road and Bridge Construction
Season 3: Road, Bridge and Bike Trail Construction
Season 4: Wretched Cold and Snow

Season 4 is my favorite!!!

Yes Mike I hijacked some of your bandwidth...LOL...
 

Attachments

  • IMG_7098.jpg
    IMG_7098.jpg
    156.6 KB · Views: 146
  • IMG_7104.jpg
    IMG_7104.jpg
    156.8 KB · Views: 139
  • IMG_7115.jpg
    IMG_7115.jpg
    163.8 KB · Views: 142
  • IMG_7119.jpg
    IMG_7119.jpg
    150.7 KB · Views: 148

Bigblue&Goldie

Well-known member
Joined
Mar 12, 2009
Messages
10,734
Location
AZ
You know you did a good job when when nothing stands out. If a person just glanced under the hood of your Jeep they'd probably only notice the filter/intake tube. A lot of work and thought went into making that look so OEM. I think you did a far cleaner job than 99% of the companies that specialize in stuffing V8's in JK's. What I like best is anyone could look at your work and jump in and make repairs without having to spend hours trying to figure out some jumbled mess. No joke, now that you have developed the "formula" you could turn this into a sweet retirement gig.
 
OP
Z

zmotorsports

ALLIANCE MEMBER
Joined
Oct 20, 2009
Messages
21,477
Location
Northern Utah
Dude...I love Snow...I love the cold...the challenge...I'll take 20 below all day long over 90+.

This past weekend I drove 231 miles north to find the only "deep" snow in the state. Inland from the lake about 10 miles we found 40-60 inches...had a blast.

I like my 4 seasons in Minnesota:

Season 1: Road Construction
Season 2: Road and Bridge Construction
Season 3: Road, Bridge and Bike Trail Construction
Season 4: Wretched Cold and Snow

Season 4 is my favorite!!!

Yes Mike I hijacked some of your bandwidth...LOL...

Ya know Pat, as much as it pains me to say this, I used to be one of those snow chasers. My wife and I started snowmobiling in 1989 after we were married and were heavy involved in the sport until we sold everything in 2009. Now I can't stand that white ****, but I do know how fun it can be to play in it, just not work in it. We too would drive several hundred miles seeking out the powder and then turn around and do it all over again the following weekend.:lol_hitti
 
OP
Z

zmotorsports

ALLIANCE MEMBER
Joined
Oct 20, 2009
Messages
21,477
Location
Northern Utah
You know you did a good job when when nothing stands out. If a person just glanced under the hood of your Jeep they'd probably only notice the filter/intake tube. A lot of work and thought went into making that look so OEM. I think you did a far cleaner job than 99% of the companies that specialize in stuffing V8's in JK's. What I like best is anyone could look at your work and jump in and make repairs without having to spend hours trying to figure out some jumbled mess. No joke, now that you have developed the "formula" you could turn this into a sweet retirement gig.

Thanks BB&G. I am flattered and appreciate the feedback.

I told my wife my goal was to make this OEM looking and running even to the point that I could toss the keys to anyone and they would swear it was factory (although NOT that I would do that).:lol_hitti
 

manwithtools

ALLIANCE MEMBER
Joined
Aug 24, 2015
Messages
14,185
Location
Lebanon, TN
You know you did a good job when when nothing stands out. If a person just glanced under the hood of your Jeep they'd probably only notice the filter/intake tube. A lot of work and thought went into making that look so OEM. I think you did a far cleaner job than 99% of the companies that specialize in stuffing V8's in JK's. What I like best is anyone could look at your work and jump in and make repairs without having to spend hours trying to figure out some jumbled mess. No joke, now that you have developed the "formula" you could turn this into a sweet retirement gig.

Absolute! Mike, you have so much respect from me. I've done a few engine swaps and way back, they were so simple. Build a 400hp small block, route a couple of wires and done you were. No emissions, no OBDII, no CanBus, no BS. You clearly thought this out to the nth degree. I applaud you for your research AND attention to detail. I'd love to to this to my 2015 JK, Could be I'm behind the curve.
 
OP
Z

zmotorsports

ALLIANCE MEMBER
Joined
Oct 20, 2009
Messages
21,477
Location
Northern Utah
Absolute! Mike, you have so much respect from me. I've done a few engine swaps and way back, they were so simple. Build a 400hp small block, route a couple of wires and done you were. No emissions, no OBDII, no CanBus, no BS. You clearly thought this out to the nth degree. I applaud you for your research AND attention to detail. I'd love to to this to my 2015 JK, Could be I'm behind the curve.

Thank you for the comments. I appreciate that.

Yeah, things have changed a bit on engine swaps over the past several decades.:lol_hitti I remember just hooking up a hot to the distributor, running a fuel line and the hardest part was locating radiator hoses to match up to the configuration you needed. I remember when I built a 396 big block bored out to 402 in my 1984 Chevrolet shortbed 4x4 and having to modify throttle linkage to keep my vacuum operated cruise control working was probably the most difficult part. Even back then my buddies were just telling me to ditch the cruise that no one used that but I wanted all of the features to work. I even modified my stock air cleaner for a dual inlet and had the hoses running to the core support trying to make it look factory and sourcing a steering column from a salvage yard because I was going from a manual to an automatic and I didn't want a floor shifter. Those were the days.:beer:

Things have changed a bit with the emissions as well as drive by wire. No more pedal modifiers for cruise control, everything is done through the ECM and even things like A/C bump for idle that have to be set up and functioning properly to have an OEM feeling vehicle.

Thanks for following along.
 
OP
Z

zmotorsports

ALLIANCE MEMBER
Joined
Oct 20, 2009
Messages
21,477
Location
Northern Utah
Last night was a long night. I thought I would throw the exhaust in if and be on a test drive but no such luck. Clearances were a bit more problematic to get everything perfect to allow for both full droop as well as full compression of the suspension.

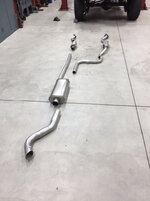
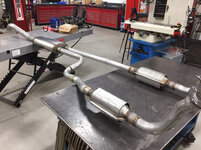
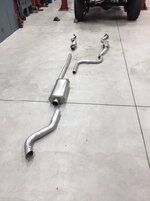
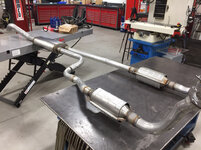
Rather than mess around with random cuts I ended up purchasing Motech’s exhaust kit which was actually a pretty fair price for everything I got. It came with two 49-state legal aftermarket hi-flow catalytic converters , a nice pair of exhaust flanges with Felpro gaskets, a stainless steel common chamber muffler and 2-1/4” bent tubing and 3” tailpipe all with slip fit ends for some adjustability.

Here is the exhaust laid out on my shop floor.
fdf35678e9eacf75685e6988f72851f4.jpg

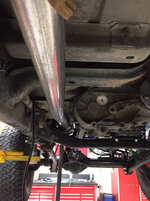
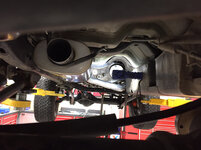
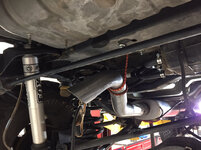
The next several pictures are of the exhaust getting mocked up in the vehicle and tack welded before dropping the exhaust and fully welding it.
3466bd4dac603376b85c7c9b92aa2ae8.jpg

88cf7d65b4e557ee1f1112f82cc2b0ad.jpg

9019cddade7fddc34d27e1555fcd256a.jpg

ffd3723a844d4d240668cdc7bbb735e4.jpg

All tack welded and ready for removal and final welding. I also marked where I wanted my upstream O2 bungs located so they will be properly located for replacement and without interference issues.
8d8341b2e250de4e6ee874525b40b272.jpg

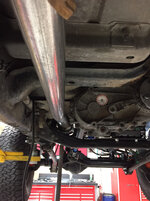
Exhaust system fully welded.
3265c4d94d47b98e12e720f009078821.jpg

72f2fb9a840c2c9dc2b1dfaedd1a25c4.jpg

O2 bungs welded in place.
12a5ffa77c2402d68fe0496efe3ecc0d.jpg

Also installed my new Tom Woods driveshafts.
a411b95c60146127bdf531d8cf39e3bc.jpg

After finishing up the driveshaft and exhaust installation I fired it up and ran the transmission through its gears in the lift to ensure all fluid passages had oil and she’s ready for a test drive.

She sounds fantastic. Not loud at all but very mild with that deep throaty V8 sound. LOVE it!

Thanks for looking.
 

Attachments

  • 88cf7d65b4e557ee1f1112f82cc2b0ad.jpg
    88cf7d65b4e557ee1f1112f82cc2b0ad.jpg
    805.7 KB · Views: 7
  • fdf35678e9eacf75685e6988f72851f4.jpg
    fdf35678e9eacf75685e6988f72851f4.jpg
    585.7 KB · Views: 2
  • 3466bd4dac603376b85c7c9b92aa2ae8.jpg
    3466bd4dac603376b85c7c9b92aa2ae8.jpg
    767.4 KB · Views: 1
  • 9019cddade7fddc34d27e1555fcd256a.jpg
    9019cddade7fddc34d27e1555fcd256a.jpg
    749.4 KB · Views: 1
  • ffd3723a844d4d240668cdc7bbb735e4.jpg
    ffd3723a844d4d240668cdc7bbb735e4.jpg
    763 KB · Views: 1
  • 8d8341b2e250de4e6ee874525b40b272.jpg
    8d8341b2e250de4e6ee874525b40b272.jpg
    675.5 KB · Views: 1
  • 3265c4d94d47b98e12e720f009078821.jpg
    3265c4d94d47b98e12e720f009078821.jpg
    790.6 KB · Views: 1
  • 72f2fb9a840c2c9dc2b1dfaedd1a25c4.jpg
    72f2fb9a840c2c9dc2b1dfaedd1a25c4.jpg
    653.9 KB · Views: 1
  • 12a5ffa77c2402d68fe0496efe3ecc0d.jpg
    12a5ffa77c2402d68fe0496efe3ecc0d.jpg
    767.2 KB · Views: 1
  • a411b95c60146127bdf531d8cf39e3bc.jpg
    a411b95c60146127bdf531d8cf39e3bc.jpg
    618.3 KB · Views: 1
Last edited:

jbmatth

Well-known member
Joined
Jun 3, 2013
Messages
5,692
Location
Northern Ok.
That is great Mike, you certainly made short work of it, how many hours of shop time to do you have in the swap excluding the many hours of research? It would be nice to be able to just buy a pre-made exhaust, I'm building my own now and it is proving to take longer than I'd have liked but about as long as I should have expected.

JB
 
OP
Z

zmotorsports

ALLIANCE MEMBER
Joined
Oct 20, 2009
Messages
21,477
Location
Northern Utah
That is great Mike, you certainly made short work of it, how many hours of shop time to do you have in the swap excluding the many hours of research? It would be nice to be able to just buy a pre-made exhaust, I'm building my own now and it is proving to take longer than I'd have liked but about as long as I should have expected.

JB

Thanks JB. I added it up last night and actual shop time I am exactly at 50.5 hours from beginning to end, time I disconnected the battery to when I started it after setting it down on the floor last night. I am somewhat surprised at how long it took me because I remember watching a couple of Robbie's videos and he said they were doing full engine swaps in a couple of days. I thought I was moving at a fairly good pace but there is no way I could do this in a couple of days. Nearly all of this project was just me working on it as my helper has had other things going on lately. He helped me lift the body off the frame and set it back down on the frame but everything else I was working alone. I maybe could have shaved an hour or two off last night with the exhaust because I was having difficulty man handling the full system around by myself and had to get creative on holding things in place while I tack welded everything but ultimately it turned out ok.

As for total hours including research, I don't even know where to begin adding up the time invested in researching and purchasing parts. I would say in the hundreds as I have been contemplating and thinking about this upgrade for over 4 years now and researching whenever I got the itch, which was a LOT.:lol_hitti

As for the exhaust, Robbie mentioned it to me when I purchased the motor mounts and billet drive brackets but I shrugged it off thinking I would just have a muffler shop bend me a few random bends and a few trips back and forth and I should have it as I didn't want to drop it off at an muffler shop because I don't think they would be as concerned about clearances and interferences than I am. I don't really care for exhaust work but on my street rods and muscle cars I usually did my own so that I could have better control of the finished product. After thinking more about it and pricing out CAT's and muffler I realized that Motech's full kit wasn't a bad deal after all and just called and ordered it. Besides, I know someone who can weld so welding it all together wasn't an issue.:bounce:

Thanks again for following along and commenting.
 
OP
Z

zmotorsports

ALLIANCE MEMBER
Joined
Oct 20, 2009
Messages
21,477
Location
Northern Utah
Your work is unbelievable. Jeep looks great.

~Jim~
Thank you Jim, I appreciate that.

I'm very flattered. I keep having people compliment me on my work, yet I think there are every bit as talented if not more talented mechanics out there as I see their work all over the internet and at various events. Maybe we are our worst critics because I see so many areas I think I could improve upon and unfortunately I'm many times not as happy with my work as I want to be.

Thank you very much for the compliment and for following along though.
 
To avoid these ads, REGISTER NOW!
Top Bottom