To avoid these ads, REGISTER NOW!

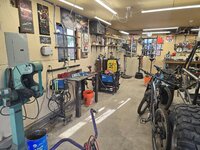
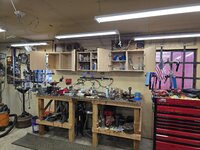
Between 705 & 1200 SQ/FT 24x30 First shop for Binders and Crawlers

Workspaces between 705 and 1200 squarefeet.

bustedcrawler

Well-known member
Joined
Feb 12, 2015
Messages
88
Location
Denver
Long time lurker and finally have something worth posting about. Last few years I've been living with a friend from college, rented room and getting part of the attached 2 car garage.

I'm a mechanical engineer for a mining equipment company, and after spending most of this year in Africa on a jobsite, finally had enough to jump into Denver's crazy housing market. Found this place while overseas and all the stars aligned with it still being on the market with a reduced price when I got back.

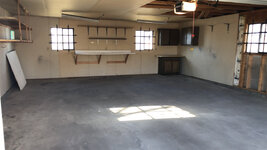
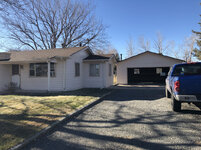
2 bed, 1 bath, 875 sqft, with a detached 24x30 heated and partially finished garage. Perfect for a single guy with an IH problem and a new buggy project.
IMG-1588.jpg

IMG-1595.jpg

Started off empty...

IMG-1587.jpg

IMG-1618.jpg

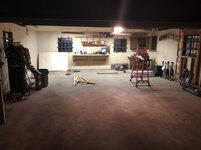
Added in 10 4ft led shop lights from Lowes as I cannot stand a dark workspace.

IMG-1622.jpg

IMG-1623.jpg

Got the 1953 IH fridge moved in to get the beer cold for the upcoming move

IMG-1620.jpg

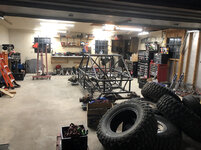
Started hauling stuff over by myself until I was out of easy 1 man stuff to move. Called some of my great friends and finished it off and then started to arrange some of the big pieces.
IMG-1663.jpg

IMG-1664.jpg

MAJH8625.jpg


Brings this up to date. Still working on getting the house interior painted, and the hardwood floors done before I move all the way in. Garage needs a MAJOR clean and organizing weekend but the tools and parts are there. Work bench that came has to go as its not deep enough or strong enough for what I will be doing. This coming weekend I'll have a new 96"x30" bench built and a set of legs for a 4'x4' solid oak counter top that was left in the garage by the previous owners.
 
Last edited:
To avoid these ads, REGISTER NOW!

spudley

Well-known member
Joined
Dec 27, 2016
Messages
702
Location
Northeast Wisconsin
Nice fridge! I was going to guess 1949 until I read your next post. Looks like you need a little ceiling repair or your heat will be useless.
Good luck!
 
OP
B

bustedcrawler

Well-known member
Joined
Feb 12, 2015
Messages
88
Location
Denver
Nice fridge! I was going to guess 1949 until I read your next post. Looks like you need a little ceiling repair or your heat will be useless.
Good luck!

Close, I also have a matching chest freezer as well. Have some good friends that understand my addiction.

Yeah, that's how the ceiling came when I bought it. Heater works but I am planning on slinging drywall after I finish up the inside of the house and get moved in. Then blow in some insulation this fall.
 
OP
B

bustedcrawler

Well-known member
Joined
Feb 12, 2015
Messages
88
Location
Denver
Been bust getting the interior of the house painted to get ahead of my hardwood floor guy. Took him way many belts to get such a small floor looking good.. but it's nice and will be stained today.

Meantime I've been picking away at the mess trying to get things better organized and ready to use.


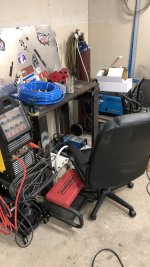
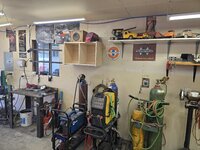
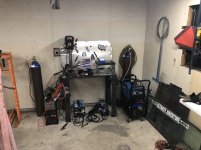
Got my welding area somewhat ready. Waiting on the cart I ordered for the AHP to show up and I get it off of the floor. The Swag table and C-Man drill press will go on a small table of their own, just need to build it.

IMG-1688.jpg


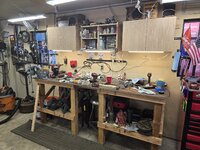
Almost done getting the bench cleared and ready for demo. This one is no where near strong enough for doing any real heavy mechanical work. Get this out and nice homemade metal topped bench will be put in place. Also of key value is having the shop stereo up and going again. Not that my little bluetooth speaker was bad... but this is just better.

IMG-1687.jpg


Got some shelving up and starting pulling stuff up off of the floor. Not sure how I had all of this in a 20x24 with room for my roommate's car to fit in as well.

IMG-1685.jpg

Dirty work wall is coming along. Just need to make my list for dimensional lumber for the work bench so I can get that plywood sheet out of the way. It's hiding the Dayton drill press and Dayton Belt/disc sander.

IMG-1686.jpg


Hard to get good help without a couple easy paths to the beer fridge so moved tires around a bit to make a temporary path.

PDPB2433.jpg
 
OP
B

bustedcrawler

Well-known member
Joined
Feb 12, 2015
Messages
88
Location
Denver
Well, now that I am finally settled in, it is time to get after a few small projects and get going on the car.

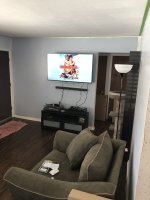
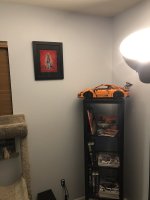
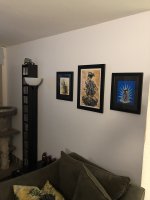
First, a couple from inside the house. Ikea is nice but eats up time assembling everything. Still need to cut some pockets and hide cables but that is low priority right now.

BXBG9313.jpg

IMG-1773.jpg

IMG-1775.jpg


Now that all the house stuff is sorted it was on to getting the shop ready to work.

Added a bluetooth receiver to the old sony receiver to borrow the freebie Bose speakers. They work okay for garage speakers.

IMG-1758.jpg

But added in a pair of these freebies from a yard sale, and it's much better now...

IMG-1757.jpg


Got an Eastwood cart for the Alpha Tig.

IMG-1751.jpg

And got a chair for use at the welding table as its a little too low for standing use. I need to hang the Rapid Air kit this weekend.

IMG-1770.jpg

Recycled a cabinet top and made a small table for the little drill press and the SWAG table for my porta band.

EMFM0242.jpg

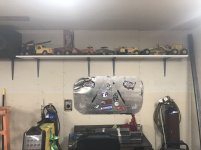
Got a shelf up above the welding table for all of my dad's old die cast trucks and tractors. Couple of them don't fit and will either go on a different shelf or back into storage.

IMG-1806.jpg

Was struggling to find a decent vise. Craigslist has been barren or was old beat up vises with gold plated price tags. Murdoch's had this import Wilson for $150 less than anywhere else in town or online so I grabbed it.

IMG-1763.jpg

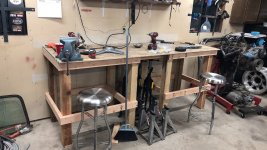
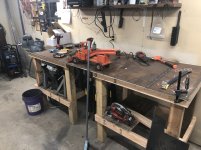
Then set about building my main bench. 96" long, 32" deep, with a 41" work top height. Top is 1/2" OSB skinned with 3/16" mild steel on top of it. Still need to wrap up some bracing and tie it into the studs.

IMG-1769.jpg

IMG-1805.jpg
 

redheelerdog

Well-known member
Joined
Jan 19, 2019
Messages
87
Location
Montana
Looks like you've been busy! I'm like you, I need good light to work, a million times better with the LEDs.

How do you like your Alpha TIG? I'm in the market for a machine, mainly to do sheet metal and thin stuff. Does it have a low amp, high freq. start?

Looks good!
 
OP
B

bustedcrawler

Well-known member
Joined
Feb 12, 2015
Messages
88
Location
Denver
Looks like you've been busy! I'm like you, I need good light to work, a million times better with the LEDs.

How do you like your Alpha TIG? I'm in the market for a machine, mainly to do sheet metal and thin stuff. Does it have a low amp, high freq. start?

Looks good!

Helps that I am moved in and not not having to go back and forth. Yeah, it's a huge difference.

So far I really like it. I got it used off of a good friend as he got a new Alpha TIG. He built a rear cab enclosure, bed, and roof for his lexus FJ 40 hybrid. So you'll like that machine for doing sheet metal and thinner metals.

I'd have to double check, but I'm pretty sure it will do low amp, high freq. starts. I haven't used it enough yet to remember off the top of my head.
 

teamextreme

Well-known member
Joined
Aug 10, 2013
Messages
867
Location
Lakewood, CO
Congrats on the new space. You're making serious progress. Mine's been a work in progress for 5 years now and I'm still not done. Another Denver area wheeler shop, I like it! I notice security bars on the windows, the PO must have had concerns. With all the equipment you've got, you might consider putting up blinds to hide things from view and look into beefing up the man-door jam/latch.
 
OP
B

bustedcrawler

Well-known member
Joined
Feb 12, 2015
Messages
88
Location
Denver
Congrats on the new space. You're making serious progress. Mine's been a work in progress for 5 years now and I'm still not done. Another Denver area wheeler shop, I like it! I notice security bars on the windows, the PO must have had concerns. With all the equipment you've got, you might consider putting up blinds to hide things from view and look into beefing up the man-door jam/latch.

Thanks, trying to get things setup so I can get the buggy built and going.

Yeah, just went from where I was renting in Lakewood to up in Wheat Ridge at my own place and gain more garage space and less house to clean. I'm sure we know some of the same people...

The story I got at closing on the bars is a few previous owners a go, it was a gentlemen with an older collectors Mercedes Benz who was paranoid about anything happening to it. I'm planning on blinds or a tint or something in the windows to block the light and limit looking in.

I've got one window covered up with my Advanced Adapters banner and some PBR boxes :D so I have at least started to address that.
The door is another issue. I want to replace it with a steel door without glass in it and just put in a new frame in it with some reinforcements.
 
OP
B

bustedcrawler

Well-known member
Joined
Feb 12, 2015
Messages
88
Location
Denver
Quick back story on the truck I had (well still have just in pieces) and what I am building.

First car was a 66 IH scout 800 with a 283 chevy in it. Built it up slowly until it was stolen and never recovered when I was in college.

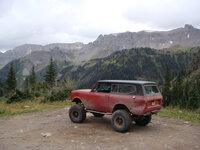
Took a few years away from wheeling, and when I came back to Denver from Pittsburgh sold the F150 I had at the time and grabbed a 76 IH Scout II from a buddy. Way too tall as it was SOA on 4" lift springs, but it had a 44 front and 14bolt rear. I added the winch and some 37s on beadlocks as it came with 36 swampers on aluminum slots and had fun.


DSC01886.jpg
DSC01711.jpg


Well played too hard, smoked the trans and decided to lower it, go to 35s, add a terralow kit in the tcase and EFI. Randomly entered for Ultimate Adventure on a whim... and well ended up being selected and got to go.

BDS-UA-09.jpg
20140707-112802.jpg
20140704-140346.jpg


It stayed like that for a couple years. Out at EJS, I thought why not run Helldorado on leafs and 35s... That was a rough day. Bent the windshield frame and popped the glass out. Glass wasn't broken by some miracle. Then little further up ripped a spring hanger off of the frame. Patched it up and limped it out and onto the trailer.

FB-IMG-1459173610579.jpg
FB-IMG-1459035073363.jpg
FB-IMG-1459028363551.jpg
FB-IMG-1459028436818.jpg


After a lot of debating... I chopped it up and made a scout buggy aka the scuggy. Back halfed the truck, 3 link front and 4 link rear on coil overs, bobbed and dovetailed the rear, dove nosed the front, added a 60 up front, full hydro, atlas 2 case, 5.38s, and 39 reds. Tons of fun like this...


matt1.png
FB-IMG-1501777319991.jpg
20170801-094128.jpg


I wanted to change up the cage for more head room. That lead to pulling the tub off and then going full tube. Came home for R&R from working in Africa and found a JHF/Goatbilt chassis for sale dirt cheap with all the trimmings. So drove down to Texas and grabbed that. That is the chassis in the pics that I am building up now.
 

XJSuperman

Well-known member
Joined
Jan 26, 2018
Messages
3,088
Location
Central Iowa
Damn, can wait to see what happens with this thread. Diggin the Scout for sure, but the garage is similar in purpose/setup to mine, so Ill keep an eye out for ideas.
 
OP
B

bustedcrawler

Well-known member
Joined
Feb 12, 2015
Messages
88
Location
Denver
Finally felt like I had everything in order enough to start using the garage, finally.

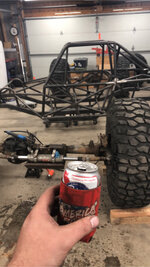
Next time, I need to use the cherry picker and not a jack to put wheels on axles :lol_hitti... rear went fine but the front. Well, there is a nice spill from hydraulic fluid coming out of the ram as the axle rotated off of the jack and went upside down. Oh well only harm done is a spill that has kitty litter on it to soak it up.
EUSE6228.jpg

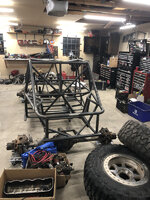
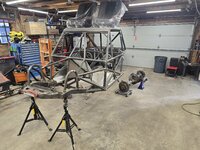
Got the chassis up off the ground and the dollies. Started moving things around and get everything mocked up to start building. Right now its 110" wb, 20" of belly height, 72" to the top of the cage, all while sitting on 42s.

IMG-1894.jpg

IMG-1893.jpg


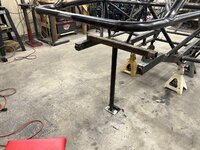
Got started on a small chassis support table. This will have leveling feet, and an additional front section that will let me rest not just the chassis, but the driveline as well on it. Helps with the chicken and egg issue of laying out a 4link and fitting a driveline in there.

IMG-1892.jpg
 
OP
B

bustedcrawler

Well-known member
Joined
Feb 12, 2015
Messages
88
Location
Denver
Long time no post. Work offered up an opportunity I couldn’t refuse so ended up in the SLC area for almost two years on a large capex project. Long term this will pay off and well not too many chances to do what we did. Always fun having crane lifts of 750K pounds on the hook, and using crawler transporters to move 3.2 million pounds.
345A73EB-0AA7-4241-B48A-76ADE7CA0B56.jpeg
Primary crusher on the move up a 10% grade. Transporter had 4, yes 4, Detroit diesels driving it. Anyways, back to the shop….

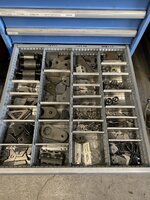
Scored a free Lista cabinet. Wished I would have gotten a few more but didn’t want to wear out friendships moving them. While making room for it, added hooks to put wheel Dollie’s up off the floor and some rafter J hooks to hold the bigger Dollie’s, and put up a couple of shelves.
C62412B2-DDB0-4B69-BA3C-7B47ABC51698.jpeg

It’s amazing how easy it is to organize in a lista….
21E3B5B1-74F6-4920-A969-8CF591AE1A0F.jpeg

Nice to have a place for all the small tabs and gussets
74047589-FD24-476A-821A-D9CA8FC261BB.jpeg


Now that I am home and off the road for work for a bit it was time to get serious on my way too long Project.
Modified the engine table from above by adding some casters to make a mobile table to put tools on while working.
27EC9170-26AF-4ED5-B44C-65648C6F8864.jpeg

Most importantly brought the buggy back from a friends house and blew it apart to finish weld out so I can start reassembly and get going on all the brain teasers…. Plumping, interior panels, exhaust, and all those fun details.

1AD793C0-2E86-4B5E-8A89-4C661A1D3CEF.jpeg

playing around with layout before it comes apart

9440E5A0-F951-4C91-8525-A4800C297289.jpeg

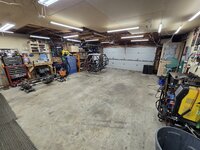
Current state as she sits. Did add another 6 lights to the shop to help clear out a few dark areas I had been fighting too.
 

jbrentd

Well-known member
Joined
Jul 8, 2015
Messages
1,039
Location
Northeast Oklahoma
Great looking space and love the crawler project. I just missed out on 3 of those Lista cabinets the other day on FB. I think they wanted $500 for them.
 
OP
B

bustedcrawler

Well-known member
Joined
Feb 12, 2015
Messages
88
Location
Denver
Great looking space and love the crawler project. I just missed out on 3 of those Lista cabinets the other day on FB. I think they wanted $500 for them.
Thanks.

$500 isn't a bad deal for that size cabinet. Good luck on the hunt.
 
OP
B

bustedcrawler

Well-known member
Joined
Feb 12, 2015
Messages
88
Location
Denver
Let’s see if I can get this back on track….

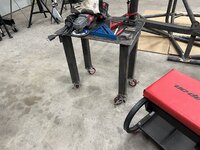
I got tired of moving the plasma by hand and having it on the floor so built a cart out of scrap material.
F7ADC44B-D30B-45CF-9FB1-DF67F4291D9F.jpeg

Next up was turning the table I built to support the engine during mock up into a grinder and catch table
489DADC5-E0C9-433E-BBAE-E4E1E9A21868.jpeg

Table was important as I needed to rework the back half of the chassis. Buying a used chassis meant I had some PO issues. Namely bad welds and in this case it was faster to cut out and make new. Plus I could fix a couple things I never cared for in the design.
8814E435-853B-452F-BA64-94D3E604C036.jpeg

No turning back now!

To make the drill press easier to use with the notched I needed to fix a broken handle that moves the table vertically. I got the drill press used from a friend. Drill press, belt disc sander, and a compressor for $200 when I moved in. Rummaged in the scrap bin, found a piece that would work and fits gorilla paws and used it as an excuse to practice tig brazing with silicone bronze filler.

AE8E2C06-24B3-48D6-AC8F-E0D3A51E5AEC.jpeg
Not great but for my first time, I’ll take it.

I didn’t had a bench grinder and have needed one more and more. So found a cheap Buffalo 1/3 hp for cheap on Craig’s. Dug out some more scrap and a buddy gave me a class 8 brake drum to use as a base.

B33470E8-8D10-47B6-9065-5F48617AA463.jpeg

Starting slinging tube and in a couple evenings a this past weekend I got the back end rebuilt.

FC127047-D8AC-4120-880A-6AABB9370441.jpeg


B17CF400-11B5-4DEF-9EB2-C26F05F9D901.jpeg

E1CE9592-0CB3-427F-8EEA-B42909ECBA8E.jpeg

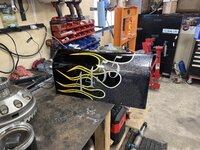
Saturday I had a friend drop off my new mailbox. He’s getting into more flake and decorative painting, so I had him do a large mailbox for me.

E3EC7C82-37E3-4FA3-863E-F8E2B6D954CD.jpeg

5BCDF40A-D413-4463-9606-F63D137702EA.jpeg

Flake pops nice in the sunlight.
 
To avoid these ads, REGISTER NOW!
OP
B

bustedcrawler

Well-known member
Joined
Feb 12, 2015
Messages
88
Location
Denver
Really need to be better about keeping this current but life happens and spent most of the last year working out of the country.

Problem, well good thing, is there was plenty of down time and some time killing on Marketplace started a slippery slope.....

Found a good deal on a used 60" Epiq. I've wanted one since I got to work out of a friend's 68" years ago but never wanted to pay the average 8k. So did the deal, grabbed it and realized I desperately needed to reorganize the shop.

Can't say no to candy apple red....
Screenshot 2025-07-02 133135.png
screenshot-2025-07-02-133135-png.2360941


The prior state of WTF is this mess?? Things definitely got out of hand and not in a good way.
20250509_145007.jpg


So with a loose plan, a big order from the local box store and a great friend/neighbor... I set out

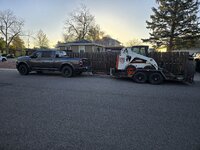
HD is close so I was lucky and was the first stop at 6am for the drop off of shed and fence materials.
20250503_062727.jpg


Really want a skiddy but can't justify it in suburbia... but man was it nice for demo work, moving all the materials out of the driveway, with the auger setting fence posts went quick, as well as scraping for the shed.
20250503_063738.jpg


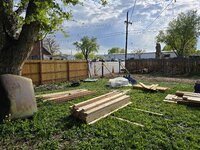
First order was tackling the fence and gate:

Roughly 150 linear feet of fencing. Basic 4x4 posts, except for the 2 at the gate, and PT runners and white wood pickets. Nothing fancy but did confirm I was on the property line as I found several balls of concrete from the fence prior to the one I ripped out for replacement.
20250508_171707.jpg

Gate is 4x4x3/16 posts, and then a 1x3x14ga frame with bullet hinges and same pickets and PT 2x4 runners.
20250511_185725.jpg


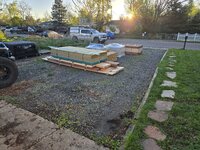
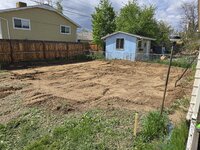
As noted by the dirt, I had already been playing with the skidsteer. Instead of only doing rock where the shed would be, that expanded into roughly a 35ft by 35ft area, 6" deep for 3/4" tricolor to go down. Cleans things up, makes a nice laydown area, good base for shed, and happens to meet city requirements for additional parking.
20250505_150435.jpg

10 tons sure doesn't look like much:
20250517_103216.jpg

Was off a bit on my estimate but luckily I am close to the supplier and they were able to make a second trip quickly. Once I had the additional 12 tons dropped off, it went smoothly with the skidsteer and some rake work to let the shed build begin.
 

Attachments

  • 20250518_171328.jpg
    20250518_171328.jpg
    1.5 MB · Views: 24
Last edited:
OP
B

bustedcrawler

Well-known member
Joined
Feb 12, 2015
Messages
88
Location
Denver
Nothing fancy, basic 10x12, single 5ft wide door, with gambrel roof and loft storage. My neighbor and I knocked it out over three weekends. First being rock and then floor of shed, then the next was main structure, and the final weekend was paint and roofing.


20250518_171328.jpg

Having the gate made things easy, as my neighbor has a killer 2 car wood shop that made making trusses easy. But we didn't want to carry them so into the back of the truck to run them between shops.
20250523_172528.jpg


20250524_163241.jpg


Finished with the major work. Now for all the trim work to dress it up. As well as rebuilding one door but we wont talk about that little oopsie.
20250526_201444.jpg


Opening for loft is roughly 6x6 so there is plenty of storage in the shed loft area.
20250524_164358.jpg


Shed being done let me turn my attention to inside the shop....
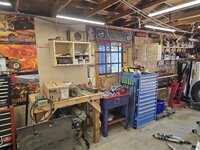
Finished insulating the walls, added OSB where the walls were open, and cleaned/purged/redid everything until I could find my benchtop and not be frustrated when I opened the shop doors.
20250630_180353.jpg
20250701_192107.jpg
20250701_192040.jpg


Much much better... still have some cabinets to build with my neighbors help but it is clean enough to start tearing the buggy down to sell it as my interests have changed. Keeping axles, atlas, and LS for the new project, but the rest of the buggy stuff will be sold off to help fund the new build.

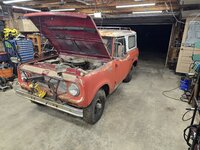
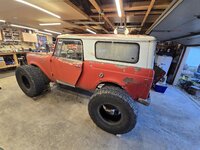
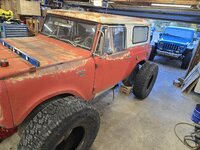
Time for another UA style scout. 66 800, rear quarters are rough since it was a plow truck, rockers arent the best but sliders will go in their place. 42 for fun but end game will be 40s.
d47ffc64-089e-4765-a053-5e3cd43d9dcb.jpg
 
OP
B

bustedcrawler

Well-known member
Joined
Feb 12, 2015
Messages
88
Location
Denver
Trying to stay on top of this both to add since I've learned a lot from reading here and to help keep myself motivated with projects.

Now that things are clean, its time to start working on some smaller summer projects to prep for the scout build.

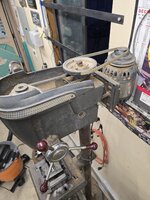
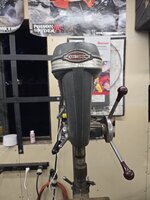
The daytona drill press developed a speed wobble in spindle. So do I sink time and effort into that or go find something else. Not finding anything new i liked and too much scrolling here... I ended up with, what I think is a 1946 Craftsman 100 series floor standing press.
1000020774.jpg


Pretty cool as it had the MSA on it already

1000020773.jpg

Needs some love for sure. Everything is stiff or stuck, feed stop collar is missing, feed return spring is either broke or missing but good bones and runs true as can be... even with a 3500 rpm motor.

Digging around for a motor and parts lead me to picking up a benchtop model. Has the correct 1800 rpm motor, feed stop collar and some good parts, even though overall that one is in really rough shape.
1000020775.jpg


So its time to bust out the electrolysis tank and start the tear downs on those. Make the floor stander into a great press and then the rest of the benchtop will get listed for someone in need of more parts.

Started working on a stand for my swag porta band stand and will post more as I go on that. Between the stand and a few other projects I wanted to step up my fab tools and picked up a few fireball clamps to try. So we'll see how those go.
1000020777.jpg


Hope everyone has a great 4th of July weekend!
 
OP
B

bustedcrawler

Well-known member
Joined
Feb 12, 2015
Messages
88
Location
Denver
When plans fall through and you have a day off of work.... time to keep moving on the reorg of the shop. Trying a new layout to see if I have the feeling of more room and better workflow. It'll be good to have the weld bench between the 220v outlets as one is shared with the compressor and other is only that outlet.
1000021227.jpg


Down to tensioning the belts and wiring in an on/off switch on the craftsman 100 series... Definitely big thanks too 11b aka Jeff's shop. Between the threads here and his youtube channel... that wealth of knowledge made it pretty easy to do the rebuild.
1000021225.jpg

Really impressed with how well Mothers cleaned up the original chrome...
1000021220.jpg
1000021219.jpg


Also snuck in redoing 3 of the window screens. 1 window is missing a frame but that is behind the toolbox and not a window that will be open often.
1000021218.jpg
 
OP
B

bustedcrawler

Well-known member
Joined
Feb 12, 2015
Messages
88
Location
Denver
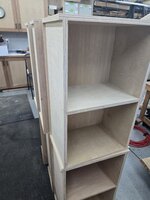
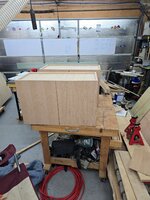
Chasing the neverending quest of being organized and having a better workflow in the shop... decided to build some cabinets. I have a great friend/neighbor who is set up for carpentry work and was willing to help out with this project.

So between his scrap sheet goods, and a couple of new sheets, I have 6 cabinets in the shop. French cleat mounted to make life easier and to take them if I were to move.

After a couple days in his shop... AC for mine is fast moving up the priority list. That is nice. 3 of the 6 cabinets are Red Oak as that is what he had a sheet of as "scrap", and then 3 are sanded Baltic Birch.

20250720_183326.jpg

094b78bd-1c38-4c3c-b513-953d1e23a918.jpg


Don't mind the mess... pulling out the shelves I had to get things mounted wrecked the bench... but couldn't say no to hanging the cleat and the cabinets

20250726_173342.jpg

20250727_091533.jpg


20250727_124642.jpg


20250727_124651.jpg


As my neighbor wants to redo his sheet goods cart and the cabinets kick started his shop purge... he ended up building a pair of spray can holders to help get rid of his leftovers. Super handy and freed up about 4 linear feet of shelf space in my shop doing this.

befa5852-3be2-49f8-bbfa-df73f6a31db4.jpg


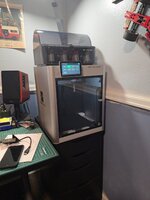
I've been wanting to get back in 3D printing more. I've had a couple Ender 3s, and the current 3 S1 had the hot bed **** out I was at a juncture. Keep pouring money in a project, both of the Enders for me have been projects needing constant attention and parts. Or step up to a newer one that is more of a tool to be used and less of a project to tinker with.

Sipped the Bambu kool-aid... picked up a X1C and couldn't be happier. Night and day difference to the Ender lines and have been cranking out small organization items for my shop and helping to repay my neighbor for his help with a few small prints for his shop. Once the trail filaments are gone, I have PETG and some ASA for car/shop parts where I need some high temp resistance.

9b13bc6f-716b-4fc6-9957-72e53b5e2fe4.jpg
 
OP
B

bustedcrawler

Well-known member
Joined
Feb 12, 2015
Messages
88
Location
Denver
Got the drill press project wrapped up and put it to use. Wired in a duplex outlet with an appliance cord so the drill press and its magnetic light plug in on the machine. Motor was missing the toggle switch it came with so put in a nice machine switch.
1000021628.jpg


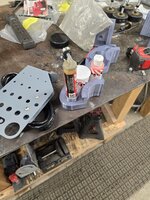
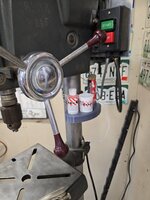
Whipped up a quick cad model and put the Bambu to use making a holder for the Blair wax and Lubricut fluid and wax.

3d printed holder and the TMR drill press organizer.
1000021494.jpg


Final design
1000021629.jpg


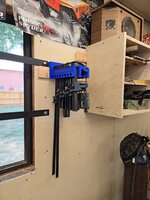
Knocked out a quick F clamp holder print too that I found on Makerworld. Mounts via french cleat.
1000021627.jpg


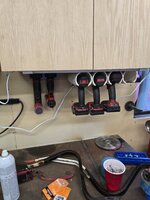
Finally got my holders mounted up and printed a couple M12 holders I found too. Nice to have stuff back where it belongs in easy reach.
1000021630.jpg


Started making handles for the cabinets.... not in love with the mounting plate but 3/16" rod and a 5/32" hole in the wrench is tight enough i cant push in by hand but is a very light press fit in the vise.
1000021637.jpg


And part of the new tools.... Cornwell was doing a pretty good sale, buy a M12 Stubby 3/8 or 1/2 impact and get 2 xc3.0 batteries for free. So bought both.... 1/2 and batteries came in and waiting on the 3/8 now
1000021638.jpg
 

XJSuperman

Well-known member
Joined
Jan 26, 2018
Messages
3,088
Location
Central Iowa
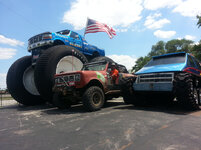
I know this isn't what your shop is about, but since I'm in the thick of tractor show season, this is what came to mind seeing your thread this morning:
hq720.jpg
(crawler and binder)


I like the drawer handle idea. Can you hide the mounting plate inside the drawer? Just leaving the rods coming through and the wrench hanging out.
 
OP
B

bustedcrawler

Well-known member
Joined
Feb 12, 2015
Messages
88
Location
Denver
I know this isn't what your shop is about, but since I'm in the thick of tractor show season, this is what came to mind seeing your thread this morning:
hq720.jpg
(crawler and binder)


I like the drawer handle idea. Can you hide the mounting plate inside the drawer? Just leaving the rods coming through and the wrench hanging out.

I'd love to find one of the small IH Crawlers, for yard art. Same with a binder or other farm equipment. Currently on the hunt for an ore cart and ore bucket, as they will go well with my tram scoop and cover the 3 main ways they moved ore in the old mines out here.


There is room on the inside of the door for the plate. Will need to look into that idea a bit more.
 
OP
B

bustedcrawler

Well-known member
Joined
Feb 12, 2015
Messages
88
Location
Denver
Fallen behind on this as work has been crazy busy again, not as much as last year but close.

Need to grab photos but found a nice simple, clean solution for door pulls... Drill and tap wrenches at 10-24, and use a small standoff to get the wrench away from the door. Let the 3d printer knock out the stand offs and drill guides. Still need to install so I will be able to catch things up.


Went to Sand Hollow with some friends so that meant the MiniVan needed some love. It's good motivation to get things sold and plan for a 2nd vehicle when the scout goes in, as it gets old wrenching on the apron when I have a nice shop.
20251004_130530.jpg


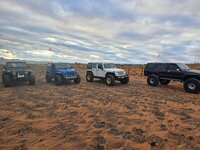
Meet up with a friend in Durango who was taking his new 4dr build out on it's maiden voyage. It flat worked and has a ton of slick little details. Not much taller for being on fresh 40s vs my wore out 35s.
20251008_143615.jpg

Fun times with a good mix of rigs. 2 V6s and 2 LS re-powers. Lots of fun was had by all.

20251011_081806.jpg


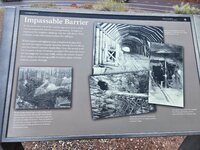
Took the scenic way home through Zion NP....
20251012_083132.jpg

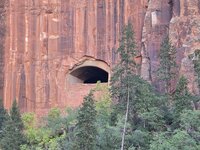
One of the tunnel "windows"
20251012_083144.jpg


Stopped by a good friends house in Grand Junction on the way home from Sand Hollow for some motivation on my project.

20251012_184935.jpg


Been on a bit of a Marketplace hunt for a few goodies...

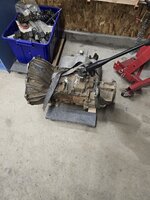
Found an early GM NV4500 for a good price, will be nice to have the 6.34 granny 1st
20250901_195319.jpg


Changed directions and sold the 5.0 Atlas 2, and will be going Magnum/205 combo, so found a chevy 205 and some mock up K5 blazer springs
20251019_100750.jpg
 
OP
B

bustedcrawler

Well-known member
Joined
Feb 12, 2015
Messages
88
Location
Denver
Got back home from SH and put the nose to the grindstone while I have time at home....


Stripped the buggy down to get some of the parts and the full chassis listed for sale.
20251019_101454.jpg

Only got a little sketchy bringing it off the pipe stands onto the home made "cart". Some casters, leftover 1x3x14ga from the fence gate and buddy had some scrap angle iron. Rolls free and will be easy to load for whoever buys it.
20251020_192530.jpg


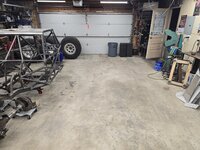
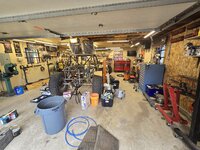
Cleaned a bit more and moved around some of the bigger items to get things ready. Took a moment to realize how big the shop looks when it's "empty"
20251021_201059.jpg


Didn't bask too long in the void of an empty shop. Got the new scout pushed in, as it has no brakes and hadn't run in who knows how long. Best I have found was it was last registered in 1997, so at least since then but could have been more recently as it was a plow truck in the mountains. Bribed some buddies with beer and pizza to lend a hand pushing it in, starting the clean up, and see if it would fire.

Pulled the plow, started the process of pulling the nasty carpet and jute, plywood, and wallpaper interior so it can get a good clean and I can have a good idea of just how rusty the ole rusty bucket it.

While that was going on, I pulled the dipstick and seeing black oil with no gas smell or signs or water... I moved on to turning the engine over and found it was indeed free. So a can of ether was brought up and battery hooked up.... took a couple tries but fired up and sounds relatively smooth. Fuel pump didn't want to pull from a gas can, as I didnt trust the gas in the tank. I'll get a cheap electric pump and see if it will run long enough to make CHP happy to see wipers working at the vin verification. Vacuum operated wipers, so it helps if the engine runs.

20251022_183559.jpg


After enjoying it run and picking up a bit from the mess made, I wheeled the kingpin 60 and lined the pass side perch up with the springs for fun. WMS to WMS on that 60 is almost the same as the scout is wide at the fenders.

20251022_222936.jpg


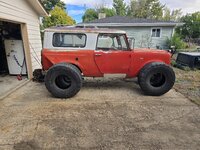
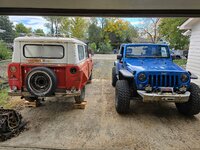
A few weekends ago I got some free mock up 40s from a buddy, and using the 6" cribbing blocks I made for the buggy so it sat at full bump, I figured I'd see what the scout would look. 6" works out the height difference if the only thing that changed was tire size on the scout.

I will remake the cribbing for 8" tall, as I have a feeling I will need about 2" more to make the 40s fit and have room for everything.

20251004_100027.jpg


Compared to the JK on 35s with a 2.5" lift.

20251004_095753.jpg
 
OP
B

bustedcrawler

Well-known member
Joined
Feb 12, 2015
Messages
88
Location
Denver
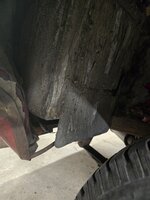
Got a bunch more cleaning done and figured out what the random cut out and bump out at the rear pass side was... Someone scabbed in a rear heater....
20251023_211219.jpg
20251023_211229.jpg


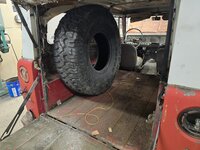
Started checking on where to mount the spare tire. Worth noting since I will run beadlocks, I am only going to mount the tire, no wheel. Lets you use the interior volume of the tire for storage.
20251023_171658.jpg


Mocked up on 9" tall cribbing blocks. Works out to 3" lift and 40s. Don't hate it at all.... top of cab is 6'5" so nice and low.
20251025_173859.jpg
20251025_173917.jpg


Sunday sent the last of the buggy parts down the line as the chassis, seats, and some misc parts got picked up. Lots of room now in the shop. Dont mind my home depot bucket as I had done an oil change on the JK earlier and hadn't fully picked up before the guy showed up to get the chassis.
20251026_095407.jpg
 

zmotorsports

ALLIANCE MEMBER
Joined
Oct 20, 2009
Messages
21,452
Location
Northern Utah
Started checking on where to mount the spare tire. Worth noting since I will run beadlocks, I am only going to mount the tire, no wheel. Lets you use the interior volume of the tire for storage.
20251023_171658.jpg

Just curious if you've every changed a tire on a beadlock wheel on the side of the road or trail? It's not as easy nor convenient as one would think and if you're running with a group, some people may resent the time spent doing the trailside repair and possibly even blocking the trail due to not having a tire mounted up and ready to swap and go. Just throwing that out there from someone who has spent quite a bit of time helping fellow off-roaders in the back country and seen way too many Karens on the trail pissed off because someone is holding them up or blocking the trail.
 
OP
B

bustedcrawler

Well-known member
Joined
Feb 12, 2015
Messages
88
Location
Denver
Just curious if you've every changed a tire on a beadlock wheel on the side of the road or trail? It's not as easy nor convenient as one would think and if you're running with a group, some people may resent the time spent doing the trailside repair and possibly even blocking the trail due to not having a tire mounted up and ready to swap and go. Just throwing that out there from someone who has spent quite a bit of time helping fellow off-roaders in the back country and seen way too many Karens on the trail pissed off because someone is holding them up or blocking the trail.

Yessir, been there and done that with spoons and tools on hand in the truck. It's not ideal but the space gained and weight lost from not having a complete beadlock wheel is a worthy trade off, for me. 17" beadlock is a 45-50# of dead weight, on top of a ~100# 40" tire.

2014 is when I started going without a wheel, and in some cases a spare. It's not for everyone as you need a totally different set-up to be able to handle tire related issues as you loose the easy/simple spare swap, as well as a different mentality about how to approach things.

For me, the most common issues I see and have had, plugs or a glue tread patch can resolve them, even if it is to limp to a town for a new tire.

You are spot on with the Karens and the Credit Card builders who get pissed when they are mildly inconvenienced. I understand where you are coming from and I am still confident in my choice as it is not a choice I've made without a good bit of thought put into it.

I'm very picky about who I go wheeling with and the main group I run with are all like minded. Most of us only have a tire. Other groups, we've been going together long enough they know I am prepared and more often than not I'm the one helping the broken rig and not the broken rig. But yes, others on the trail may and most likely wont understand the choice and will be upset by the inconvenience.
 

zmotorsports

ALLIANCE MEMBER
Joined
Oct 20, 2009
Messages
21,452
Location
Northern Utah
Just thought I'd bring it up, but it sounds like this is your normal setup.

For the vast majority of the time I wheel alone, just the wife and I, so I do carry a full spare as well as a full assortment of tools and some spare parts, however, I've come across people in the past with little to no off-road experience as well as no spare so it's a little frustrating when I'm inconvenienced because of someone else's poor planning coupled with lack of knowledge or skill to self-recover.
 
OP
B

bustedcrawler

Well-known member
Joined
Feb 12, 2015
Messages
88
Location
Denver
Just thought I'd bring it up, but it sounds like this is your normal setup.

For the vast majority of the time I wheel alone, just the wife and I, so I do carry a full spare as well as a full assortment of tools and some spare parts, however, I've come across people in the past with little to no off-road experience as well as no spare so it's a little frustrating when I'm inconvenienced because of someone else's poor planning coupled with lack of knowledge or skill to self-recover.

It's a good point to bring up. It has become my normal over the years and I have adjusted what I carry based on those choices.

I also know you can't make it any more broke, to a degree, and will make sure I limp to an area where I am out of the way so others can get by me. I don't like the pressure of knowing I'm blocking the trail so I'll do what I have to so that I'm out of the way.

All of my wheeling rigs have tool kits set-up specifically for them and only shop tools I take are power tools and a few speciality items like crimpers or the Fluke DMM. Some typical spares are in the rigs as well. I also have a pretty large recovery gear set-up to make sure I am able to self recover. When I go on bigger trips, I usually tear things down and do a lot of pre-work prior to the trip. Wheeling rigs tend to have parts replaced well before end of service life to stack the cards in my favor.

I'm the same way, as most of my wheeling is done solo. I do much more solo than I do with a group and that drives a lot of what I carry and how I am set up. You're spot on, there are a lot of folks out there without a lot of experience or common sense to bring basic equipment or have the knowledge to either self rescue or self repair. I see it a lot and those attitudes are a big part of why I backed out being involved with clubs in my area. Coddling those who weren't prepared and the constant spotting over every little thing.
 
OP
B

bustedcrawler

Well-known member
Joined
Feb 12, 2015
Messages
88
Location
Denver
With the good conversation going on regarding tools and prep for wheeling trips.... this might be a good time to talk about how I carry stuff.

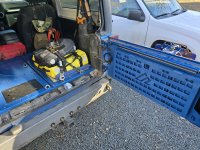
Under driver's seat, from the back is a 30ft strap, and from the front is my winch controller. Passenger seat covers my ARB twin compressor.

Factory cubbies in the back hold spill kit, glue tread, tire plug kit, breaker bar, and other misc items I don't use often. Don't mind the custom art work on the cover panels... price you pay when your friend does the Cerakote paint job for free. Remember kids, nothing is truly free, haha.

20240720_145012.jpg


Red bag is first aid kit, brown back on back of passenger seat is pneumatic accessories, and the hose can be seen on back of passenger seat. The two yellow bags are full, one of recover gear including 2x tree savers, 4x soft shackles, 2x pin shackles, a SARA device, 2x recovery ring setups, and a couple 1" rachet straps. Other yellow bag is tools, wrenches, sockets, rachets, drivers, etc that are jeep specific sizes. I can't help too many others but I can tear the jeep down with that kit. Black bag has all my fluids, tapes, etc. Not shown is the bag with a 100ft winchline extension on it. Hatchet and shovel can be seen on the C-pillar of the factory roll bar.

20250209_151735.jpg


This past weekend, I got had by a market place deal I couldn't refuse.... only catch was needed to run Denver to outside of Milwaukee and back. So with a friend as crazy as I am to make a 15.5hr each way run, we took off around 530pm Friday and got back about 930pm on Sunday.

Really need to add a winch to the trailer but we got the 1963 Scout 80 loaded the hardway with a come along in the sub-zero temps. She's not much to look at... but there is a reason the rear quarters aren't on the rig on the trailer. Typical Wisconsin truck, rusted and hurting, but has a 345/ 4spd/ dana 20, scout 2 dana 44s, and 33s on Jackman Wheels.

20251213_204659.jpg


20251214_100724.jpg


20251214_100806.jpg


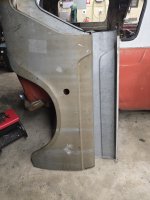
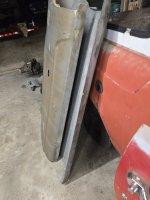
Because they are NOS quarters. These don't come up very often, and the last time I had seen a set come up, they sold for what I am into the truck for. Pure unicorn gold, in metal.

20251215_184259.jpg

20251215_185825.jpg
 

zmotorsports

ALLIANCE MEMBER
Joined
Oct 20, 2009
Messages
21,452
Location
Northern Utah
It's a good point to bring up. It has become my normal over the years and I have adjusted what I carry based on those choices.

I also know you can't make it any more broke, to a degree, and will make sure I limp to an area where I am out of the way so others can get by me. I don't like the pressure of knowing I'm blocking the trail so I'll do what I have to so that I'm out of the way.

All of my wheeling rigs have tool kits set-up specifically for them and only shop tools I take are power tools and a few speciality items like crimpers or the Fluke DMM. Some typical spares are in the rigs as well. I also have a pretty large recovery gear set-up to make sure I am able to self recover. When I go on bigger trips, I usually tear things down and do a lot of pre-work prior to the trip. Wheeling rigs tend to have parts replaced well before end of service life to stack the cards in my favor.

I'm the same way, as most of my wheeling is done solo. I do much more solo than I do with a group and that drives a lot of what I carry and how I am set up. You're spot on, there are a lot of folks out there without a lot of experience or common sense to bring basic equipment or have the knowledge to either self rescue or self repair. I see it a lot and those attitudes are a big part of why I backed out being involved with clubs in my area. Coddling those who weren't prepared and the constant spotting over every little thing.

The wife and I still wheel with our national club that is an RV and Jeep related club where we travel across the country wheeling various areas. It is a national RV club (FMCA) with a secondary chapter specific to off-roading. However, seeing as how my wife and I are still working full-time and most of the members in that club are retired and full-time RV'ers, we only hit one or two events a year as time and our schedules allow. We hope to be able to attend more once we retire.

As for local clubs, we joined a local Jeep club in the Ogden, UT area back in 2017 and quite enjoyed wheeling with them for the first couple of years. They have a monthly run, plus some of us would meet up for a non-club related run once in a while in between the monthly runs. However, in 2020 when every idiot with a checkbook or could sign their name on the dotted line bought a Jeep and joined our local club, I got fed up and dropped out at the end of 2022. Our club had monthly meetings and, in those meetings, held information type seminars and I had actually conducted a few covering very basic maintenance and repair issues that I have seen on the trail and how to prevent them. I also communicated what kinds of very basic tools to carry that could get most people even with minimal skills out of a variety of situations.

Unfortunately, what I found was no one was listening nor cared to even try to be self-reliant. They flogged on their vehicles and then when something broke, they stood back while myself or others jumped in to address the issue. I had even tried to get them to spread their wings and enjoy places that aren't local. My wife and I hosted a trip to Ouray, CO in 2022 during one of our annual trips and all the group wanted to do were short couple hour trails so they could go back to camp or town and drink and be idiots. That was the beginning of the end for me as we went there to wheel and not party. The wife and I went off by ourselves on a couple of the days because the group wanted to do other things than wheel. The final straw for me was during one of our last local trips in 2022 when one of the members insisted on trying an obstacle that his Jeep was neither built for nor did he possess the driving skills to tackle. Unfortunately, he was being encouraged by some of the other idiots in the club and he ended up hopping his Jeep around until he snapped a front U-joint despite my telling him he should back off the obstacle and give it a break.

I backed my Jeep down the canyon to get closer as I carry way more tools than usually necessary in my Jeep and commenced tearing down the front end to remove the axle shaft and get it back together where he could drive out. Partway through the teardown I turned around and the owner of the Jeep was over sitting in his lawn chair bullshitting with others while eating his lunch. Me and one other guy were working on his Jeep and that was the last straw. I was done after that and I figured I didn't need them any longer nor want to be associated with them.


As for tools, I know I carry way more than necessary for most situations, but my Jeep is not only my off-road vehicle, it is my daily driver and my toad that we tow behind our coach so the tools cover both the Jeep and the coach, plus we don't always solely travel dirt, many times it is 50+ miles of pavement before we even get to the trail, so preparation is paramount. Fortunately, most of the trail side repairs thus far have been on other people's vehicles we come across on the trail, but I try to be prepared as much as possible. I won't clutter up your thread with my toolbox or tools as I have posted quite detailed pictures and descriptions on my thread.
 
To avoid these ads, REGISTER NOW!
Top Bottom