To avoid these ads, REGISTER NOW!

Hanging a Gladiator cabinet flush with a doorway

Relax

Well-known member
Joined
Nov 22, 2011
Messages
449
Location
GTA, Ontario
I want to hang a cabinet right next to a doorway (so the cabinet is touching the doorway trim). My measurements show the wall studs are 16" OC, but the first stud (at the doorway) is under the trim. If I install a 48" length of Gear Track, I will catch 3 studs and then there will be 14" span that's unsupported between one stud and the doorway. Is this a problem? Here is a rudimentary drawing to show what I mean:

NfcRDlgg_02cW7xNqBL2yv8oRDSsofThCggJZkFKzCSJidS5bI1Ojk1SF7A7w2MsQZn6GGhViKMpPRhXQKoQMhBot4saXXRzeoJirB0prqiqH-Nmp69iOp0EUYbVsVT3v6IDhXpHEiRGSnni8zsemNY2i0SqnKzrzuK4AMg4QdWfBXekEE5KhNy4pGt1idHWfFLN-vSvF0ScoTIjQMEcVU4a11YGxSBdiMelb95o4ivXVl9mDIs2pgGJczvNH7lSmL5hqDCy_JyDrunzdrx-fZVFZMp5THmlAN3P-w-TBQ8qU3XAftJWulKAsaZzRJjiHmG9Yy_SYF-W2XU2BsoisKVC4i4KKUANvXrxS2Rr6cU5tDab351oROoLasNQW7n_3t26kIjm0pB0Y8RfAUAfkGgdj_5IzsVW8Nk2Vw8jx4TlUM2lzx_oevWtkBMAlbna3xAjfUe59LAEB3K5DlZzGpWG6ux3cdxhj21M_AmqLkOTyd_qTpMS_v0HcPTK9CgIcaVQ4Oj2re08BzuRXHs-sKEbCd_mYrLIKVS44r4oFgGX2LmXCfpUDyN9J2doHGEYbCxEXLwgOg-5a3_hiGS53vttGaLtlJwa3YHep2jHfDhV-Nfj75BlzpW--adwJ9g94RRZCfgJkYvzFnvmQGLKzXur094Lrqlbfzg1q6KDXeQuMUddoMTJ9IEgw1qAksS6e05vu2SRXuhWJ0TCdg=w407-h328-no
 
To avoid these ads, REGISTER NOW!
OP
R

Relax

Well-known member
Joined
Nov 22, 2011
Messages
449
Location
GTA, Ontario
Hmmm, my Google photos album isn't showing for some reason.

EDIT: Nevermind, got it (at least I can see it).
 

Justind97

Well-known member
Joined
Oct 6, 2014
Messages
691
Location
Ottawa, Canada
Each door should have a king post and a jack post. King post being the outer one. It should be close to that 14” mark.

If not, what about cutting the trim away and having the cabinet closer to the door?
 
OP
R

Relax

Well-known member
Joined
Nov 22, 2011
Messages
449
Location
GTA, Ontario
I forgot another part of the question. If the above setup is OK, would I be asking for trouble if I trimmed the track down to 40" and relied on only 2 studs? The cabinet is only rated for a total of 200 pounds. It's actually more of a shelf.

f427bc31daf29fbd39fd6c9e3f06017a.jpg
 
OP
R

Relax

Well-known member
Joined
Nov 22, 2011
Messages
449
Location
GTA, Ontario
Each door should have a king post and a jack post. King post being the outer one. It should be close to that 14” mark.

If not, what about cutting the trim away and having the cabinet closer to the door?

To be completely honest, I'm guessing about the location of the stud nearest the doorway because my stud finder is useless with the extra layer of plywood between the drywall and the studs. I had to use magnets to find the stud centers.

Cutting the trim is not really an option - the garage is mostly finished and it would ruin the look. If this setup won't work, I have a smaller 28" cabinet I can mount there instead, which would still be centered above my parts washer that's against that door.
 

Bluedodge

Well-known member
Joined
Jun 22, 2015
Messages
1,995
Location
Michigan (not the Detroit part)
"...because my stud finder is useless with the extra layer of plywood between the drywall and the studs..."

Are you saying there is plywood behind the drywall?

If so, zap a couple extra screws into the plywood and call it good.
 
OP
R

Relax

Well-known member
Joined
Nov 22, 2011
Messages
449
Location
GTA, Ontario
"...because my stud finder is useless with the extra layer of plywood between the drywall and the studs..."

Are you saying there is plywood behind the drywall?

If so, zap a couple extra screws into the plywood and call it good.

That's the only thing that makes sense. When we were installing the lag bolts for my tire storage racks, my friend tried locating the studs using a small drill bit but at every location we thought there was one, the drill would go through the drywall, hit some resistance at what we thought was the stud, then go right through again. He said some builders add an extra layer of plywood for some reason. The stud finder worked perfectly from inside the house, so we ended up locating them from there. This cabinet is going on a different wall, though.
 

couch67

Well-known member
Joined
Mar 18, 2016
Messages
1,406
Location
Ontario Canada
press an awl or small screwdriver through the drywall where the track will be installed (ideally where you will need to put a screw where you dont think there is a stud. will be easy to tell if you have plywood behind the drywall.
 

homeschool

Well-known member
Joined
Sep 14, 2016
Messages
259
I forgot another part of the question. If the above setup is OK, would I be asking for trouble if I trimmed the track down to 40" and relied on only 2 studs? The cabinet is only rated for a total of 200 pounds. It's actually more of a shelf.

f427bc31daf29fbd39fd6c9e3f06017a.jpg
That's pretty cool, never would have thought to orient it that way. You'll be fine with two studs. Just don't use it for storing bricks.

Sent from my SM-G965U using Tapatalk
 
OP
R

Relax

Well-known member
Joined
Nov 22, 2011
Messages
449
Location
GTA, Ontario
Each door should have a king post and a jack post. King post being the outer one. It should be close to that 14” mark.

OK, now that I understand what you mean, I'm looking at it the other way. The door trim is 3.25" wide. The king and jack posts should be 1.5" each. How thick is a typical pre-hung door frame? If it's at least .75", then the king post would protrude from under the trim by .5". Or if less, I can easily go in diagonally like OccupantRJ suggested. I guess I'm overthinking this?
 

bad_idea

Well-known member
Joined
Jun 11, 2011
Messages
4,335
Location
Pasquotank, NC
Your rough opening for the door should be 2" wider than the finished opening. That's 1" on each side for the door case and some space for shimming. So, your 3.25" trim should be on the studs by 2.25" leaving you 3/4" worth of the king stud to fasten to.

As to your initial question - I think you would be fine with just two studs. Open up your kitchen cabinets and look at how those are fastened. You'll see they do not hit every stud, and dishes get heavy when stacked up.

As far as finding the studs - I like the 'machine gun' method (as my carpenter friend called it). In the area you think the stud is - run a screw. Keep moving the screw over until you hit the stud, then find each side of the stud and mark the center. Then measure the rest. You will have a series of holes punched in the wall, hide that behind the cabinet.
 
To avoid these ads, REGISTER NOW!

jimreed2160

Well-known member
Joined
Aug 7, 2016
Messages
3,589
Location
Tallahassee FL
I like what you are doing with your Gladiator cabinets. I have over a dozen in my shop and really enjoy them. You can check out my thread over in the Gallery.

In your case, I think the two studs would be just fine. There should be enough room on the Gear Track for you to put two screws into each stud. As for the unsupported edge, just pop a screw there into the plywood to keep the Track from pulling away.

Good luck and please post more pictures for us to enjoy.
 
OP
R

Relax

Well-known member
Joined
Nov 22, 2011
Messages
449
Location
GTA, Ontario
That's pretty cool, never would have thought to orient it that way. You'll be fine with two studs. Just don't use it for storing bricks.

That's how it's meant to be mounted - it's not just a standard cabinet on its side. Would love to have a few more, but they're discontinued.

I like what you are doing with your Gladiator cabinets. I have over a dozen in my shop and really enjoy them. You can check out my thread over in the Gallery.

In your case, I think the two studs would be just fine. There should be enough room on the Gear Track for you to put two screws into each stud. As for the unsupported edge, just pop a screw there into the plywood to keep the Track from pulling away.

Good luck and please post more pictures for us to enjoy.

That's just a picture I found on the net, but it's how I intend to use it - mounted above my parts washer as a temporary shelf with oil and cleaning supplies on the shelves. My garage is a mess, but I'll post pics once I get it mounted anyway!
 

Big Dad

Well-known member
Joined
Sep 8, 2006
Messages
2,287
Location
S.E. South Dakota
I just screwed them right into the studs .. if the holes did not meet up, I just made new holes
 

Attachments

  • insidewall.jpg
    insidewall.jpg
    74.5 KB · Views: 101
  • undercabon.jpg
    undercabon.jpg
    93.2 KB · Views: 95
  • undercanon2.jpg
    undercanon2.jpg
    129.7 KB · Views: 97
OP
R

Relax

Well-known member
Joined
Nov 22, 2011
Messages
449
Location
GTA, Ontario
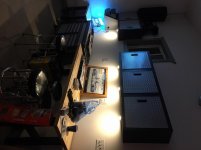
I finally mounted it. There was a stud right next to the door frame (I guess for the light switch?), so everything worked out and I was able to secure the tracks on 4 studs.

YE-XkyUAuCV24O5UstJ6EIJm7CH87XWDEL3d8zJhntfRyG1wqdu8AZ4_4zjjLhIiheVqQiBiqa4QKb6w-7ywIAKEtsw7pk_RKiPSn_czUREgCiZ8VbwaYzArwAAsXWW1-yg5_kUV0-0uJRKr7PMhb2DTS1Z91g9ZLIBejRzbvQpf1jpX_kcCIBYpm3fOYUdrs1WZ0W9BS_1iyiaavmEnkI-B89CvaTMo44btYp9Xtty4xpCUwKaxnLgp3F-F8nvAnnvclCzZYYa8Cgx3rZBqV5yBr947HHnCslysxJPY-M9NByR3ac2xafYTpU9wQEMQaFelUf3pkNHxtl3oERxZkbyhVKATA_GeC-sWicHtJsx5SqfwC45QeLLznBRKj6B-I_URs98J-p4_sYBhvetOYVU2OkkyrDd0ALPQBYrbg0amVVjm_gKr_EKbrsEUh0_ZoOkT79QJ72LpiICajby4U4B12J2mf2YDlp_5Uze4IJY__URN8ZOn8BjN1x-7aswH5-ivQFUEMUxnsrBD38t3B6lFbeR1yL9xr_cfWyZvdeNdm38NLibQ2mA4UNOqjBQ_9kpurHGQ-PIaPVUmkZrjMoEKb6ltsAwyszN9gsCAqlLjOIj1iPbDQHsVPorTUI_HQe5c2aCRqI_wlwdPU2weRfqt-W4GVaYrGwlH2OfLzoA7iII7HmN8YEnp16sH=w1136-h2018-no


Tjgs-QeTjD6OtzhkDpYbe_ACGUl_gVp5tY5C0s3pahkIq8AjcVx9Oku99keLS-44UOwy5iyD441lGE0mEUXNn9yV9ZzLPCGEWdGRL960vxocxqCAKm5u9WI9MJUxjq3W35H5dtrZTO6fSNUZFo7R_ePdqCln-fDjA1I7SR7m361PZK5z1ORLFX_NOYcjVEHlwKopRYowmYmTeh4LLNSbYLTpFzIPkNZ9j5gZpvlfnbJLoLWAHjOhsre7U19YfYHk7xTL8fTRGyLXhOfjr-QTbZdIHAm8Ni4c_tBFqGfcNGuXIlruPP30F42XpDOzvIEKZiEGkxyhfn3aZ66MjynLwv75j7K3fnF9wGEHOGS7HwntuW64qSXHYmS_7GXR8ljkGsN9W5d8gsrohQ_6huc6m20qoLIS3GBTpi1TCnSmS9WIFIlmxfb13MWk267EG96a1RcCbDClfom34vF7ZMQp0nsF_XCSeC1wqRl5rQV3u04_Lmw52holQhe9F4VhYTJiuciHC1rrRfh3SlW_LlSim9h2lYescYrIBVXZuD8Pfj_3EbJWQuQVtsO84Xy-RK3iCo5Xw_2etReBx3vZrRsDF3R7tMWvvGOnAq4czh59_iCH3aSMcOWYBnYC5B-WFhQ-rJWCcYAUgI_uAWWTIkd0XuebGHkCVLVrcSF932uu_vmXRP_Zo6vpi-j83nSC=w1136-h2018-no


KqqR0uI4zkPTYFRIyUcCvHLkJCEleWI2x3ayJz99RmyDtWI5oxG3i0CJwEVH6zVE_ejcFxqg9y1Xr8GalfUh9uth96ShtpCSshdAtgG-SX2EnFj16eWF_eL_bwkqi1ZUtmdxojMp0MRF-vPj6FO-1NSt7iDkd666gZ8dZs4oFEvev_voE7QBOHulsly9P7bYCE4gsyfPyoAxOdNQdl2IEUT4Fj2ivkaLn3VQhD964kbhqVzbB2BckF9Q0ItiI1QoJ3L9kk7zYH7KpCDCK6swV5x4f1uSlDQIpjPgatl6M57mk6yNMC3zQ3L80NnZt29SX_ri132trn-PTRs4Dk29twi8HXUU93tjIS7HlcQUYFBGAb4Zt1GdLMBTywOY3vVRu7uIKrS6VbbV-gXPYZh7JtPfHm3rhiHtH1UxHeKwsutAcYGIrWNJCWTuyB4z-M5nAN_9KuIcF7yzTwk6h9s8_w97WBGC2fL2hawidSbm-bB9DBtrv2Gy6VnBkfoleYkr46PcGNGn6sG9c5th_W4jCRt6NDmWEtiSQGsGXy1ubbOUsl8C0Jn_Y6dn_t30bJ89Dd7AYYVytv0sYg0ZyJCbkcbpikYmEBVLIf0-R40tpCbH02jD3iAOHyu2SztmXFCAMVReByd0zlgTrZ6Yl9-SDB2pdyAkseiKwI5U_1CmdMe0xxDrW1_Fa1LUmt2s=w1514-h2018-no
 

driftpin

Well-known member
Joined
Dec 22, 2016
Messages
11,289
Location
Miami-Dade/Broward Co. Florida
I have a bunch of Gladiator Premier (Whirlpool Corp.) welded wall cabinets and roller floor cabinets. Fortunately for me, my 2-car garage is CBS, I can run tapcons pretty-much anywhere on the back of the cabinet I wish. I use fender washers w/the tapcons, and have 4 screws for each cabinet, in the corners. I also use a 1" X 2" ledger below the bottom edge, cabinets resting upon it. Ain't goin' nowhere!

FYI, I like the Craftsman brackets much-more than the Gladiator ones for holding different tools. The Craftsman have a latch-lock for holding the bracket securely. The Gladiators use friction-fit, they aren't as-well secured, those which I have, frequently shift position when grabbing a tool. Sure, I could drill a hole on the bracket and secure it to the Gear Track, but I don't want to drill a bunch of holes in my Gear Track. Take a look at the Craftsman brackets/tool holders.

Just use screws which penetrate 2" into the 'two-by,' and which have a wide head, or use flat washers w/the screws, and countersink them flush with the surface of the Gear Track. I'd drill pilot holes. Have you tried Spax screws? They work well.

No pics showing.
 
Last edited:
OP
R

Relax

Well-known member
Joined
Nov 22, 2011
Messages
449
Location
GTA, Ontario
Nobody can see the 3 pics in my post?

I finally mounted it. There was a stud right next to the door frame (I guess for the light switch?), so everything worked out and I was able to secure the tracks on 4 studs.

YE-XkyUAuCV24O5UstJ6EIJm7CH87XWDEL3d8zJhntfRyG1wqdu8AZ4_4zjjLhIiheVqQiBiqa4QKb6w-7ywIAKEtsw7pk_RKiPSn_czUREgCiZ8VbwaYzArwAAsXWW1-yg5_kUV0-0uJRKr7PMhb2DTS1Z91g9ZLIBejRzbvQpf1jpX_kcCIBYpm3fOYUdrs1WZ0W9BS_1iyiaavmEnkI-B89CvaTMo44btYp9Xtty4xpCUwKaxnLgp3F-F8nvAnnvclCzZYYa8Cgx3rZBqV5yBr947HHnCslysxJPY-M9NByR3ac2xafYTpU9wQEMQaFelUf3pkNHxtl3oERxZkbyhVKATA_GeC-sWicHtJsx5SqfwC45QeLLznBRKj6B-I_URs98J-p4_sYBhvetOYVU2OkkyrDd0ALPQBYrbg0amVVjm_gKr_EKbrsEUh0_ZoOkT79QJ72LpiICajby4U4B12J2mf2YDlp_5Uze4IJY__URN8ZOn8BjN1x-7aswH5-ivQFUEMUxnsrBD38t3B6lFbeR1yL9xr_cfWyZvdeNdm38NLibQ2mA4UNOqjBQ_9kpurHGQ-PIaPVUmkZrjMoEKb6ltsAwyszN9gsCAqlLjOIj1iPbDQHsVPorTUI_HQe5c2aCRqI_wlwdPU2weRfqt-W4GVaYrGwlH2OfLzoA7iII7HmN8YEnp16sH=w1136-h2018-no


Tjgs-QeTjD6OtzhkDpYbe_ACGUl_gVp5tY5C0s3pahkIq8AjcVx9Oku99keLS-44UOwy5iyD441lGE0mEUXNn9yV9ZzLPCGEWdGRL960vxocxqCAKm5u9WI9MJUxjq3W35H5dtrZTO6fSNUZFo7R_ePdqCln-fDjA1I7SR7m361PZK5z1ORLFX_NOYcjVEHlwKopRYowmYmTeh4LLNSbYLTpFzIPkNZ9j5gZpvlfnbJLoLWAHjOhsre7U19YfYHk7xTL8fTRGyLXhOfjr-QTbZdIHAm8Ni4c_tBFqGfcNGuXIlruPP30F42XpDOzvIEKZiEGkxyhfn3aZ66MjynLwv75j7K3fnF9wGEHOGS7HwntuW64qSXHYmS_7GXR8ljkGsN9W5d8gsrohQ_6huc6m20qoLIS3GBTpi1TCnSmS9WIFIlmxfb13MWk267EG96a1RcCbDClfom34vF7ZMQp0nsF_XCSeC1wqRl5rQV3u04_Lmw52holQhe9F4VhYTJiuciHC1rrRfh3SlW_LlSim9h2lYescYrIBVXZuD8Pfj_3EbJWQuQVtsO84Xy-RK3iCo5Xw_2etReBx3vZrRsDF3R7tMWvvGOnAq4czh59_iCH3aSMcOWYBnYC5B-WFhQ-rJWCcYAUgI_uAWWTIkd0XuebGHkCVLVrcSF932uu_vmXRP_Zo6vpi-j83nSC=w1136-h2018-no


KqqR0uI4zkPTYFRIyUcCvHLkJCEleWI2x3ayJz99RmyDtWI5oxG3i0CJwEVH6zVE_ejcFxqg9y1Xr8GalfUh9uth96ShtpCSshdAtgG-SX2EnFj16eWF_eL_bwkqi1ZUtmdxojMp0MRF-vPj6FO-1NSt7iDkd666gZ8dZs4oFEvev_voE7QBOHulsly9P7bYCE4gsyfPyoAxOdNQdl2IEUT4Fj2ivkaLn3VQhD964kbhqVzbB2BckF9Q0ItiI1QoJ3L9kk7zYH7KpCDCK6swV5x4f1uSlDQIpjPgatl6M57mk6yNMC3zQ3L80NnZt29SX_ri132trn-PTRs4Dk29twi8HXUU93tjIS7HlcQUYFBGAb4Zt1GdLMBTywOY3vVRu7uIKrS6VbbV-gXPYZh7JtPfHm3rhiHtH1UxHeKwsutAcYGIrWNJCWTuyB4z-M5nAN_9KuIcF7yzTwk6h9s8_w97WBGC2fL2hawidSbm-bB9DBtrv2Gy6VnBkfoleYkr46PcGNGn6sG9c5th_W4jCRt6NDmWEtiSQGsGXy1ubbOUsl8C0Jn_Y6dn_t30bJ89Dd7AYYVytv0sYg0ZyJCbkcbpikYmEBVLIf0-R40tpCbH02jD3iAOHyu2SztmXFCAMVReByd0zlgTrZ6Yl9-SDB2pdyAkseiKwI5U_1CmdMe0xxDrW1_Fa1LUmt2s=w1514-h2018-no
 

Fatboy148

Well-known member
Joined
Feb 15, 2017
Messages
999
I use fender washers w/the tapcons, and have 4 screws for each cabinet, in the corners. I also use a 1" X 2" ledger below the bottom edge, cabinets resting upon it. Ain't goin' nowhere!

Just use screws which penetrate 2" into the 'two-by,' and which have a wide head, or use flat washers w/the screws, and countersink them flush with the surface of the Gear Track. I'd drill pilot holes. Have you tried Spax screws? They work well.

This is what I did with my fully assembled, welded Gladiator wall units. I did not use their hanging brackets (the instructions said this was a option). Just like installing kitchen cabinets, I drilled holes in the back of the cabinets, top and bottom where the studs fell. I didn't use screws though, I used 1/4" or 5/16" x 2 1/2" lag bolts (For the record, I have never used lags for my kitchen installs!) with the fender washers to spread the load some. I also drilled and installed #8 x 1/2" machine screws with #8 washers, near the front, top and bottom of each cabinet on each side attaching the cabinets together together. This is a note for anyone considering these cabinets.... I do not like the lip on the bottom in the front. I also wanted to mount some 48" LED lights undercabinet so instead of mounting the lights with machine screws, I cut a piece of 3/4" plywood to fit and laid it in the bottom of the cabinets and used sheet metal screws from the light up into the cabinet and plywood to attach the light. This eliminated 3/4" (about half) of that lip. In order to get the plywood in the cabinet, I had to cut it a little undersized. I cut and laid a piece of heavy tool box drawer liner to cover the plywood and the maybe 1/8" gaps at each side and where I had to cut around the front supports. It came out pretty nice!
 
To avoid these ads, REGISTER NOW!
Top Bottom