To avoid these ads, REGISTER NOW!

Between 485 & 705 SQ/FT Bob Heine's Auto Emporium

Workspaces between 485 and 705 squarefeet.
OP
B

Bob Heine

ALLIANCE MEMBER
Joined
Oct 24, 2009
Messages
10,708
Location
Boca Raton, Florida
Bob looks like your drawers has a hole in them.


Sent from my iPhone using The Garage Journal mobile app
Stewart, I could have sworn I threw out the ones with the holes.
I never tire of looking in Bob's drawers.
I know how Moe feels now. At least Homer and the rest of the Simpsons aren't watching!
attachment.php
 

Attachments

  • Moe from the Simpsons.jpg
    Moe from the Simpsons.jpg
    69.5 KB · Views: 544
To avoid these ads, REGISTER NOW!
OP
B

Bob Heine

ALLIANCE MEMBER
Joined
Oct 24, 2009
Messages
10,708
Location
Boca Raton, Florida
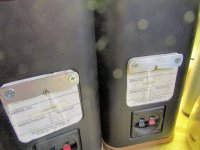
It was time to finish up the Advent speaker project. Made some spacers from some stainless tubing. Ended up making a couple of extras -- I only needed four eyeballed similar sizes.
attachment.php


Now the speakers can hang from a screw.
attachment.php


I seem to have gotten a reprieve. The screw holding the "End Call" button is still working. I guess it's time to do something productive.
 

Attachments

  • Advent Speakers 14.jpg
    Advent Speakers 14.jpg
    80.3 KB · Views: 542
  • Advent Speakers 15.jpg
    Advent Speakers 15.jpg
    79.1 KB · Views: 541
OP
B

Bob Heine

ALLIANCE MEMBER
Joined
Oct 24, 2009
Messages
10,708
Location
Boca Raton, Florida
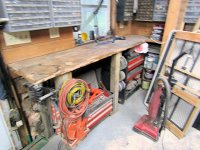
I made a narrow workbench next to the workshop door (probably 20 years ago). It serves multiple purposes with a vise next to the door so I can use it on long pieces. Because I bought the least expensive Swag Off Road Portaband table (only the top, no legs) the vise by the door became its semi-permanent home.
attachment.php


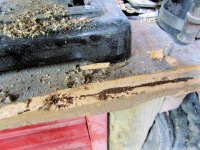
The lumber I used for the top of the bench was either infested with termites or it was their favorite flavor. I knew there was some damage on the left side but now there is damage everywhere. Pushed through the edge to find this in front of the drill press.
attachment.php


The workday was coming to an end but I managed to get a few things moved -- to things with wheels.
attachment.php


I still have to un-bolt the vise, empty the tool chest that's attached to the bench top and un-bolt the receiver that mounts the buffer.
Dry-wood termites have slowly been consuming the top of the bench and I didn't re
 

Attachments

  • Workbench 1.jpg
    Workbench 1.jpg
    138.3 KB · Views: 544
  • Workbench 2.jpg
    Workbench 2.jpg
    121.3 KB · Views: 544
  • Workbench 3.jpg
    Workbench 3.jpg
    120.9 KB · Views: 541
OP
B

Bob Heine

ALLIANCE MEMBER
Joined
Oct 24, 2009
Messages
10,708
Location
Boca Raton, Florida
Bob, so what is the plan of attack moving forward?
Steve, turns out my first job will be to replace the outdoor receptacle where the 10-3 extension cord to the workshop plugs in. Ground fault interrupter tripped today (it has been raining for three days). The outlet is close to 20 years old and I suspect the "weatherproof" box has given up the ghost, along with the receptacle inside.

Once power is restored to the workshop, I'll remove the stuff attached to the top and then remove the two 2"x10" framing lumber. I may change the frame so it is easily removable or maybe even use some casters to make it mobile. The lumber for the top is going to be pressure treated this time.

We have friends visiting so I expect tomorrow to be R&R rather than QST.
Sounds like the best plan is to get Andy, being extra gassy, in there for an hour. lol


Sent from my iPhone using The Garage Journal mobile app
Stewart, that's going to be a really long pipeline.
 

rixtrix1

Well-known member
Joined
Aug 25, 2013
Messages
3,010
Location
Chandler, AZ (from west NE)
Wow, Bob, tons of stuff happening since I last stopped by: Congrats on the family extension, thanks for the how-to on the speaker rings. I have 2 24" high Techniques air suspension speakers, 3" and 12" in each. I got in the '70's when they were in vogue. When our sons were 3&4, I came home one day to find they had pulled the friction fit covers off and picked the foam rings apart in 5,000 little pieces while Trudi was on the phone with her family(1993). A local shop wanted $85 per speaker 2/box to repair them. Since then the walnut boxes have served to raise different sets of stereo speakers and currently surround sound speakers off the floor. Now that I know where to get parts, I'll have a go at repairing them to see if they sound as good as the 3.25" Polk Audio ones we have for our home theater setup. I know they sounded great with my Techniques amp/tuner and turntable( you know I NEVER get rid of ANYTHING!) I currently use the amp/tuner as a pre-amp for the Harmon-Kardon one for the surround sound which enable me to use my OLD turntable. Sorry to see the workbench got eaten up!
 
Last edited:
OP
B

Bob Heine

ALLIANCE MEMBER
Joined
Oct 24, 2009
Messages
10,708
Location
Boca Raton, Florida
Wow, Bob, tons of stuff happening since I last stopped by: Congrats on the family extension, thanks for the how-to on the speaker rings. I have 2 24" high Techniques air suspension speakers, 3" and 12" in each. I got in the '70's when they were in vogue. When our sone were 3&4, I came home one day to find they had pulled the friction fit covers off and picked the foam rings apart in 5,000 little pieces while Trudi was on the phone with her family(1993). A local shop wanted $85 per speaker 2/box to repair them. Since then the walnut boxes have served to raise different sets of stereo speakers and currently surround sound speakers off the floor. Now that I now where to get parts, I'll have a go at repairing them to see if they sound as good as the 3.25" Polk Audio ones we have for our home theater setup. I know they sounded great with my Techniques amp/tuner and turntable( you know I NEVER get rid of ANYTHING!) I currently use the amp/tuner as a pre-amp for the Harmon-Kardon one for the surround sound which enable me to use my OLD turntable. Sorry to see the workbench got eaten up!
Ric, so good of you to stop by. I've been following your S10 resurrection and love that you are autocrossing it. I haven't made a run for 25 years, since our Corvette club disbanded.

I really like saving those old speakers. I think they have a special sound but that may just be my ears getting older.
 
OP
B

Bob Heine

ALLIANCE MEMBER
Joined
Oct 24, 2009
Messages
10,708
Location
Boca Raton, Florida
Well, we went out to a local watering hole for burgers and sides. It has been a long time since we've eaten out and as good as it tasted my gut had a hard time handling it.

At around 2:00 this afternoon I tackled the outlet problem. I was reminded that Florida foliage doesn't take a break in winter. Once I located the outlet I managed to take it apart.
attachment.php


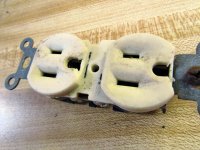
I was hoping the outlet was in terrible shape but it wasn't. The plastic around the ground pin was broken but the metal parts looked OK. A little rust here and there but no obvious failure points.
attachment.php


Well, I proceeded to replace the $0.59 duplex outlet with a heavy duty $5.00 outlet in heavy duty gray. Installed a new waterproof cover and plugged in the 10-3 extension and 14-3 timer/transformer. I still have to drive a new stake to mount the box -- it's just the conduit holding it up at the moment.
attachment.php


Turned the power back on and the GFCI didn't trip. It was 2:45 so I headed to the workshop. Unbolted the vise and receiver and vacuumed up the mess from the termites.
attachment.php


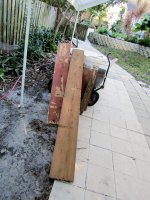
All but two screws came out and those gave up with little reciprocating saw/metal blade persuasion. The infested wood top is out in the yard 10 feet from the workshop, along with a piece of disintegrating tongue & groove wall planking.
attachment.php


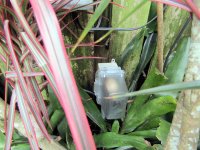
I quit around 5:00 and left my little heater running. Everything was fine until just after sunset, when the side yard lights failed to come on. I realized the problem was in the low voltage transformer so I unplugged it and re-set the GFCI. Yup, that was the problem. The good news is I expected that timer and transformer to fail a couple of years ago and bought one on sale.
attachment.php


I have to bypass the photocell and timer so the separate astronomic timer controls the lights.
 

Attachments

  • Workbench 8.jpg
    Workbench 8.jpg
    130.1 KB · Views: 450
  • Workbench 7.jpg
    Workbench 7.jpg
    110.3 KB · Views: 449
  • Workbench 6.jpg
    Workbench 6.jpg
    122.6 KB · Views: 450
  • Workbench 5.jpg
    Workbench 5.jpg
    89.4 KB · Views: 452
  • Workbench 4.jpg
    Workbench 4.jpg
    86.9 KB · Views: 451
  • Workbench 9.jpg
    Workbench 9.jpg
    113.5 KB · Views: 454

oldironfarmer

Well-known member
Joined
Jun 25, 2016
Messages
6,664
Location
Terlton, Oklahoma
I hope you saved the old outlet for emergency use.:bounce:

Always nice to have supplies on hand. By the way, does Liane tack your cell phone so she can tell when you go to HF?
 

jimreed2160

Well-known member
Joined
Aug 7, 2016
Messages
3,589
Location
Tallahassee FL
Termites in workbench--YIKES! Two reasons not to like them. First, there is the obvious damage. But more importantly, their industriousness makes us all look bad. Looks like you caught it in time. Hope you are able to do some perimeter control.
 

drivesitfar

Well-known member
Joined
Oct 23, 2013
Messages
36,047
Location
Pacific Northwest
Bob: sorry to hear you have termites in your bench top. were they still alive and were you able to kill them? and with what spray or did you just torch the bench in the street?

best of luck with that project which looks like you've almost got it done.

thanks for the reminder about making all my exterior outlets waterproof cause i bought all the parts maybe 6 years ago and I just need to move that to the top of my TO DO LIST.

I also love eating burgers, fries and ice cream, but the side effects keep me from doing that often too.

cheers
 

rubberrodder

Well-known member
Joined
Jul 6, 2007
Messages
616
Location
Tacomatose Wa.
That reminds me... I have to spray "bug-b-gone" stuff around the perimeter of our house and garage. Especially the corner of the house with the big fir tree. Sorry to hear about the bench bugs. Up here we get carpenter ants. {I think.} Their the ones with wings anyway.
 
OP
B

Bob Heine

ALLIANCE MEMBER
Joined
Oct 24, 2009
Messages
10,708
Location
Boca Raton, Florida
Bob it is always a great sense of achievement to get on top of an issue like that.:thumbup:
Hi Steve. I should have been a little more observant. When I installed the Astronomical timers on the outdoor lighting transformers, I had to set the timers to ON. That particular timer was located on top of the transformer with a lid covering/protecting it from rain. I seem to have left the lid up and saturated the transformer in this last bout of rain. The new one has no openings on top so it should be a more permanent fix.
Looking good Bob, happy belated new year! All the best and keep up the great work on the projects.
Hi Sean. Great to see you stop by. I am really eager to see your new house come together, especially the garage.
I hope you saved the old outlet for emergency use.:bounce:

Always nice to have supplies on hand. By the way, does Liane tack your cell phone so she can tell when you go to HF?
Andy, were you watching me? I stood next to the trash can for the longest time before I could get my hand to release the outlet. For most of my adult life I have been purchasing the cheapest outlets sold at the big box stores. Now I splurge and sometimes spend more than a dollar. I know where each and every one of them has been installed and those won't be trashed until I've Vieuxed them more than once.

Between the Internet and stockpiling [[FONT=&quot]hoarding?][/FONT], I rarely have to leave home. I never take the phone with me when I go to Harbor Freight. Actually I rarely take it anywhere. Somehow Liane always knows where I've been and what I've been doing -- it's probably that Chinese tool smell.
Termites, uck. But it's nice to catch in time, I guess. And good call on having a back up timer.
Kirk, thanks for posting, I appreciate it. Because we're so far south, the termites never die. The dry-wood termites are bad but the subterranean termites are worse. Fortunately they need a constant supply of water to make their mud tunnels but once they have that, even pressure treated lumber is lunch. It's why I have to replace fence posts so often.
Termites in workbench--YIKES! Two reasons not to like them. First, there is the obvious damage. But more importantly, their industriousness makes us all look bad. Looks like you caught it in time. Hope you are able to do some perimeter control.
Jim, you got that right. The subterranean termite infestation I had in the garage destroyed the studs on both side walls. The plywood and stucco siding was the only thing keeping the roof up. Those bastards caused that damage in only three years. I'm planning to sheath the inside wall below the benches with 5/8" pressure treated plywood and sheath the outside with 4'x8' Hardie siding. I have some termite stations in the garage attic that I plan to install in the ground around the workshop.
Bob: sorry to hear you have termites in your bench top. were they still alive and were you able to kill them? and with what spray or did you just torch the bench in the street?

best of luck with that project which looks like you've almost got it done.

thanks for the reminder about making all my exterior outlets waterproof cause i bought all the parts maybe 6 years ago and I just need to move that to the top of my TO DO LIST.

I also love eating burgers, fries and ice cream, but the side effects keep me from doing that often too.

cheers
Hi Drives, good to hear from one of this week's Birthday Boys! I came across some live termites in the bench-top a few months ago and injected termiticide foam in their galleries. I don't know if I killed them all but as I pick away at the damage, I haven't come across any more live termites. I used FastOut CS Foam, which is the stuff my Terminix guy uses (https://www.pestmall.com/fastout-cs-foam.html). I have the lumber stacked outside and will cut it up into small pieces for disposal.
attachment.php


I have more work to do, including making this bench more moveable, if not mobile (movable = adjustable feet, mobile = wheels).

I bought better quality outlets and covers for the outdoor locations and I'm hoping that reduces the problems.

In my youth eating vast quantities of hard-to-digest food was necessary to maintain my weight. Now water and air are make me gain weight.
That reminds me... I have to spray "bug-b-gone" stuff around the perimeter of our house and garage. Especially the corner of the house with the big fir tree. Sorry to hear about the bench bugs. Up here we get carpenter ants. {I think.} Their the ones with wings anyway.
Dave, I see you are adding more carpenter ant food to your garage (lean-to for yard equipment). We pay a crew to mow and trim the yard so all we need is a six-foot plastic cabinet for rakes and shovels. The bugs leave it alone but the squirrels or rats like to gnaw on the edges of the roof. I keep the personal grooming stuff (chainsaws and pole-saws) in the workshop.

I noticed lot of the insect sprays won't kill Carpenter (or Fire) Ants.
 

Attachments

  • Workbench 10.jpg
    Workbench 10.jpg
    131.5 KB · Views: 368

jimreed2160

Well-known member
Joined
Aug 7, 2016
Messages
3,589
Location
Tallahassee FL
Bob, take a look at the rolling toolbox bottom workbenches. I have five or six in my garage and they really make nice worktables. The drawers are more efficient at storage than shelves. And last I heard, the Boca termites have not figured out how to live on a steel diet.
 
OP
B

Bob Heine

ALLIANCE MEMBER
Joined
Oct 24, 2009
Messages
10,708
Location
Boca Raton, Florida
Bob, take a look at the rolling toolbox bottom workbenches. I have five or six in my garage and they really make nice worktables. The drawers are more efficient at storage than shelves. And last I heard, the Boca termites have not figured out how to live on a steel diet.
Jim, that's an excellent idea. I have shrunk the 18-foot by 12-foot workshop by lining all four walls with workbenches. The damaged one has a rolling toolbox bottom under it, along with a hanging mid-box and the top chest from the roller. I think I'm going to make the roller easier to extract so I can use it as a work surface. I have already tested the concept and it turns out I have terminal FSD. Anything I put on it adds to the stack and something falls off.

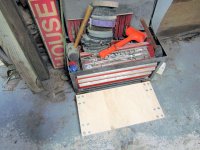
As a first step, I needed to get that top chest moved out of the way. A leftover from the router and saw cabinet projects is close enough for Florida Government work.
attachment.php


This is the first time in more than a decade that I'll be able to move this top chest.
attachment.php


Another stationary item gets its wheels. I'm liking this a lot.
attachment.php


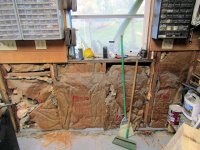
After I swept the floor it was time to remove the ledger board and toss it in the termite hotel pile. Well, it turns out I have a couple of 2"x6" studs that are Termite Tower hotels -- that's termite turds in the wood pile.
attachment.php


I see another scope creep project in my future. Heck, I was planning to replace the T-11 siding with Hardie panels anyway.
 

Attachments

  • Workbench 14.jpg
    Workbench 14.jpg
    119.8 KB · Views: 274
  • Workbench 13.jpg
    Workbench 13.jpg
    98.3 KB · Views: 274
  • Workbench 12.jpg
    Workbench 12.jpg
    102.9 KB · Views: 272
  • Workbench 11.jpg
    Workbench 11.jpg
    117.3 KB · Views: 273

sawduststeve

Well-known member
Joined
Oct 7, 2016
Messages
2,139
Location
Havering-Atte-Bower,London/Essex boarders, England
Bob, you were doing so well with your "To Do" list, but now you just seem to be adding to it. .If it wasn't so hot where you are you are might have had some carpets to sweep it under. :lol_hitti
I've got to Hardi Plank a little shed this year, no wood eaters just plenty of wet rot.

Good work so far, keep on keeping on.:thumbup:

Steve:beer:
 
To avoid these ads, REGISTER NOW!

drivesitfar

Well-known member
Joined
Oct 23, 2013
Messages
36,047
Location
Pacific Northwest
Bob: seems like you are chasing TERMITES like I've been chasing small and big ants here at my home. I haven't stayed at a Holiday Inn lately or maybe at all so pretty sure i'm not qualified to give you any TERMITE EXTERMINATION TIPS, but I will send you some LUCK.

looks like you are getting at the problem with all your removal and guessing a new and improved bench is in your future.

do you burn the termites old wood or do tell?

cheers
 

Vieux

Well-known member
Joined
Jan 31, 2014
Messages
2,531
Location
Russia
Yes, you have a lot to do in the future. But such is life-graduated one thing deal, begins the next and so around the circle...
 

slimpickins

Well-known member
Joined
Mar 27, 2011
Messages
2,404
Location
Canada
Bob,
We don't have termites up here in Canada. They don't like the cold! You could move up here! Of course you'd have to buy a few extra warm coats and a toque! :lol_hitti

I have lots of useful ideas eh?
Cheers!
 
OP
B

Bob Heine

ALLIANCE MEMBER
Joined
Oct 24, 2009
Messages
10,708
Location
Boca Raton, Florida
I thought I just started this thread but I seem to have lost three years somewhere. And now I learn from Andy that 10% of this year is gone. If I don't pick up the pace I'm going to be wondering where 100% of this year has gone.

Bob, you were doing so well with your "To Do" list, but now you just seem to be adding to it. .If it wasn't so hot where you are you are might have had some carpets to sweep it under. :lol_hitti
I've got to Hardi Plank a little shed this year, no wood eaters just plenty of wet rot.

Good work so far, keep on keeping on.:thumbup:

Steve:beer:
Steve, the first item on my "To Do" list is to "Make a To Do List" but I have so many projects started that I can't find the time (see above comment).

I think the second item on the list is to buy some carpet.

The wet/dry rot problem is with us as well. We had about 7-inches of rain last week and I noticed the north side of the house is turning green. I am pretty sure the Texture-111 siding is going to be easy to remove from the shed, based on how much dry rot I'm seeing.
Damn Bob, I need to hire you to do my place. I know I can’t afford you. LOL
Gerard, I work for less than minimum wage but you'll have to pay my mileage and I charge $1.25 an hour from the time I leave home until I return. Current IRS rate is $0.58 a mile so the 526 mile commute would be $305.08. With door-to-door round trip drive time projected to be 7-hours and 50 minutes, I would have 10-minutes to devote to actual work. Wait, I forgot about the lunch break. Hmmm, you might be right about not being able to afford me.
Bob: seems like you are chasing TERMITES like I've been chasing small and big ants here at my home. I haven't stayed at a Holiday Inn lately or maybe at all so pretty sure i'm not qualified to give you any TERMITE EXTERMINATION TIPS, but I will send you some LUCK.

looks like you are getting at the problem with all your removal and guessing a new and improved bench is in your future.

do you burn the termites old wood or do tell?

cheers
Drives, thanks for sending me some luck but what kind are you sending? If it includes snow and ice, I already have more than I need (NONE).

My life is currently on hold because our elderly Pug (Ellie) has some "to be determined" health issues. X-rays indicate something suspicious (pneumonia or a tumor) that is going to require more medication and tests. We are prepared for bad news but if it can be fixed with money, we'll happily splurge with our children's inheritance.

I don't burn much wood because we don't have a fireplace and standing next to a hot barrel when it's in the 80s isn't on my To Do List. I just cut it up into kitchen trash bag size pieces and donate it to the landfill.
Yes, you have a lot to do in the future. But such is life-graduated one thing deal, begins the next and so around the circle...
Vieux, you are so right. I am happy to still be able to help these little projects graduate and make room for the next. It was quite funny to watch me turn to the missing workbench and its tools to perform a task. Even funnier to see me turn to the other workbenches that are made useless with stacks of those tools.
Are you glad termites don't eat plastic?
Andy, I base lots of decisions on termite menus.
Bob,
We don't have termites up here in Canada. They don't like the cold! You could move up here! Of course you'd have to buy a few extra warm coats and a toque! :lol_hitti

I have lots of useful ideas eh?
Cheers!
Slim, I would happily move to Canada but that would involve alimony, which would mean Naked Time! Nobody wants to see that.
 
OP
B

Bob Heine

ALLIANCE MEMBER
Joined
Oct 24, 2009
Messages
10,708
Location
Boca Raton, Florida
Good luck with the termite eviction. Hope they did not use Termite Tower Arms as a route to Rafter City.
Jim, I'm with you! They seem to have feasted on the bench top two pine studs and the pine T&G directly above the bench. I know there are pine rafter ties but most of the structure is redwood from packing crates the previous owner of the house got his hands on.
 
OP
B

Bob Heine

ALLIANCE MEMBER
Joined
Oct 24, 2009
Messages
10,708
Location
Boca Raton, Florida
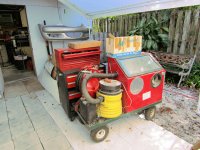
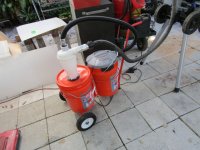
Spent a few minutes working in the shed (in its current condition it isn't much of a workshop). I am going through vacuum cleaner filter bags pretty fast so I decided it was time for a better approach. I have enough projects so this is just assembly of parts. I bought a 5-gallon bucket cart and it arrived yesterday. Pretty simple -- three nuts and bolts, two wheels and hubcaps.
attachment.php


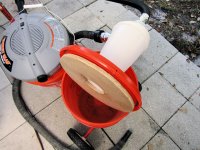
I splurged on two brand new Home Depot 5-gallon buckets, one lid and "Bucket Head" wet/dry vacuum. I purchased the cyclone clone a while back so that went on the lid of the second bucket.
attachment.php


The lid is pretty flimsy so I added a piece of plywood to stiffen it up. Seems to work pretty well,
attachment.php


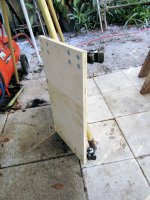
With the carport in place I feel comfortable moving stuff out of the shed, freeing up some working space. I have managed to remove the four drawers from the intermediate chest, take the chest out from under the bench and set it on the bottom chest (it's a JC Penny :dunno:). I am really proud of myself for not spilling a single tool from the drawers in the process.
attachment.php


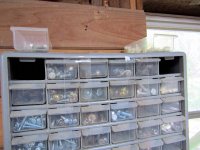
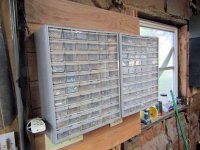
I know I am going to regret this but I removed the parts bins from the wall with all the parts still in the drawers.
attachment.php


These are plastic cabinets so I have been expecting them to drop to the floor any day now. I may have to do a little work on them to extend their life. I discovered the mounting screws were pretty tight so I un-taped the first and last rows to loosen the screws.
attachment.php


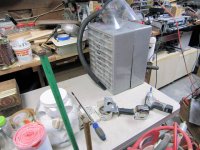
I got both cabinets off the wall and sitting on the table.

attachment.php
 

Attachments

  • Workbench 20.jpg
    Workbench 20.jpg
    112 KB · Views: 315
  • Workbench 19.jpg
    Workbench 19.jpg
    95.1 KB · Views: 310
  • Workbench 18.jpg
    Workbench 18.jpg
    104.3 KB · Views: 311
  • Workbench 17.jpg
    Workbench 17.jpg
    120.8 KB · Views: 312
  • Workbench 16.jpg
    Workbench 16.jpg
    94.2 KB · Views: 315
  • Workbench 15b.jpg
    Workbench 15b.jpg
    119 KB · Views: 316
  • Workbench 15a.jpg
    Workbench 15a.jpg
    71.8 KB · Views: 313
OP
B

Bob Heine

ALLIANCE MEMBER
Joined
Oct 24, 2009
Messages
10,708
Location
Boca Raton, Florida
Great work! The termites are really getting you busy...
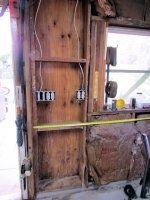
Thank you Andy. When I bought this place in 1996 the shed wasn't finished and the building permit had run out. I paid for a new permit and finished the things needed to close it out. The studs are not even close to standard, with 20-, 22- and 25-inches on center. Rather than tear out the studs I just covered up the worst of it and put the workshop to use. Now that I have to repair the termite damage I am going to try to straighten it out a bit and may even install some more electrical. I don't know why the bay next to the door has the extra cross pieces (fire stops?) but those are going to go and the window will get standard framing. I was dumbfounded when I saw it so I just filled the voids with foam and installed R-19 fiberglass batts in the main bays.
attachment.php


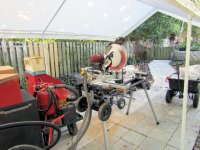
All of the damaged wood is being cut up into short pieces and tossed in the curbside container. That HF 12-inch miter saw makes quick work of it. Unfortunately it is a heavy beast and not fun to set up. I'm really liking the cloth carport.
attachment.php
 

Attachments

  • Workbench 21.jpg
    Workbench 21.jpg
    95.9 KB · Views: 307
  • Workbench 22.jpg
    Workbench 22.jpg
    114.9 KB · Views: 310

bolensboneyard

Well-known member
Joined
Nov 22, 2013
Messages
3,074
Location
South East
I like the bucket cart and; a bucket vacuum? Did you get that at the HD also? Looks like a great thing for a wood shop. Bob you amaze me with your ability to find new ways to spice up a shop. How about a vacuum bucket after burner made with the weed torch so you can **** up the termites and blow them (to H---), into the furnace, at the same time. Caution, do not place the flame end inside the garage while in operation, and do not use alcohol operating machinery. May be a good idea not to let the neighbors know you have it either.
 

drivesitfar

Well-known member
Joined
Oct 23, 2013
Messages
36,047
Location
Pacific Northwest
Bob: not sure if you have the room or like this idea, but several members have built their miter saws into their benches which might be something you could do and then you'd have yours out of that covered area that you could use for something else even though it looks like a good set up now.

also have you found any live termites yet or just their trails and damage?

also don't feel like the lone ranger having to tear up things you built or repaired 20+ years ago cause as soon as my deck is snow free (or sometime soon after) i'm tearing it apart and wish I would have used screws and not listened to my bride who for some reason wanted me to nail it down.

have a great day in the perfect weather in your part of the world while I get ready for another snow storm.

cheers
 

Attachments

  • bench with 2 miter saws built in it.jpg
    bench with 2 miter saws built in it.jpg
    40.9 KB · Views: 38
  • featured-image-GP-ultimate-miter-saw-station.jpg
    featured-image-GP-ultimate-miter-saw-station.jpg
    106.7 KB · Views: 37
  • miter saw cart with wings.jpg
    miter saw cart with wings.jpg
    72.1 KB · Views: 39

driftpin

Well-known member
Joined
Dec 22, 2016
Messages
11,301
Location
Miami-Dade/Broward Co. Florida
Bob, glad to hear your monitoring of Ellie has allowed you to hopefully nip the issue in the bud. I hear you about "spending the children's inheritance." Specialized health care can be expensive, whatever the species.

We've had two canines with CA issues over-time, and I don't regret for one second the cumulative 'into five figures' costs of care. Fortunately we were both working at the time, and had the discretionary income to do the right thing for our canines. Now in retirement, if the need arises again, it's just another budget item, as our 'quality of health' is directly related to the health of our great little companion.

The first-time we took our shetland sheepdog into the vet, and got the referral to the canine oncologist, the oncologist told us, "it's an expensive process." I said, "it's like buying a used Toyota," when we were digesting the cost of the treatment.

The next time we returned to the oncologist for the current furry fellow needing care, I reminded the doctor of our reasoning for the cost of being similar to buying a used Toyota. She responded, "I'm afraid this is going to-be a step-up in cost, to a Lexus!" Actually the cost wasn't as-bad as that, but the care is definitely expensive. I hope Ellie gets-out the door with less-invasive procedures, and lower costs.

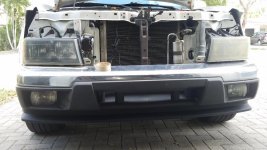
Since you like to wrench-on the vehicles, I'm gonna show a fix I decided to make, I wish I'd done-it a long time-ago! I have a '09 GMC pick-up I bought new, and over-time, the headlights developed cataracts. I put it-off, doing the sanding, until I finally decided, "time to fix it or to buy replacements." While it would be easy to go through Rock Auto for replacements, as I did with my wife's Camry, after one go-round sanding them, and when they got foggy-again, I just bought new aftermarket; I decided to once-again use the 3M kit I had for the first Camry headlight 'intervention.'

The sanding disc in the 3M kit is probably-about 3" and after using it for awhile, I decided I had better uses for my time. I broke-out my D-A pneumatic sander, and a 600 wet-or-dry, and resumed. Much-better! I continually wiped-off the residue frequently, and soon switched to an 800 grit. After I got done with that, I could actually see through the lens, and in an A-B comparison with the untreated lens, I felt-like one of those infomercial guys, touting the miracle product he's selling: "just look-at that transparency, folks!" Sand it and forget it!"

I did the opposite side and while it's not-done, it's much, much better than it was. I have to visit the body supply store to get some 1000 and 1600 grit wet-or-dry pads for the D-A, and once I use them, I'll try a polishing compound on a foam pad, the foam pad I'll make a trip to Harbor Freight, and pick a free gift for my troubles.

The dog was out of the Science Diet food/kibble, so last night after it got dark, I went to Pet Supermarket. As I turned out of the driveway, I saw light in-front of my vehicle again! I hadn't realized how-much the haze of the headlight lenses had affected my night-time vision. I had recently been thinking, "man, I'm not seeing so-well at-night, I've gotta get to the opthalmologist for a new-pair of glasses!" That, or sand-down your headlight lenses. When you take a look at the before/after, you'll see (again, as I did!)

Driving-around as I had been it was like having one headlight out, or worse. I still have-to finish things, but at-least I have my nighttime illumination nearly-back to normal.

I also replaced a failed relay for my WOLO airhorn, which had stuck on, creating an exciting minute in traffic, until the fuse popped. It spontaneously stuck 'on,' leaving me in the middle of the road, with drivers giving me the stinkeye at my continually-blaring horn. You need a good horn in south Florida, if-only to alert the texting driver drifting into your lane to get-off facebook, stop vaping, and pay-attention to the SUV's path before we "meet by-accident."
 

Attachments

  • GMC headlight fix.jpeg
    GMC headlight fix.jpeg
    106.4 KB · Views: 43

driftpin

Well-known member
Joined
Dec 22, 2016
Messages
11,301
Location
Miami-Dade/Broward Co. Florida
An addendum:
About a month ago I had to replace one of the driving lamp lightbulbs, which I did from underneath the front bumper. Last week, the other driving lamp lightbulb failed, so I had another contortionist work job under the bumper ahead of me. But since I already had the grille off, I merely removed two 10 mm hex head machine screws for the headlight shell, and did the driving lamp bulb replacement from above-deck, while sitting in my comfy Harbor Freight stool. Quicker, easier, and no lying underneath the truck.

I looked up the auto body supply chain store by me since their closest branch closed, & will get my wet-or-dry D-A discs today to finish the headlights.
 
Last edited:

jimreed2160

Well-known member
Joined
Aug 7, 2016
Messages
3,589
Location
Tallahassee FL
Drift--Great job on the lights. But I have a few questions about technique. Just could not seem to grasp it all in your brief post. It would help if you could come north and demonstrate. As a matter of fact, I have a good candidate for you. I am sure you could clear a few things up.
 

shortykorte

Well-known member
Joined
Sep 1, 2014
Messages
8,039
Location
Tallahassee, Fl
Drift--Great job on the lights. But I have a few questions about technique. Just could not seem to grasp it all in your brief post. It would help if you could come north and demonstrate. As a matter of fact, I have a good candidate for you. I am sure you could clear a few things up.


Definitely, please visit us and give a hands-on seminar. FYI-We have Ford and Chevy plastic. Lol.


Sent from my iPhone using The Garage Journal mobile app
 

driftpin

Well-known member
Joined
Dec 22, 2016
Messages
11,301
Location
Miami-Dade/Broward Co. Florida
Ah, you-guys! If I can do-it, you can, too! The #1 suggestion I have is to forget that ridiculous small sanding pad in the 3M kit, and just use something with surface area, like my elderly pneumatic D-A sander. As I mentioned, continually wiping-off the sanding pad from the accumulated residue will help to keep-cutting, and will greatly-shorten your time for the job, I used paper towels.

I thought I should go-to the auto body supply store for some finer grit paper than the 800 wet-or-dry I stopped-with. The counter guy suggested that I just use polishing compound now, that I didn't need to sand things any more, and to consider using some clear after being done with the polishing. I suggested lacquer as the clear, and he said that would work. he also said that whatever clear I used would probably eventually yellow, requiring another go-round with sanding. So, I think I'll stop with the sanding, buy a cheap Harbor Freight foam head for my D-A, and polish the lenses. After that, I'll see how I want to proceed. I looked at Rock Auto pricing for aftermarket headlamps, and they weren't too-expensive, <$100 before shipping, the pair.

I think there's some wipe-on treatment to provide some UV protection, but I assume the duration of the treatment lasting and being effective is inversely-proportional to the ease of use. I looked online, and 3M, Meguiar's, Turtle Wax and others all carry some sort of wipe-on or spray treatment, so I expect that you can get this from your local auto parts store, or Walmart.
 

gilr

Well-known member
Joined
Jul 26, 2008
Messages
297
Location
Richmond, VA
I have a friend in Richmond, VA that sands the lens just as you suggest, with a DA sander using 600 to 800 grit paper (depending on how cloudy the lamp is) and then sprays it with automotive clear, and I've seen lamps he did over 5 years ago and they still look like new. Much better than polishing and lasts much longer.

Gil
 
To avoid these ads, REGISTER NOW!
Top Bottom