So as this project drags on and Lara and I are set to head to Austin in a week... less than a week, I'm getting more and more frustrated with how long it's taking.
So the base cabinet is almost done.
I decide to make the tops the same size as the bases. I could have done two 8' long ones and then a 4' but Lara thought it would make more sense to do them the same and I couldn't think of any reason not to. I cut the ends to match the wall and then overlaid the middle panel onto of the last one and scribed a cut line.
Since I posted that less than flattering photo of Lara last week I'll post her shot of me this week. I'm using the compass to get the measure of the amount of overhang I have and that I'll need to take off the back.
I drag the compass over the 20' of counter top to establish a cut line that will follow the wall's not exactly flat profile.
And Lara got this shot of me using the reciprocating saw to remove the back edge.
I used Domino's to both align the front edge and the tops but I also used some pocket screws underneath on the center panel to pull the boards together.
The boards still needed a sanding to get them perfectly smooth but then we did a final coat of poly on the cabinet doors and top.
The detail that I was going for was two angled edges that are rounded over with that router bit from earlier. You can reach in and grab the top edge - it's intuitive and I like seeing the edge of the plywood. It feels midcentury to me. Actually it feels like a 70's classroom right now. Which doesn't bother me. It's sentimental.
Next I taped up an aspirational tv box - we have an old 55" tv that was given to us but this represents a 65" tv which is about as big as we could/should go with it. The other bits of tape map out the studs on the wall.
So at this point I had an epiphany of sorts. I loved the look of the long stretch of cabinets. It made the room seem really large and long. The original idea was bookcases that went across the room at just under the window level and were backed with 6mm plywood. I had an idea to do a single "box" on either side of the tv to keep the majority of the white wall. Jwoo shot that down instantly - she hated the idea of floating boxes. Not sure why but I decided I didn't like the idea of the bookcases just as much at this point. My plan had been to back the bookcases and I considered making them without backs to preserve some of the white wall but I didn't like that either.
The compromise was floating shelves.
I'm always amazed at how strong the torsion boxes are that I made as the wings for the Kapex chop saw. Actually the counter that the torsion box is sitting on in that shot above - they've held a ton of weight.
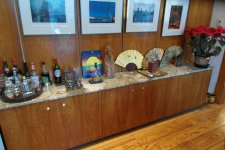
I like floating shelves and my first experience with them was ones that I bought from Ikea. Like everything I buy at Ikea I love it at first and am utterly disappointed after any use whatsoever. My fan collection sits on Ikea floating shelves...
And while they're still functioning they have a decided sag to them as if they're slowly peeling off the wall. They use a metal bracket that has some tubes extending out and the shelf rides on them but it's weak - there's no real mechanical "lock" to them. It's rickety and while it
has held I've never had much confidence in it.
So this torsion box I wanted to make strong. Really strong. There's no "sagulator" calculator for torsion boxes. I'm not worried about the actual shelf sagging in it's length - that would be nearly impossible because the vertical edges and interior blocks act like "I" beams and the glue used ties it into a massively strong box. Torsion boxes don't flex. At all.
In researching the idea of torsion box shelves it seemed the best method for fastening them was to make a cleat of the exact dimensions of the interior that the shelf would fit snugly onto and you'd then drill and screw the top edge through the skin (in this case 6mm baltic birch) and into the cleat which is screwed into studs. The shelf here is not screwed on yet. Just friction holds it.
While I was typing this the cat jumped onto the shelf - then the window and then back down onto the shelf. It didn't budge and there's nothing holding it but the fit.
The only thing was that I considered recessing the tops so you wouldn't see the plywood edges but decided that I wanted them to show as a detail. Now looking at them it seems - sort of chintzy.
We decide we have a bunch of scrap and should make a quick box with some different treatments on the edges to see if that helps.
I was telling Lara how pin nailers, how we're holding the boxes together as we glue them, can just get a wild hair and shoot out any direction. Be careful with pin nailers.
We clean off the router table and try a few different rounding bits to see if they help the edges. I don't know anyone who doesn't smile the first time they round over corners with a roundover bit on a router table. It feels like cheating - a perfect edge in nothing flat. Or curved. Depends on the bit.
Lara sands the test piece and we consider the options.
And then call it a night.
Gregor