To avoid these ads, REGISTER NOW!

ZMotorsports Shop Projects 2.0

To avoid these ads, REGISTER NOW!
OP
Z

zmotorsports

ALLIANCE MEMBER
Joined
Oct 20, 2009
Messages
21,476
Location
Northern Utah
Excellent work Mike, she's coming along nicely.

Thanks Paco.

I didn't get as much done over the weekend on it as I had hoped. My son and future daughter in law found a living room set that they really liked last week. My wife and I told them we would get them a living room set or bedroom set for their wedding and after they told us Friday night they found "the one" they really liked we went Saturday morning and picked it up for them. I didn't get out to the shop until late Saturday afternoon and then only got a little bit of work done on his truck.
 
OP
Z

zmotorsports

ALLIANCE MEMBER
Joined
Oct 20, 2009
Messages
21,476
Location
Northern Utah
A few pictures from Saturday afternoons work.

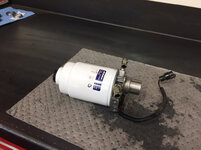
Rebuilt the filter head assembly.
c3a224cae66c7c38a68a39b9362f7232.jpg

Rebuilt and prepped for reinstallation along with new fuel lines at the ready.
6df630a16eb000cbcd7cceefd1109d62.jpg

While I was reassembling the truck I noticed that many of the wire trunks had the split loom damaged from either age or heat so I opted to replace quite a bit of the split loom.
0b827cd34a5c5ce9cd6b2aa52ba4b7a9.jpg

I’m nearing completion and on the home stretch. Again, the little details are what take time but in my experience are also what separate the levels of workmanship and the pride that goes along with knowing the job was done properly vs. just completed and running.

Thanks for looking.
 

Attachments

  • c3a224cae66c7c38a68a39b9362f7232.jpg
    c3a224cae66c7c38a68a39b9362f7232.jpg
    813.3 KB · Views: 0
  • 6df630a16eb000cbcd7cceefd1109d62.jpg
    6df630a16eb000cbcd7cceefd1109d62.jpg
    662.1 KB · Views: 0
  • 0b827cd34a5c5ce9cd6b2aa52ba4b7a9.jpg
    0b827cd34a5c5ce9cd6b2aa52ba4b7a9.jpg
    791.4 KB · Views: 0

fnieto

Well-known member
Joined
Aug 27, 2013
Messages
1,401
Location
Tucson,Arizona
Thanks Paco.

I didn't get as much done over the weekend on it as I had hoped. My son and future daughter in law found a living room set that they really liked last week. My wife and I told them we would get them a living room set or bedroom set for their wedding and after they told us Friday night they found "the one" they really liked we went Saturday morning and picked it up for them. I didn't get out to the shop until late Saturday afternoon and then only got a little bit of work done on his truck.

Priorities my brother. Exciting times for your family.The Dmax will still be there in the morning, besides, you make impressive headway once you start rolling.

I recently rebuilt my filter head as well. Fun Fact, I used Napa's Sil-Glyde on the O-rings as well. I've been using that stuff for a loooong time. I use a thin film on the inside of radiator hose at the connections and they come right off years later. Luv that stuff.
Have you considered replacing that vent cap with a brass T-valve and small tube to keep fuel from making a mess when purging the air? I run an 18" section of poly tube zipped tied to the wheel well. A small jar can be rested on the upper control arm to catch the fuel during purging. Ace should have the necessary fitting and valve as well as the poly tube. Worth mentioning anyway.

Excellent work as always my friend.
 
OP
Z

zmotorsports

ALLIANCE MEMBER
Joined
Oct 20, 2009
Messages
21,476
Location
Northern Utah
Thank you Paco. I’ve considered adding the T-valve after seeing yours but just haven’t had time.
Thanks again for following along.


Sent from my iPhone using Garage Journal
 
OP
Z

zmotorsports

ALLIANCE MEMBER
Joined
Oct 20, 2009
Messages
21,476
Location
Northern Utah
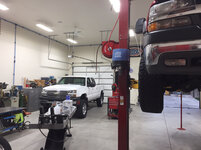
We finished up my son’s Duramax tonight and swapped places in the shop so we could get it on the lift. We have done steering upgrades on it to do and change the engine oil after having it open this past week.

d39ede43e73a4637017a6fa94422ab5e.jpg

40c637ac5625c41db54ae5daf019e32b.jpg

f76517fdabfce1f9fff0e62066e0a6c3.jpg

f67e28c2d94359a6a7f4999a60def776.jpg

Thanks for looking.
 

Attachments

  • f67e28c2d94359a6a7f4999a60def776.jpg
    f67e28c2d94359a6a7f4999a60def776.jpg
    690.3 KB · Views: 0
  • d39ede43e73a4637017a6fa94422ab5e.jpg
    d39ede43e73a4637017a6fa94422ab5e.jpg
    805.3 KB · Views: 0
  • 40c637ac5625c41db54ae5daf019e32b.jpg
    40c637ac5625c41db54ae5daf019e32b.jpg
    840.1 KB · Views: 0
  • f76517fdabfce1f9fff0e62066e0a6c3.jpg
    f76517fdabfce1f9fff0e62066e0a6c3.jpg
    731.7 KB · Views: 0
Last edited:
OP
Z

zmotorsports

ALLIANCE MEMBER
Joined
Oct 20, 2009
Messages
21,476
Location
Northern Utah
Tonight we installed the Cognito steering support kit on my son’s 2002 2500HD Duramax.

Idler side
7855ac40829584dd9ffc58dd55d17dda.jpg

Pitman arm side.
2de60b2907d9fe5067309377291b8400.jpg

Changed the oil and filter then put the rear summer tires & wheels on and took her for a test drive.
ef9efbe1e20bc38b1feab4dd361a0912.jpg

It drove great and my son said it seemed smoother and quieter but I think it may be the placebo affect. Although he is used to the vehicle more so than I am and I can tell minor changes in my vehicles so maybe it is smoother and quieter.
 

Attachments

  • 2de60b2907d9fe5067309377291b8400.jpg
    2de60b2907d9fe5067309377291b8400.jpg
    659.9 KB · Views: 0
  • ef9efbe1e20bc38b1feab4dd361a0912.jpg
    ef9efbe1e20bc38b1feab4dd361a0912.jpg
    722.1 KB · Views: 0
  • 7855ac40829584dd9ffc58dd55d17dda.jpg
    7855ac40829584dd9ffc58dd55d17dda.jpg
    593 KB · Views: 0
Last edited:

lilscorpion

Well-known member
Joined
Mar 15, 2010
Messages
3,600
Location
Colorado
zmotorsports said:
It drove great and my son said it seemed smoother and quieter but I think it may be the placebo affect. Although he is used to the vehicle more so than I am and I can tell minor changes in my vehicles so maybe it is smoother and quieter.


Sometimes knowing you’ve made the machine better translates through the steering wheel and into the drivers seat. Or it’s the shinny clean better looking than new thermostat housing. [emoji16]
 

TTMotorsports

Well-known member
Joined
Jan 8, 2019
Messages
1,107
Location
Lucerne Valley, CA
What is the purpose or intended aim for this modification?


Thanks!
They help keep the steering box and idle arm from flexing causing steering wander. The front end of these trucks is the weakest part of the trucks. The inner tie rods are the size of my pinky finger. Super steer makes a nice upgraded setup
 
OP
Z

zmotorsports

ALLIANCE MEMBER
Joined
Oct 20, 2009
Messages
21,476
Location
Northern Utah
Sometimes knowing you’ve made the machine better translates through the steering wheel and into the drivers seat. Or it’s the shinny clean better looking than new thermostat housing. [emoji16]

Thanks Matt. I think you're right because mine even feels different after a wash and detail.:bounce:

But then again, it may be that t-stat housing.:lol_hitti
 
OP
Z

zmotorsports

ALLIANCE MEMBER
Joined
Oct 20, 2009
Messages
21,476
Location
Northern Utah
What is the purpose or intended aim for this modification?

Thanks!

They help keep the steering box and idle arm from flexing causing steering wander. The front end of these trucks is the weakest part of the trucks. The inner tie rods are the size of my pinky finger. Super steer makes a nice upgraded setup

More so to keep the center link from pivoting front to rear than steering flex but it is mainly to prevent premature wear of the ball & socket on the center link at the pitman arm and idler arm positions. That constant flopping front to rear of the center link prematurely wears the joints and is just plain annoying in my opinion. These supports keep the center link centered from flopping yet still allow the joint to pivot as needed for steering.

And yes, the tie rods are very small. On my 2006 Duramax I added the Fabtech tie rods which are about 1.125" in diameter and on my son's 2002 Duramax we added the tie rod sleeves several years ago when he first bought the truck. We also added the Cognito upper A-arm to my son's when we leveled it out which places the upper ball joint in the correct orientation vs. someone who merely cranks the torsion bars down tight to raise the front end up.
 
OP
Z

zmotorsports

ALLIANCE MEMBER
Joined
Oct 20, 2009
Messages
21,476
Location
Northern Utah
Does he notice a difference with it installed, or is it just meant to stop future problems?

Mainly future problems but as the joints wear, even slightly from new, they allow the center link to flop front to rear when turning left and right. On some GM chassis I have actually been able to hear the center link flop as turning the steering from the cab but that is somewhat rare. When I did my 2006 back when I bought it in 2009 I really couldn't tell much difference by seat of the pants feel.

Time will tell on his as he just took a couple mile test drive last night after getting it off the lift.
 

fnieto

Well-known member
Joined
Aug 27, 2013
Messages
1,401
Location
Tucson,Arizona
More so to keep the center link from pivoting front to rear than steering flex but it is mainly to prevent premature wear of the ball & socket on the center link at the pitman arm and idler arm positions. That constant flopping front to rear of the center link prematurely wears the joints and is just plain annoying in my opinion. These supports keep the center link centered from flopping yet still allow the joint to pivot as needed for steering.

And yes, the tie rods are very small. On my 2006 Duramax I added the Fabtech tie rods which are about 1.125" in diameter and on my son's 2002 Duramax we added the tie rod sleeves several years ago when he first bought the truck. We also added the Cognito upper A-arm to my son's when we leveled it out which places the upper ball joint in the correct orientation vs. someone who merely cranks the torsion bars down tight to raise the front end up.

Nice work on your sons Dmax, You saved him a ton of dough and more importantly taught him (and us) something. The Fabtech tie rods are a huge improvement over the skinny OEM. The Cogneto upgrade is on my list as well. I have a tight suspension but with the oversized tires I believe its a necessary justified upgrade. Are you happy with the material used and design of the Contigo brackets?

Thanks again for all you share with us Mike.
 
OP
Z

zmotorsports

ALLIANCE MEMBER
Joined
Oct 20, 2009
Messages
21,476
Location
Northern Utah
Nice work on your sons Dmax, You saved him a ton of dough and more importantly taught him (and us) something. The Fabtech tie rods are a huge improvement over the skinny OEM. The Cogneto upgrade is on my list as well. I have a tight suspension but with the oversized tires I believe its a necessary justified upgrade. Are you happy with the material used and design of the Contigo brackets?

Thanks again for all you share with us Mike.

Thanks Paco.

As for the Cognito components, yes, I am very happy with their brackets. Actually everything that I have used from Cognito over the years I have found to be of very good quality and they function as advertised/designed. I haven't been disappointed in anything of theirs that I have used.

If you are looking to upgrade your tie rods I would suggest the heavy duty ones from either Fabtech or another similar vendor vs. the sleeves. The sleeves are a nice upgrade from stock and plenty stout for most vehicles such as my son's with just a leveled suspension and 33" tires on 18" wheels but with my 36" tires on a 6" lift I wanted the ultimate in strength and therefore went with the large replacement tie rods.
 
OP
Z

zmotorsports

ALLIANCE MEMBER
Joined
Oct 20, 2009
Messages
21,476
Location
Northern Utah
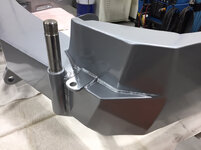
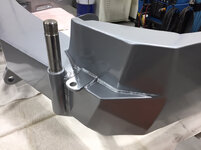
I got a call yesterday saying my son’s bumper was done so I stopped and picked it up. It usually takes about two weeks for powder coating but they’re pretty busy and had it three weeks. Good thing we had other things to work on and weren’t in a rush for it but at least it turned out nice.

4d8ab403163981618291b297cbde9951.jpg

2dc63403c6cccdf01dd4d0f301eb82d2.jpg

e752e9bf410059c016dda82d921d4f07.jpg

b5deb747eeb42fe0b3c6d13384e7e25b.jpg

038d0f7e93647dec6a1bece288b5d64c.jpg

db5151d9b9e3dda2484323646a76374c.jpg

Thanks for looking.
 

Attachments

  • 038d0f7e93647dec6a1bece288b5d64c.jpg
    038d0f7e93647dec6a1bece288b5d64c.jpg
    639.5 KB · Views: 1
  • db5151d9b9e3dda2484323646a76374c.jpg
    db5151d9b9e3dda2484323646a76374c.jpg
    646.6 KB · Views: 0
  • b5deb747eeb42fe0b3c6d13384e7e25b.jpg
    b5deb747eeb42fe0b3c6d13384e7e25b.jpg
    638 KB · Views: 0
  • e752e9bf410059c016dda82d921d4f07.jpg
    e752e9bf410059c016dda82d921d4f07.jpg
    767 KB · Views: 0
  • 4d8ab403163981618291b297cbde9951.jpg
    4d8ab403163981618291b297cbde9951.jpg
    712.7 KB · Views: 0
  • 2dc63403c6cccdf01dd4d0f301eb82d2.jpg
    2dc63403c6cccdf01dd4d0f301eb82d2.jpg
    752 KB · Views: 1
OP
Z

zmotorsports

ALLIANCE MEMBER
Joined
Oct 20, 2009
Messages
21,476
Location
Northern Utah
The weldlng and powder coating work are both top shelf. Bumper is going to look great on his truck.

jhn9840
John

Thank you. I appreciate the comments and for following along. Unfortunately we probably won't have time to install it on his Jeep for at least another week as he is having his carpet installed in his house this week then he wants to move in so I'm sure we'll be moving him next weekend.
 

fnieto

Well-known member
Joined
Aug 27, 2013
Messages
1,401
Location
Tucson,Arizona
Thanks Paco.

As for the Cognito components, yes, I am very happy with their brackets. Actually everything that I have used from Cognito over the years I have found to be of very good quality and they function as advertised/designed. I haven't been disappointed in anything of theirs that I have used.

If you are looking to upgrade your tie rods I would suggest the heavy duty ones from either Fabtech or another similar vendor vs. the sleeves. The sleeves are a nice upgrade from stock and plenty stout for most vehicles such as my son's with just a leveled suspension and 33" tires on 18" wheels but with my 36" tires on a 6" lift I wanted the ultimate in strength and therefore went with the large replacement tie rods.

Thanks for the input on the Cognito.
I have been running the Fabtech tie rods since I lifted the rig. In fact,Its time for new rubber boots. Fabtech is proud of them but what's a guy to do.

The bumper looks over the top Mike, can't wait to see it on the rig. Excellent work my friend.
 
Last edited:
To avoid these ads, REGISTER NOW!

C2tuck

Well-known member
Joined
Apr 22, 2015
Messages
663
Location
North Texas
Your welds are amazing. Very talented. I know professional welders that couldn’t lay it down like that. Very nice.
 

Duker

Well-known member
Joined
Sep 25, 2010
Messages
10,868
Location
Livingston, TX
Mike that turned out great! Good luck on your son’s upcoming move. I have been moving stuff from my house to the shop over the last few weeks and my back is reminding me everyday!


Sent from my iPhone using Tapatalk Pro
 
OP
Z

zmotorsports

ALLIANCE MEMBER
Joined
Oct 20, 2009
Messages
21,476
Location
Northern Utah
Thanks for the input on the Cognito.
I have been running the Fabtech tie rods since I lifted the rig. In fact,Its time for new rubber boots. Fabtech is proud of them but what's a guy to do.

The bumper looks over the top Mike, can't wait to see it on the rig. Excellent work my friend.

Thanks Paco, I appreciate that.
 
OP
Z

zmotorsports

ALLIANCE MEMBER
Joined
Oct 20, 2009
Messages
21,476
Location
Northern Utah
Bumpers are sweet.

Question about disc sander. Do you worry about sanding dust getting on lathe. Maybe it’s farther away than pic shows.


Sent from my iPhone using The Garage Journal mobile app

Shorty, believe me, I catch a lot of **** over the placement of my tools but they work for me. The belt/disk sander is about 3' from the lathe and a little more than that from my mill. Usually the dust from the disk sander drops straight down to the floor around the base and I don't get a film or debris on the machining equipment although I'm sure at least a small amount makes its way over there. I try to keep things cleaned up and not leaving a layer of dust on my equipment. If I was doing more production work I would have my equipment separated a more and take up closer to half of the shop but most of my work is mechanical and the small amount of machining and fabricating I do really doesn't contribute much in the manner of dust. This is why I have most all of my machining and fabricating equipment in one quarter of the shop rather than half.
 
Last edited:
OP
Z

zmotorsports

ALLIANCE MEMBER
Joined
Oct 20, 2009
Messages
21,476
Location
Northern Utah
Your welds are amazing. Very talented. I know professional welders that couldn’t lay it down like that. Very nice.

Thank you, I'm flattered. Truth be told I'm never really satisfied with my welds and I'm always trying to improve upon them but I don't weld enough to really get as consistent as I would like.
 
OP
Z

zmotorsports

ALLIANCE MEMBER
Joined
Oct 20, 2009
Messages
21,476
Location
Northern Utah
Mike that turned out great! Good luck on your son’s upcoming move. I have been moving stuff from my house to the shop over the last few weeks and my back is reminding me everyday!


Sent from my iPhone using Tapatalk Pro

Best of luck Duke. I hate moving, especially tools and large equipment, but the final result is well worth it and you've built yourself a hell of a place there.
 
OP
Z

zmotorsports

ALLIANCE MEMBER
Joined
Oct 20, 2009
Messages
21,476
Location
Northern Utah
Today after arriving home I mixed up a little weed killer and hit a few that were showing themselves in my rock beds then gave the Jeep a wipe down with Final Inspection and put a little protectant on the fenders before snapping a few photos. It’s been such a nice day today after dinner I think the wife and I may go for a spin while the Jeep is clean.

06a57ff8f981e9423752e5b823a515cd.jpg

a7d0d20f24ea30b9211d9073a9a883be.jpg

b14d89519f88fe471630b0de4d0cfcb9.jpg

a0d149bdba2e54af2b44701e749e0d39.jpg
 

Attachments

  • 06a57ff8f981e9423752e5b823a515cd.jpg
    06a57ff8f981e9423752e5b823a515cd.jpg
    726 KB · Views: 1
  • a7d0d20f24ea30b9211d9073a9a883be.jpg
    a7d0d20f24ea30b9211d9073a9a883be.jpg
    735.2 KB · Views: 0
  • b14d89519f88fe471630b0de4d0cfcb9.jpg
    b14d89519f88fe471630b0de4d0cfcb9.jpg
    682 KB · Views: 0
  • a0d149bdba2e54af2b44701e749e0d39.jpg
    a0d149bdba2e54af2b44701e749e0d39.jpg
    754.5 KB · Views: 0
OP
Z

zmotorsports

ALLIANCE MEMBER
Joined
Oct 20, 2009
Messages
21,476
Location
Northern Utah
Damn that jeep has a commanding stance.
Me like!


Thanks Paco. I like the stance as well. It’s taken a lot to get the suspension dialed in with not only the proper stance but also the ride and flex that I sought. Keeping it with a fairly low center of gravity was also part of the formula.

Unfortunately, it hasn’t been something I could buy in one package because of how uniquely the Jeep is set up and equipped. It’s a hodge podge of components but I’m ecstatic about the way it performs both on and off road. Then there’s my personal quirks about wanting to keep the OEM fenders so that required playing with limiting strap length as well as bumpstop. I’ve tried to strive for a 50/50 or 60/40 ratio of droop/compression as I have found that seems to work very well for a daily driver and weekend wheeler that will ride nice and flex well.

I am currently at around 60/40 and I’m very pleased and all without contacting my fenders. My son keeps telling me to put flat fenders on it and I could probably get to that 50/50 but for some reason I’m just not much a fan of flat fenders as my goal was to keep it at sleeper status. If someone walks past it in a parking lot they’ll just think it’s a JKU on 37’s, nothing more. The devil is in the details once they look close enough.
 
To avoid these ads, REGISTER NOW!
Top Bottom