honza.vosalik
Well-known member
TFTIHope you guys didn't get into too much trouble
Sent from my Moto G (5) Plus using Tapatalk
LOL, it was more of a 5min visit in the parking lot at my work and his wife kept us in check.

TFTI
Sent from my Moto G (5) Plus using Tapatalk
Great score, honza
You’re building up a very nice little collection of those Yorks.
And there's more coming soon!


LOL, it was more of a 5min visit in the parking lot at my work and his wife kept us in check.


Honza nice addition to your workshop! What are you gonna do with the 206R??

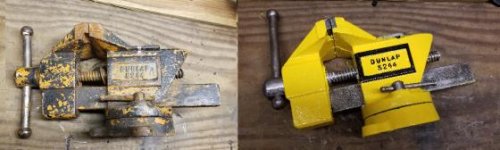
Before & after.


Before & after.
Honza:
I enjoyed meeting you too. It was a good trade. Each of us got what he wanted and didn’t even need any $$ to even things out. It must have looked pretty strange to anybody who happened to be watching the deal go down.
I had to drive 93 miles each way but my wife and I had a long lunch (after the vise deal) with some old friends who live not too far from Honza’s workplace. A very pleasant afternoon. I highly recommend other GJ members to find excuses to meet up with others. I have met with about 10 members over the years and had positive experiences with each one.
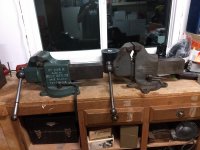
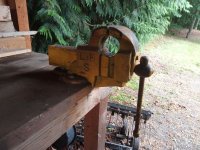
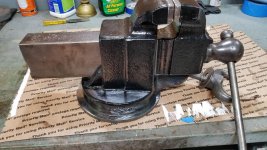
After months of searching I finally found a replacement swivel base for my blue Prentiss no.22. I found this Frankenprentiss for fifty bucks and the swivel base is in great condition. The vise has had the swivel jaw broken in several places and when a puddle of braze didn’t work they decided to bolt it back together. I must admit it’s kind of interesting to look at.

Does that come in a rattle can?Smitty if you don't paint this thing like Eddit Van Halen's Frankenstrat I'm going to be dissapointed.
Does that come in a rattle can?
3 cans, black white and red.
Spray it black
Dry
Painter's tape stripes
Spray it white
Dry
Painter's tape stripes
Spray it red.
3 cans, black white and red.
Spray it black
Dry
Painter's tape stripes
Spray it white
Dry
Painter's tape stripes
Spray it red.
Honza/Shift, Nice Reeds!!! I am scared of what I would pay for a C series if I ever came across one! Let alone one as nice as those!
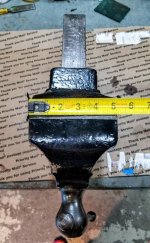
I came across this "LHS" vise for sale. It looks like a Parker but doesnt seem to have any other marks. I checked the spreadsheet and found nothing. Any ideas on this??? it looks like someone made a new collar at some point.
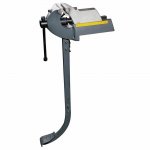
I picked up this Reed No. 105 R vise yesterday at an estate sale. This is one heavy vise. I also picked up the tiny red vise marked 4.
Dayum Ken! That is a real beauty. Dint you just pickup a Reed 203R too? I have a 105R as my primary garage vise. Absolutely Love it.
Looks pretty good, how did you repair it? Pic's are not showing your repair.


It's a little bit of trick photography. A different angle and you'll maybe see what I did. I'll post more pictures of this soon when it's assembled and mounted to the bench.
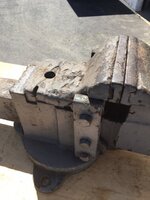
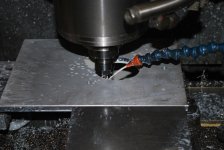
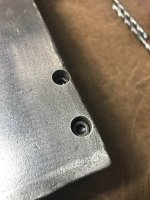
For this fix I did pretty much what a lot of you have done, except I don't have a torch to braze and where I live, you'd never find anyone capable and willing to do a small job like that.
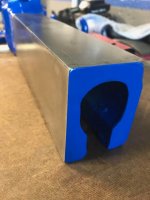
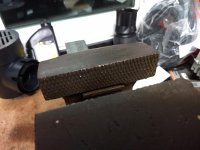
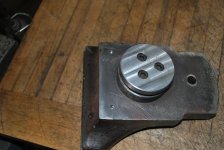
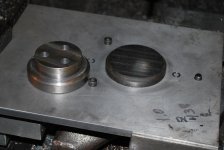
Degreased/derusted.
Stop drilled end of crack.
Drilled, counter bored and inserted two 1/4 cap screws from the side.
Plugged the cap screw holes with 3/8 rod.
Plugged the drill stop hole with press fit dowel.
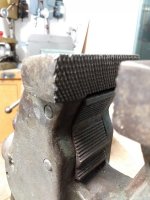
Ground a groove along the crack.
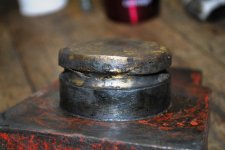
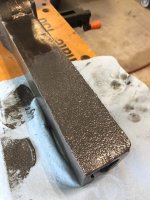
Wanted to braze the top of the slide, but not able to and the whole top surface was concaved and beat pretty hard. Instead I mixed epoxy with a lot of cast iron drill chips and covered the entire top surface. Then sanded, filed, ground the surface flat and square. The sides of the slide also required about .020 removed to fit in the vise with a few thou clearance.
The surface looks metallic and is smooth and flat. We'll see how it works out. It does fit nice now.
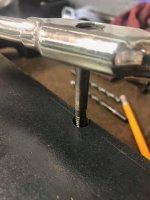
Anyone have any suggestion on how to make the "tool" he makes in this video @ 1:15 to open his seized vise? I'm having the exact same problem with my Morgan 140 and I don't have an entire machine shop to fabricate this.
I looked for something off the shelf at home depot that I could throw together but I couldn't find anything (besides the bolts) that would be strong or thick enough.
It's a little bit of trick photography. A different angle and you'll maybe see what I did. I'll post more pictures of this soon when it's assembled and mounted to the bench.
For this fix I did pretty much what a lot of you have done, except I don't have a torch to braze and where I live, you'd never find anyone capable and willing to do a small job like that.
Degreased/derusted.
Stop drilled end of crack.
Drilled, counter bored and inserted two 1/4 cap screws from the side.
Plugged the cap screw holes with 3/8 rod.
Plugged the drill stop hole with press fit dowel.
Ground a groove along the crack.
Wanted to braze the top of the slide, but not able to and the whole top surface was concaved and beat pretty hard. Instead I mixed epoxy with a lot of cast iron drill chips and covered the entire top surface. Then sanded, filed, ground the surface flat and square. The sides of the slide also required about .020 removed to fit in the vise with a few thou clearance.
The surface looks metallic and is smooth and flat. We'll see how it works out. It does fit nice now.