To avoid these ads, REGISTER NOW!

Between 485 & 705 SQ/FT Rudi's Datsun resto and late nights shed in Australia.

Workspaces between 485 and 705 squarefeet.
OP
C

cros13

Well-known member
Joined
Sep 29, 2014
Messages
496
Location
Sydney, Australia
Thanks for all the support lads! I'm keen as mustard to get stuck into the garage too! and sooner rather than later.... for now....


Update 17.7.19

So i finished demolishing the wall to the toilet. I also cut the tiles straight:

https://flic.kr/p/2gACZmz

Now the garage is.... "prepped" ready for the floor. I rang around and found a guy to epoxy the floors, he came round, and gave me a quote i am happy with. It seems his epoxy is also used in commercial workshops, so it should be good against fuel and oils and brake fluid.

Funnily enough... another guy i was getting quotes from stated it would be better to mop spills up right away, as he had a customers clear coat lift and peel from leaving tire shine on the floor.....

yes.... tire shine... aka silicone spray..... well i dropped him from the running quick smart!

Here are some samples of choices:

https://flic.kr/p/2gACZjR


I have been working long **** shifts at work the last... well... nearly going on a year. but now am doing 12 hour days minimum. I was sick of directing all my spare cash at the house. It had worn me out over the last few months.

So i splurged abit for the Forester!

I took the the dump pipe my mate gave me down to the local performance coaters to get it ceramic coated! Much nicer than the scummy heat wrap he had on it:

2

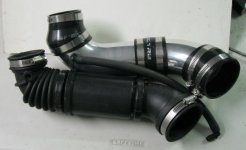
And I also scored a little Nagasaki Noisy boy!

So its a factory turbo from a 2018 STI. i got it second hand but practically new at 10 months old.

https://flic.kr/p/2gADcNo

Also bought a fuel pump that i might put in this weekend.

The dump pipe according to my measurements wont fit. it will be too short by 30mm. So I'll have to fit it and drive to the exhaust shop with a open header to get it fixed.

Plenty going on atm!

Rudi. :thumbup:
 
To avoid these ads, REGISTER NOW!
OP
C

cros13

Well-known member
Joined
Sep 29, 2014
Messages
496
Location
Sydney, Australia
Update Sunday? 21st? heck i don't even know!

argh! what a weekend!

Friday went and looked at the zed. Its now in Highfill.

They need to fix my fuel door. i got it 90% of the way there with the metal work and got over it and left it for the painters to fix and they kinda left it as it was... yeah nah... i want that gap 100% thanks!

https://flic.kr/p/2gCrWv9

Went home after that and frantically cleared out the rest of the garage ready for the floor painter to come saturday morning:

https://flic.kr/p/2gDrxUw


Bloke came Saturday morning to grind and prime the slab, then Sunday morning to do the Epoxy top coat.....

Didn't get to ****** sleep in! which i always look forward to on weekends as during the week im up at 4:30am!

Anyways.... here is a little sneak peek:

https://flic.kr/p/2gDrxSs

You can still see all the defects in the slab that couldn't be ground out, and you can see where he patched the cracks and holes in the slab. He did say it would be still visible, and if i wanted it to be all masked and hidden to get the flake finish.

Cant walk on it until Tuesday so that's when I will do a good inspection of his work! All in all pretty happy with it.

Rudi.
 
OP
C

cros13

Well-known member
Joined
Sep 29, 2014
Messages
496
Location
Sydney, Australia
Update 28th July -

Floor is done! its... ok

I can't fault the job the painter did on the floor. It is fine. I can however fault my concrete floor. It is uneven, and has been repaired, and due to this, in some parts the epoxy painted floor looks different and reflects the light different.

There isn't a physical issue with the paint, it just looks different in different light conditions.

Painter did warn me that any repair work will show through, and if i wanted it to really camouflage and look perfect, to get the flake job.

Anyway:

Here, slab/paintwork looks near perfect:

https://flic.kr/p/2gHRJNj

however, look at the same patch from another angle:

https://flic.kr/p/2gHR2LU

and you can see the repair work showing through.

It is a little annoying, but i knew it would be the case. I'm sure when the shed is filled with junk i wont notice anything at all.

Next task at hand (after repairing the ceiling in main bathroom that is) is to crack on and repair the garage wall and roof and paint it:

https://flic.kr/p/2gHRJMn

Lots going on here!
 

humming

Member
Joined
Jul 25, 2019
Messages
18
Location
Phoenix
Just got to the end. We've got some commonality, I love Datsun, I've got a 327 swapped 240 that hasn't run in 20 years, just picked it up from my uncle. Can't wait to see what you do with the new place!
 

Coolabah

Well-known member
Joined
Jun 6, 2010
Messages
1,370
Location
2nd Floor, 3rd on the Right,Narooma, Australia
Update 28th July -

Floor is done! its... ok

<snip>
and if i wanted it to really camouflage and look perfect, to get the flake job.

Yes this is very true (although even with flake , you can still see the defects if you try hard enough)
For a working garage , you did the best thing IMHO- try finding even a dropped sandwich on a flecked floor , let alone that small, expensive and irreplaceable spring/nut/etc....:(
 

Jumpman-Z

Well-known member
Joined
Jun 9, 2014
Messages
144
Location
Amarillo
Love the garage, and really love the cars. Hoping someday to build an S30Z, and I'm waiting till I can import an S15 here in the states. Keep it up!
 
OP
C

cros13

Well-known member
Joined
Sep 29, 2014
Messages
496
Location
Sydney, Australia
Update August

So Alot of this month has been spent working on my Subaru's, to make a deadline for when i booked the blue eski in to get tuned.

Jobs i had to complete:

1. put in a bigger fuel pump
2. Fit 3" dump pipe
3. Fit STI intercooler
4. Fit turbo
5. Profit?

So it began with fitting the fuel pump and dump pipe and turbo....

but we had a small issue with exhaust fitment.....

https://flic.kr/p/2gSFoaR

yeah..... And i had no time to rectify it... So i had to drive around like that for a week....

Had some pretty sick turbo spool! :3gears:

But due to the bigger turbo i had to "try" and keep her off boost to avoid leaning out the motor!

Next week i fit the bigger STI inter cooler, which of course didn't line up with all my brackets, so i had to bust out the welder and extend them:

https://flic.kr/p/2gSFobN

.

fitted:

https://flic.kr/p/2gSGdgM

I Didn't have Trimix or stainless welding wire so i was at the mercy of a exhaust shop to fix my exhaust, and they butchered my Invidia exhaust extending it.... not happy.

But the final results after tune:

https://flic.kr/p/2gSFo8M

185kw at the wheels on about 16psi (250hp)

i was a bit disappointed i didn't crack 200kw, but that is due to my having a completely stock intake. If i got a Cold air intake and a Silicone Intake pipe i should see 200kw. But the car is Nice and zippy now, essentially a bit faster than a stock STI.

.

Lastly the painter wanted some parts for final fit up and check on the 260z.

So i took the opportunity while scavenging through all my boxes of parts to pull out all my locks and latches to send them away to get plated:

https://flic.kr/p/2gSGddR

Should be done in a few weeks.


Yes this is very true (although even with flake , you can still see the defects if you try hard enough)
For a working garage , you did the best thing IMHO- try finding even a dropped sandwich on a flecked floor , let alone that small, expensive and irreplaceable spring/nut/etc....:(

Exactly why i didn't go flake floor. My eyes are bad enough as it is, with me trying to find a M4 bolt on the floor if its 70 colours.

Love the garage, and really love the cars. Hoping someday to build an S30Z, and I'm waiting till I can import an S15 here in the states. Keep it up!

Thanks bro! Find me a 69 Chevy Nova and ill swap ya for the S15 LOL! (its the last car i want - hope to one day import one from the states!)

Floor looks good mate, I'm jealous! Zed is looking really good too.

Thanks bud! your wife still have hers? when are you gonna get stuck into that!

Floor looks pretty great mate!

how much around did that set you back?

$1400.

Which seems a little steep.... however:

product i was looking at was rustoleum epoxy floor kit, it was $300 at bunnings, ALL reviews say you need minimum 3 kits to get a even good coverage, so there is $900, then about $300 to hire a concrete grinder for half a day from Kennards, so we are up to $1200...

And due to me being a novice id be sure to screw it somehow.

So eh, for $200 more, i'll lay on the couch while the expert does all the work!

:beer:

Rudi.
 

Bob Heine

ALLIANCE MEMBER
Joined
Oct 24, 2009
Messages
10,706
Location
Boca Raton, Florida
Update August
185kw at the wheels on about 16psi (250hp)

i was a bit disappointed i didn't crack 200kw, but that is due to my having a completely stock intake. If i got a Cold air intake and a Silicone Intake pipe i should see 200kw. But the car is Nice and zippy now, essentially a bit faster than a stock STI.

Rudi.
Rudi, I didn't go overboard on my PT Cruiser turbo upgrades. It started out as a stock 2.4L Turbo, supposedly putting out 180 hp (the GT model was tuned for 215 hp).
attachment.php


When I was done it had an Airaid cold air filter, blowoff valve, a composite intake manifold, a Stage 2 computer, Diablo Sport 93-octane tune and upgraded turbo intake and intercooler to throttle body plumbing.
attachment.php


I found an upper intercooler to throttle body pipe that connects everything with 3-inch aluminum tubing and silicone couplers instead of rubber hose so I forked over the $160 for that but those are no longer available.

Each item helped a little but nobody offered an upgrade for the air-cleaner-to-turbo-inlet connection. I cobbled together a couple of pieces of mandrel bent 3" aluminum tubing and silicone couplers from Spectre Performance. The pieces totaled about $100. Because there isn't any pressure (or a whole lot of vacuum) in that part of the intake, I didn't worry about swaged ends on the thin-wall tubing. It hasn't come apart in the 7 years since I put it in the car.
attachment.php


I didn't think the stock corrugated elbow was very efficient but it did adapt the 3-inch straight section to the 2.5-inch turbo inlet. I just used an EPDM reducer/adapter.
attachment.php


I wish I could say that piece made a huge difference but I wasn't very scientific. Seat of the pants if feels pretty good because it lights up the tires when I am going 30mph and floor it (sadly it's only an automatic).

With the much bigger and better Subaru performance market, you should be able to do something even better with your ride.
 

Attachments

  • Stock Turbo Engine.jpg
    Stock Turbo Engine.jpg
    87.9 KB · Views: 761
  • Intake After.jpg
    Intake After.jpg
    99.8 KB · Views: 763
  • Intake Pipe Comparison.jpg
    Intake Pipe Comparison.jpg
    49.9 KB · Views: 753
  • Intake Pipe Comparison2.jpg
    Intake Pipe Comparison2.jpg
    39.8 KB · Views: 757
OP
C

cros13

Well-known member
Joined
Sep 29, 2014
Messages
496
Location
Sydney, Australia
I didn't go overboard on my PT Cruiser turbo upgrades. It started out as a stock 2.4L Turbo, supposedly putting out 180 hp (the GT model was tuned for 215 hp).

I'm trying not to go overboard with this car either. It is my daily driver after all!

When I was done it had an Airaid cold air filter, blowoff valve, a composite intake manifold, a Stage 2 computer, Diablo Sport 93-octane tune and upgraded turbo intake and inter cooler to throttle body plumbing.
what did she end up making after all those mods?

Each item helped a little but nobody offered an upgrade for the air-cleaner-to-turbo-inlet connection. I cobbled together a couple of pieces of mandrel bent 3" aluminum tubing and silicone couplers from Spectre Performance. The pieces totaled about $100.

That's what i did on the Silvia, but the Subaru has about 6 or 7 vacuum lines connected to the intake pipe... argh.. the subaru is just a pain to work on.

So the Silvia is like your PT cruiser, a pretty average pipe from filter to turbo intake

The Subaru has a plastic intake pipe running under the intake manifold, you replace that with a Silicone Intake pipe. Then you have your Cold air intake pipe which connects to that. And there is a "short fat bit" silicone coupler that goes somewhere? Its just painfully complicated, and apparently a real real pain to get in and out, everyone cringes when you mention doing a silicone intake pipe. Do i need it? nah.

I'll probably just stick to a Process West CAI. Its $370 will require a retune ($500) or the motor will lean out, and it will give me only 5hp.

But it will have mad induction noise :D

Worth it? YES! :lol_hitti

I wish I could say that piece made a huge difference but I wasn't very scientific. Seat of the pants if feels pretty good.

I highly doubt I will notice the difference, but i want to hear that turbo spool!

With the much bigger and better Subaru performance market, you should be able to do something even better with yours.

And this is where i need to put my foot down and say enough is enough.

Subaru Boxer engines are just terrible for making any power out of. I could make maybe 300hp and that's about all the motor will take, We don't have ethanol readily available, so i'm talking about a reliable honest daily work commuter.

Around here a basic built motor will cost you 7k, for the motor alone. All that includes is forged pistons, race bearings, race head gasket, ARP head studs and that's it. AND that's starting with a Semi closed deck block (STI block)

And it will be good for max 300kw, (400hp) at the wheels..... 7k for the long block.......(that might be drive in drive out at the particular shop im referencing....)

They just don't make power....

If i got a junkyard barra for example.... bolt on a turbo, cam springs and retainers, tune, fuel pump and exhaust and it will make 500hp without breaking a sweat!

Focus... focus... the Datsun is the silly car! subaru is the commuter!

At least now i can pretty much chop anything off the line :beer:

Rudi.
 

Bob Heine

ALLIANCE MEMBER
Joined
Oct 24, 2009
Messages
10,706
Location
Boca Raton, Florida
I'm trying not to go overboard with this car either. It is my daily driver after all!
Rudi, I understand completely. Before I retired the '87 Corvette was my daily driver but it was too hard for my wife to climb out. The 04 PT Cruiser took over and became the primary vehicle in December 2004 when it had 271 miles on it. Tonight it has 47,125 miles on the odometer.
what did she end up making after all those mods?
I never had it on a dyno to find out. The local shop wants $500 an hour and expects it to be on the roller for three hours. One local dyno shop focuses on high-end cars (a Porsche is their low-end vehicle). Another is a Mustang specialty shop with nightmarish customer reviews and the third does American muscle cars and full-on drag race vehicles. They never stopped laughing long enough for me to ask for a price. All that said, I believe the car is in the 250 hp and 300 ft lbs range based on similarly upgraded cars on the forums.
That's what i did on the Silvia, but the Subaru has about 6 or 7 vacuum lines connected to the intake pipe... argh.. the subaru is just a pain to work on.

So the Silvia is like your PT cruiser, a pretty average pipe from filter to turbo intake

The Subaru has a plastic intake pipe running under the intake manifold, you replace that with a Silicone Intake pipe. Then you have your Cold air intake pipe which connects to that. And there is a "short fat bit" silicone coupler that goes somewhere? Its just painfully complicated, and apparently a real real pain to get in and out, everyone cringes when you mention doing a silicone intake pipe. Do i need it? nah.
I gave up trying to explain need when it comes to my vehicles. I have one granddaughter who has the infection but based on the number of Zs she has totaled she needs to pay a driving school for some lessons. She drives a Cadillac CTS coupe with a V6 and has kept it in one piece for two years. She lusts after my CTS-V but can't find an insurance company to cover it.
I'll probably just stick to a Process West CAI. Its $370 will require a retune ($500) or the motor will lean out, and it will give me only 5hp.
All of my upgrades were done with a longevity focus. It's a beast compared to a stock 2.4 PT Turbo but I stopped short of a boost controller, big turbo and bigger injectors. I did make a 3" downpipe and high flow catalytic converter setup with an extra O2 bung for a wideband but never installed it. Liane loves it the way it is because she can scare a lot of people when she's in the mood.
But it will have mad induction noise :D
I removed the weatherstrip from the engine compartment next to the Airaid CAI box so I could hear it better and upgraded the exhaust to a Borla 2.5" setup with dual outlets. The connection from the stock downpipe to the Borla system is only 2.25" and that's the reason I make my own downpipe (it necks down from 3" to 2.5" where it would connect to the Borla system)
attachment.php

Worth it? YES! :lol_hitti


I highly doubt I will notice the difference, but i want to hear that turbo spool!

And this is where i need to put my foot down and say enough is enough.

Subaru Boxer engines are just terrible for making any power out of. I could make maybe 300hp and that's about all the motor will take, We don't have ethanol readily available, so i'm talking about a reliable honest daily work commuter.

Around here a basic built motor will cost you 7k, for the motor alone. All that includes is forged pistons, race bearings, race head gasket, ARP head studs and that's it. AND that's starting with a Semi closed deck block (STI block)

And it will be good for max 300kw, (400hp) at the wheels..... 7k for the long block.......(that might be drive in drive out at the particular shop im referencing....)
The 2.4 DOHC with the turbo can be made stupid stupid powerful and I was tempted to go down that rabbit hole. This one, for example, puts out 808 hp:
https://www.motor1.com/news/347315/800-horsepower-chrysler-pt-cruiser/
No idea what that cost but I chose to waste my money on a grandpamobile that is close to unbreakable and makes 556 hp and 551 pound-feet of torque.

They just don't make power....

If i got a junkyard barra for example.... bolt on a turbo, cam springs and retainers, tune, fuel pump and exhaust and it will make 500hp without breaking a sweat!

Focus... focus... the Datsun is the silly car! subaru is the commuter!

At least now i can pretty much chop anything off the line :beer:

Rudi.
I am with you on the focus. If I ever get done with the yard and workshop work, I'll get back to the silly car, the 1972 Corvette coupe with the bored out 454 ci (7.4L) with coilovers, rack & pinion and hydroboost brakes.
 

Attachments

  • Upper and Lower Pipes.jpg
    Upper and Lower Pipes.jpg
    80.5 KB · Views: 638
OP
C

cros13

Well-known member
Joined
Sep 29, 2014
Messages
496
Location
Sydney, Australia
Update End of August:

Finally got the paint done in the Garage. I took inspiration from how Racestatus did his garage, taking a paint sample of his mustang to the hardware shop and paint matching it to do a stripe in his wall. His car is also green which is nice!

I took it a step further, i didn't really know which way i was going to go with it, but this is what i ended up with.

The green is the colour the datsun will be, 303 Emerald green:

https://flic.kr/p/2h3uzDa

.

I also fit some corner trim to the tiles in the open air toilet:

https://flic.kr/p/2h3tRGo

.

I finally took the welder home from my old shed. Not wanting to weld in the garage and have slag ruin my new floor, i set up outside:

https://flic.kr/p/2h3uzBG

.

And here is my uhhh.... temporary (probably permanent) welding bench. a plastic table, with a hollow core paper filled door on top, topped with a welding blanket.... i wonder how long its going to take me to set it on fire!

I'm starting the cubicle for the toilet now:

https://flic.kr/p/2h3tRD7

getting stuck into it now!

:thumbup:
Rudi.
 
To avoid these ads, REGISTER NOW!

Motoman1100

Well-known member
Joined
Oct 2, 2014
Messages
443
Location
GA
Just found your thread and I really like it! Not sure how I missed it. I especially like the color scheme in the garage. Nice job!
 
OP
C

cros13

Well-known member
Joined
Sep 29, 2014
Messages
496
Location
Sydney, Australia
Update September 2019: toilet progress and some cabinets.

Been chipping away at the shed full steam ahead.

I have continued and finished the basic frame for the toilet cubicle.

Its been real hard getting this done, as by the time i get home from work, its dark, and i don't want to be grinding at night annoying my new neighbors. So I've been limited to working on it on a friday afternoon, or weekends, which seem to be full of events that stop me from being able to put a solid days work into this. Its been real frustrating to tell you the truth.

https://flic.kr/p/2hbKzcW


I had also planned on making a full custom wall mounted cabinet, to match this, and my toolbox, but with the slow progress of the toilet cubicle i have decided not to, because it will never be done at the slow rate i can work on it.

Instead i decided for some nice workshop storage cabinets. They come from the same mob who i get all my toolboxes from. They only had these 2 in stock, which neatly fit right up to my power point conduit. I will get double door cabinets to continue on the other side, but they are back ordered until the end of September.

https://flic.kr/p/2hbJG2y

.

https://flic.kr/p/2hbKzc5

Gonna need to make sure i keep a ladder handy as i cant reach the top shelf from the floor :lol_hitti

:beer:
 

hewey

Well-known member
Joined
Sep 5, 2014
Messages
1,679
Location
Blue Mountains, Australia
Cabinet looks like a perfect fit :thumbup:

My wife could see the screen as I was reading and wanted to know why you needed bombproof metal framing on the loo? :bounce::bounce::bounce::bounce:
 

JDMjunkies.ch

Well-known member
Joined
Dec 27, 2016
Messages
447
Location
Switzerland
Hey Rudi!
So after you mentioned your similar interrests and your JDM garage build i had to read through the entire thread today!
Loved the workbenches / cabinets and the stove from the old shop. New one is coming along really nice. have to follow this one for sure! Go for it :
And you defnitely own two of my favourite cars :)
 
OP
C

cros13

Well-known member
Joined
Sep 29, 2014
Messages
496
Location
Sydney, Australia
Update end of September

Work has slowly progressed on the "bomb proof loo"

I have the outer frame finished, with all the mounting points for the timber, and it is all dynabolted into the floor, i also have made the door frame:

https://flic.kr/p/2hnmqXu

I have also made my door handle. A broken Subaru camshaft my workmate gave me. He snapped the cam in half trying to undo the cam gear to do the timing belt. :headscrat

https://flic.kr/p/2hnkFRy


I also added 2 more cabinets to the wall. making progress now! I plan on bringing over my toolbox workbench next week hopefully when i can get a mates help with my trailer.

https://flic.kr/p/2hnkFQG

.

And on the Datsun side of things, the interior has been painted in a semi gloss black. Hopefully the body will be done in the next 2 weeks!

https://flic.kr/p/2hnkFPj

.

https://flic.kr/p/2hnmqWh

We are having a housewarming party at the end of the month and i want my car home then!

Rudi.
 
OP
C

cros13

Well-known member
Joined
Sep 29, 2014
Messages
496
Location
Sydney, Australia
Datsun Video update #11

Just the video update on the zed over the last few months. I think you guys have pretty much seen it in the photos.

- Car bodywork was complete

- Car was put in epoxy primer.

- Interior was painted in epoxy black.

Paint goes on this week!!! :shocking:


Rudi
 
OP
C

cros13

Well-known member
Joined
Sep 29, 2014
Messages
496
Location
Sydney, Australia
Update October 2019

So the Zed didn't get painted this week. painter fell behind with work and other jobs bla bla bla.

It gets done on Monday i hope.

Anyway, had a big weekend moving last week. Had a mate help me with her ute and trailer. We moved my toolbox, workbench, air compressor and BBQ over from my family home and brought it all to my house. What a mission. 3 trips and about 6 hours worth of work total!

I also finished the frame to the bomb proof loo:

https://flic.kr/p/2hu4EgX

.

A close up of the finished door handle:

https://flic.kr/p/2hu4EfQ

Some retro wall art for the loo, more to come:

https://flic.kr/p/2hu4Ef4

.

Toolbox in place, what a mission moving it in the garage without scratching the epoxy flooring! It pretty much slotted in between the wall pillars perfectly! how about that!

https://flic.kr/p/2hu7oVd


But here we see a problem. I didn't make a side panel for this side as it butted up against the wall in the old garage, so i will need to make a new one:

https://flic.kr/p/2hu4EdA

Rudi.
 
To avoid these ads, REGISTER NOW!
Top Bottom