To avoid these ads, REGISTER NOW!

ZMotorsports Shop Projects 2.0

To avoid these ads, REGISTER NOW!

lilscorpion

Well-known member
Joined
Mar 15, 2010
Messages
3,600
Location
Colorado
Mike - a little disappointed you didn’t take the opportunity to drop an LS in that mower during the refresh but to each his own. [emoji1787]
 
OP
Z

zmotorsports

ALLIANCE MEMBER
Joined
Oct 20, 2009
Messages
21,462
Location
Northern Utah
How did it get so worn on the side like that? Nice job, as usual.

Thank you.

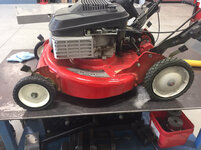
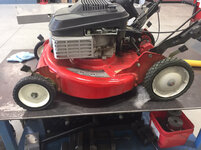
Rubbing against both the side of the shop and the sidewalk at my last place is where most of the wear came from, not so much lately but just enough to wear it through the last bit. This is a very common occurrence on many 21"-22" walk-behind mowers if they last long enough because the decks stick out slightly further than the wheels. Usually when I've seen this the mowers aren't worth saving as there are so many other issues with them but I opted to repair mine seeing as how it is still running so good and otherwise in pristine condition.
 
OP
Z

zmotorsports

ALLIANCE MEMBER
Joined
Oct 20, 2009
Messages
21,462
Location
Northern Utah
Nice job on the repair Mike.

Does CertiFit Auto Body Parts make a patch panel for that application???

Thanks Pat. I'm not aware of a patch panel that is available as I don't know how popular it would be.

At this point I was bound and determined to NOT buy a new mower and keep this one going even if nothing more than proving to myself it can be done. Lately in this "disposable society" that we now find ourselves in I have become more adamant in the whole repair, rebuild, repurpose and refurbishing mindset.

Funny thing is I now have the money I could go buy a new one without really blinking an eye yet I prefer to keep and repair the one I have vs. spending the money that I don't really need to.:headscrat
 

slodat

ALLIANCE MEMBER
Joined
Feb 6, 2010
Messages
3,682
Location
Central-ish, WA
Funny thing is I now have the money I could go buy a new one without really blinking an eye yet I prefer to keep and repair the one I have vs. spending the money that I don't really need to.:headscrat

THIS!! Like you, I'm a buy once, cry once kind of person. With almost everything. I'd rather go without until I can afford what I want. When I do buy, I often over buy a little so I have a tool that will last for a long time, and is repairable when the time comes. Also, it probably would seem like a missed opportunity to enjoy the shop if you just threw it away and bought new.

Excellent work on the repair.
 
OP
Z

zmotorsports

ALLIANCE MEMBER
Joined
Oct 20, 2009
Messages
21,462
Location
Northern Utah
THIS!! Like you, I'm a buy once, cry once kind of person. With almost everything. I'd rather go without until I can afford what I want. When I do buy, I often over buy a little so I have a tool that will last for a long time, and is repairable when the time comes. Also, it probably would seem like a missed opportunity to enjoy the shop if you just threw it away and bought new.

Excellent work on the repair.

Thank you. I appreciate the comments and thanks for following along.
 

jimgood

Well-known member
Joined
Aug 4, 2014
Messages
2,394
Location
Marshall, VA
Nice repair on the mower deck.

The mount for the panhard bar (to keep the deck from shifting left to right) on my ZT broke off a couple years ago. It still works fine so the spirit hasn't moved me to fix it yet.
 
OP
Z

zmotorsports

ALLIANCE MEMBER
Joined
Oct 20, 2009
Messages
21,462
Location
Northern Utah
Nice repair on the mower deck.

The mount for the panhard bar (to keep the deck from shifting left to right) on my ZT broke off a couple years ago. It still works fine so the spirit hasn't moved me to fix it yet.

Thanks.

I have a hard time letting things go, my OCD doesn't handle it well so I figured the sooner I fix it the better.

Thanks for stopping by my thread and commenting.
 

4 FN 27

ALLIANCE MEMBER
Joined
Oct 19, 2015
Messages
4,635
Location
Minnesnowta
At this point I was bound and determined to NOT buy a new mower and keep this one going even if nothing more than proving to myself it can be done. Lately in this "disposable society" that we now find ourselves in I have become more adamant in the whole repair, rebuild, repurpose and refurbishing mindset.

Funny thing is I now have the money I could go buy a new one without really blinking an eye yet I prefer to keep and repair the one I have vs. spending the money that I don't really need to.:headscrat

I hear you...as other mention I would rather rebuild any way when possible.

Thus why we have Home Shops!!!
 
OP
Z

zmotorsports

ALLIANCE MEMBER
Joined
Oct 20, 2009
Messages
21,462
Location
Northern Utah
Just catching up on the last few pages Mike, cool stuff as always.
I am shocked however that had no red rattle can for the mower.

Me too. I must have either tossed an old can or lost it in the move because I had painted a few little items red in my last shop. I dug all through my aerosol cabinet looking for it until finally giving in to the fact that I'll have to buy a can.:headscrat

Oh well, I stopped by my NAPA store yesterday and I have a can now, it even matches pretty, by the lid anyways. I'll find out just how close tonight.:beer:
 

4 FN 27

ALLIANCE MEMBER
Joined
Oct 19, 2015
Messages
4,635
Location
Minnesnowta
That's just one way of justifying having all of the cool tools and shop equipment Pat, although we don't all have quite the collection as you.

Thanks Mike!

Mike your collection of "specialty tools" is over the top...

His “collection” makes mine look like a starter kit from Fisher Price. [emoji857]

We all start somewhere and add as we go...33 years ago I converted a wooden create in to a Roller Cabinet by flipping it on it's end, added 2 hinges, 4 Casters and a couple of Plywood Shelves. It was what I could afford at the time. Grateful to have been able to do what I have done so far...but I never forget where I came from and those who helped me a long the way.

Besides Fisher Price had some awesome starter kits...
 

Attachments

  • Fisher-Price Tool Set.jpg
    Fisher-Price Tool Set.jpg
    45.2 KB · Views: 64
OP
Z

zmotorsports

ALLIANCE MEMBER
Joined
Oct 20, 2009
Messages
21,462
Location
Northern Utah
I appreciate you trying to make me feel better Pat but come on, I would say there’s probably less than a hand full of people that have a fabrication shop that’s as well equipped as yours. I drool every time I see pictures of your shop and more drool with the cool **** that you have in the shop. So keep those pictures coming.
 
OP
Z

zmotorsports

ALLIANCE MEMBER
Joined
Oct 20, 2009
Messages
21,462
Location
Northern Utah
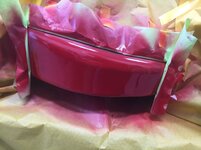
I grabbed a can of red paint yesterday so I could finish up the mower tonight. I realize that this is probably overkill for a simple lawn mower but in all honesty it doesn’t take more time than doing a half-assed job.

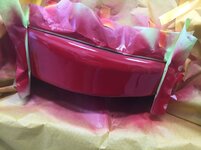
After giving it a wipe down with wax & grease remover I installed a little masking paper to the area to prevent overspray.
35b6a0a6dad9d824b60168fa22f94fd7.jpg

A simple little trick called back-masking in which aids in creating a soft edge in the paint.
c4ec1b563e95e1e0e5f458c4a00f0884.jpg

I forgot to get a picture of the etching primer before I moved on to the first coat of color but if you look around the perimeter you can see the grey primer peeking out from under the color.
ec8a927f7e6c5245410d2d8861705a4b.jpg

After the second light coat of color I pulled the 3” tape back slightly. You can see the fresh green color on the tape. By pulling the tape back a little after each coat this is what creates the soft edge.
679529a353b8e9c1f1469830fa5c301c.jpg

Unmasked. Paint is a "fairly" close match but not exact. Close enough from an aerosol can of Rustoleum enamel.
cd7a1c6e8bc2df35bbd0f10e2d6ba206.jpg

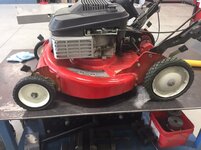
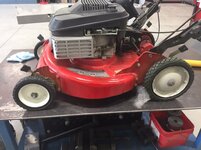
Ready for many more years of service.
0d7b96c29efb123272ffe8167de64476.jpg

Thanks for looking.
 

Attachments

  • 35b6a0a6dad9d824b60168fa22f94fd7.jpg
    35b6a0a6dad9d824b60168fa22f94fd7.jpg
    677.9 KB · Views: 1
  • 0d7b96c29efb123272ffe8167de64476.jpg
    0d7b96c29efb123272ffe8167de64476.jpg
    672.7 KB · Views: 0
  • cd7a1c6e8bc2df35bbd0f10e2d6ba206.jpg
    cd7a1c6e8bc2df35bbd0f10e2d6ba206.jpg
    764.3 KB · Views: 0
  • 679529a353b8e9c1f1469830fa5c301c.jpg
    679529a353b8e9c1f1469830fa5c301c.jpg
    747.8 KB · Views: 0
  • ec8a927f7e6c5245410d2d8861705a4b.jpg
    ec8a927f7e6c5245410d2d8861705a4b.jpg
    678.2 KB · Views: 0
  • c4ec1b563e95e1e0e5f458c4a00f0884.jpg
    c4ec1b563e95e1e0e5f458c4a00f0884.jpg
    681.2 KB · Views: 0
Last edited:
To avoid these ads, REGISTER NOW!
OP
Z

zmotorsports

ALLIANCE MEMBER
Joined
Oct 20, 2009
Messages
21,462
Location
Northern Utah
Mike, that’s a very nice job on your mower. Thanks for the back masking tip. I learned something new and useful today.

jhn9840
John


You’re welcome John. I used that technique quite a lot when I was doing a lot of painting but don’t do much painting these days.

Thanks for following along John.
 

driftpin

Well-known member
Joined
Dec 22, 2016
Messages
11,308
Location
Miami-Dade/Broward Co. Florida
I grabbed a can of red paint yesterday so I could finish up the mower tonight. I realize that this is probably overkill for a simple lawn mower but in all honesty it doesn’t take more time than doing a half-assed job.

After giving it a wipe down with wax & grease remover I installed a little masking paper to the area to prevent overspray.
35b6a0a6dad9d824b60168fa22f94fd7.jpg

A simple little trick call back-masking in which aids in creating a soft edge in the paint.
c4ec1b563e95e1e0e5f458c4a00f0884.jpg

I forgot to get a picture of the etching primer before I moved on to the first coat of color but if you look around the perimeter you can see the grey primer peeking out from under the color.
ec8a927f7e6c5245410d2d8861705a4b.jpg

After the second light coat of color I pulled the 3” tape back slightly. You can see the fresh green color on the tape. By pulling the tape back a little after each coat this is what creates the soft edge.
679529a353b8e9c1f1469830fa5c301c.jpg

Unmasked.
cd7a1c6e8bc2df35bbd0f10e2d6ba206.jpg

Ready for many more years of service.
0d7b96c29efb123272ffe8167de64476.jpg

Thanks for looking.

I'll have to try something like the back-masking, I have a lawnmower deck repair to-do. The side rotted-away where the handle attaches, I'll probably just use some 1/8" X 2" strapping to hold it together, & use my HFT flux-core machine to pay for itself, one more time ($34 at an 'open-box' sale, it was all-there, and didn't appear to have been fired-up, from what I could see). I didn't read earlier to-see if that's a Snapper, it looks like it. I had a walk-behind self-propelled Snapper I bought cheap, but it was stolen from my house before I had a chance to do anything to it, it ran, but was going to need some maintenance.

Now I'm using the Snapper rear-engined sit-down mower for my 1/3 acre space, I just replaced the mower drive belt and the drive rubber-edged disc for the self-propelling, as it was not making it up my gentle increases in elevation. I have to pay more-attention to how I mow, maybe making two different height cuts if it gets too-long, instead of just blazing-through it being longer, in one pass. I don't know why they don't have the deck higher, as I've never-used the three shortest cutting lengths, it seems to me that they're wasted settings unless you're a greens specialist cutting 'em at a golf course.

I've read almost all of your pages at one time or another, It's fun to-see what you've done, your work is great, and like many on-here, I find inspiration in your work. Thanks.
 

Attachments

  • ec8a927f7e6c5245410d2d8861705a4b.jpg
    ec8a927f7e6c5245410d2d8861705a4b.jpg
    82.6 KB · Views: 0
  • c4ec1b563e95e1e0e5f458c4a00f0884.jpg
    c4ec1b563e95e1e0e5f458c4a00f0884.jpg
    88.2 KB · Views: 0
  • 35b6a0a6dad9d824b60168fa22f94fd7.jpg
    35b6a0a6dad9d824b60168fa22f94fd7.jpg
    86.7 KB · Views: 0
  • 679529a353b8e9c1f1469830fa5c301c.jpg
    679529a353b8e9c1f1469830fa5c301c.jpg
    99.7 KB · Views: 0
  • cd7a1c6e8bc2df35bbd0f10e2d6ba206.jpg
    cd7a1c6e8bc2df35bbd0f10e2d6ba206.jpg
    123.1 KB · Views: 0
  • 0d7b96c29efb123272ffe8167de64476.jpg
    0d7b96c29efb123272ffe8167de64476.jpg
    98.9 KB · Views: 0
OP
Z

zmotorsports

ALLIANCE MEMBER
Joined
Oct 20, 2009
Messages
21,462
Location
Northern Utah
I'll have to try something like the back-masking, I have a lawnmower deck repair to-do. The side rotted-away where the handle attaches, I'll probably just use some 1/8" X 2" strapping to hold it together, & use my HFT flux-core machine to pay for itself, one more time ($34 at an 'open-box' sale, it was all-there, and didn't appear to have been fired-up, from what I could see). I didn't read earlier to-see if that's a Snapper, it looks like it. I had a walk-behind self-propelled Snapper I bought cheap, but it was stolen from my house before I had a chance to do anything to it, it ran, but was going to need some maintenance.

Now I'm using the Snapper rear-engined sit-down mower for my 1/3 acre space, I just replaced the mower drive belt and the drive rubber-edged disc for the self-propelling, as it was not making it up my gentle increases in elevation. I have to pay more-attention to how I mow, maybe making two different height cuts if it gets too-long, instead of just blazing-through it being longer, in one pass. I don't know why they don't have the deck higher, as I've never-used the three shortest cutting lengths, it seems to me that they're wasted settings unless you're a greens specialist cutting 'em at a golf course.

I've read almost all of your pages at one time or another, It's fun to-see what you've done, your work is great, and like many on-here, I find inspiration in your work. Thanks.

Yes it is an old Snapper. I bought it brand new in 1991 and it has been a great mower with only a few repairs over the years.

Thanks for the comments, I greatly appreciate them and thank you for following along on my posts.
 
OP
Z

zmotorsports

ALLIANCE MEMBER
Joined
Oct 20, 2009
Messages
21,462
Location
Northern Utah
OK, this may get a bit lengthy and I already went on a long diatribe over on Matt's (lilscorpion) thread about my unproven theories of suspension.

If you've been following along at all you know I like Jeeps and have made a couple of "tweaks" to mine.:bounce:

After a few off-roading trips this year I have been thinking through a few alterations to my suspension. Back when I first built the Jeep in 2011 I had purchased a BDS 4.5" long-arm suspension system and over the years I have tweaked and modified it to resolve what I think were design flaws and to customize it to my liking. Things such as building my own links to incorporate rubber encapsulated (Clevite) style bushings and Johnny Joints vs. the BDS proprietary bushings that kept failing. Also over the years as my Jeep has gained a few pounds I have played with rear coil springs in order to chase rear ride height as well as overall ride characteristics. I replaced the BDS coils several years ago with some OME ones that rode nice but still didn't give me quite the height I was after so I added a 1" spacer to get me closer. Ride height was better but overall ride was a bit "soggy" feeling.

Next up was I added some 4.5" plus Currie over-landing rear coils. These were recommended by Currie as a direct replacement for their 4.5" suspension springs but for one that is loaded a bit heavier in the rear for over-landing. These were better but still not quite where I wanted to be. I ended up added a 1/2" spacer but again ride height was still a bit lower than I would like in the rear and with a couple people in the rear I was contacting my jounce stops over bumps.

As I have been toying over thoughts over the past six months of playing off-road as well as on pavement I determined that I wanted to try a rear spring that had not only a bit more free length but also a slightly stiffer spring rate. On the last couple of off-roading trips I noticed that when climbing a rather steep ledge or shelf that I could actually feel the weight transfer to the rear as I ascended the climb which I feel was making my Jeep lose traction at the front tires. My thinking is that if I install a rear coil spring with a stiffer spring rate it would benefit two-fold. First, it would give me that little bit of extra lift at ride height, I figured about 3/4" would be about ideal as I don't want the front end lower than the rear. I like that nose high look and feel. Secondly, I think that as I am climbing if the rear didn't compress so easily it would help keep my front end planted and maintain traction with the front tires.

My search for spring rates and free length went on for a few weeks and many phone calls as most companies don't list such specifics. Well after a long discussion with a gentleman at Metalcloak suspensions a couple of weeks ago I opted to give something a try. He thought I should use their 4.5" true dual rate springs but I informed him I haven't had the best luck with anyone's 4.5" springs as they are netting me closer to 3.25"-3.5" of net lift due to the weight. He said he has overlanding Jeeps that use them and they get more height than advertised but I again informed him that I feel mine is a bit heavier than having a tent on my roof and a refrigerator in the rear. I was not doubting his knowledge as he was very knowledgeable and obviously has more experience than I do, I just know my Jeep.

In the end I ordered a set of their 5.5" dual rate springs because I didn't want to use spacers again as I wanted to use all effective coils to accomplish what I was after.

The springs showed up on Friday so Saturday I made quite a few measurements and then swapped out the rear coil springs. I think I am on to something with a cure for pavement driving but I will have to wait until I can get off-road to test the off-pavement manners.

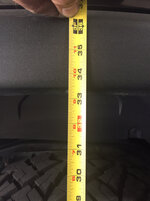
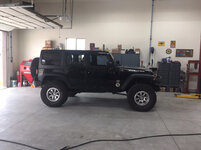
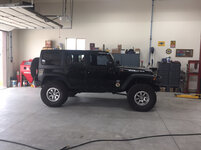
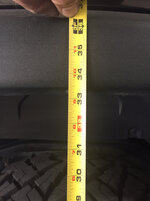
So far here are my results. Starting photos. Jeep with 4.5" Currie over-landing rear coil springs and a beginning measurement of 32-1/8" from bottom of wheel to rolled lip of fender flare. My goal would be in the range of 33" to max. of 33-5/8" at ride height. Also worth noting is that I am not running my hi-lift jack, Yeti cooler, lawn chairs and I have just under 1/4 tank of fuel. This will be the highest ride height I should experience.
cf5ec5752b4d6c15fd073a7c516161fc.jpg

0b38029b281e8947bd98a95f3ab4a046.jpg

After removing my Currie 4.5" over-landing springs you can see the free length difference between the Currie 4.5" coils and the Metalcloak 5.5" coils, much more than merely an inch. Also look at the diameter of the coils and the pitch. The Metalcloak's are about .062" thicker and the pitch is greater resulting in the slightly higher spring rate. The Currie's were 88 lbs/in and the Metalcloak's are 100 lbs./in. spring rate so not much but only slightly stiffer.
f9f26fb6e447ef35923956be8f88776e.jpg

New Metalcloaks installed at droop.
59a99e6ff75a2d37541b9e32c6744aec.jpg

New Metalcloaks installed at ride height.
c48bd13960947e00b0db1373c3cbf3ba.jpg

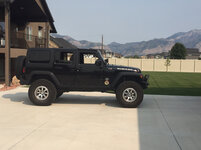
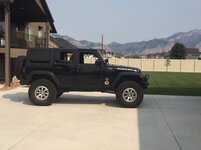
Final measurement at ride height after a test drive to let everything settle is 33-3/8" so a height gain of 1-1/4". A bit more than I wanted but slightly less than my max amount. I had acquired my maximum amount by leveling the Jeep as I do not want the rear higher than the front at any time.
8926198a168b82fee414ae1ab92404ff.jpg

53e06799b64b7835b697728242ac446c.jpg

709c8c52376627413a334a3f4e2a5804.jpg

I also checked the angle after my test drive and I am still very slightly nose high with .4 degrees of difference front to rear, rear being ever so slightly lower.
4c293fefc2082495b693d20341d1149b.jpg

So far I only have about 150 miles on the new rear coils but I can definitely tell a difference on the pavement. It is not harsh by any stretch of the word but it did firm up the rear end. Going over interstate bridge seams and railroad tracks at speed is where I have noticed it the most. The rear end feels much more planted with the road and hardly any undulations from the rear end. I even did some high speed cornering yesterday, well as high speed as you can in a Jeep anyways, and it is much more stable in the corners. We have a rather winding on-ramp to the freeway and upon accelerating aggressively it felt so much more stable and firm that I could push it even harder than really necessary. I really wanted to push it a bit so I could rule out just having a placebo affect with spring swap and so far there is definitely a favorable difference on the pavement. It still floats going down the interstate @ 70 MPH though so my street manners did not suffer and actually improved slightly. Now the real test will be the off-road manners.

Thanks for looking.
 

Attachments

  • 4c293fefc2082495b693d20341d1149b.jpg
    4c293fefc2082495b693d20341d1149b.jpg
    617.1 KB · Views: 0
  • 709c8c52376627413a334a3f4e2a5804.jpg
    709c8c52376627413a334a3f4e2a5804.jpg
    642.1 KB · Views: 0
  • 53e06799b64b7835b697728242ac446c.jpg
    53e06799b64b7835b697728242ac446c.jpg
    629.3 KB · Views: 0
  • 8926198a168b82fee414ae1ab92404ff.jpg
    8926198a168b82fee414ae1ab92404ff.jpg
    729.4 KB · Views: 0
  • c48bd13960947e00b0db1373c3cbf3ba.jpg
    c48bd13960947e00b0db1373c3cbf3ba.jpg
    727.7 KB · Views: 0
  • 59a99e6ff75a2d37541b9e32c6744aec.jpg
    59a99e6ff75a2d37541b9e32c6744aec.jpg
    681.8 KB · Views: 0
  • f9f26fb6e447ef35923956be8f88776e.jpg
    f9f26fb6e447ef35923956be8f88776e.jpg
    704.2 KB · Views: 0
  • 0b38029b281e8947bd98a95f3ab4a046.jpg
    0b38029b281e8947bd98a95f3ab4a046.jpg
    760.5 KB · Views: 0
  • cf5ec5752b4d6c15fd073a7c516161fc.jpg
    cf5ec5752b4d6c15fd073a7c516161fc.jpg
    665.2 KB · Views: 0
Last edited:
OP
Z

zmotorsports

ALLIANCE MEMBER
Joined
Oct 20, 2009
Messages
21,462
Location
Northern Utah
An additional item I decided to address yesterday was my CB mic lanyard. Since installing my new Cobra Model 29 overhead I have been playing with mic locations when in use on the trail. When daily driving and not using the CB it’s no big deal to wrap the cord around the body and clip the mic into the holder which holds it up and out if the way. However it has been awkward figuring out an easily reachable place when on the trails.

Just prior to last months annual Ouray trip I picked up one of those retractable lanyards that truck drivers use thinking I’d give it a try. I actually really like that option with the exception that it bounces around too much. I ended up using some tie wraps to control the swinging and realized that it had too many pivot points for an off-road vehicle allowing it to swing around way too much.

Yesterday after the wife and I returned from breakfast I went out to the shop to come up with a mounting solution that would hold the body solid and just allow the mic to hand by the retractable lanyard.

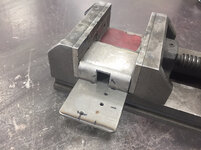
I measure the hole spacing on the CB body and used the mill to drill the exact hole configuration which would allow me to mount the bracket directly to the CB.
59b899b5852ff17c09a169010a787cc8.jpg

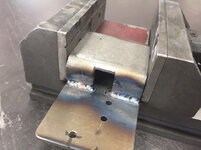
After drilling the holes I milled a 1/2” slot which would allow the end to barely fit through. I then TIG welded the two pieces together slightly tapering at the top to firmly hold the body.
84d872dc4f2cb039d379cc496f413855.jpg

Testing the fitment prior to beadblasting and painting. There is just enough taper at the top to hold it tightly in place and no additional fasteners are required to keep the body inside the bracket. I also was able to trim the two small tabs off that are visible in this picture at the top of the body where the other pivot point was at.
cde5572b7d8a72af39859ff705e529b4.jpg

Test fitting to check clearances.
71445a8332d0c4e704aa082fea46672c.jpg

Quick little tip on cutting fasteners on a vertical bandsaw. Use a small piece of metal opposite the pliers to aid in holding the fastener parallel with the table. Also feed very slow to prevent the piece from catching as it cuts through.
2378cd19509e103f057461d0648d9a8c.jpg

Fasteners trimmed and ready to touch up on the sander to square up the cut end.
4fd0c3b55f57bad39a12340060220093.jpg

Completed bracket and ready for use.
93ff7f4c4f8f7bc485548a7d50a0de18.jpg

33f44388698019c39a93535c37c45c01.jpg

Thanks for looking.
 

Attachments

  • 2378cd19509e103f057461d0648d9a8c.jpg
    2378cd19509e103f057461d0648d9a8c.jpg
    928.1 KB · Views: 0
  • 33f44388698019c39a93535c37c45c01.jpg
    33f44388698019c39a93535c37c45c01.jpg
    698.8 KB · Views: 0
  • 93ff7f4c4f8f7bc485548a7d50a0de18.jpg
    93ff7f4c4f8f7bc485548a7d50a0de18.jpg
    682.9 KB · Views: 0
  • 4fd0c3b55f57bad39a12340060220093.jpg
    4fd0c3b55f57bad39a12340060220093.jpg
    1.1 MB · Views: 0
  • cde5572b7d8a72af39859ff705e529b4.jpg
    cde5572b7d8a72af39859ff705e529b4.jpg
    753 KB · Views: 0
  • 59b899b5852ff17c09a169010a787cc8.jpg
    59b899b5852ff17c09a169010a787cc8.jpg
    748 KB · Views: 0
  • 84d872dc4f2cb039d379cc496f413855.jpg
    84d872dc4f2cb039d379cc496f413855.jpg
    725.3 KB · Views: 0
  • 71445a8332d0c4e704aa082fea46672c.jpg
    71445a8332d0c4e704aa082fea46672c.jpg
    103.8 KB · Views: 0
Last edited:
OP
Z

zmotorsports

ALLIANCE MEMBER
Joined
Oct 20, 2009
Messages
21,462
Location
Northern Utah
Mike,

That thing looks really heavy. What's the tipping point for weight for the rig? All kidding aside, fabulous craftsmanship as usual.....

Thanks you.

Yeah, she's a portly ole' girl but she gets around well.:lol_hitti Considering it started life around 4400 pounds and now tips the scale at 6k I've had to make alterations to her suspension over the years (and pounds).

Luckily most of the mass is low and centered which is much better than being top heavy, especially in an off-road vehicle.
 
Last edited:
OP
Z

zmotorsports

ALLIANCE MEMBER
Joined
Oct 20, 2009
Messages
21,462
Location
Northern Utah
I was thinking the same thing. I guess your stock of 1/2" thick plate ran out Mike? :bounce:

If you're referring to the bracket for the mic lanyard, it is just some .125" P&O that I had lying around. Yeah, probably a little overkill for just a mic holder but it's about all I had in such small quantity without using 20-gauge sheet metal which would have been too light I'm afraid.
 

lilscorpion

Well-known member
Joined
Mar 15, 2010
Messages
3,600
Location
Colorado
Mike,

Nice bracket. Little touches like that, especially ones that are in your face, sometimes make all the difference.

Question: what’s this tool?

eece724d7caf00bf31b4457d26e2fdf3.jpg
 

Attachments

  • eece724d7caf00bf31b4457d26e2fdf3.jpg
    eece724d7caf00bf31b4457d26e2fdf3.jpg
    438.2 KB · Views: 2
OP
Z

zmotorsports

ALLIANCE MEMBER
Joined
Oct 20, 2009
Messages
21,462
Location
Northern Utah
Mike,

Nice bracket. Little touches like that, especially ones that are in your face, sometimes make all the difference.

Question: what’s this tool?

eece724d7caf00bf31b4457d26e2fdf3.jpg

Thanks Matt.

The locking pliers are just some NAPA 7" axial locking pliers that I use for cutting small fasteners as it aids in letting me hold them and move parallel to the saw blade. I also have heard them called panel clamping locking pliers because the flats give them the ability to grab two flat flanges and clamp them together. They work pretty slick for cutting off fasteners before touching up on the disk sander.

If memory serves the NAPA part # was something like 810.
 
Last edited:

lilscorpion

Well-known member
Joined
Mar 15, 2010
Messages
3,600
Location
Colorado
Thanks Matt.

The locking pliers are just some NAPA 7" axial locking pliers that I use for cutting small fasteners as it aids in letting me hold them and move parallel to the saw blade. I also have heard them called panel clamping locking pliers because the flats give them the ability to grab two flat flanges and clamp them together. They work pretty slick for cutting off fasteners before touching up on the disk sander.

If memory serves the NAPA part # was something like 810.


Thanks!

Side note: I would have thought by now I’d seen most tools, or at least could recognize a type or style. It’s a cool feeling to still think “those are neat, what are they for?” even after so many years.
 

shortykorte

Well-known member
Joined
Sep 1, 2014
Messages
8,039
Location
Tallahassee, Fl
A couple of things. I would think a Jeep is lighter than a PU. Where’s the extra weight coming from?
Second, what’s a CB mic? Lol
Last, thanks for the tip on cutting fasteners.


Shorty Korte
Always remember quality in QST

Sent from my iPhone using Garage Journal
 
OP
Z

zmotorsports

ALLIANCE MEMBER
Joined
Oct 20, 2009
Messages
21,462
Location
Northern Utah
Thanks!

Side note: I would have thought by now I’d seen most tools, or at least could recognize a type or style. It’s a cool feeling to still think “those are neat, what are they for?” even after so many years.

I hear ya Matt. I too have those moments when I see something new and think huh, I really don't know everything.:lol_hitti
 

lilscorpion

Well-known member
Joined
Mar 15, 2010
Messages
3,600
Location
Colorado
A couple of things. I would think a Jeep is lighter than a PU. Where’s the extra weight coming from?


LOL. The Jeep you’re referring to is of the 2006 and older vintage that are exclusively 2-door. They’re really all just variants of the old school jeeps with a little more plastic to make them feel newer age.

2007 and later though are a different breed especially in regards to the 4 door Unlimited. They’ve actually made an effort to make the Jeep less noisy internally, improve the crash rating/safety, and add in the creature features. They’re longer, wider, and taller than the older models with a more modern shape and style (less body). After market parts in turn are bigger and heavier. We also like beefy axles so we upgrade them to 1-ton which increases the weight by hundreds of pounds. ...And we still want full sized spares and to load them full of tools and gadgets for the trail.

6k lbs for a 4 door JK may be light.
 
To avoid these ads, REGISTER NOW!
Top Bottom