Unruh
Well-known member
Did it fire off like a bullet?
Lol, yes! I was thinking it may, I made sure to aim it at the wall.

Did it fire off like a bullet?
A dead blow works a lot better than conventional steel hammers. I've broken a swivel myself trying to free it up. Good penetrants will help here. Kroil, Deep Creep, etc. WD40 is a horrible penetrant.
Don't get the temptation to just whack it until it moves...

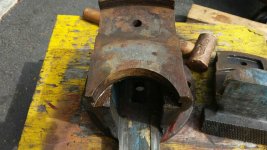
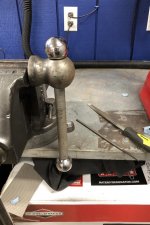
So I am getting zero movement. I put Kroil all over the place and tried hitting it with the dead blows. Still nothing. I set up this clamp, it gets a lot of pressure, more than I could myself. Then I have been hitting it all around with the dead blow just trying to get any movement. Still nothing. I'll keep the pressure on over night and keep it soaked. In the morning I'll hit all around and put the pressure from the other side. Thanks for all the support everyone! You guys are great!

Have you tried any heat? Even a Bernz-o-matic torch?
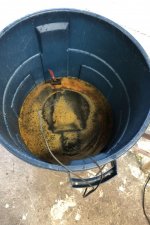
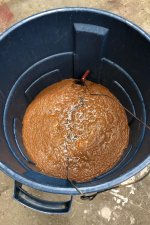
Unruh, looks like you are going to have to resort to the old trusty standby, THE OLD ELECTROLYSIS BATH trick.---When all else fails.


Good set up there...just make sure your can doesn’t make contact with the vise part.
Is this your first time with that charger? Like drives said, some newer chargers won’t run an electrolysis tank without a load in the circuit.
Looks good to me! just don't jostle the drum while hot!
Unruh: I was a bit concerned you might not have a big enough container for that big Reed 406, but it looks like a 32 gallon plastic garbage can is doing just fine.
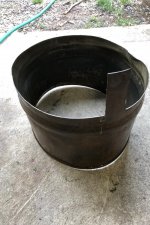
nice idea cutting up an old steel bucket and did you weld on the tail you are connecting the power of your charger too or was it built like that? looks like the Reed is cooking up nicely and it should be done next week. even though this should work you still might need to use more penetrating oil, brass or copper hammer tapping and heat to get it to free up.
good luck!!
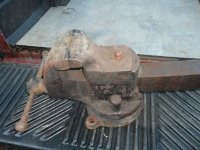
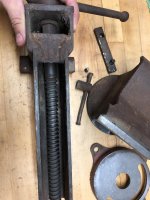
Shift, I scored a real nice Rock Island that is a swivel jaw, because the guy didn't know it moved, and didn't know what the pin was.---Funny thing was, he had a Charles Parker swivel jaw also and said I could have either one for the same money.---I chose the Rock because it had been in storage and the CP was mounted to his bench and was abused some.---After it was in my trunk I asked him about the swivel jaw and if he had ever used that feature.---OH the look I got.---A deal is a deal.---The Rock weighs 124 lbs..
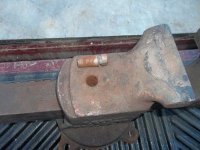
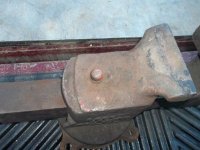
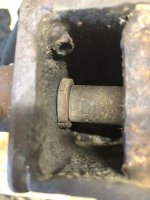
EDIT----Took me a while to dig up the pics but finally found them.---I'd like to say that there was exceptionally tight tolerances on the Rock but I think that layers of paint have taken up a lot of the slack.---Here's some pics for your spreadsheet KMS, but not good ones.
TSR:
Those jaws probably aren’t worn out...I doubt that they were very sharp or deep to begin with. I took a few pics of mine to compare. Here it is in its unrestored glory, just as I found it. These are rare vises. Congrats on finding one.
The only other all steel, welded up vise that I know of is the Milhoff. I assume the Columbian came first.
.
.