To avoid these ads, REGISTER NOW!

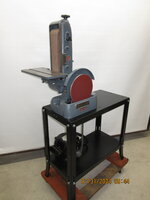
Atlas 5010 Disc/Belt Sander Resto

nitroracer20

Well-known member
Joined
Feb 25, 2018
Messages
238
Location
NY
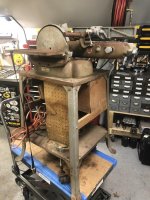
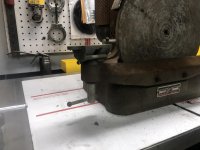
Scooped one of these up the other day...finally. Ive Been looking for one a long while. Happy i found it locally.

Didnt see much in terms of forum following on this machine. I decided to post as I restore. If anyone has any input/insight please chime in.

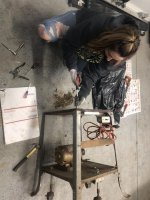
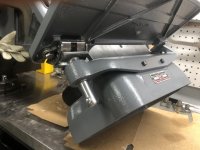
Just getting around to tear down. It worked when i bought it, bearings seem smooth. Mostly im planning to sand and repaint. Would love to clean up the motor a bit also.

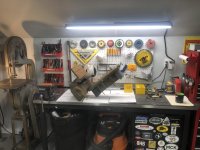
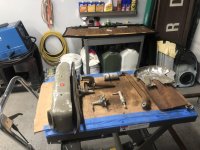
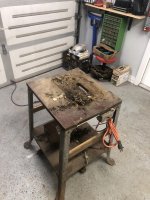
Here are a few pics!
 

Attachments

  • 1C775B9C-3729-475E-BBCA-7B4F7CA1B5B2.jpg
    1C775B9C-3729-475E-BBCA-7B4F7CA1B5B2.jpg
    124.3 KB · Views: 350
  • CDBCC035-0D36-4C3B-8942-6E989779BEC7.jpg
    CDBCC035-0D36-4C3B-8942-6E989779BEC7.jpg
    147.7 KB · Views: 270
  • CE52DE11-2DD9-4E6D-8C54-3C3389F0926D.jpg
    CE52DE11-2DD9-4E6D-8C54-3C3389F0926D.jpg
    151.1 KB · Views: 249
  • 80054ADF-D30D-4571-A65C-C4EBB2A1AFF2.jpg
    80054ADF-D30D-4571-A65C-C4EBB2A1AFF2.jpg
    120.4 KB · Views: 245
  • C14CFAFE-8660-40EB-B68A-8B4087E5428F.jpg
    C14CFAFE-8660-40EB-B68A-8B4087E5428F.jpg
    115.3 KB · Views: 231
  • B836242A-F82D-4755-BA6B-933832D79BB4.jpg
    B836242A-F82D-4755-BA6B-933832D79BB4.jpg
    125.1 KB · Views: 225
To avoid these ads, REGISTER NOW!
OP
N

nitroracer20

Well-known member
Joined
Feb 25, 2018
Messages
238
Location
NY
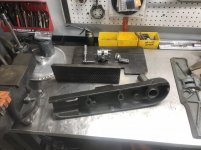
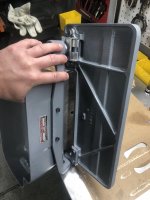
Dissassembled Into a pile of parts! I May get em blasted if its reasonable $$. Would save me like 3 hours of miserable work.

Bearings feel great. Think ill keep them, they are original with oiling groove in bearong shield. Ill get some dimensions on them if it helps anyone else out.
 

Attachments

  • E8EDC7B7-F8D9-41CC-9216-AF4145420840.jpg
    E8EDC7B7-F8D9-41CC-9216-AF4145420840.jpg
    100.7 KB · Views: 169
OP
N

nitroracer20

Well-known member
Joined
Feb 25, 2018
Messages
238
Location
NY
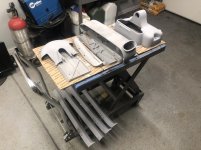
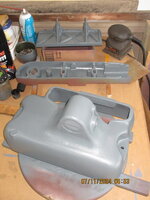
Got about 60% of everything grinded down. Who needs arm day when you can hit the angle grinder for 3 solid hours.

Hope to hit these parts with some rattle can rustoleum automotive primer ive had layong around if rain holds out. Dont want any flash rust on non-alum parts. Then, ill top coat with a battleship gray rustoleum thru the $10 HF spay gun - my first time using it. Maybe thin down with acetone?

The 9$ harbor freight angle grinder continues to impress me. I beat the hell out of it. Im on my second...ive only roasted one of them due to stripped gears on in about 3 years. I just dont have the heart to break out my Mac.

Im sure my neighbors hate me with the amount of grinding ive been doing.

Getting closer. Talking to myself....but thats not new! 🔥
 

Attachments

  • DB0CD23E-9570-42B6-A0B4-42BD7FE413B3.jpg
    DB0CD23E-9570-42B6-A0B4-42BD7FE413B3.jpg
    89.8 KB · Views: 158

don long

Well-known member
Joined
Mar 31, 2012
Messages
8,857
Location
southern california
Like the new project. Sand blasting is a lot faster. I use my HF die grinder a bunch on my projects too. They are very handy. I see an old band saw in your shop too. What other vintage tools do you have?
 
OP
N

nitroracer20

Well-known member
Joined
Feb 25, 2018
Messages
238
Location
NY
Thanks for thethanks for the feed back fellas!

I only have a 5HP craftsman 25 gal compressor right now. Not enough to blast but it actually runs my airtools just fine. Changed a few piston rings, but it keeps coming back for more. I really want a 80 gal compressor with 18-20 CFM - that should blast no problem right? I have 220V 30A line - mostly used for my heater right now. Keeps garage toasty in winter for wrenching. Think ill need more electric than that for the above mentioned compressor? Thats motly
Why ive been delaying a compressor purchase. My main house panel is only 100A. I dont really wannt to upgrade panel/add sub panel right now. I digress!

I scooped a 110V miller MIG and a Walker Turner 1300 Drill press from a old work colleague getting divorced a few years back when i was 25 or so. I got the Atlas TH42 lathe this winter, built a bench and turned a few parts since. I think ill make it my Winter 2020 goal to turn some metal and get proficent. I bought the Delta Rockwell 14” metal/wood bandsaw 2 years ago. I really wanted one and round it relatively close - so i pulled the trigger. Great shape. Previous owner took great care.

Got 2 coats of primer onto the parts i grinded. Wiped them down woth PrepAll before painting.
 

Attachments

  • EEFEAC93-F7B2-4F58-A480-4DC27DCAC912.jpg
    EEFEAC93-F7B2-4F58-A480-4DC27DCAC912.jpg
    147.2 KB · Views: 116
Last edited:
OP
N

nitroracer20

Well-known member
Joined
Feb 25, 2018
Messages
238
Location
NY
Few more items grinded, no more time tonight. Blasting sounds good right now!
 

Attachments

  • 2BAEC1FC-A180-4467-B6A7-7B54F40DE5A1.jpg
    2BAEC1FC-A180-4467-B6A7-7B54F40DE5A1.jpg
    92 KB · Views: 102
  • B30D71F9-8B88-466F-ABB3-A1A41048103B.jpg
    B30D71F9-8B88-466F-ABB3-A1A41048103B.jpg
    123.5 KB · Views: 103
  • C0E59046-6D2D-40AE-8682-4BF20A87EF3B.jpg
    C0E59046-6D2D-40AE-8682-4BF20A87EF3B.jpg
    108.7 KB · Views: 114

OccupantRJ

Well-known member
Joined
May 15, 2009
Messages
11,264
Location
Eastern North Carolina
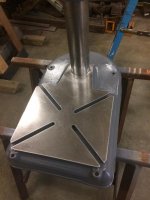
If you have an orbital sander, it will put a nice finish on the machined table by using 40 to 60 grit abrasive. Follow up with burgundy scotchbrite. Here is a drill press base I sanded a month or so ago. I use a Dewalt 5” variable speed. Keep the sander pad flat near the edges to prevent rounding them over.
 

Attachments

  • 8B726A24-24EE-424B-BD8F-DB40E10EF1F4.jpg
    8B726A24-24EE-424B-BD8F-DB40E10EF1F4.jpg
    73.8 KB · Views: 150
OP
N

nitroracer20

Well-known member
Joined
Feb 25, 2018
Messages
238
Location
NY
That looks fantastic! Definetly the route i will go + some paste wax when done.
 

OccupantRJ

Well-known member
Joined
May 15, 2009
Messages
11,264
Location
Eastern North Carolina
Here is the type of thing I deal with. I wire brush and sand a lot. Lol, and yes, an 18-20 cfm compressor will sandblast just fine with the proper air jet or nozzle size. That is what I am running on.
Check out my thread linked below for about all the blasting information you can read in one place on GJ.

https://www.garagejournal.com/forum/showthread.php?t=237844
 

Attachments

  • 34BA680B-CCA5-4532-B554-7600F1BB1C00.jpg
    34BA680B-CCA5-4532-B554-7600F1BB1C00.jpg
    84.5 KB · Views: 136
  • 9E15CC8E-4AEA-4FA3-BFC8-5674D37D1732.jpg
    9E15CC8E-4AEA-4FA3-BFC8-5674D37D1732.jpg
    150.5 KB · Views: 123
Last edited:
OP
N

nitroracer20

Well-known member
Joined
Feb 25, 2018
Messages
238
Location
NY
thats a beaut ORJ! I gotta step my game up!

Whats stopping me from using a 185CFM “job site” gas compressor to do blasting? Aside from noise. I feel like i can come close in price with that to a nice automotive compressor. Run a regulator and a dryer and im set? Plus i can rent it out perhaps to friends with a jackhammer for weekend demo projects?

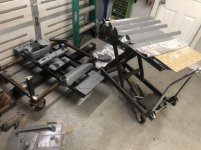
The grinding continues. My 3 hour grinding estimate was way off...but im still loving the resto!

Just need to grind the belt sander fence and then all sander parts will have been cleaned up! Then...Finally to paint on those.

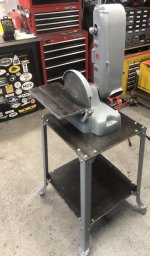
Got 3/8” steel plate cut up to replace the “table top/motor mount plate” also.
 

Attachments

  • 54E13AB0-711C-44C2-A922-352850BB1FF0.jpg
    54E13AB0-711C-44C2-A922-352850BB1FF0.jpg
    104.7 KB · Views: 151
  • 09F58651-447B-4B6F-8061-5DC5C1786029.jpg
    09F58651-447B-4B6F-8061-5DC5C1786029.jpg
    114.5 KB · Views: 146
  • 09AD32B9-03ED-494E-9674-B006B02B5DAF.jpg
    09AD32B9-03ED-494E-9674-B006B02B5DAF.jpg
    146.6 KB · Views: 131
Last edited:

OccupantRJ

Well-known member
Joined
May 15, 2009
Messages
11,264
Location
Eastern North Carolina
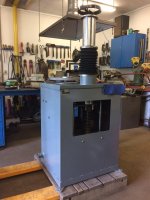
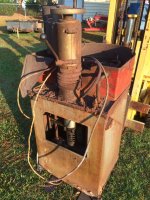
I have two 20 cfm compressors, only run one at a time for each blast cabinet. I also have a 110 cfm mobile unit that I can pipe to a port I installed in my shop wall to pressurize my shop air system if needed. It is hard to outdoor blast here due to neighbors, but my BIL has property we can both use for major blasting.

The girlfriend looks like a keeper, for sure!

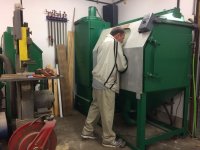
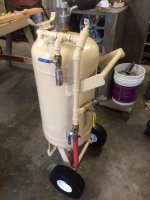
Here is my BIL using the large cabinet with aluminum oxide. The glas bead cabinet is to the left in the picture. The other picture is my pressure blaster pot that I restored. Both the cabinets have also been restored. A blast cabinet will be a very worthwhile investment if you enjoy restoring things. I love it and am at it most every day of the week.

The last picture is the outdoor port into my air system where I can attach the larger mobile compressor to power the whole shop with maximum air.
 

Attachments

  • 042EF550-3E8D-4DF0-B434-6368B0B1E5F7.jpg
    042EF550-3E8D-4DF0-B434-6368B0B1E5F7.jpg
    124.9 KB · Views: 89
  • 6D61B922-5E3C-4FC1-A669-DBC6D6D38137.jpg
    6D61B922-5E3C-4FC1-A669-DBC6D6D38137.jpg
    84.5 KB · Views: 80
  • A90990F3-37E5-47AC-B3CB-FCB72A9DCDB7.jpg
    A90990F3-37E5-47AC-B3CB-FCB72A9DCDB7.jpg
    101.2 KB · Views: 85
OP
N

nitroracer20

Well-known member
Joined
Feb 25, 2018
Messages
238
Location
NY
Thanks for the replies and info RJ. Once i wrap this project up ill immerse mysefl into your blasting thread. Thats next....

More grinding and prime today. Probably wont get any more done in next couple days....Life.

Im looking to spray everything in one shot for finish coats of a battleship gray. Moving along.
 

Attachments

  • 53C4076C-B18C-4D3D-8E1D-24B3D359E277.jpg
    53C4076C-B18C-4D3D-8E1D-24B3D359E277.jpg
    144.7 KB · Views: 80
  • 90C2504C-C764-4BC4-A13F-857A8E914084.jpg
    90C2504C-C764-4BC4-A13F-857A8E914084.jpg
    98.1 KB · Views: 83

OccupantRJ

Well-known member
Joined
May 15, 2009
Messages
11,264
Location
Eastern North Carolina
Looks like you got it going on.
Are you going to paint with rattlecan or with a gun?
Rustoleum has a nice grey in the 2x series that I use. It is the color used on the part pictured, if that is a color you like. It has good coverage and shoots well.

Looks like you got the best of that brush.
 

Attachments

  • 225FA54A-A649-4611-AF38-BBCCC79C571F.jpg
    225FA54A-A649-4611-AF38-BBCCC79C571F.jpg
    70.8 KB · Views: 83
Last edited:
OP
N

nitroracer20

Well-known member
Joined
Feb 25, 2018
Messages
238
Location
NY
ORJ - looking tight as always! Im going to spray with a gun. First time trying out the 9$ HF gun. Probably just toss it after this project. Ill thin the rustoleum i purchased with acetone. I believe i bought a smoke gloss gray. I always did rattle cans till now. I looked into the 2X...but nothing in cans - only aerosol.


Stillgottime - Many thanks! Too many guys i work with are getting hearing aides about to retire 55-60. Although these new ones are pretty sleek and slick with bluetooth - no thanks. All their years of construction and busting rivets with no hearing protection......crazy. I use the half face miller respirator with hearing peotection and a grinding mask. Ill take all the help i can get. No need to be a superhero.

Everything is primed, but no chance to spray top coat today. Hopefully Early this week once the weather dries out a bit.
 

Attachments

  • 6ED6EE09-07E5-41C2-B94A-73688C72BCD0.jpg
    6ED6EE09-07E5-41C2-B94A-73688C72BCD0.jpg
    151.8 KB · Views: 93

OccupantRJ

Well-known member
Joined
May 15, 2009
Messages
11,264
Location
Eastern North Carolina
Looks like you are prepped and ready to go at it! You can practice shoot on a piece of cardboard to get the spray pattern you want, whether flat and wide, or smaller and rounder. The left side knob adjusts this aspect. Knob on rear adjusts paint output volume, knob on bottom adjusts how much air flow. I run about 40-45 psi on my outlet regulator with the trigger on the gun pulled. Acetone should work fine, my son uses xylene, and I use VM&P naphtha as reducer.
Here is a link to read up on the paint gun if you have not already read it.
https://manuals.harborfreight.com/manuals/47000-47999/47016.pdf
 
Last edited:
To avoid these ads, REGISTER NOW!
OP
N

nitroracer20

Well-known member
Joined
Feb 25, 2018
Messages
238
Location
NY
Thanks for the tips, as usual, ORJ.

Got paint down last night. Scotchbrited everything, then wiped down with Prepall.

Thinned 20%, 3oz acetone on 15oz paint. Im so amazed how little overspray these guns have! 15 oz covered everything. Sprayed at 45 psi with the HF dryer hooked inline to the gun. Id think I would have used 5-6 rattle cans.

I only did one heavy coat, hoping thats all ill need. I think really should have done 2 light coats, but i got carried away.

Spent More time cleaning the gun than i did spraying. Im trying to keep gun for another use...but it almost makes sense to just throw it out after one use. I went through alot of laquer thinner cleaning the gun before and after use. Still seems more effective than rattle cans.

Ill let the paint set up and begin reassembly in a couple days!
 

Attachments

  • B03EFB18-C146-4E1E-BBF2-89B75669EE14.jpg
    B03EFB18-C146-4E1E-BBF2-89B75669EE14.jpg
    125.4 KB · Views: 84
  • 3F2F2444-8B91-4036-B727-DC58412143E4.jpg
    3F2F2444-8B91-4036-B727-DC58412143E4.jpg
    92.3 KB · Views: 90
  • 26502880-FDB4-454A-AD5A-60E4F5864206.jpg
    26502880-FDB4-454A-AD5A-60E4F5864206.jpg
    153.1 KB · Views: 92

OccupantRJ

Well-known member
Joined
May 15, 2009
Messages
11,264
Location
Eastern North Carolina
Looks like factory, as a guy in my neighborhood always said after I had refurbed something. Be careful, the restoration bug can be habit forming, but it provides a great sense of accomplishment. Looks like you did well with the gun.
 
OP
N

nitroracer20

Well-known member
Joined
Feb 25, 2018
Messages
238
Location
NY
Getting plate cut, drilled and cleaned up!
 

Attachments

  • 674C920D-046A-42F6-AD2C-123F4F4A94B3.jpg
    674C920D-046A-42F6-AD2C-123F4F4A94B3.jpg
    84.5 KB · Views: 80
Last edited:
OP
N

nitroracer20

Well-known member
Joined
Feb 25, 2018
Messages
238
Location
NY
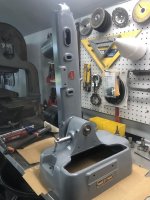
Coming along!
 

Attachments

  • FFD3EB43-3567-4C27-BFF0-995C1D271333.jpg
    FFD3EB43-3567-4C27-BFF0-995C1D271333.jpg
    91.6 KB · Views: 135

Boulderdash

Member
Joined
Nov 21, 2018
Messages
9
Location
UK
That looks fantastic, keep the updates coming!
(Very jealous of the band saw too. Being nosy, but what make/model is it?)
 
OP
N

nitroracer20

Well-known member
Joined
Feb 25, 2018
Messages
238
Location
NY
Thanks man. Bandsaw is a Delta Rockwell 14” metal/wood with the gearbox. Serial number dates it to approx 1948. Alot of people seem to knock the 14”, but it works great for what i do. Ive cut some thick steel with it no problem.

Had a good weekend, but didnt spend any time on the sander. Got the jetski out for the seasons maiden voyage. Sunday was a swap meet. Got three Weatherhead storage units for $20. The one pictured, and two larger ones.

Yesterday i got more sander reassembly in. Coming along. Only issue i seem to have is this old cast aluminum. So soft. I got the sanding disc onto the arbor shaft, forgot the washer, had to take it off and it seems like the aluminum disc was galling on the steel arbor threading. Very tight coming back off. Was worried i would strip it. Chased the threads and it was fine.

I reassembled it with the washer and it seems okay. Disc Runout is acceptable, but i wish it was perfect. I never checked it before i disassembled. Ill find out how it is when i spin it up under power.

After a light wire wheeling to remove oxidation/rust, I applied meguiars metal polish to all bolts/studs/any bare aluminum.

The oddball size sanding belts were sourced from customsandingbelts.com and ahould arrive today.
 

Attachments

  • 31644051-10AD-47B6-946D-3571B033A5FA.jpg
    31644051-10AD-47B6-946D-3571B033A5FA.jpg
    106.3 KB · Views: 108
  • 75BC500F-A7B8-4DD3-95E3-5B244C0C7AB9.jpg
    75BC500F-A7B8-4DD3-95E3-5B244C0C7AB9.jpg
    98.6 KB · Views: 113
  • 562B422E-390A-46A6-B9C6-286D8222E58D.jpg
    562B422E-390A-46A6-B9C6-286D8222E58D.jpg
    130.1 KB · Views: 96
  • 7CBD726C-D404-4526-9BF2-924C52950EEC.jpg
    7CBD726C-D404-4526-9BF2-924C52950EEC.jpg
    78.7 KB · Views: 93
  • 8332A550-38D0-4877-AA1C-5222EA8F4CF8.jpg
    8332A550-38D0-4877-AA1C-5222EA8F4CF8.jpg
    155.1 KB · Views: 92
Last edited:

rk_tek

Well-known member
Joined
Apr 12, 2015
Messages
153
Location
Bella Vista, AR
I use the Rustoleum Smoke Gray for all of my refurbs as well. I find that it just takes ages to dry. Sometimes that's fine as I may leave a project for a while, but other times I really want to get it painted and back together.
 
OP
N

nitroracer20

Well-known member
Joined
Feb 25, 2018
Messages
238
Location
NY
Thanks for the replies fellas! Ill keep the thread updated.

Im about 50-60 hours into the project over slightly less than 3 weeks - with approx $50-60 in materials.

Rk_tek - Im new to this paint myself, but I found with the acetone thinner it was nearly rock hard after spraying in 2-3 days. It was Relatively warm out, and i dont have humidity problems in my garage. By rock hard i mean you can scratch it with a finger nail and paint is not affected. What were your cure times?

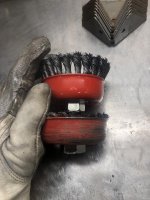
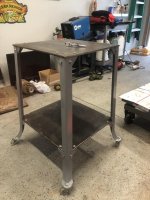
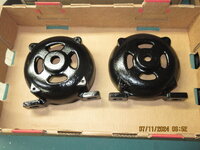
I Ground the table stand brackets today and brushed on one coat of paint. Finally done with grinding and paint for the sander components. No primer on these though. I borrowed a metabo electric die grinder. So much quieter than pneumatic. Very big tool...but it was so smooth! Just dont overspeed the wire wheels like i did, or they blow up/dont last.

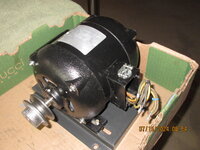
Last major project is the motor overhaul/switch rewire.
 

Attachments

  • 26D66084-1161-4F84-90A8-9CDC97168495.jpg
    26D66084-1161-4F84-90A8-9CDC97168495.jpg
    152.5 KB · Views: 95
Last edited:
OP
N

nitroracer20

Well-known member
Joined
Feb 25, 2018
Messages
238
Location
NY
Got some progress in finally.

Anyways...i think i am going to rewire motor and just leave it with the “pattina” it has. Time to wrap this project up.
 

Attachments

  • 7580ABB6-E416-4BB7-9C90-F81776A1A0FF.jpg
    7580ABB6-E416-4BB7-9C90-F81776A1A0FF.jpg
    97.6 KB · Views: 122
  • 8D1D705B-9C3F-4F1C-858C-18F2C2C510B2.jpg
    8D1D705B-9C3F-4F1C-858C-18F2C2C510B2.jpg
    109.3 KB · Views: 102
Last edited:

Jayman17

Well-known member
Joined
Feb 6, 2017
Messages
3,818
Location
Seattle, Wa
Beautiful results on that sander. :thumbup: I am on the lookout for one myself.
If you don't mind saying, what did you pay for it in that condition?

Jay
 

86turbodsl

Well-known member
Joined
Jul 1, 2005
Messages
6,558
Location
Michigan
I have that same Atlas sander combo. Where did you find belts for it? They are an odd size that nobody around here seems to carry.
 

Capt. Curt

Well-known member
Joined
Dec 31, 2018
Messages
92
Location
Harrison Arkansas
I have an Atlas 5010 Sander also after I had been looking for one for YEARS!! One of the most beautiful design "art deco" sanders of all time in my opinion :)
Mine is posted on Vintage Machines.org
I've heard it said that these Atlas 5010 Sanders are referred to by others on that website as their "Quest Machine" :)

I've only just cleaned up this sander, it is in INCREDIBLE original condition with all the factory Atlas paint still intact on it.

Specs on Atlas 5010 Sander:
Disk Size: 10"
Belt Size: 37 13/16" x 4"
Table: 7 " x 15"
Spindle Speed: 1360 RPM
Belt Speed:1150 FPM
Overall Dimensions: 28 " x 20 " X 12" high
Weight:62 lbs.
 

Attachments

  • WP_20170622_13_50_40_Pro.jpg
    WP_20170622_13_50_40_Pro.jpg
    112.4 KB · Views: 99
  • WP_20170528_17_54_18_Pro.jpg
    WP_20170528_17_54_18_Pro.jpg
    47.3 KB · Views: 92
  • WP_20170528_17_53_45_Pro.jpg
    WP_20170528_17_53_45_Pro.jpg
    88.7 KB · Views: 87
  • WP_20170528_17_45_33_Pro.jpg
    WP_20170528_17_45_33_Pro.jpg
    109.3 KB · Views: 90

Jayman17

Well-known member
Joined
Feb 6, 2017
Messages
3,818
Location
Seattle, Wa
I have an Atlas 5010 Sander also after I had been looking for one for YEARS!! One of the most beautiful design "art deco" sanders of all time in my opinion :)
Mine is posted on Vintage Machines.org
I've heard it said that these Atlas 5010 Sanders are referred to by others on that website as their "Quest Machine" :)

I've only just cleaned up this sander, it is in INCREDIBLE original condition with all the factory Atlas paint still intact on it.

Specs on Atlas 5010 Sander:
Disk Size: 10"
Belt Size: 37 13/16" x 4"
Table: 7 " x 15"
Spindle Speed: 1360 RPM
Belt Speed:1150 FPM
Overall Dimensions: 28 " x 20 " X 12" high
Weight:62 lbs.

Wow, that is a nice machine! :pimpflash

Jay
 
OP
N

nitroracer20

Well-known member
Joined
Feb 25, 2018
Messages
238
Location
NY
Holey blast from the past. I didn't realize there were a few more replies...

Jayman - Thanks! I think I paid $50 or $100 for it.

Capt Curt - That's a beauty man!

Nice to see there are more of these out there!

I picked up a larger Rockwell Delta disc/belt sander from a retired home machinist. He fitted a 1" belt sander onto the back side of it. Pretty innovative. Ill have to shoot some photos later when I get home.

I'm sad to say I sold this to my buddy for what I had into it. I definitely lost out on the labor expense! He has a few final touches to get it running yet. At least its staying in the "family".

I am concerned for him about the runout on the disc, though. Have any of you guys had issues after removing/replacing the cast aluminum sanding disc plate from the threaded hub - regarding thread galling/runout?

Hopefully this fall/winter ill do a resto on my bandsaw or lathe.
 

FrankLee

Well-known member
Joined
Sep 13, 2010
Messages
3,618
Location
seMI, 48317
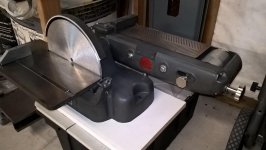
I'm dredging up this thread once again to post my 5010. There's good info above and I want to keep like info together.


Late this past June, I picked up this Atlas 5010. It came with the original Atlas motor and stand.

410052095_1148542419626840_8924291058444289213_n.jpg

I knew from the seller's photo that the original 10" disk was replaced with a smaller (8") disk, all original knobs were missing and a too-short 36" sanding belt was installed. A previous own made a rather nice belt guard. The seller demonstrated that it did run.

I like this model because it is more compact than the 6x48" sanders and, more importantly to me, it takes standard ball bearings; 6202-5/8 (x4). IMO, standard ball bearings are much better than those water-pump bearings.

After I got it home and started disassembling, I also discovered that the belt table was missing (due to the 36" sanding belt) and the belt tracking assembly needed replacing. eBay to the rescue. The drive drum rubber sleeve was also missing, but I think I'll be ok without it.

I stripped all paint and repainted everything:
  • sander: Krylon Matte Dark Pearl
  • motor: Rustoleum Black Satin (spray)
  • stand: Rustoleum Black Satin (roll-on)
The motor also received new bearings (6301-RS x1 and 6203-RS x1), a new grounded cord and a new 52" cogged v-belt.

Most of the standard hardware was replaced and new knobs were sourced.

I already had some 9" self-adhesive sanding disks and ordered new custom 4" x 37-1/2" zirconia sanding belts from Red Label Abrasives. Their custom belts are reasonably priced, made in Michigan and they offer great service. HIGHLY recommended.
(BTW, the link to customsandingbelts.com mentioned above is dead.)

I also installed a Craftsman Powr-Panl on the stand and I'm working on making a miter guide for the 1/8" x 1/2" table slot.

So, it kinda turned into a labor intensive money pit, but I'm very pleased with how it looks and runs.

IMG_5334.JPG IMG_5335.JPG IMG_5393.JPG IMG_5447.JPG

IMG_5336.JPG IMG_5474.JPG IMG_5543.JPG


Related links:
 
Last edited:
To avoid these ads, REGISTER NOW!
Top Bottom