To avoid these ads, REGISTER NOW!

Straightening-Out A Poorly-Constructed Garage?

jseymour

Active member
Joined
Nov 20, 2019
Messages
39
Location
S.E. Michigan
I'll try to keep the back-story as short as possible and get to the questions.

We have an over-sized two-car garage, measuring 23 ft. by 23 ft. attached to the house. It's a ranch house with a hip roof. The garage roof is also a hip roof.

We knew something had been going on with the garage for years. Finally figured it out last spring: The roof was pushing the walls out. Near as we can tell, the original owner expanded the garage from 1-1/2 cars to its current size, and they put in only half the rafter ties they should have. Nor did they put collar ties on every rafter.

By the time I figured this out it was at the point that one good snow load probably would have brought the whole thing down. A contractor wanted $8-$9 thousand to fix it. A number of construction types, incl. an acquaintance that once built garages said "Nonsense. You can fix this yourself."

So I am.

Over the past five months I've been gradually pulling the the walls in using front-to-back and side-to-side cables and come-alongs, plus a column with a jack screw pushing the far end of the ridge board up.

I'm nearly there. Except for a slight bulge in the top of the middle of the back wall (the rafter tie there had literally come loose!), the walls now appear straight and plumb. Checking the wall studs with a level, the bubble is between the lines in all but that one spot--where that mild bulge remains. The ridge board isn't level, but it's not too bad.

I've a stack of 2x6's for additional rafter ties ready to go in once I've got the walls where I want them. Which leads me to my questions.

1. How to best fasten the new rafter ties to their rafters? I purchased a framing nailer for this purpose, but I've seen it suggested I should through-bolt them?

2. Should I install hurricane ties to the rafters before installing the new, additional rafter ties?

3. Anybody got any tricks-of-the-trade for getting the new rafter ties in, in existing construction, being as the roof constrains my maneuvring room?

Thanks in advance!
 
To avoid these ads, REGISTER NOW!

manwithtools

ALLIANCE MEMBER
Joined
Aug 24, 2015
Messages
14,110
Location
Lebanon, TN
Do you have some pictures of the bulge in the back wall? Do you have an idea of why that particular area is a problem?

Pictures of all of it might help, but I'd offer the following:
1) Rafter ties to rafters, nails will work. But a bolt or two can't hurt.
2) Hurricane ties to the rafters before the ties is a good idea as well.
3) getting the rafter ties in will take some maneuvering, thankfully they are only 2 x 6's.
 

jimindm

Well-known member
Joined
Oct 29, 2011
Messages
2,398
Location
Des Moines, Iowa
I would second having some pictures.

I would use everything you have talked about. I would also likely use some some structural screws.

GRK is one brand and most box stores carry them in a lot of different lengths. Not cheap.
 

Joemctag

Well-known member
Joined
Aug 11, 2017
Messages
813
Location
Outside raleigh nc
I wouldn’t overlap the tie and rafter. I’d angle-cut the tie to fit the rafter and put plywood gussets on each side. Glue with polyurethane construction adhesive and a lot of screws or 1/4” or 5/16” bolts. Those ties need to assume the he same tension you have in n the cables plus the roof load pushing the walls out after you remove the shore(s) under the ridge. When in doubt , over-build, I say.
 
OP
J

jseymour

Active member
Joined
Nov 20, 2019
Messages
39
Location
S.E. Michigan
Thanks for the follow-ups, guys!

Do you have some pictures of the bulge in the back wall?
You wouldn't be able to see anything in any photo I could take of the outside of that wall. Particularly since what's left of the bulge isn't very much, any more. In fact: I would bet nobody'd even notice it if I didn't point it out.

Do you have an idea of why that particular area is a problem?
I do. Remember: Hip roof. The ridge board ends just shy of where the original side of the garage used to be, near as I can figure. As the ridge of the roof sagged, more at the end of the ridge board than closer to the house, it pushed-out the middle of the back wall further than the rest. The force was so great the rafter tie at that spot literally pulled right out of the rafter. Only one-half to one-quarter inch of it was still atop the top plate of the wall when I figured out what was going on.

Same with the side wall opposite the house, but not to the same degree. In fact: While still not yet quite plumb, it's been flat as near as the eye can tell for a good couple months, now.

I would second having some pictures.
Not certain what to take photos of.

I would use everything you have talked about. I would also likely use some some structural screws.
Through-bolt + nails + structural screws? I came here for advice, so I'm not challenging you, but that seems like over-kill?

ETA: Just read up on structural screws a bit. Looks like a structural screw in each rafter tie could serve the purpose through-bolting was meant to serve: To keep the rafter tie tight against the rafter, while the nails provide the shear strength?

I wouldn’t overlap the tie and rafter. I’d angle-cut the tie to fit the rafter and put plywood gussets on each side.
That'd be tricky for me to do, since I'm doing this on my own :). I'd have to put up some kind of rigging to hold stuff in place while I secured it.

Those ties need to assume the he same tension you have in n the cables plus the roof load pushing the walls out after you remove the shore(s) under the ridge.
Will that really likely be an issue? There are currently only five rafter ties. I'm adding another nine, plus collar ties on every rafter. (There were only three. I'll be adding another five.) Plus they had a half-a** cross-tie that wasn't secured well. (That had also pulled loose.) I'll be fabricating a kind of 2x6 L-beam, glued and screwed or nailed, to replace that. It'll be tied into the side of the house, to the top of each front-to-back rafter tie, and to the rafter above the center of the wall opposite the house.

When in doubt , over-build, I say.
That is the plan :)
 
Last edited:

Dustball

Well-known member
Joined
Jun 25, 2011
Messages
2,081
Location
Hudson, WI
I'd pull the walls in just a bit past where they need to be before you do the work. When you release the cables, the walls will move outwards a bit.
 
OP
J

jseymour

Active member
Joined
Nov 20, 2019
Messages
39
Location
S.E. Michigan
I'd pull the walls in just a bit past where they need to be before you do the work. When you release the cables, the walls will move outwards a bit.
That was the original plan. But as the walls get closer to plumb they become increasingly reluctant to move any further. I gained a lot in the first month or so. So much that I ordered and took delivery of my new, additional rafter ties then. They've been sitting outside, under tarps, ever since :(

Though, admittedly, part of what slowed things down was I discovered the bottle jack I'd been using to push up the end of the ridge board wasn't maintaining. Thus the jack screw. (Which nobody had in stock and took forever-in-a-day to get.) Then there's been the occasional weather delay. I've been reluctant to apply additional force when temperatures got down in the low 20's and below, or when there was snow load on the roof.

But you are right. Maybe, once I get that remaining bit of bulge out of the back wall I'll give it another month to see if I can get it all to get at least more plumb than it is.
 
Last edited:
OP
J

jseymour

Active member
Joined
Nov 20, 2019
Messages
39
Location
S.E. Michigan
Great job of taking on and accomplishing a project that takes both know-how and persistence.
Thanks!

I'd put hurricane ties on, while you're doing the work. Every roof should have those.
Will do.

Any recommendation on which to use?

You're at a slight disadvantage correcting a failure that's under load, and want it to hold with as little take-up movement as you can get.
My big concern, all along, was putting too much force in the wrong place too quickly and crashing the garage myself!

As previously mentioned, pulling just past plumb with the cables before attaching the ties might serve you well.
I'll try. I don't know if I can get things to move that much further.

A lot of the wood in that garage is very hard. It doesn't like to move.

Good luck with the rest of the repair. You've gotten further than most non-professionals would have already!
Thanks again! :)
 

matt_i

Well-known member
Joined
Mar 14, 2008
Messages
10,752
Location
SE Michigan
Sometimes the problem you can have with a low pitched roof is that the cross-tie ends up with its end cut on a long skinny angle to match the roof. Any little defect in the wood is magnified and its easy for it to split there and then you are back to having nothing. The suggestion of using plywood gussets helps to get the connection back to the full dimension of the wood. Above I noted you were not in favor of that since working solo but I wouldn't discard the idea so quickly. All you need is a block or ledge to get one side close and then move to the other side, figure out how to use bar clamps to help you out.

I don't know if your steel cable setup is sustainable long-term but nothing says you have to release it or take it down at the end, unless its in the way.
 

jbwilkins

Well-known member
Joined
Mar 16, 2016
Messages
310
Location
Nashville Tn
Thanks for the follow-ups, guys!


....... The force was so great the rafter tie at that spot literally pulled right out of the rafter. Only one-half to one-quarter inch of it was still atop the top plate of the wall when I figured out what was going on.


That is the plan :)

Your comment above makes me think you're calling ceiling joist 'rafter ties'.......Rafter ties should be installed at the top 1/3 of the rafter, ceiling joist typically sit on the top plate and tie into the rafters and the top plate.......

Does the garage have both Ceiling Joist and Rafter Ties??? If not you need to make sure both are installed.....

Next....If you're ceiling joist are #2 2x6 SYP (you said you had a stack of 2x6 for rafter ties on hand), AT MOST they should be spanning 18'8' (from where you are you probably have SPF or Hem-Fir which would span even less).......
 

nh_yota

Well-known member
Joined
Mar 10, 2015
Messages
4,078
Location
Seacoast New Hampshire
Your comment above makes me think you're calling ceiling joist 'rafter ties'.......Rafter ties should be installed at the top 1/3 of the rafter, ceiling joist typically sit on the top plate and tie into the rafters and the top plate.......

Does the garage have both Ceiling Joist and Rafter Ties??? If not you need to make sure both are installed.....

Next....If you're ceiling joist are #2 2x6 SYP (you said you had a stack of 2x6 for rafter ties on hand), AT MOST they should be spanning 18'8' (from where you are you probably have SPF or Hem-Fir which would span even less).......

Collar ties go on the top third and rafter ties go on the bottom third. Ceiling joists can function as rafter ties so people often use the two terms interchangeably, but they're not the same as collar ties.
 

tncatadjuster

Well-known member
Joined
Jan 3, 2010
Messages
2,008
Location
Memphis, TN
A picture is worth a thousand words. Seeing exactly how it is constructed and how you are straightening out would be informative for the future. I think it's great you are saving it and fixing it at the same time.

I'm all for leaving cable installed.:thumbup:
 
OP
J

jseymour

Active member
Joined
Nov 20, 2019
Messages
39
Location
S.E. Michigan
Sometimes the problem you can have with a low pitched roof is that the cross-tie ends up with its end cut on a long skinny angle to match the roof.
The pitch is low, but not that low. I think there will be plenty of meat for securing the ties/joists to the rafters.

Any little defect in the wood is magnified and its easy for it to split there and then you are back to having nothing.
Understood and good point. (Then again: I'm not using HD/Lowe's wood, so there's that ;).)

The suggestion of using plywood gussets helps to get the connection back to the full dimension of the wood. Above I noted you were not in favor of that since working solo but I wouldn't discard the idea so quickly. All you need is a block or ledge to get one side close and then move to the other side, figure out how to use bar clamps to help you out.
Like a temporary ledger boards... hmmm... Ok, I will give it further consideration.

I don't know if your steel cable setup is sustainable long-term but nothing says you have to release it or take it down at the end, unless its in the way.
The side-to-side ones definitely would be. The front-to-back ones not so much. I'll consider that.

Next....If you're ceiling joist are #2 2x6 SYP (you said you had a stack of 2x6 for rafter ties on hand), AT MOST they should be spanning 18'8' (from where you are you probably have SPF or Hem-Fir which would span even less).......
Yeah, the contractor we had out said they should be 2x8's. But that would've opened up a whole new can of worms--like having to remove the garage door opener, a bunch of wiring, etc. So I decided to stick with the existing 2x6's. I figured nearly tripling the number of ties/joists and collar ties would do the trick?

I will be putting plywood up there for storage, but I won't be putting a lot of weight up there.

Maybe I should make that side-to-side tie an engineered beam, placed under the front-to-back ties, atop ledger boards on the house and far side walls? Or consider making the post I have there for pushing up the ridge board permanent?

Collar ties go on the top third and rafter ties go on the bottom third. Ceiling joists can function as rafter ties so people often use the two terms interchangeably, but they're not the same as collar ties.
Yes, what I'm referring to as rafter ties would be ceiling joists, were I putting in a ceiling. The collar ties will be up top, just under the ridge board.

A picture is worth a thousand words. Seeing exactly how it is constructed and how you are straightening out would be informative for the future.
Very well. I'll see if I can get any useful photos.

I think it's great you are saving it and fixing it at the same time.
Thanks!

Thanks for the additional input, guys!
 

joe--h

Well-known member
Joined
Jan 30, 2013
Messages
536
3 times you've been asked for pictures, and still no pictures.

If you knew what to do you wouldn't be asking, and the people here who might know have asked for pictures.

Here's the deal, get your camera & go outside and take some pictures, then go inside and take some more.

Then post them here and see what happens?

I know exactly what I would do, but you're not me and again, I haven't seen it so maybe what I'd do isn't feasible.

Not trying to insult you, but without pictures it's a waste of time just guessing.

Joe H
 
OP
J

jseymour

Active member
Joined
Nov 20, 2019
Messages
39
Location
S.E. Michigan
3 times you've been asked for pictures, and still no pictures.
Perhaps you didn't notice, Joe, but I just posted my initial question at 7 p.m. yesterday evening and didn't see the first request for photos until 12:30 a.m. this morning. In my first response today, just an hour ago, I said I'd get photos.
 
OP
J

jseymour

Active member
Joined
Nov 20, 2019
Messages
39
Location
S.E. Michigan
Allll righty, then. Y'all want photos? I gots photos :)

This first set was taken about a year ago, when I was first trying to figure out what was going on, and posted to another forum.

P1000489.JPG


Gap in the siding over the top of the garage door. It'd been getting bigger, for years. We couldn't figure out what was going on.

P1000495.JPG


The bottom part of this downspout originally came straight out from the elbow. Because of what you see here, we wondered if the garage wasn't sinking. Then, last spring, looking out a window that faces across the back of the garage I saw this:

P1000492.JPG


The angle's not great, but you can see things are quite out-of-kilter.

Went into the garage and spotted this:

P1000493.JPG


That's the tie/joist that runs front-to-back in the center of the garage. As you can see, it's nearly off the top plate!

P1000490.JPG


This is the end of a half-a** cross-tie, opposite the house.

Upon the suggestion in the other forum, I took a level to the walls. Then it became clear what was going on. First three are across the back wall, from the house end, the second three from the side wall, opposite the house, from back to front.

P1000501.JPG


P1000502.JPG


P1000503.JPG


P1000504.JPG


P1000506.JPG


P1000507.JPG


Curiously enough: The front of the garage, where the main door is, wasn't much out-of-plumb. Go figure.

As of the end of November, here are the same six locations, in the same order.

IMG_1445.JPG


IMG_1446.JPG


IMG_1448.JPG


IMG_1449.JPG


IMG_1450.JPG


IMG_1454.JPG


As you can see, in the second image in the set above, the middle of the back wall was the worst.

As of last week of so, the bubble is between the lines on all of them, save that back, middle one.

Today's photos.

The outside of the garage, working from the SW corner, near the house, to the front.

P1000762.JPG


Much to my surprise, the slight bulge in the siding shows up better than I thought it would.

(And, yeah: I'm going to have to do something about that service entry conduit, as well. That'll mean the expense of having roof work redone, too. *sigh*)

P1000763.JPG


P1000764.JPG


P1000765.JPG


Notice the gap in the siding above the garage door remains, despite all the other movement.

Shots along the top plates, starting in the same corner, one shot from each direction, for a total of eight:

P1000766.JPG


P1000767.JPG


P1000768.JPG


P1000769.JPG


P1000770.JPG


P1000771.JPG


P1000772.JPG


P1000773.JPG


The ridge board and a close-up of the end of it:

P1000774.JPG


P1000775.JPG


The chains and turnbuckles are to provide extra pull on the rafters where that bulge in the back is.

Finally, that tie/joist that had been almost off the top plate last March, and the brain-dead cross-tie, today:

P1000776.JPG


P1000777.JPG


Let me know if there are any other photos you want and thanks for the help!
 
Last edited:

joe--h

Well-known member
Joined
Jan 30, 2013
Messages
536
OK, sorry I offended.

If it was mine I would peel off that top piece of siding and drill through the top plates.

Get some rod 5/16 will do from steel supplier, and some 1/2" all thread. HD or Lowes will have 10' lengths of all thread.

Cut a piece of all thread and weld to the end of the rod. Over lap a couple inches and weld if on. Unless you can get rod longer than 20' you'll need to splice a piece on to make it long enough to go across.

So now you have a rod across the garage with all thread sticking out through the top plates. Washers like are used on foundation bolts, about 2" square would be good.

Nuts on and start tightening gradually until it's squeezed together. I doubt you'll be able to get a decent anount of nails into your ties to do much good given the low angel of the roof.

Sounds like a kludge but it will work. Those big star washers you see on the outside of old brick buildings are doing the same thing.

Again, I apologize.

Joe H
 
OP
J

jseymour

Active member
Joined
Nov 20, 2019
Messages
39
Location
S.E. Michigan
No worries, Joe. Thanks for the suggestion.

I could achieve the same effect with heavier wire rope (than the 3/16ths I'm currently using) and machine-threaded eye bolts more easily and economically, could I not?
 
To avoid these ads, REGISTER NOW!
OP
J

jseymour

Active member
Joined
Nov 20, 2019
Messages
39
Location
S.E. Michigan
Re: Straightening-Out A Poorly-Constructed Garage? (Revised Plan)

Taking everybody's comments and suggestions into account (thanks again!), I've revised my plans.

I'm going to continue pulling the walls in until the bubble on the level is at least touching the line indicating a slight inward lean--if I can. (Now that the weather's warmed-up a bit and the snow load's off, things appear to be moving again.)

I'll try one rafter tie/joist installed as the current ones are, using a structural screw and nails, and see how it goes. If that turns out not to work well, employ member joemctag's suggestion using plywood gussets.

In either event: Hurricane ties on the rafters before installing new ties/joists.

Given member jbwilkins' comment, re: span: Instead of installing a cross-tie from the house side to the side opposite, I'm thinking a pair of 2x8 (1-3/4 x 9-1/4 actual) LVL beams, on ledger boards at each end, under the ties/joists. After the job's complete: Keep an eye on movement/deflection and install a post in the center if necessary.

A pair of 2x6's on each end sufficient for ledger boards? Tied into at least three wall studs?

What do y'all think?
 
Last edited:

tncatadjuster

Well-known member
Joined
Jan 3, 2010
Messages
2,008
Location
Memphis, TN
Pull it back together and tie it up with whatever method works, it will be the craftsmanship that determines the outcome. You can over do it for satisfaction, I do sometimes on some projects.

Plenty of good advice from experienced people.

Photos were very helpful, thanks.
 
OP
J

jseymour

Active member
Joined
Nov 20, 2019
Messages
39
Location
S.E. Michigan
Pull it back together and tie it up with whatever method works, ...
That's the thing: Knowing what will likely work, and this is an field in which I've no first-hand experience.

E.g.: It never occurred to me, when I bought this house and looked at the garage, that it had been poorly-constructed. Perhaps the home inspector I hired should have caught it, but he didn't. So here I am.

...it will be the craftsmanship that determines the outcome.
Even the best craftsmanship can't make up for an inadequate design, yes?

You can over do it for satisfaction, I do sometimes on some projects.
I usually do over-design. Or try to. I'm something of a "belt and suspenders" kind of a guy :)

Plenty of good advice from experienced people.
Yup. And I appreciate it.

I was hoping somebody with some construction expertise might chime in about my mid-span beam idea, though. And, if it was reasonable, a suggestion on how best to hang it.
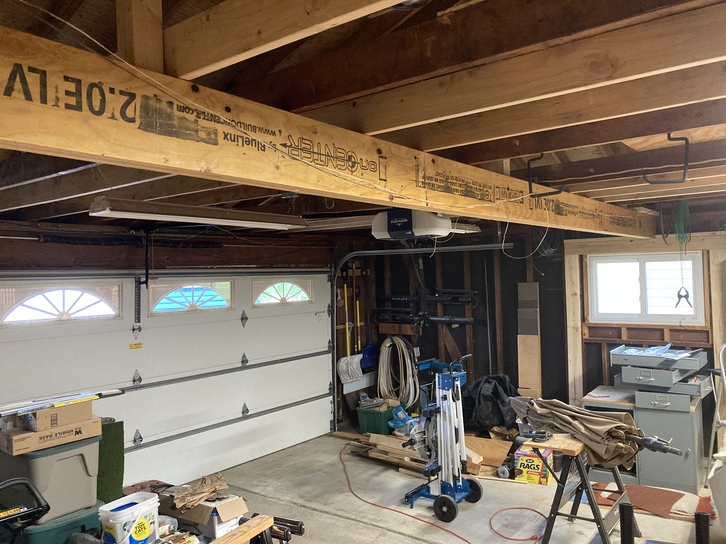
Turns out I don't have quite enough room above the window on the wall opposite the house to set a 9-1/4 in. wide beam atop a 2x6, so maybe a face-mount joist hanger? But it appears 3-1/2 in. x 9-1/4 in. hangers are kind of rare? Only one I've found so far is made by Fastenal. This leads me to suspect what I'm planning isn't commonly done. Usually, if it's not commonly done, there's a reason.

Photos were very helpful, thanks.
You're welcome and thank you for the follow-up.
 

jm71lt1

Member
Joined
Mar 22, 2010
Messages
12
Use your 2x6 ceiling joists and collar ties. Nail it with a framing gun using 16d nails. Use hurricane straps and anchor to top plate as best you can in amount of space you have to work in. Space these 16" or 24" on center and this will hold fine. If you wanted even more support add 2x4's to make it like a truss. Anchor to your rafters and ceiling joists with plywood gussets on one end and nail the other end. This will hold your lifetime and beyond.
 
OP
J

jseymour

Active member
Joined
Nov 20, 2019
Messages
39
Location
S.E. Michigan
Use your 2x6 ceiling joists and collar ties. Nail it with a framing gun using 16d nails.
And here I am with a box full of more 3 in. framing nails than I'll ever use in my lifetime. Guy at the big box store, allegedly a construction guy, said 3 in. nails were the longest I'd ever need.
shake.gif


16d nails are 3-1/2 in., right? But the longest I can find are 3-1/4 in.

... anchor to top plate as best you can in amount of space you have to work in.
To the top plate? That may be a problem, what with the low roof angle. I thought I'd be going into the rafters.

If you wanted even more support add 2x4's to make it like a truss. Anchor to your rafters and ceiling joists with plywood gussets on one end and nail the other end.
Could you point me to photos or a drawing of what this means?

This will hold your lifetime and beyond.
Great!

But I also hoped to be able to put some plywood atop the ties/joists for storage. That's why I was thinking to add that mid-span beam of 2 x 1-3/4 x 9-1/4 LVL.

Thanks for the follow-up and guidance, jm71lt1!
 
Last edited:

tfb

Well-known member
Joined
May 21, 2012
Messages
61
Location
Eastern PA
Since this is half a hip roof you need to counteract the downward force by running a 3/8 or 7/16 wire rope cable from the bottom of the two hip rafters across the hypotenuse to the wall connected to the house. They should be installed permanently with a turnbuckle and wrap around the hip rafter and not bolted or screwed into the side. But before these are tightened you need to jack the roof up to about an inch above its original position, then load the cables by drawing up all slack and installing several wire rope clips on each end. Then tighten the turnbuckles. Then install your rafter ties as planned.
 

Evilgoat

Member
Joined
Nov 21, 2019
Messages
5
Location
Fort Worth, TX
I just got done replacing the rafter ties on my ceiling (to raise them and add more).

I used the 1/4" x 2 1/2" GRK RSS fasteners. Those things are worth every. darn. penny. No pre-drilling, no splitting, drive quickly, yadayada.

If you want to be "sure" about it, you can find the required number of fasteners per the IRC and do it with nails. I felt more confident in my screws, but used the same number of screws as 16D nails were required. The number of fasteners will be dependent on your roof pitch and snow load - you'll have to check for yourself.

The screws had a higher shear-force allowable than the 16D nails, if I recall, plus you get a little "bonus" since they're technically "clinched fasteners" but I just opted to throw a couple more screws in while I was there because.. it was kind of fun.. and I bought twice as many as I needed.

The screws were a bit harder to toe-nail, but if you're doing hurricane ties (I could not), then I think 2-3 16D toe nails are all that you'd need, given the point of the rafter ties, anyway.

Also, you mentioned you got 2x6's for the ties. While this will almost certainly work for their purpose, if you intend to put a ceiling up ever you might have some deflection in the center to deal with. There are lots of ways of handling it, but I'd run with AT LEAST a 2x8 if you can sneak it onto the top plate without cutting too much off. If not, you can use some perlins or fancy other methods that I know nothing about.
Also, for your "mid span" idea, if you're going to do something like that, you might consider just putting in a ridge BEAM and eliminate the ties all together. I'm no expert, but I've seen that around as an option. I think your "mid span" beam would work out either above or below them, above you'd need some sort of strap though, and I'm not sure what's out there. Check out how they design the ridge beams for your requirements on the LVL and the posts you'd need to support it/the support required below it on the walls.
 
Last edited:
OP
J

jseymour

Active member
Joined
Nov 20, 2019
Messages
39
Location
S.E. Michigan
Since this is half a hip roof you need to counteract the downward force by running a 3/8 or 7/16 wire rope cable from the bottom of the two hip rafters across the hypotenuse to the wall connected to the house.
By "hypotenuse" I expect you mean diagonally across the garage? Believe it or not: Something like that had occurred to me.

How high up those corner rafters would you recommend?

They should be installed permanently with a turnbuckle and wrap around the hip rafter and not bolted or screwed into the side.
Not certain how I'd accomplish getting wire rope around those hip rafters, what with the sheathing up there.

Those chains and turnbuckles in that one photo of mine are attached to the under-sides of their rafters with 3/8 in. x 2-1/2 in. lag screws. Would that not be sufficient on the rafter ends? And how to attach to the house side, where the pull would be essentially straight out? (No way to through-bolt those.)

But before these are tightened you need to jack the roof up to about an inch above its original position, ...
That will take a while, at least at the rate I've been going, but... ok.

Thanks for the follow-up and suggestion, tfb.
 

tfb

Well-known member
Joined
May 21, 2012
Messages
61
Location
Eastern PA
view
0GX5mKeMTGm0NiBkOGDLRQ.mw76Kvw4FujvNXIWIVWle7
We separated this hip from its ceiling joist and raised it 9 ft. and then set it on prefabricated walls which were lifted up in place over a weekend. Your roof will go back to where it once was, no worries.
(Having trouble posting the pic) [

The rafters that you referred to as "corner rafters" are called "hip rafters". Connect the cables to the rafters at the top of the wall plate height and yes run the wire diagonally, on the same plane as the hip rafter but level. You can feed the wire thru a notch in the rafter by drilling a 1/2 hole in its edge where it meets the roof sheathing. Depending on how much the ridge dropped on that end you should be able to jack it up over a couple days, don't worry it will go where you want. If you want, scab a couple 2x4x3 ft pieces on either side of the hip rafter to disperse the force of the pull and keep the wire from kinking tight on the notch.

I'm not sure if your corners are pushed out in both directions but once you take the pressure off by jacking the ridge, you may have to use some persuasion with a sledge on the outside of the top plate to bring it back to plumb. In fact, I would do this all the way around, including the bow you spoke of in the rear wall. Don't be afraid to give it several good wacks till it obeys.

As this thing sagged over time the walls initially tried to resist the force, I'm not sure if your rafters have birdmouth cuts, if not you may see indications where the rafters slid out on the top plate until the nails tightened and resisted the movement. You may need to deal with this but probably not.
 
Last edited:

Falcon67

Well-known member
Joined
Jun 11, 2009
Messages
18,371
Location
Merkel, TX
Collar ties won't do anything for walls, they will only help prevent uplift and separation of rafters from the ridge board. If the walls are pushed out from the roof load, then the joints where the joists hit the top plates would be the problem area. If you need more beef in that area, you can double those up on the other side of the rafters where they hit the plates. Lifting the ridge likely won't pull the walls in, might require cables and come-alongs spaced along the top plates.
 
OP
J

jseymour

Active member
Joined
Nov 20, 2019
Messages
39
Location
S.E. Michigan
... if you're doing hurricane ties (I could not), then I think 2-3 16D toe nails are all that you'd need, given the point of the rafter ties, anyway.
I understand three nails are called for. I planned to use three nails plus a single structural screw.

if you intend to put a ceiling up ever you might have some deflection in the center to deal with.
Not a ceiling, but I was hoping to put some (more) plywood up there for storage.

I think your "mid span" beam would work out either above or below them,
I'd definitely put it below them.

The rafters that you referred to as "corner rafters" are called "hip rafters". Connect the cables to the rafters at the top of the wall plate height and yes run the wire diagonally, on the same plane as the hip rafter but level.
Got it. Thanks.

I'm not sure if your corners are pushed out in both directions but ...
They are, but not badly. Since those hip rafters don't appear to be pulling loose from the ridge board or the top plates, I assume they're coming in with the walls :)

... once you take the pressure off by jacking the ridge, you may have to use some persuasion with a sledge on the outside of the top plate to bring it back to plumb. In fact, I would do this all the way around, including the bow you spoke of in the rear wall. Don't be afraid to give it several good wacks till it obeys.
Yeah... that would require pulling off siding. I really had hoped to avoid that. I'm going to see if I can get everything where I need it with pulling from the inside, first.

I did get a chuckle out of "...till it obeys"
lol.gif


As this thing sagged over time the walls initially tried to resist the force, I'm not sure if your rafters have birdmouth cuts, ...
They do not, but...

... if not you may see indications where the rafters slid out on the top plate until the nails tightened and resisted the movement. You may need to deal with this but probably not.
It does not appear so.

Collar ties won't do anything for walls, they will only help prevent uplift and separation of rafters from the ridge board.
I figured, but thanks for noting it.

If the walls are pushed out from the roof load, then the joints where the joists hit the top plates would be the problem area. If you need more beef in that area, you can double those up on the other side of the rafters where they hit the plates.
I'm not certain what you mean by the rafter/top plate joints being the problem area.

What appears to have happened was the ridge sagged, pushing on the rafters, pushing the walls out.

Lifting the ridge likely won't pull the walls in, might require cables and come-alongs spaced along the top plates.
Lifting the ridge, alone, no. But lifting the ridge, coupled with pulling the walls in, is what's doing the trick.

My process has been to push the ridge up and monitor the cable tension. (I have a cable tension gauge from when we used to have a sailboat.) When the cable tension on any cable drops far enough that I know I can safely do it (I know approximately what my cable anchors' maximum pull load is), I crank the tension back up. Then I give the screw jack under the ridge board another turn each day, wait for the cable tensions to relax, wash, rinse, repeat.
 

Falcon67

Well-known member
Joined
Jun 11, 2009
Messages
18,371
Location
Merkel, TX
>What appears to have happened was the ridge sagged, pushing on the rafters, pushing the walls out.

No, what happened is that the roof load on the rafters was not arrested by the rafter ties and the walls moves away, pulling down the ridge. Ridge boards are not structural.

https://www.nachi.org/collar-rafter-ties.htm

"Rafter ties are always required unless the roof has a structural (self-supporting) ridge, or is built using engineered trusses. A lack of rafter ties is a serious structural issue in a conventionally framed roof."

You do not have a structural ridge
 
OP
J

jseymour

Active member
Joined
Nov 20, 2019
Messages
39
Location
S.E. Michigan
I thought I'd share with y'all what I finally ended-up doing.

It took a while, but I finally got the walls as plumb as they were going to get. (It was to the point that the ends of two rafter ties that had come loose were butting-up against the roof sheathing.) Most of the wall studs are now plumb and all of them have the bubble between the lines.

I doubled the number of collar ties and more than doubled the number of rafter ties. I was able to get the new rafter ties in, with plenty of overlap with the rafters--at least as much as the originals had, without too much trouble. Collar and rafter ties were secured to the rafters with a 3-1/8 in., #10 GRK structural screw and three 3 in. nails each.

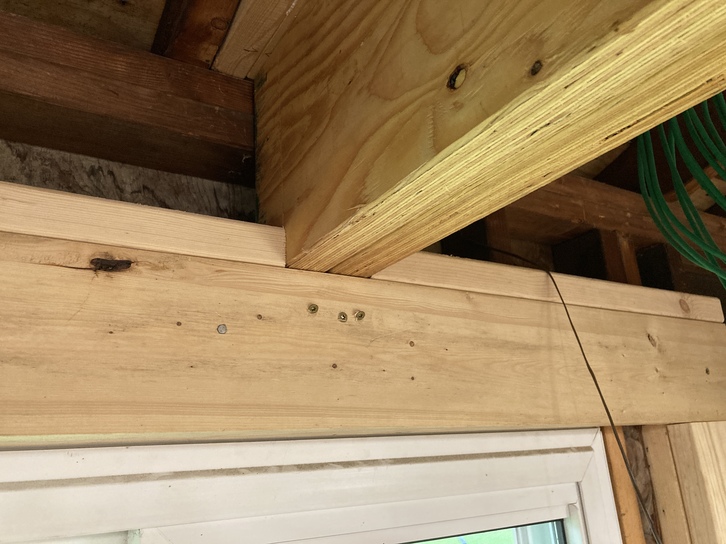
I then installed a 9-1/4 x 3-1/2 in. LVL mid-span beam.

IMG_1875.JPG-18pct.JPG


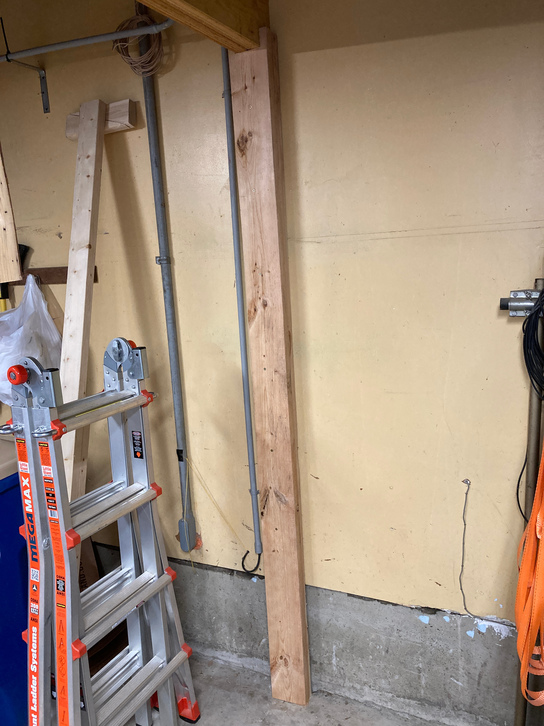
The beam is supported on the house side with two 2x6's, secured to the wall stud behind with 3-1/8 and 4-3/4 in. #10 GRK structural screws. The vertical load is supported primarily by the concrete floor.

IMG_1850.JPG-18pct.JPG


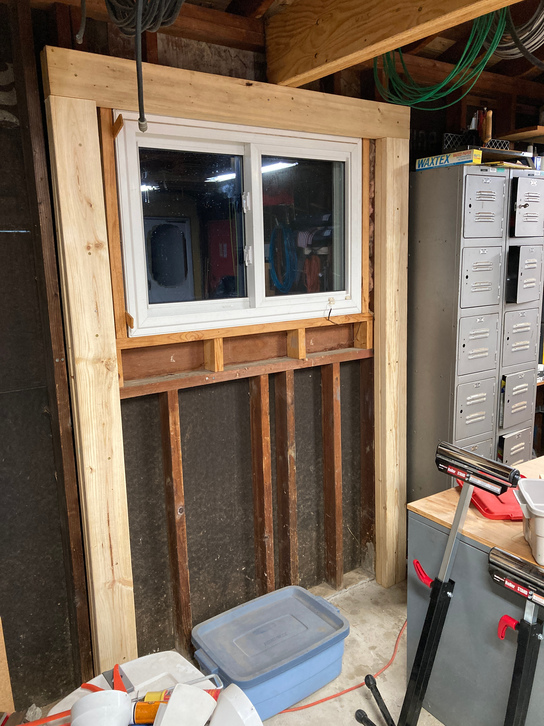
On the far side the beam is supported by jack studs and a header formed of doubled-up 2x6's, secured to the wall studs. Again: The vertical force will be primarily supported by the floor.

IMG_1851.JPG-18pct.JPG


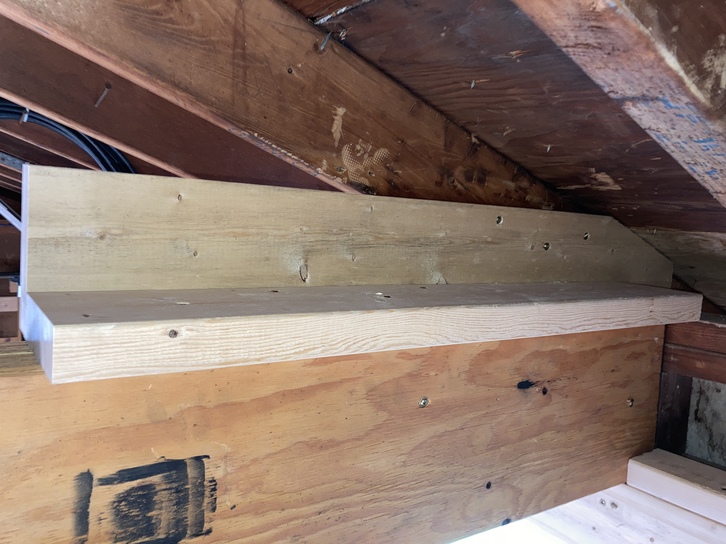
I created a "pocket" for the window end of the beam by affixing 2x4's to the top of the header, either side of it.

IMG_1874.JPG-18pct.JPG


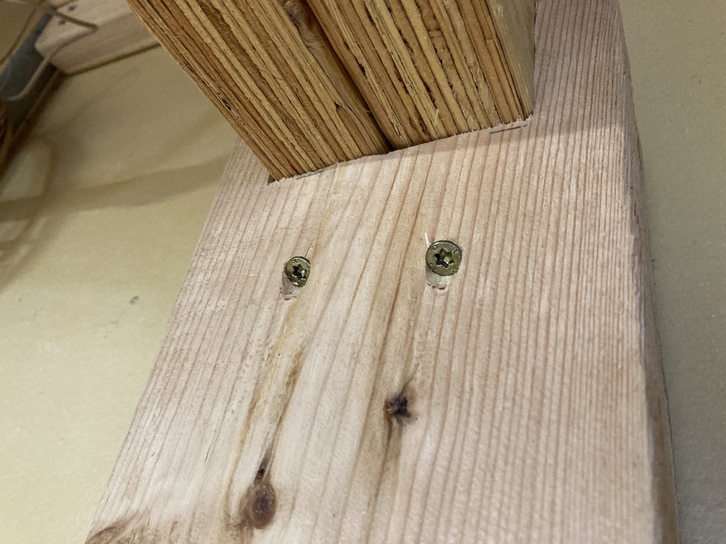
The beam was secured at each end with a pair of 4-3/4 in. #10 GRK structural screws.

IMG_1868.JPG-18pct.JPG


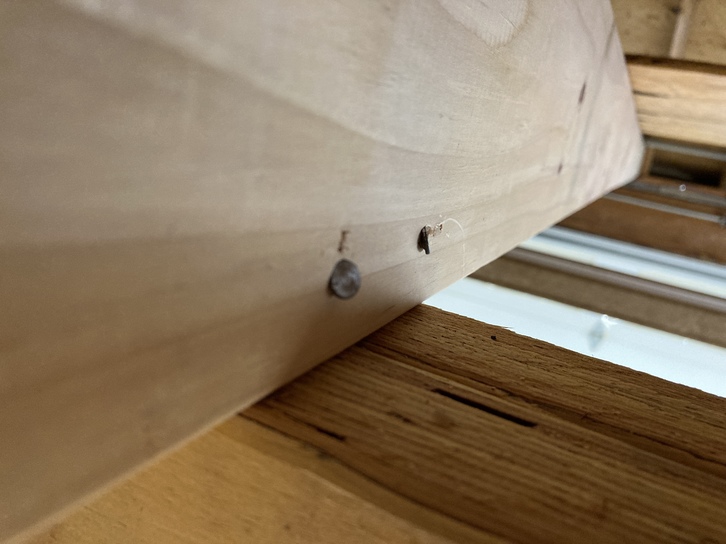
I toe-nailed all the rafter ties to the top of the beam with 3 in. nails: One driven from each side.

IMG_1865.JPG-18pct.JPG


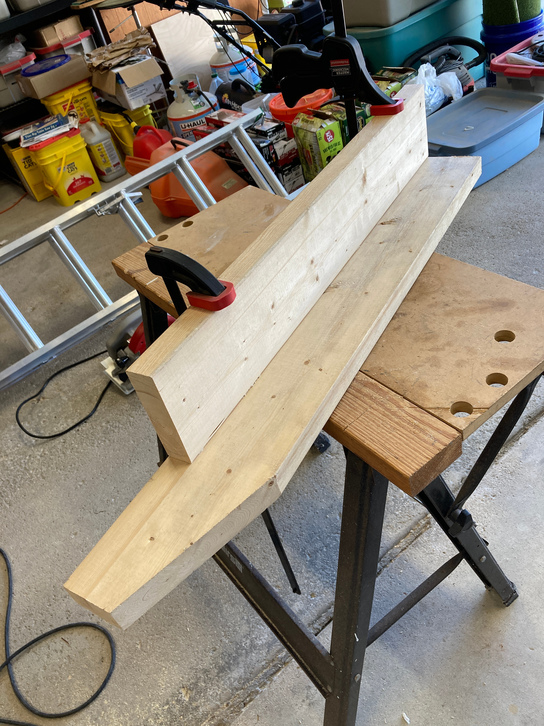
I removed the old not-so-strong strongback, fabricated a kind of "L-bracket" of glued and screwed 2x6...

IMG_1855.JPG-18pct.JPG


...and secured that to the rafter to which the old strongback had been attached and to the top of the beam.

IMG_1867.JPG-18pct.JPG


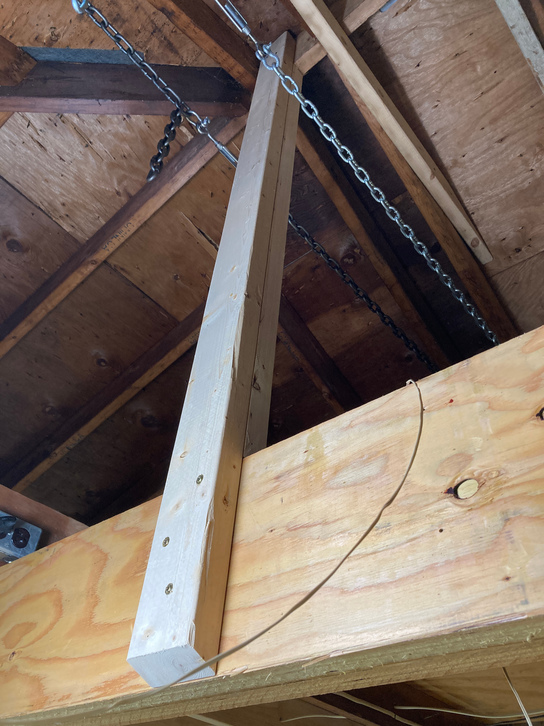
Finally, I added support for the ridge board in two places, using a pair of doubled-up 2x4's.

IMG_1863.JPG-18pct.JPG


The chains and turnbuckles you see in that photo were part of what I used to pull everything back in. I think I'll just trim off the excess chain and leave them there.

So: Verdict? How did I do?
 
Last edited:
To avoid these ads, REGISTER NOW!
Top Bottom