To avoid these ads, REGISTER NOW!

ZMotorsports Shop Projects 2.0

OP
Z

zmotorsports

ALLIANCE MEMBER
Joined
Oct 20, 2009
Messages
21,469
Location
Northern Utah
Mike, enjoying the history and projects. I used to be into the sand for a long time as well. We would hit Glamis probably 6-8 times a year late 80's-early 90's until I got into Jeeps. It was all over after that! Still into Jeeps all these years later!

Thanks Quinn and I hear ya on Jeeps.

My wife and I actually started duning in 1987 right out of high school and before we were married and didn't sell our sand toys until 2012, so a good 25 year streak with a high emphasis the last 9 years or so. We started snowmobiling in 1989 right after getting married. I bought a wrecked sled for me and rebuilt it and a fairly clean one for the wife and we snowmobiles for 20 years until 2009.

We had had Jeeps since around 1994 when we bought our first motorhome and needed a tow vehicle. We sold the wife's Thunderbird (thank goodness) and she wanted an SUV as a daily driver. I suggested a Jeep Cherokee so we could use it as a toad as well as daily driver and maybe do some off-roading since I had sold my 1984 shortbed and we hadn't done any exploring off the pavement in a few years. She eagerly agreed and loved the XJ and we enjoyed towing it and exploring where we traveled. We then traded it for a 1996 ZJ that I lifted slightly and set up as a toad.

When my son got his driver's license around 2008~ish he was more interested in Jeeping than duning or sledding so we began by selling the sleds and continued to use the sand toys for a few years because I had just built the sandrail. My son always wanted to go to St. Anthony sand dunes in Idaho in October for his birthday weekend in October but in 2009 he asked if we could go to Moab instead and the rest was history. We put the sleds up for sale and then sold the sand toys in 2012 and have been very heavily involved in Jeeps ever since.

Those Jeeps will change your life won't they Quinn.....:lol_hitti

Thanks for stopping by and checking out my thread.
 
To avoid these ads, REGISTER NOW!
OP
Z

zmotorsports

ALLIANCE MEMBER
Joined
Oct 20, 2009
Messages
21,469
Location
Northern Utah
Mike, the sand quads are real nice. I used to have a Quadzilla 500 Suzuki in the past younger bachelor days. My friends and I would go out to SoCal deserts, or Glamis. Riding a quad around the dunes is so much fun, especially with your buddies and just having fun together. One friend had the 250 Suzuki, and another had the Honda 250 (2-stroke). None of us had the Banshee, but those could be very fast! Ours were mostly stock, maybe a pipe, some simple bolt-ons and we all had the paddle tires of course. Your custom suspension and frames are very nice, thanks for sharing the pics. Brings back good memories for me too.

Thanks for stopping by and checking out the projects and sharing your experiences Terry. I appreciate it. While I did enjoy going with the guys on occassion to dial in a new quad or something, i enjoyed going with the family the most. Although my wife enjoyed the dunes and riding her own she now admits that she enjoyed the Jeep even more but I'm glad we got to dune as long as we did.
 
OP
Z

zmotorsports

ALLIANCE MEMBER
Joined
Oct 20, 2009
Messages
21,469
Location
Northern Utah
Finally caught up!


My last snowmobile was in 1975! Bought a new Polaris TX 500 Triple from local dealer.


My last sand toy was in 2003. Glamis China Wall on way down at high speed did not see a large hard bump in sand. Broke my leg . . Quad never got a scratch.


Thank you for following along. I follow your adventures as well and hope your health is doing good.


Those hard lips and/or witches eyes in the sand will get ya every time if you don't see them. I crashed the week before my wife and I's wedding and wiped out the front suspension on my quad but didn't get hurt. She saw it happened and though I was going to in a body cast for the wedding.
 
Last edited:
OP
Z

zmotorsports

ALLIANCE MEMBER
Joined
Oct 20, 2009
Messages
21,469
Location
Northern Utah
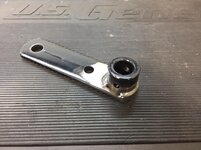
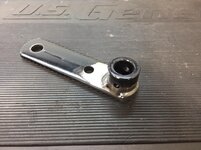
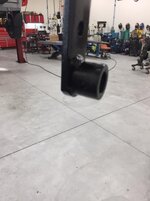
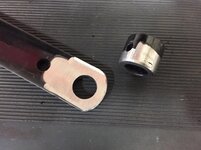
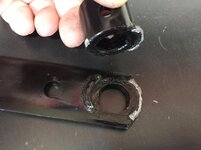
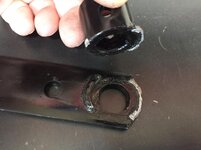
My neighbor hit me up and asked if I could repair a bracket off of his tow behind aerator today.

Not much penetration going on here.
ae7c1a3e1ee2a2301574a26df7df7412.jpg

I knocked down the failed weld.
16e624b17b086411cca706d0117b8cec.jpg

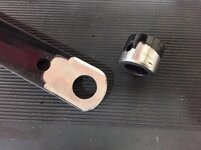
I placed a .750” piece of O1 drill rod to align for welding.
d9c22c4b9fcc64fc15254c7fe65d6343.jpg

Ready for paint.
673c94dfdbcddf5bab941945c6e80880.jpg

Painted.
ee924369d7caf41b6f369f2d83656f6f.jpg

Next item of the day was to build the rock sliders for my son’s WJ.

Bent some 1.5” x .083” tubing.
3968e9cc7a30c399d8b175682a63d531.jpg

1.5” square tubing mocked up with brackets bolted to the sides of the frame boxes.
6bc41d7bb925f0a933768ea26165dc6f.jpg

b04dc30a5b2d7ebb18a039ce4523f380.jpg

Tacked into place.
57f3c24e5b3812748ae7584ccdafc86b.jpg

dca7b5fe495dc0363f574f7ce81e4420.jpg

d12987cca4f35f8be83e2ee828452943.jpg

Ready to go off to the powder coater.
a4970cd13686db3a27dc3e9e12db3f3f.jpg

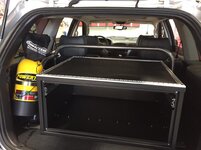
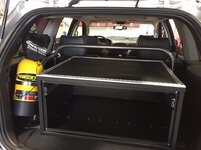
Before closing up the shop we mocked up the Mac’s Black Box in the back to locate for mounting. We opted to shift the box quite a bit to the passenger's side so we can create a large void on the driver's side for storage as well as mounting his Powertank nearly vertical yet allowing easy access.
1b58c11ac370a4874e965edd7bc4b757.jpg

Thank you for looking.
 

Attachments

  • 673c94dfdbcddf5bab941945c6e80880.jpg
    673c94dfdbcddf5bab941945c6e80880.jpg
    112.2 KB · Views: 0
  • ee924369d7caf41b6f369f2d83656f6f.jpg
    ee924369d7caf41b6f369f2d83656f6f.jpg
    61 KB · Views: 0
  • 3968e9cc7a30c399d8b175682a63d531.jpg
    3968e9cc7a30c399d8b175682a63d531.jpg
    72.4 KB · Views: 0
  • 6bc41d7bb925f0a933768ea26165dc6f.jpg
    6bc41d7bb925f0a933768ea26165dc6f.jpg
    75.5 KB · Views: 0
  • d9c22c4b9fcc64fc15254c7fe65d6343.jpg
    d9c22c4b9fcc64fc15254c7fe65d6343.jpg
    127 KB · Views: 0
  • 1b58c11ac370a4874e965edd7bc4b757.jpg
    1b58c11ac370a4874e965edd7bc4b757.jpg
    82.7 KB · Views: 0
  • b04dc30a5b2d7ebb18a039ce4523f380.jpg
    b04dc30a5b2d7ebb18a039ce4523f380.jpg
    59.2 KB · Views: 0
  • 57f3c24e5b3812748ae7584ccdafc86b.jpg
    57f3c24e5b3812748ae7584ccdafc86b.jpg
    74.5 KB · Views: 0
  • dca7b5fe495dc0363f574f7ce81e4420.jpg
    dca7b5fe495dc0363f574f7ce81e4420.jpg
    90.6 KB · Views: 0
  • d12987cca4f35f8be83e2ee828452943.jpg
    d12987cca4f35f8be83e2ee828452943.jpg
    112 KB · Views: 0
  • a4970cd13686db3a27dc3e9e12db3f3f.jpg
    a4970cd13686db3a27dc3e9e12db3f3f.jpg
    85.2 KB · Views: 0
  • 16e624b17b086411cca706d0117b8cec.jpg
    16e624b17b086411cca706d0117b8cec.jpg
    93.2 KB · Views: 0
  • ae7c1a3e1ee2a2301574a26df7df7412.jpg
    ae7c1a3e1ee2a2301574a26df7df7412.jpg
    68.6 KB · Views: 0
Last edited:

C_F

ALLIANCE MEMBER
Joined
Jan 21, 2005
Messages
9,675
Location
Utah...SNOW BLOWS!
Mike, I have seriously spent the last 4.5~ish hours reading through your posts of your life's various projects, and have thoroughly loved it! Until today, I didn't know that you also built your previous shop too. I should have known. :)

I have said it before, but the amount of hours & intensity you throw at every project you do...makes me exhausted just reading about it! :lol_hitti

Thanks so much for opening your photo albums, and sharing all those old projects & the stories that go with them. I (and I'd bet all who posted here) thoroughly enjoyed them.
The snubbing you received from the car club with your first show car just pisses me off. I hate it when someone with that sort of raw talent is brushed off due to his young age, like he somehow doesn't deserve the kudos for the amazing work done. If anything, it should be the exact opposite reaction!

Anyway, thanks again for sharing with us all. Your talents know no bounds. :thumbup:
 
OP
Z

zmotorsports

ALLIANCE MEMBER
Joined
Oct 20, 2009
Messages
21,469
Location
Northern Utah
Mike, I have seriously spent the last 4.5~ish hours reading through your posts of your life's various projects, and have thoroughly loved it! Until today, I didn't know that you also built your previous shop too. I should have known. :)

I have said it before, but the amount of hours & intensity you throw at every project you do...makes me exhausted just reading about it! :lol_hitti

Thanks so much for opening your photo albums, and sharing all those old projects & the stories that go with them. I (and I'd bet all who posted here) thoroughly enjoyed them.
The snubbing you received from the car club with your first show car just pisses me off. I hate it when someone with that sort of raw talent is brushed off due to his young age, like he somehow doesn't deserve the kudos for the amazing work done. If anything, it should be the exact opposite reaction!

Anyway, thanks again for sharing with us all. Your talents know no bounds. :thumbup:

Thank you, I appreciate the comments and especially for taking the time to read through all of it. I threw a lot of pictures and commentary out over the past several days and appreciate anyone who read through it all.

As far as clubs, the snubbing was exactly why my wife didn't want us joining either of the Jeep clubs that we currently belong to. I have pretty much kept my head down and enjoyed most of the people but mainly the Jeeping and haven't gotten involved with those who are merely looking for freebies or something for nothing.
 
Last edited:

PhantomEB

Well-known member
Joined
Feb 6, 2006
Messages
6,817
Location
Medicine Hat, AB, Canuckistan
As far as clubs, the snubbing was exactly why my wife didn't want us joining either of the Jeep clubs that we currently belong to. I have pretty much kept my head down and enjoyed most of the people but mainly the Jeeping and haven't gotten involved with those who are merely looking for freebies or something for nothing.

I hear you on that, I used to belong to half the clubs and found out it was more just the moneybags using the club for something they couldn’t do on their own.

Now I just stick with my friends who all have built their own shops, purchased tools and just get out for the hell of it. No need to depend on anyone!
 

Johnno

Well-known member
Joined
Jul 17, 2017
Messages
88
Location
East Granby, Ct
Mike
I have never commented on your thread but I have been following along for a while now and all of your builds both old and new have been great. I really enjoy all the pictures and stories that go with them. I also had a 91 Polaris RXL and what a sled that one was, that triple wouldn't let anything pass me on the lakes. Looking forward your future builds.
 
OP
Z

zmotorsports

ALLIANCE MEMBER
Joined
Oct 20, 2009
Messages
21,469
Location
Northern Utah
Mike
I have never commented on your thread but I have been following along for a while now and all of your builds both old and new have been great. I really enjoy all the pictures and stories that go with them. I also had a 91 Polaris RXL and what a sled that one was, that triple wouldn't let anything pass me on the lakes. Looking forward your future builds.

Thank you for following along and for commenting.

If I could have combined the handling and weight of the RXL with the brute power of the Thundercat I would have been ecstatic.:bounce: That would have been one heck of a combination.
 
OP
Z

zmotorsports

ALLIANCE MEMBER
Joined
Oct 20, 2009
Messages
21,469
Location
Northern Utah
I hear you on that, I used to belong to half the clubs and found out it was more just the moneybags using the club for something they couldn’t do on their own.

Now I just stick with my friends who all have built their own shops, purchased tools and just get out for the hell of it. No need to depend on anyone!

We've met some great friends from both clubs and if not going on a club run will still usually end up with friends from either depending on where we are at the time.

I just don't get conned into working on everyone else's stuff anymore like I used to. IF I have time and IF I want to I will take it on otherwise I don't lose sleep over not working on something for someone. Completely different than back when I was trying to keep paying jobs coming through the shop for revenue.
 

steves_001

Well-known member
Joined
May 30, 2011
Messages
529
Location
Southern MN / Northern MN
Thanks again for sharing the stories. Neat stuff... Ed Roth, how did you run into him? I belonged to a Camaro club back in the mid 80's. Part of that was having the club name painted on the rear window. Guess who did that for us? Yep, Ed. I ended up at his place one evening somewhere in LA. Cant remember the actual suburb anymore but, he painted the window up for me (and scratched my trunk in the process with is belt, lol) Funny how small the world really is.
 
OP
Z

zmotorsports

ALLIANCE MEMBER
Joined
Oct 20, 2009
Messages
21,469
Location
Northern Utah
Thanks again for sharing the stories. Neat stuff... Ed Roth, how did you run into him? I belonged to a Camaro club back in the mid 80's. Part of that was having the club name painted on the rear window. Guess who did that for us? Yep, Ed. I ended up at his place one evening somewhere in LA. Cant remember the actual suburb anymore but, he painted the window up for me (and scratched my trunk in the process with is belt, lol) Funny how small the world really is.

Thank you for following along.

I actually met Gary Mizer first and was then introduced to Ed. At the time I didn't realize he lived in Utah as well as I. I had Gary stripe several projects of mine in the mid-late 90's.
 

macgyver

Well-known member
Joined
Feb 13, 2008
Messages
45
Location
Big Bear Lake
Those Jeeps will change your life won't they Quinn.....:lol_hitti

Thanks for stopping by and checking out my thread.
This right here! Jeeps did change my life! Back when I was into the sand with quads and 3-wheelers, my step dad invited me to a "Jeep run" with his Jeep club. I tried to follow along on my quad. After overheating from moving too slow on my 250R Honda quad, and having to struggle trying to rock crawl on the quad, I gave in and bought my first Jeep. A 1964 CJ5 POS that I sunk so much money into! That started the craze for me around 1994. That was the first of around 30 Jeeps that I have owned. My new Gladiator being #30. A lot of them I bought, then fixed them up and re-sold. Currently I have 3.5 in the stable. Plus we started our shop in 1997 building Boulder Bars for Jeeps which has morphed into our current Jeep Shop. So yes It has changed my life! And I have met some awesome lifelong friends through Jeeps!
 

Wanna Ride

Well-known member
Joined
Jul 28, 2010
Messages
2,790
Always enjoy stopping by to see your latest project (and past ones too!). Very inspiring, as usual. The front bumper turned out really nice, and can't wait to see the sliders once completed and installed.

This is my busiest time of the year and I'll soon have plenty of shop time back on my calendar again. So I'm going to buy a tubing bender as soon as work slows down to a norm again, and once I determine which one, but I'm curious to hear which one you have and why that one, as opposed to others?
 
OP
Z

zmotorsports

ALLIANCE MEMBER
Joined
Oct 20, 2009
Messages
21,469
Location
Northern Utah
This right here! Jeeps did change my life! Back when I was into the sand with quads and 3-wheelers, my step dad invited me to a "Jeep run" with his Jeep club. I tried to follow along on my quad. After overheating from moving too slow on my 250R Honda quad, and having to struggle trying to rock crawl on the quad, I gave in and bought my first Jeep. A 1964 CJ5 POS that I sunk so much money into! That started the craze for me around 1994. That was the first of around 30 Jeeps that I have owned. My new Gladiator being #30. A lot of them I bought, then fixed them up and re-sold. Currently I have 3.5 in the stable. Plus we started our shop in 1997 building Boulder Bars for Jeeps which has morphed into our current Jeep Shop. So yes It has changed my life! And I have met some awesome lifelong friends through Jeeps!

Timing sounds similar to us Quinn.

We bought our first Jeep (XJ) around 1994/95. It was a 1992 model and in pristine condition. We replace the wife's Thunderbird as that 1993 winter here in Northern Utah was pretty severe and she had gotten stuck twice backing out of the driveway after the snowplows went past. She said that's it and wanted something with some ground clearance. We both migrated to a Jeep but she wanted the SUV style vs. a Wrangler. We did a little off-roading when we were dating with my 1984 shortbed Chevy but nothing like we do now. I haven't owned as many as you have by any means and I usually keep them for a long time. We had our 1992 XJ for only a couple of years but I traded it in for a 1996 ZJ which we kept for nearly 16 years after handing it down to our son when he got his driver's license. That's where the love of Grand Cherokee's started for him I guess. He had his LJ that we build, then I bought another ZJ nearly identical to his for a toad and now our JKUR and his WJ, so we've only had about 6 in our stable over the past nearly 31 years of marriage.

I'm envious that you get to make your living around Jeeps however.
 
OP
Z

zmotorsports

ALLIANCE MEMBER
Joined
Oct 20, 2009
Messages
21,469
Location
Northern Utah
Always enjoy stopping by to see your latest project (and past ones too!). Very inspiring, as usual. The front bumper turned out really nice, and can't wait to see the sliders once completed and installed.

This is my busiest time of the year and I'll soon have plenty of shop time back on my calendar again. So I'm going to buy a tubing bender as soon as work slows down to a norm again, and once I determine which one, but I'm curious to hear which one you have and why that one, as opposed to others?

Thanks for stopping by and checking in on projects.

I am using a JD2 tubing bender. I've had it a long time, nearly 25 years now. I purchased it as a manual version and then added air over hydraulic about five years later. I originally purchased it when I was building sand drag ATV chassis and bought dies for .5", .625", .750", .875" and 1". I bought it from a company that offered a "beginners race kit" that came with the bender and 4 dies and I added the fifth die right at the point of purchase to cover all of the sizes I was using at the time. Later I added a 1.25", 1.5" and 2" dies to cover the sandrails and Jeeps that I was working on.

It has really been a great bender and has gotten quite a lot of use in the first 10+ years I owned it but I don't nearly as much tube work these days.
 
To avoid these ads, REGISTER NOW!
OP
Z

zmotorsports

ALLIANCE MEMBER
Joined
Oct 20, 2009
Messages
21,469
Location
Northern Utah
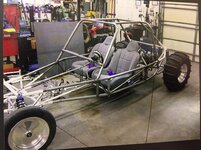
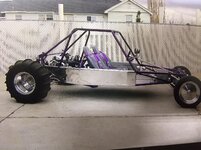
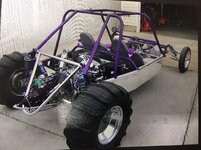
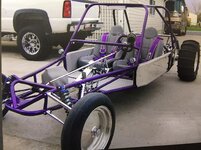
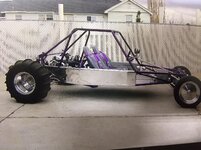
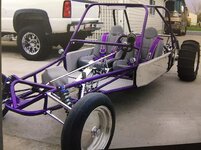
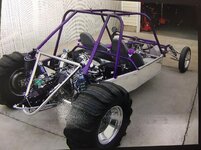
Speaking of sandrails, I forgot to post one of my favorite projects, our 120” mid-engine sandrail that I built around 2008/2009. I think I have a full build thread on here because that was my first project that I documented when I joined garagejournal.

I had wanted a sandrail since we got into duning in the late 80’s but couldn’t afford to build one for quite some time. There was something about watching those things ripping around a bowl that just sent chills down my spine. I subscribe to Sand Sports magazine mainly to follow along with the various sand cars being built and would wear out the magazines drooling over them, issue after issue. I was collecting parts as I could afford them and storing them in my basement. My wife used to joke that I was like Radar from MASH that mailed a Jeep home one piece at a time but I was building a sandrail one piece at a time.

I had done some work on several for clients such as engine and transmission work and even a few engine cradles for engine swaps but never a complete car until my own. My goal again was to build one that would generate business for our shop.

During my build I had a guy from the old car club hit me up about doing another street rod. I told him I had tired of the street rod scene and was turning my attention to sand cars. When he asked why I told him because anybody can build a car and make it look nice because they can hide a lot in a full bodied car such as poor body work, poor welds and even poor wiring but in a tube chassis car you can’t hide things as everything is right out in the open for the entire world to see and will really show the builder’s workmanship.

Here is the start of my new chassis on my chassis fixture.
f1af7d405011a4b9097e879ba4b187d3.jpg

PRP suspension seats being mocked into position. I told the wife it would be a smooth and comfortable ride.
f1002686ef1b269b218db7d44c9d2bea.jpg

Radiator and engine cooler being mocked up.
2307c79b64c46d13f1cd5ab22fc6a538.jpg

Steering.
c736d9d206ab4039bb770f71ac0cce93.jpg

Rolling chassis. Cycling suspension and checking for interferences and final fitment of things before blowing it apart to send out for powder coating and bright work.
9aa0c2847d3093c762f23ce801db61a3.jpg

This was the first chassis that I had powder coated. All of my others I had painted myself but we had just sold the parent’s farm and I was out of a place to paint. Had it not been the middle of winter I would have painted it outside but choices were limited and I swore I would never paint in my home shop.
18d75fb7f1fbcd70cf5bcb1e47f4ce23.jpg

Final pictures after completion and interior work. I caught some slack for adding interior panels because most were not finished to that degree but I guess that’s the old street rodder in me and I had some left over gray tweed material from our 1940 Chev Coupe street rod.
a74664895bd509801aaf1f3d41cee68c.jpg

42630128d5a1b9c865f7ba8e101f3f4c.jpg

eb61e9cc7759350183cd1a2a91b99eff.jpg

859f7a73159fa5328fbaa2dba60013fa.jpg

21f1bd2f5a726e027230572e03ac8f9c.jpg

2ad38ccb79188584bfb17ceec5da1194.jpg

0a0924ee77cce2298b50979b758ec3c5.jpg

That was a fun as hell and fast as hell car and I miss it.

Thanks for looking.
 

Attachments

  • eb61e9cc7759350183cd1a2a91b99eff.jpg
    eb61e9cc7759350183cd1a2a91b99eff.jpg
    119.9 KB · Views: 0
  • 859f7a73159fa5328fbaa2dba60013fa.jpg
    859f7a73159fa5328fbaa2dba60013fa.jpg
    115.4 KB · Views: 0
  • 0a0924ee77cce2298b50979b758ec3c5.jpg
    0a0924ee77cce2298b50979b758ec3c5.jpg
    118.2 KB · Views: 0
  • 2ad38ccb79188584bfb17ceec5da1194.jpg
    2ad38ccb79188584bfb17ceec5da1194.jpg
    123.6 KB · Views: 0
  • 21f1bd2f5a726e027230572e03ac8f9c.jpg
    21f1bd2f5a726e027230572e03ac8f9c.jpg
    108.4 KB · Views: 0
  • 42630128d5a1b9c865f7ba8e101f3f4c.jpg
    42630128d5a1b9c865f7ba8e101f3f4c.jpg
    120.4 KB · Views: 0
  • a74664895bd509801aaf1f3d41cee68c.jpg
    a74664895bd509801aaf1f3d41cee68c.jpg
    116.6 KB · Views: 0
  • 18d75fb7f1fbcd70cf5bcb1e47f4ce23.jpg
    18d75fb7f1fbcd70cf5bcb1e47f4ce23.jpg
    135.5 KB · Views: 0
  • 9aa0c2847d3093c762f23ce801db61a3.jpg
    9aa0c2847d3093c762f23ce801db61a3.jpg
    124 KB · Views: 0
  • c736d9d206ab4039bb770f71ac0cce93.jpg
    c736d9d206ab4039bb770f71ac0cce93.jpg
    122.7 KB · Views: 0
  • 2307c79b64c46d13f1cd5ab22fc6a538.jpg
    2307c79b64c46d13f1cd5ab22fc6a538.jpg
    114.5 KB · Views: 0
  • f1002686ef1b269b218db7d44c9d2bea.jpg
    f1002686ef1b269b218db7d44c9d2bea.jpg
    118.7 KB · Views: 0
  • f1af7d405011a4b9097e879ba4b187d3.jpg
    f1af7d405011a4b9097e879ba4b187d3.jpg
    100.9 KB · Views: 0
Last edited:

vwracer

Well-known member
Joined
Jan 16, 2011
Messages
1,810
Location
Linn Creek MO. 65052
Great stuff Mike, I started watching your posts when you built this awesome buggy. How did you like the shifter? I have driven buggys with every style mid-engine shifters but the style in yours. Hated the Jamar, and Cable shift was not much better. I have a PBS system now and it works great. Really liked the LS swap in the Jeep!
 
OP
Z

zmotorsports

ALLIANCE MEMBER
Joined
Oct 20, 2009
Messages
21,469
Location
Northern Utah
Great stuff Mike, I started watching your posts when you built this awesome buggy. How did you like the shifter? I have driven buggys with every style mid-engine shifters but the style in yours. Hated the Jamar, and Cable shift was not much better. I have a PBS system now and it works great. Really liked the LS swap in the Jeep!


Thank you for following along for that long. Glad I didn’t scare ya off. [emoji12]

The mid-engine shifter in my sandrail worked very well after some tweaking upon initial setup.

I had mixed feelings on the Jamar shifter. I put a couple in clients cars and one worked quite well right out of the gate and the second one took a lot of fussing with and I still wasn’t all that impressed. I have no experience with the PBS shifter but I’ll keep that in mind if I ever work on another mid-engine rail.
 

JCQuick

Well-known member
Joined
Nov 29, 2008
Messages
4,933
Location
Apopka Fla.
Mike i can not lie just just cruised thru many pages of pics with out reading much. ( love the banshee my son has that same year) What I see in these pictures is a man that takes much pride in his Family First, his gear head desires, and just having a good time in life.
As a man that happen to marry a great women that puts up with what ever I want to do and be involved. I'm going to take a moment and commend your wife she has trained you well. LOL.

Ok now I can go back and read all this.
 
OP
Z

zmotorsports

ALLIANCE MEMBER
Joined
Oct 20, 2009
Messages
21,469
Location
Northern Utah
Tonight my son and I made some decent progress on his rear cargo area in his WJ.

The Mac’s Black Box is designed for the rear of a Jeep JKU so we had to cut and modify the front mount and fabricate new rear mounts to work in a WJ.

Front mounting plate.
7f4a86823b4c7c5f82633e1bfc8a7e18.jpg

Squaring up some .625” thick plate.
521c0376e3b212c5b6e4724a946392dd.jpg

278f5455f38dfe0256bb9d79ff437a97.jpg

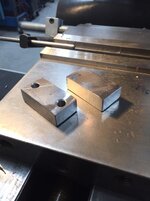
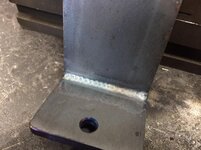
Cut, machined square and drilling holes to 1.375” on center to match the holes we are utilizing in the rear cargo area.
19eb27e3650296405ee2a8e76356e76a.jpg

Block sitting down in the void to bring up to flush.
15b283b4274c73871a4c0ce0cae009b6.jpg

Test fit successful. One down one to go.
420e983396cb999cb448e72dd588235f.jpg

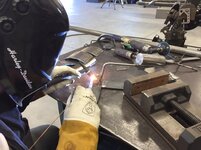
After more drilling time to break out the TIG welder.
90db8b5250dfe6f884fea4e9801a6a0a.jpg

8439d0550d86d30b25d3ed2d5a8f3abe.jpg

71c6bfcb797fba25498f26a4d53a1193.jpg

f4c0a558734f6431f37f979e489f4bd7.jpg

7a6f8976e74ed3bab487b3eba9fddbcd.jpg

a885ca5f6dbe0ace397882c1cd6e7feb.jpg

Passenger’s side mounted.
a2380ac29e6ec8d93541629812745df4.jpg

Driver’s side mounted.
1bdf7beedff82fa76c3c0be4c70bca9b.jpg

Box removed with mounting brackets remaining.
7d1fea97bf6a882397183955576ba165.jpg

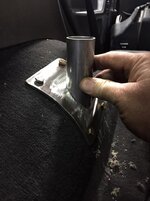
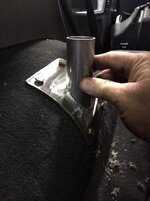
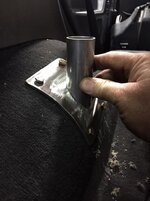
Curved body plates for the rear hoop cut, drilled and mocked into place.
06d863335bf751a5526a77ac3b797cfa.jpg

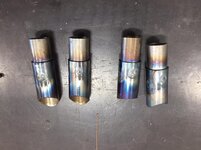
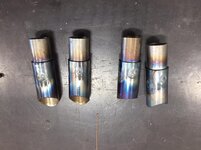
Short length of tube cut and notched.
a99cab252677c81c60014065ebea82b0.jpg

Sleeves cut and ready to weld into the half that will be bolted to the floor.
93c9aaf479248b8d18a6e7ebf8e8d395.jpg

Next will be to bend a hoop that goes up and slightly over the forward edge of the black box yet just behind the rear seat. This is to serve as a mounting point for his high lift jack and then an angled tube back from the hoop to the driver’s box mounting point to serve as a mounting point for his Powertank CO tank.

Hope that makes sense but pictures following tomorrow night will clear up any confusion on what we’re trying to accomplish.

Thanks for looking.
 

Attachments

  • 93c9aaf479248b8d18a6e7ebf8e8d395.jpg
    93c9aaf479248b8d18a6e7ebf8e8d395.jpg
    100.8 KB · Views: 0
  • a99cab252677c81c60014065ebea82b0.jpg
    a99cab252677c81c60014065ebea82b0.jpg
    80.6 KB · Views: 0
  • 06d863335bf751a5526a77ac3b797cfa.jpg
    06d863335bf751a5526a77ac3b797cfa.jpg
    50 KB · Views: 0
  • 7d1fea97bf6a882397183955576ba165.jpg
    7d1fea97bf6a882397183955576ba165.jpg
    77.2 KB · Views: 0
  • 1bdf7beedff82fa76c3c0be4c70bca9b.jpg
    1bdf7beedff82fa76c3c0be4c70bca9b.jpg
    73.5 KB · Views: 0
  • a2380ac29e6ec8d93541629812745df4.jpg
    a2380ac29e6ec8d93541629812745df4.jpg
    140.1 KB · Views: 0
  • a885ca5f6dbe0ace397882c1cd6e7feb.jpg
    a885ca5f6dbe0ace397882c1cd6e7feb.jpg
    114.6 KB · Views: 0
  • 7a6f8976e74ed3bab487b3eba9fddbcd.jpg
    7a6f8976e74ed3bab487b3eba9fddbcd.jpg
    91 KB · Views: 0
  • f4c0a558734f6431f37f979e489f4bd7.jpg
    f4c0a558734f6431f37f979e489f4bd7.jpg
    82.5 KB · Views: 0
  • 71c6bfcb797fba25498f26a4d53a1193.jpg
    71c6bfcb797fba25498f26a4d53a1193.jpg
    84.3 KB · Views: 0
  • 8439d0550d86d30b25d3ed2d5a8f3abe.jpg
    8439d0550d86d30b25d3ed2d5a8f3abe.jpg
    87.1 KB · Views: 0
  • 90db8b5250dfe6f884fea4e9801a6a0a.jpg
    90db8b5250dfe6f884fea4e9801a6a0a.jpg
    94.1 KB · Views: 0
  • 420e983396cb999cb448e72dd588235f.jpg
    420e983396cb999cb448e72dd588235f.jpg
    69.5 KB · Views: 0
  • 15b283b4274c73871a4c0ce0cae009b6.jpg
    15b283b4274c73871a4c0ce0cae009b6.jpg
    92.7 KB · Views: 0
  • 19eb27e3650296405ee2a8e76356e76a.jpg
    19eb27e3650296405ee2a8e76356e76a.jpg
    64.8 KB · Views: 0
  • 278f5455f38dfe0256bb9d79ff437a97.jpg
    278f5455f38dfe0256bb9d79ff437a97.jpg
    76.5 KB · Views: 0
  • 521c0376e3b212c5b6e4724a946392dd.jpg
    521c0376e3b212c5b6e4724a946392dd.jpg
    88.4 KB · Views: 0
  • 7f4a86823b4c7c5f82633e1bfc8a7e18.jpg
    7f4a86823b4c7c5f82633e1bfc8a7e18.jpg
    77.6 KB · Views: 0
Last edited:

Wanna Ride

Well-known member
Joined
Jul 28, 2010
Messages
2,790
Mike, if I understood you right, you’re going to weld the sleeves into the lower “stems” (for lack of a better word). But then are you going to implement some sort of quick-detach for the hoop, onto those stems? Knowing you’re as forward-thinking as you are when you build something, I can see the necessity to possibly remove that hoop at some point, even if just temporarily, to facilitate other use of the cargo area. You know, for not-so-fun **** like hauling furniture, etc. Sorry if you mentioned that somewhere along the way, and I just overlooked it.

As for the tubing bender, I’ve pretty much narrowed it down to the J2 also, and right away, I’ll be upgrading it to hydraulic. Too old for all that manual **** anymore. ;-)
 
OP
Z

zmotorsports

ALLIANCE MEMBER
Joined
Oct 20, 2009
Messages
21,469
Location
Northern Utah
Subie motor? I always thought you had a VW in there, but you mentioned the radiator I never noticed.

Bb&G, the engine in the sandrail is actually a Mazda 13b rotary. This was my first experience building a rotary and it was quite a fun project. I've always loved the sound of those rotaries with limited exhaust and this one sounded cool as hell.

The engine I had been planning on building was a turbo'd 2332 VW but changed direction at the end. I had built several VW engines and felt comfortable with them but the damaged car had a rotary and so I tore it down and went through it after doing a lot of research and reading up on the rotaries.

Thanks for stopping by and checking out the projects.
 
OP
Z

zmotorsports

ALLIANCE MEMBER
Joined
Oct 20, 2009
Messages
21,469
Location
Northern Utah
Mike i can not lie just just cruised thru many pages of pics with out reading much. ( love the banshee my son has that same year) What I see in these pictures is a man that takes much pride in his Family First, his gear head desires, and just having a good time in life.
As a man that happen to marry a great women that puts up with what ever I want to do and be involved. I'm going to take a moment and commend your wife she has trained you well. LOL.

Ok now I can go back and read all this.

Thanks JC. I appreciate you taking the time to stop by and browse through my projects.

I'll agree with ya that my wife has me trained well.:beer:
 
OP
Z

zmotorsports

ALLIANCE MEMBER
Joined
Oct 20, 2009
Messages
21,469
Location
Northern Utah
Mike, if I understood you right, you’re going to weld the sleeves into the lower “stems” (for lack of a better word). But then are you going to implement some sort of quick-detach for the hoop, onto those stems? Knowing you’re as forward-thinking as you are when you build something, I can see the necessity to possibly remove that hoop at some point, even if just temporarily, to facilitate other use of the cargo area. You know, for not-so-fun **** like hauling furniture, etc. Sorry if you mentioned that somewhere along the way, and I just overlooked it.

As for the tubing bender, I’ve pretty much narrowed it down to the J2 also, and right away, I’ll be upgrading it to hydraulic. Too old for all that manual **** anymore. ;-)

That is correct. The mounts will allow easy removal if necessary but also easier installation where it will be sectional. That would be tight squeezing that in there as one piece without scratching anything inside. I don't see it coming out much as he has a truck for hauling duties but ya never know.

As for the bender, you won't regret the hydraulic option. I couldn't afford it at first but having it bolted to the floor was kind of a pain. I much prefer not only the hydraulic bending but also having it on a cart that is mobile and can be used in various locations around the shop.
 
OP
Z

zmotorsports

ALLIANCE MEMBER
Joined
Oct 20, 2009
Messages
21,469
Location
Northern Utah
Tonight’s work consisted of bending the rear cargo area hoop and welding the floor plates.

69d7496d10ae13ddb1252fbd2bcd7d35.jpg

35a874541f3c64c03d6bfb1653e66afa.jpg

c710a4505635c61ae5c58c184575c50c.jpg

0901d3090c9b4dd49036e7c72be69986.jpg

78d1e4e9e74ae865f00c89bb99978888.jpg

d69c2b585c451f230dc1ac8bf9871d73.jpg

52dd9c2b85a2152a411c659a7952a432.jpg

4ece6d35a13f2773c87a8c3cbfb43c1d.jpg

8a9a1358e46af36a5178815f0c5abf71.jpg

Before closing up I cut out a couple of 1/4” thick tabs in which to use as mounting points for the hi-lift jack on the hoop.
4c1dcea0f7e95796054e4706e7d432ca.jpg

Thanks for looking.
 

Attachments

  • 69d7496d10ae13ddb1252fbd2bcd7d35.jpg
    69d7496d10ae13ddb1252fbd2bcd7d35.jpg
    50 KB · Views: 0
  • 35a874541f3c64c03d6bfb1653e66afa.jpg
    35a874541f3c64c03d6bfb1653e66afa.jpg
    85.4 KB · Views: 0
  • c710a4505635c61ae5c58c184575c50c.jpg
    c710a4505635c61ae5c58c184575c50c.jpg
    100.8 KB · Views: 0
  • d69c2b585c451f230dc1ac8bf9871d73.jpg
    d69c2b585c451f230dc1ac8bf9871d73.jpg
    64.7 KB · Views: 0
  • 4c1dcea0f7e95796054e4706e7d432ca.jpg
    4c1dcea0f7e95796054e4706e7d432ca.jpg
    124.5 KB · Views: 0
  • 8a9a1358e46af36a5178815f0c5abf71.jpg
    8a9a1358e46af36a5178815f0c5abf71.jpg
    111.6 KB · Views: 0
  • 4ece6d35a13f2773c87a8c3cbfb43c1d.jpg
    4ece6d35a13f2773c87a8c3cbfb43c1d.jpg
    82.4 KB · Views: 0
  • 52dd9c2b85a2152a411c659a7952a432.jpg
    52dd9c2b85a2152a411c659a7952a432.jpg
    69.5 KB · Views: 0
  • 78d1e4e9e74ae865f00c89bb99978888.jpg
    78d1e4e9e74ae865f00c89bb99978888.jpg
    102 KB · Views: 0
  • 0901d3090c9b4dd49036e7c72be69986.jpg
    0901d3090c9b4dd49036e7c72be69986.jpg
    111.2 KB · Views: 0
Last edited:

Pressingonward

Well-known member
Joined
Mar 9, 2016
Messages
522
Location
SW WA
Nice work - on the jeep and everything else! That sand rail looks like a lot of fun.
I love the lines of that 36 Ford - what a cool car!
 
OP
Z

zmotorsports

ALLIANCE MEMBER
Joined
Oct 20, 2009
Messages
21,469
Location
Northern Utah
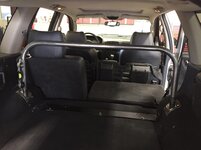
Finished up the actual fabrication tonight on the rear cargo storage rack in my son’s WJ.

ddc4327d6e6e9ad683f9c31163fd1819.jpg

Black Box mocked into place and mounting tabs fabricated for the Powertank, everything tacked and ready to remove for final welding.
27169a0fdeaa03b8a893b5b1f37b64a8.jpg

ac764280e3c9fb013142e956250e80a9.jpg

770aa9ff1b5ac40f6523c7e3413ae319.jpg

47e69ddb7488716c036bf69a6f2df396.jpg

Tabs for mounting the Hi-Lift jack. I’ll machine two standoffs for mounting the jack.
45aac9f50caf6255208abe86445e0b2e.jpg

0a4681b58d15a84b4fcb90dc190a0320.jpg

8dcbbac70d6c0e1f79f83a43cd66d472.jpg

Thanks for looking.
 

Attachments

  • 8dcbbac70d6c0e1f79f83a43cd66d472.jpg
    8dcbbac70d6c0e1f79f83a43cd66d472.jpg
    101.4 KB · Views: 1
  • ddc4327d6e6e9ad683f9c31163fd1819.jpg
    ddc4327d6e6e9ad683f9c31163fd1819.jpg
    83.4 KB · Views: 1
  • 0a4681b58d15a84b4fcb90dc190a0320.jpg
    0a4681b58d15a84b4fcb90dc190a0320.jpg
    87.3 KB · Views: 1
  • 45aac9f50caf6255208abe86445e0b2e.jpg
    45aac9f50caf6255208abe86445e0b2e.jpg
    79.5 KB · Views: 1
  • 47e69ddb7488716c036bf69a6f2df396.jpg
    47e69ddb7488716c036bf69a6f2df396.jpg
    107.5 KB · Views: 1
  • 770aa9ff1b5ac40f6523c7e3413ae319.jpg
    770aa9ff1b5ac40f6523c7e3413ae319.jpg
    110.7 KB · Views: 1
  • ac764280e3c9fb013142e956250e80a9.jpg
    ac764280e3c9fb013142e956250e80a9.jpg
    88.1 KB · Views: 1
  • 27169a0fdeaa03b8a893b5b1f37b64a8.jpg
    27169a0fdeaa03b8a893b5b1f37b64a8.jpg
    78.2 KB · Views: 1
Last edited:

LXCam

ALLIANCE MEMBER
Joined
Apr 23, 2013
Messages
19,203
Location
AZ
Slick as always Mike. So will this be powder coated or rattle canned?.
 
OP
Z

zmotorsports

ALLIANCE MEMBER
Joined
Oct 20, 2009
Messages
21,469
Location
Northern Utah
Slick as always Mike. So will this be powder coated or rattle canned?.

Thanks Cam. I have some PPG Silver left over from a previous project that isn't an exact match to his Jeep but close enough that we will use. I'll use some PPG Epoxy Primer and then topcoat it with the Silver paint.

He was going to have it powder coated but I think I talked him out of it on this one. My thinking was it is inside the vehicle and not subjected to the elements and secondly he may want to add other tabs for other accessories down the road and this will be easier to touch up if that is the case. Lastly, it will save him some money not being powder coated.

Thanks again for checking in Cam.
 

aka Larry

Well-known member
Joined
May 2, 2012
Messages
8,090
Location
Eastern, NC
Top notch work as always Mike, but I'm not understanding what this rack does exactly? I understand the actual box, but not the rack since it doesn't seem to be designed to "contain" the box.
 
OP
Z

zmotorsports

ALLIANCE MEMBER
Joined
Oct 20, 2009
Messages
21,469
Location
Northern Utah
Outstanding as ever zmotorsports.

Thank you and thanks for stopping by to check in on my projects.


Top notch work as always Mike, but I'm not understanding what this rack does exactly? I understand the actual box, but not the rack since it doesn't seem to be designed to "contain" the box.

Vincent, the hoop is merely to be an anchoring point for accessories, nothing structural and in no conjunction with the box as the box mounts independently. The hoop did however, have to clear the box which is why the box had to be installed prior to the tubing work.

The hoop up and over the box has attachment tabs in which the Hi-Lift jack will secure to after I machine a couple of standoffs. The driver's side rearward facing tube will hold the Powertank as well as his fire extinguisher which will allow easy access by opening the rear driver's side door and reaching around the seat to grab the fire extinguisher.

That is pretty much all for now but there will still be a little space remaining in he wants to mount things later on but the jack, CO2 tank and fire extinguisher were the main items he wanted to secure outside of the box and he didn't want the Hi-Lift jack mounted outside of the car like I have mine mounted. This was the next best and safest solution to avoid having loose items in the passenger area of the car.

Hopefully that makes better sense.

Thanks.
 

aka Larry

Well-known member
Joined
May 2, 2012
Messages
8,090
Location
Eastern, NC
Vincent, the hoop is merely to be an anchoring point for accessories, nothing structural and in no conjunction with the box as the box mounts independently. The hoop did however, have to clear the box which is why the box had to be installed prior to the tubing work.

The hoop up and over the box has attachment tabs in which the Hi-Lift jack will secure to after I machine a couple of standoffs. The driver's side rearward facing tube will hold the Powertank as well as his fire extinguisher which will allow easy access by opening the rear driver's side door and reaching around the seat to grab the fire extinguisher.


Gotcha. Thanks for taking the time to explain it to me.
 
To avoid these ads, REGISTER NOW!
Top Bottom