JoCoSawdust
Well-known member
Nice stack. That STP decal is a perfect example of a sticker I wouldn't mind a bit having on that chest.

I was worried about that.
I'm 6'2, and keep all my 1/2-inch sockets and drives in the top of that chest... Might have to come up with a Plan B there...
A Plan B that doesn't simply transfer them to the three drawers I just picked up!
Hello I found this forum while googling trying to restore 2 of my old Craftsman Tool chests from my father. They are form 1975,76 . Wonder if you guys could explain to me how the bottom cabinet cover is removed on the 65035 chests?Picture would be so awesome too if possible.
Thanks
Wow, these are GREAT! They're the same size as my dad's old boxes... they'd make a perfect pairing. I'd move all my stuff out of the C-man boxes I got when I was 17, and give those two boxes to my 24 year old.Great tool boxes.
Here's one that popped up on CL this morning. SE Michigan/Metro Detroit.


https://detroit.craigslist.org/mcb/tls/d/sterling-heights-craftsman-rolling-tool/7092241203.html
I love these, but I don't have room for a third, plus the SO in the garage.
That is good tip. I never thought about using heat. My method using hammer and block of wood. The main issue is that they are crimped down along the pull.
I have a similar chest given to me with no keys, where might I find a new lock set?Here is one of mine found in 2002-2003 while out for a walk. This is a '68 model six drawer. The logo and tray are wrong and those are copies of the original Sears catalog ads in the top lid.. It sits in my garage with some vintage Craftsman tools my next door neighbor was going to toss.
Also have a 1962 Sears Craftsman combination (pictured) and a 1960 Sears Craftsman combination that I won a contest with Sears with 2002.
Love these oldies!
")
Did someone mention keys?
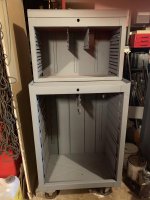
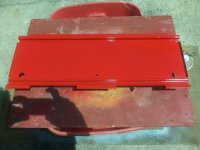
I got the upper and lower painted this afternoon. It takes so long to set up to paint! (Homemade paint booth) I still need to clean the slides. The upper drawers are painted and are ready to tap the aluminum pulls on. I hope to get the lower drawers stripped and painted soon. All in good time.

Say lock or keys and the lock whisperer shows up. LOL
Took me a while to acquire, but here she is:
Sent from my iPhone using Garage Journal
Do all the middle boxes have a drop front?
I posted before reading your comment. Yes around 1970 they switch sides. I can’t remember the one that violated that rule. Everytime you think you figure it out one pops up that changes things but at least we got a general idea of things.
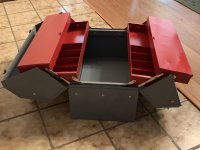
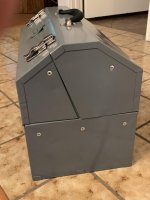
I know this isn’t a Craftsman rollaway, but it’s from the same era . I always thought these were cool boxes too. This one lived a very rough life before it was rescued from someone tossing it out. Since then, it’s been sitting in my shed. Lots of rust damage inside and out. The bottom had holes in it and all of the chrome was rusted and pathetic. I took it completely apart to sandblast and I cut out a new floor for the bottom. I was very happy with the way the chrome came out. Buffing wheels do miracles. I’m thinking about using this as my travel box, having metric on one side and SAE on the other.
Took me a while to acquire, but here she is:
Sent from my iPhone using Garage Journal
Your box looks great!Pictures did not attach. User error. I'll try again.
Your box looks great!