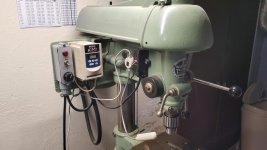
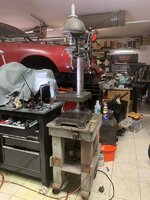
Background: Last month, I picked up a Walker Turner 900 drill press for $150. The machine itself ran fine and the owner told me it had been sitting under a tarp in a garage for the last 20 years. The machine had never been repainted and aside from some surface rust, it was in great shape. The serial number is “1944” which I believe means it was manufactured in the late 1930s. Now, onto the restoration…
Teardown: Everything came apart fairly easily. I don’t have a press so getting the bearings off the spindle wasn’t the easiest, but used some scrap pvc pipe and a hammer to tap them off. All the metal parts first went into a bath of EvapoRust overnight and then wire wheeled. The only thing I didn’t wire wheel was the spindle as it didn’t need it and it is a machined surface, so no need to mark it up. I used acetone to clean anything including the bearings.
Paint: First up, I used paint stripper to get the bulk of the paint off (mainly the head and base), and then followed up with a wire wheel and then cup wheel on my drill. I wiped everything down good with acetone and used Rustoleum automotive primer (3 light coats) followed by Rustoleum ‘Hammered Black’ spray paint. The texture is supposed to be a textured/ hammered metal but I had a hard time getting that finish because of our rough/ porous the cast iron is. I even tried the non-spray version on the base which worked better but end of the day it’s a drill press so I left it alone. It is sort of a flat/ textured back which looks nice.
Column: The column had some rust and was generally marked up from people adjusting the table over the years, plus it had this dingy dark grey coloring. I first tried wrapping it in soaked EvaopRust paper towels and wrapped plastic wrap over it which worked ok, but didn’t get rid of the discoloration. So I screwed down 4 casters (2 side by side) and using my drill, made a makeshift lathe and sanded with 100 > 120 > 180 > 220 > 400 > 600 > polish. Came out nice. I also used a dowel and put a small wire brush on the end so I could get the inside of the column, just to knock out any big rust.
Motor: The motor ran fine to start but it was dirty and the cord was rotted/ cut. So I popped the motor open and used compressed air to get out the loose gunk followed by acetone. I did end up re-soldering one connection in there that didn’t look great. Aside from that, the motor internals were fine and I only had to replace one washer. I will say, getting the motor back together was a total pain… it kept on binding on itself no matter how I aligned it. What I found out was the bracket that holds the starter motor on was bent slightly which was pushing the bell ends out of sync. I ended up re-wiring the cord and added a toggle switch. The black/ hot wire is soldered directly to the switch which then links up to the motor wiring. I used some electrical caps to connect everything and then followed up with some electrical tape. The motor doesn’t have a ground, so the ground screws right into the gang box (green screw). I’m sure it isn’t entirely up to code, but it works and I checked voltage and ground with my multimeter and everything checked out. The motor was originally wired with an outlet and old switch. Both got trashed.
Chuck: The drill came with a Jacobs taper 6A chuck. I used my vise to press off the collar and then cleaned the internal parts, wired wheeled, and reassembled with some white lithium grease. Just watch out, when disassembling the chuck you need to have the jaws extended otherwise you’ll break a couple teeth on them.
Assembly: Not much to say here, everything went back easy. I used anti-seize where needed and used Red N’ Tacky in the bearings as well as on the quill/ spindle. The drill works well now. It has 3.5 thousands of runout on the chuck which is good enough for my needs. I also used a link belt which seems to work well.
Teardown: Everything came apart fairly easily. I don’t have a press so getting the bearings off the spindle wasn’t the easiest, but used some scrap pvc pipe and a hammer to tap them off. All the metal parts first went into a bath of EvapoRust overnight and then wire wheeled. The only thing I didn’t wire wheel was the spindle as it didn’t need it and it is a machined surface, so no need to mark it up. I used acetone to clean anything including the bearings.
Paint: First up, I used paint stripper to get the bulk of the paint off (mainly the head and base), and then followed up with a wire wheel and then cup wheel on my drill. I wiped everything down good with acetone and used Rustoleum automotive primer (3 light coats) followed by Rustoleum ‘Hammered Black’ spray paint. The texture is supposed to be a textured/ hammered metal but I had a hard time getting that finish because of our rough/ porous the cast iron is. I even tried the non-spray version on the base which worked better but end of the day it’s a drill press so I left it alone. It is sort of a flat/ textured back which looks nice.
Column: The column had some rust and was generally marked up from people adjusting the table over the years, plus it had this dingy dark grey coloring. I first tried wrapping it in soaked EvaopRust paper towels and wrapped plastic wrap over it which worked ok, but didn’t get rid of the discoloration. So I screwed down 4 casters (2 side by side) and using my drill, made a makeshift lathe and sanded with 100 > 120 > 180 > 220 > 400 > 600 > polish. Came out nice. I also used a dowel and put a small wire brush on the end so I could get the inside of the column, just to knock out any big rust.
Motor: The motor ran fine to start but it was dirty and the cord was rotted/ cut. So I popped the motor open and used compressed air to get out the loose gunk followed by acetone. I did end up re-soldering one connection in there that didn’t look great. Aside from that, the motor internals were fine and I only had to replace one washer. I will say, getting the motor back together was a total pain… it kept on binding on itself no matter how I aligned it. What I found out was the bracket that holds the starter motor on was bent slightly which was pushing the bell ends out of sync. I ended up re-wiring the cord and added a toggle switch. The black/ hot wire is soldered directly to the switch which then links up to the motor wiring. I used some electrical caps to connect everything and then followed up with some electrical tape. The motor doesn’t have a ground, so the ground screws right into the gang box (green screw). I’m sure it isn’t entirely up to code, but it works and I checked voltage and ground with my multimeter and everything checked out. The motor was originally wired with an outlet and old switch. Both got trashed.
Chuck: The drill came with a Jacobs taper 6A chuck. I used my vise to press off the collar and then cleaned the internal parts, wired wheeled, and reassembled with some white lithium grease. Just watch out, when disassembling the chuck you need to have the jaws extended otherwise you’ll break a couple teeth on them.
Assembly: Not much to say here, everything went back easy. I used anti-seize where needed and used Red N’ Tacky in the bearings as well as on the quill/ spindle. The drill works well now. It has 3.5 thousands of runout on the chuck which is good enough for my needs. I also used a link belt which seems to work well.
Last edited:
 It works great.