To avoid these ads, REGISTER NOW!

ZMotorsports Shop Projects 2.0

To avoid these ads, REGISTER NOW!

shortykorte

Well-known member
Joined
Sep 1, 2014
Messages
8,039
Location
Tallahassee, Fl
The stand turned out great. It looks bigger than my 24” but they do say pictures add pounds, lol. Looks like your brake is a little better condition. Southeast humidity didn’t help mine but it cleans up well.


Shorty Korte
Always remember quality in QST

Sent from my iPhone using Garage Journal
 

Bears Fan

Well-known member
Joined
Jan 26, 2012
Messages
3,442
Location
Indiana
8788bf23775847bec6673f1a3924551d.jpg

Nice job on the metal brake stand and your shop is just freaking awesome :bowdown:
 

Attachments

  • 8788bf23775847bec6673f1a3924551d.jpg
    8788bf23775847bec6673f1a3924551d.jpg
    84.7 KB · Views: 0
OP
Z

zmotorsports

ALLIANCE MEMBER
Joined
Oct 20, 2009
Messages
21,450
Location
Northern Utah
Looks like a metalworking Buffet!

Yeah, that whole wall is a dream!:thumbup:

Nice finished work! I'd like to add a few of your machinery row items to my setup!

Nice job on the metal brake stand and your shop is just freaking awesome :bowdown:

It sure does! :drool:

Thanks guys. I really appreciate all of the kind words. I love how the shop is setup now and for the foreseeable future.

I appreciate all of your following along.
 
OP
Z

zmotorsports

ALLIANCE MEMBER
Joined
Oct 20, 2009
Messages
21,450
Location
Northern Utah
Sweet new brake Mike. Since you went this way, I have been thinking about going that way instead of holding out for a 48" I can afford.

Thank you. I have been waffling over a 48" pan brake for several years now, especially since I built the new shop. However, I still didn't want to take the plunge and give up that much real estate in the shop and finally realized over the past year or so that I could get by with half of that pretty easily.

Thanks for following along.
 
OP
Z

zmotorsports

ALLIANCE MEMBER
Joined
Oct 20, 2009
Messages
21,450
Location
Northern Utah
Mike I understand your apprehension to the flat surface, uhm $#!+ Collector, so you could add a couple of vertical flat stock bars that your fingers could sit on kind of upside down to the in use mounting. I hope you can grasp my lacking description. Just copy the upper finger mount on your brake and you should be able to sit them on there when not in use. I think that the Diacro is an excellent choice for your brake, if you out grow it with their following you will do quite well quickly when you upsize. Harry

Thanks for the suggestion Harry. While I think that would work I think I will just order some expanded metal next time I order material and any dust will fall through yet still allow a small shelf.

I appreciate you checking in and for the suggestion.:beer:
 
OP
Z

zmotorsports

ALLIANCE MEMBER
Joined
Oct 20, 2009
Messages
21,450
Location
Northern Utah
The stand turned out great. It looks bigger than my 24” but they do say pictures add pounds, lol. Looks like your brake is a little better condition. Southeast humidity didn’t help mine but it cleans up well.


Shorty Korte
Always remember quality in QST

Sent from my iPhone using Garage Journal

Thanks Shorty. It should be the same as your DiAcro but I was impressed with how clean it was. I can tell it was well used but the bushings and all of the hardware are still in pristine condition. Should provide many more years of service, especially where I'm not a production shop.

Thanks for stopping by to check it our Shorty.
 

MP&C

Well-known member
Joined
Oct 21, 2009
Messages
4,405
Location
Leonardtown, MD
Now Mike, you know you're gonna need some radius dies, so go ahead and add the shelf to your stand. :beer:


Nice job, enjoy the new brake!
 
OP
Z

zmotorsports

ALLIANCE MEMBER
Joined
Oct 20, 2009
Messages
21,450
Location
Northern Utah
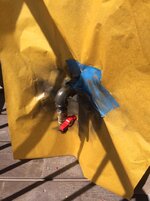
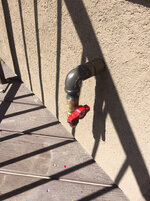
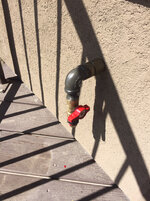
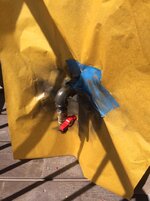
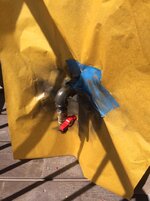
Tonight I arrived home from work and before mowing the lawns I thought I’d add the ball valve and elbow to my natural gas line on my deck in preparation for the arrival of my new grill this week.

Added the elbow, 1/2” ball valve and 1/2” to 3/8” reducer. I angled it downward because I want to run the line down and under the deck to the grill.

After installation I wiped everything down with acetone, masked and painted to match the railing.
6d0a537fb3ab465c4df2764728ed5b80.jpg

1a553b52176f57f80421f12eb90b2b27.jpg
 

Attachments

  • 1a553b52176f57f80421f12eb90b2b27.jpg
    1a553b52176f57f80421f12eb90b2b27.jpg
    956.2 KB · Views: 0
  • 6d0a537fb3ab465c4df2764728ed5b80.jpg
    6d0a537fb3ab465c4df2764728ed5b80.jpg
    91.4 KB · Views: 0

casmurbax

Well-known member
Joined
Sep 25, 2012
Messages
2,760
Location
Wilton, NY
Gas fitting looks good. Glad I'm not the only one that paints those!

x2


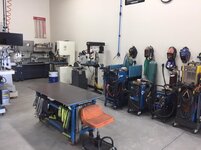
I am curious about about what I believe to be are different types of welders lined up against your wall. I do very little welding because I never have done enough of it to become proficient at it, but it is one of things that I am always curious about. If you don't mind telling me or I am sure one of your many followers could tell me, what are all the different types you have? I am assuming the helmets are all different because you have different lenses in them based upon what type of welding you are doing?

Thank you for sharing so many of of your projects and your knowledge on here. I appreciate what you and all the other members on here share.

John
 
OP
Z

zmotorsports

ALLIANCE MEMBER
Joined
Oct 20, 2009
Messages
21,450
Location
Northern Utah
8788bf23775847bec6673f1a3924551d.jpg


x2


I am curious about about what I believe to be are different types of welders lined up against your wall. I do very little welding because I never have done enough of it to become proficient at it, but it is one of things that I am always curious about. If you don't mind telling me or I am sure one of your many followers could tell me, what are all the different types you have? I am assuming the helmets are all different because you have different lenses in them based upon what type of welding you are doing?

Thank you for sharing so many of of your projects and your knowledge on here. I appreciate what you and all the other members on here share.

John

Certainly John.

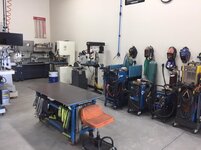
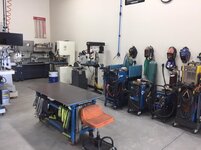
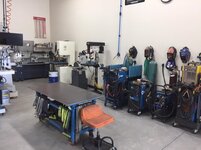
In the picture above from center of the picture to the right they are as follows:

* Miller Dynasty 300 DX with Coolmate cooler
* Miller MM251 MIG welder running .030" wire and C25 gas
* Miller Millermatic M211 MIG welder running .023" wire and C25 gas
* Miller Passport portable MIG machine w/ CO2 bottles and .030" wire located under the cart with the ESAB 875 Plasma cutter on top.

If you have any further questions about welders or any other equipment in the shop please don't hesitate to ask John.

Thanks for following along.
 

Attachments

  • 8788bf23775847bec6673f1a3924551d.jpg
    8788bf23775847bec6673f1a3924551d.jpg
    84.7 KB · Views: 0
Last edited:

jbmatth

Well-known member
Joined
Jun 3, 2013
Messages
5,691
Location
Northern Ok.
I'm a fan of the blue as well, but venture out, I do have to ask then with so many Miller's why the ESAB plasma?

JB
 
OP
Z

zmotorsports

ALLIANCE MEMBER
Joined
Oct 20, 2009
Messages
21,450
Location
Northern Utah
I'm a fan of the blue as well, but venture out, I do have to ask then with so many Miller's why the ESAB plasma?

JB

Because the Miller plasma's ****!!!

I haven't used one yet that I'm impressed with. Now in all fairness the newest I've used has been two years old but we have had half a dozen between work and contractors and none have worked worth the ****, plus they eat consumables like candy.

My ESAB, although doesn't get used very much, it gentle on the consumables and cuts consistent as hell.

I tried to like the Miller plasma's but just can't do it nor can I recommend them. Other than their plasma's I pretty much bleed blue.

Sorry JB.
 

bradpac

Well-known member
Joined
Sep 8, 2013
Messages
721
Location
Central TX
I have one of those ESABs, mine is probably 10-15 years old with the older style cutting torch. Have you made any improvements to that one? I really like how it cuts although finding tips and consumables is a little tougher than the newer stuff.
 
To avoid these ads, REGISTER NOW!
OP
Z

zmotorsports

ALLIANCE MEMBER
Joined
Oct 20, 2009
Messages
21,450
Location
Northern Utah
I have one of those ESABs, mine is probably 10-15 years old with the older style cutting torch. Have you made any improvements to that one? I really like how it cuts although finding tips and consumables is a little tougher than the newer stuff.

Mine is the same, older unit with the older style torch and hose/cable. I'd really like to upgrade to the new style but it works so well I can't justify it. I've had to order the consumables when needed because my local welding supply doesn't stock them on a normal basis but it hasn't been an issue. I reorder when I get low and not out but the nice thing is that they last quite a while so I'll order half a dozen of each and be fine for 4-5 years until I have to reorder.
 

amalik

Well-known member
Joined
Feb 3, 2016
Messages
221
Tonight I arrived home from work and before mowing the lawns I thought I’d add the ball valve and elbow to my natural gas line on my deck in preparation for the arrival of my new grill this week.

Added the elbow, 1/2” ball valve and 1/2” to 3/8” reducer. I angled it downward because I want to run the line down and under the deck to the grill.

After installation I wiped everything down with acetone, masked and painted to match the railing.
6d0a537fb3ab465c4df2764728ed5b80.jpg

1a553b52176f57f80421f12eb90b2b27.jpg

What did you decide on for a new grill?
 

Attachments

  • 6d0a537fb3ab465c4df2764728ed5b80.jpg
    6d0a537fb3ab465c4df2764728ed5b80.jpg
    87.4 KB · Views: 0
  • 1a553b52176f57f80421f12eb90b2b27.jpg
    1a553b52176f57f80421f12eb90b2b27.jpg
    208.5 KB · Views: 0

jbmatth

Well-known member
Joined
Jun 3, 2013
Messages
5,691
Location
Northern Ok.
Because the Miller plasma's ****!!!

I haven't used one yet that I'm impressed with. Now in all fairness the newest I've used has been two years old but we have had half a dozen between work and contractors and none have worked worth the ****, plus they eat consumables like candy.

My ESAB, although doesn't get used very much, it gentle on the consumables and cuts consistent as hell.

I tried to like the Miller plasma's but just can't do it nor can I recommend them. Other than their plasma's I pretty much bleed blue.

Sorry JB.

Absolutely no need to apologize Mike, I appreciate the feedback. I didn't have the coin for a miller when I was looking for a tig or plasma so I'm glad I didn't stretch to get the Miller plasma now. As always I appreciate the information you share, nice to hear from someone who uses equipment regularly and knows how to use it.

JB
 
OP
Z

zmotorsports

ALLIANCE MEMBER
Joined
Oct 20, 2009
Messages
21,450
Location
Northern Utah
Absolutely no need to apologize Mike, I appreciate the feedback. I didn't have the coin for a miller when I was looking for a tig or plasma so I'm glad I didn't stretch to get the Miller plasma now. As always I appreciate the information you share, nice to hear from someone who uses equipment regularly and knows how to use it.

JB
Glad to help JB. This is hard to say because I'm such a fan of Miller products but there are much better plasma cutters out there.

Thanks for following along and I'm happy to answer any questions that I can.
 
OP
Z

zmotorsports

ALLIANCE MEMBER
Joined
Oct 20, 2009
Messages
21,450
Location
Northern Utah
Today turned out to be pretty productive.
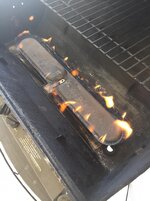
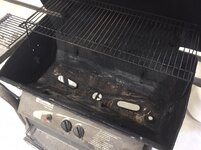
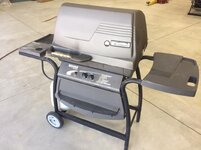
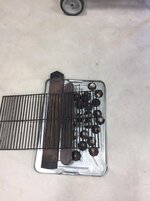
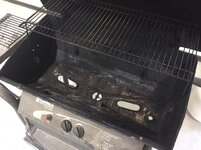
After getting the new grill up and running last night I focused on getting the old Kenmore grill disassembled, cleaned and ready to give away. A co-worker’s mother in-law was looking for a grill and this one works good and I couldn’t justify throwing it out and would like to give it to someone who can use it.

7807e60ac9e828aa36b1b4e579346cca.jpg

Ready to pressure wash.
e0821959fc95125c1ab74597bce5c2a9.jpg

Reassembled the burner and made sure the spark igniter worked and the burner wasn’t plugged.
3bd142b2cda704101532566f12e50282.jpg

Reassembled.
4e59eb96df01eaf8a60d69746399f58c.jpg

Ready to be picked up.
6947c454a5bc8b3f2fa66709857df5d5.jpg

I thought it was about 12 years old or so but when my wife grabbed the original paperwork so I could give it to them I noticed the purchase date of 6/10/2000 that I had written on the owner’s manual. I always write the purchase dates, installation dates as well as vendor for references.

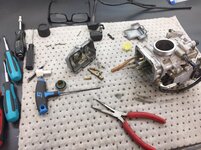
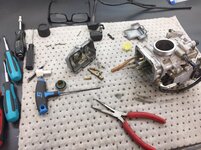
After that I had a “hey man” project to work on. A friend of mine dropped off the carburetor from his Yamaha YFZ450 last night. I generally don’t work on powersports equipment any more but this is a friend whom I’ve built many snowmobiles and ATV’s for over the years when I had my business so I told him to bring it by and I’d take a look at it for him.

Disassembled.
8d7020333e3bb70bb0aaf9c6d981e2e5.jpg

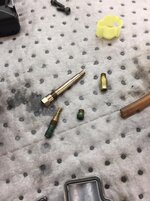
Nasty looking inside. Jets plugged up as well. No wonder why it wouldn’t run.
fb2ff0a28c016efce37f37ad4f4d0753.jpg

a8b400aafda8da46ca0267f8bae42a33.jpg

After removing from carb cleaner.
f093ded9e1aa9344eef8423ea0c8a66c.jpg

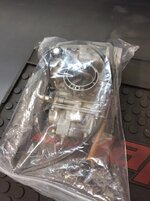
Ready for reassembly.
8ef0e58c29b59ce6ccfbb79c021653be.jpg

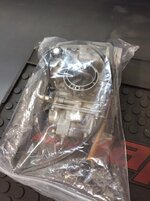
Another project completed and ready to be picked up.
c3cb58607bcd8b15a5925d8e2df2b7aa.jpg

Last project in the shop before edging, trimming and mowing the lawn in preparation for tomorrow’s BBQ.

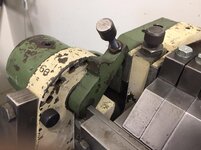
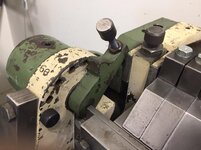
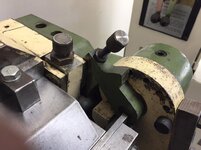
I needed some new adjustment screws and angle stop pins for the leaf on the DiAcro finger brake.

The fine adjustment screws were in pretty poor condition.
3d92c51440e8ab278247cb2a059c0af0.jpg

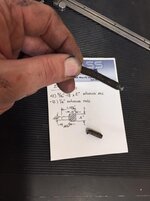
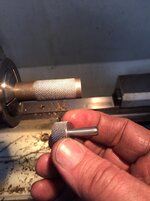
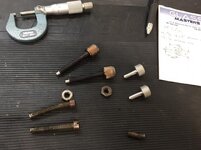
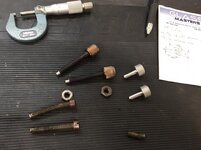
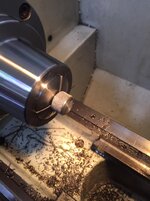
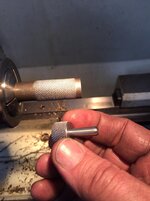
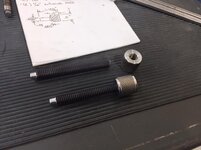
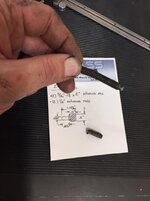
I cut a couple of pieces of grade 8 5/16”-18 allthread and reduced the tip to .200” diameter as well as machined two knurled thumb nuts. The threaded rod will thread into the nuts and be TIG welded on the end then turned to finish them off.
4ff83f58b55d4936288792ed70f029c6.jpg

715b0358bb7f0cd57cc5c69416c5a3bc.jpg

Next was to machine two push pins for the leaf angle. These are .625” diameter, knurled then stepped down to .250” x .750” in length.
7c818246d5d762e62b9fabb97c4d7f82.jpg

Head faced and chamfered.
b7aa7ab69f190d1ce935f11a1b715226.jpg

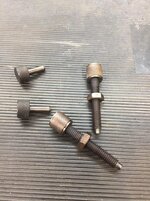
Original pieces in foreground with new pieces in the background.
3c906199c5a99d9bd8fbbc4a5f8e979d.jpg

I opted to use some cold bluing to match the original thumbscrews on the brake.
74b002498cbf9a5bca67e580b9d2640f.jpg

Wiped down with a little oil and ready to install.
f51aeefdcafbbd48422a294a1d2c697f.jpg

Completed left side of brake. The upper right large knurled thumbscrews are original on the brake and the other two are the ones I just made.
23e1e8e61d976ab9cb03b0138085b0b9.jpg

Right side of brake.
f856a568179d461a2a959f778ed7e517.jpg

Thanks for looking.
 

Attachments

  • f51aeefdcafbbd48422a294a1d2c697f.jpg
    f51aeefdcafbbd48422a294a1d2c697f.jpg
    149 KB · Views: 1
  • 23e1e8e61d976ab9cb03b0138085b0b9.jpg
    23e1e8e61d976ab9cb03b0138085b0b9.jpg
    86.5 KB · Views: 0
  • 74b002498cbf9a5bca67e580b9d2640f.jpg
    74b002498cbf9a5bca67e580b9d2640f.jpg
    79.7 KB · Views: 0
  • f856a568179d461a2a959f778ed7e517.jpg
    f856a568179d461a2a959f778ed7e517.jpg
    85.2 KB · Views: 0
  • 3c906199c5a99d9bd8fbbc4a5f8e979d.jpg
    3c906199c5a99d9bd8fbbc4a5f8e979d.jpg
    104.6 KB · Views: 0
  • b7aa7ab69f190d1ce935f11a1b715226.jpg
    b7aa7ab69f190d1ce935f11a1b715226.jpg
    83.2 KB · Views: 0
  • 7c818246d5d762e62b9fabb97c4d7f82.jpg
    7c818246d5d762e62b9fabb97c4d7f82.jpg
    63.5 KB · Views: 0
  • 3bd142b2cda704101532566f12e50282.jpg
    3bd142b2cda704101532566f12e50282.jpg
    89.9 KB · Views: 0
  • e0821959fc95125c1ab74597bce5c2a9.jpg
    e0821959fc95125c1ab74597bce5c2a9.jpg
    93.6 KB · Views: 0
  • 7807e60ac9e828aa36b1b4e579346cca.jpg
    7807e60ac9e828aa36b1b4e579346cca.jpg
    74 KB · Views: 0
  • 4e59eb96df01eaf8a60d69746399f58c.jpg
    4e59eb96df01eaf8a60d69746399f58c.jpg
    120.3 KB · Views: 0
  • 6947c454a5bc8b3f2fa66709857df5d5.jpg
    6947c454a5bc8b3f2fa66709857df5d5.jpg
    68.9 KB · Views: 0
  • 8d7020333e3bb70bb0aaf9c6d981e2e5.jpg
    8d7020333e3bb70bb0aaf9c6d981e2e5.jpg
    114.1 KB · Views: 0
  • 715b0358bb7f0cd57cc5c69416c5a3bc.jpg
    715b0358bb7f0cd57cc5c69416c5a3bc.jpg
    173.5 KB · Views: 0
  • 4ff83f58b55d4936288792ed70f029c6.jpg
    4ff83f58b55d4936288792ed70f029c6.jpg
    71.3 KB · Views: 0
  • 3d92c51440e8ab278247cb2a059c0af0.jpg
    3d92c51440e8ab278247cb2a059c0af0.jpg
    72.1 KB · Views: 0
  • c3cb58607bcd8b15a5925d8e2df2b7aa.jpg
    c3cb58607bcd8b15a5925d8e2df2b7aa.jpg
    86.2 KB · Views: 0
  • 8ef0e58c29b59ce6ccfbb79c021653be.jpg
    8ef0e58c29b59ce6ccfbb79c021653be.jpg
    108.9 KB · Views: 0
  • f093ded9e1aa9344eef8423ea0c8a66c.jpg
    f093ded9e1aa9344eef8423ea0c8a66c.jpg
    106.2 KB · Views: 0
  • a8b400aafda8da46ca0267f8bae42a33.jpg
    a8b400aafda8da46ca0267f8bae42a33.jpg
    75.5 KB · Views: 0
  • fb2ff0a28c016efce37f37ad4f4d0753.jpg
    fb2ff0a28c016efce37f37ad4f4d0753.jpg
    108 KB · Views: 0
Last edited:

Kiwi Canuck

Well-known member
Joined
Dec 13, 2014
Messages
156
Location
Langley BC
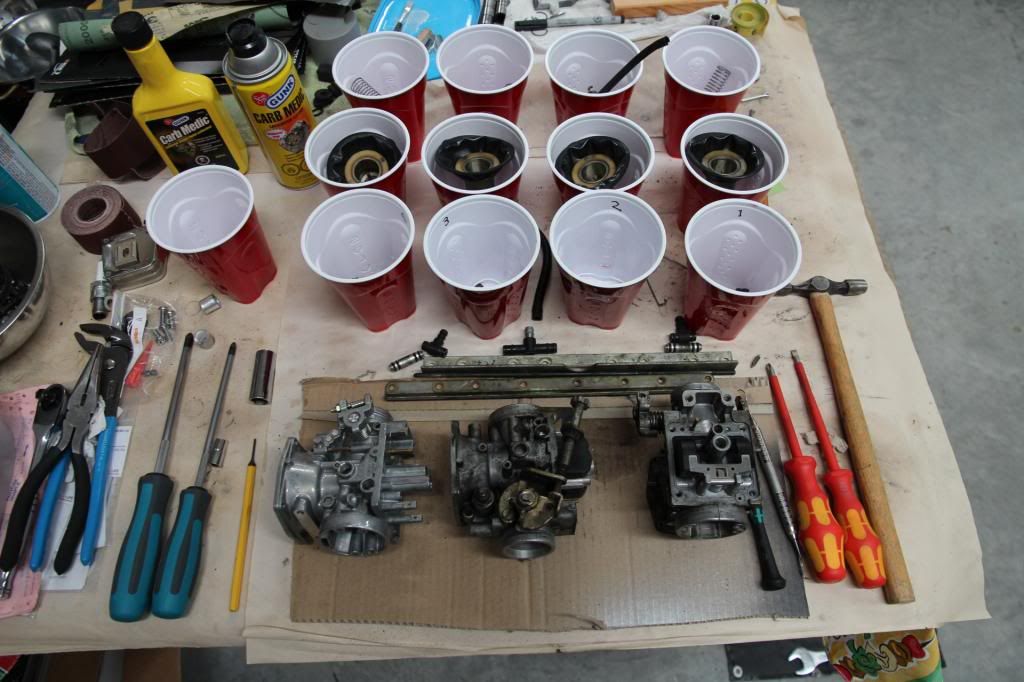
Mike, nice to see you using Vessel Screwdrivers, I bought a #2 & #3 PH with the 150mm (6") shank and they saved many screws on my older Suzuki's that I restored, I recently bought the same sizes in the Impactor model, they are excellent drivers and I love using them.

IMG_2087_zpsdd09d9df.jpg


61zfQONqV%2BL._AC_SL1500_.jpg


Excellent for carb work.

IMG_2105_zpsed7f9d36.jpg


You know it's a tight fit when it can support it's own weight, never see a phillips screwdriver do that.

photo127_zps21ebca02.jpg

David
 
Last edited:

Bigblue&Goldie

Well-known member
Joined
Mar 12, 2009
Messages
10,719
Location
AZ
Mike, nice to see you using Vessel Screwdrivers, I bought a #2 & #3 PH with the 150mm (6") shank......

How often do you find yourself using the #3? I keep the #2 Vessel for working on bicycles (Shimano components) and Japanese carburetors, but never came across a need for a #3.
 

Kiwi Canuck

Well-known member
Joined
Dec 13, 2014
Messages
156
Location
Langley BC
How often do you find yourself using the #3? I keep the #2 Vessel for working on bicycles (Shimano components) and Japanese carburetors, but never came across a need for a #3.

All engine case screws on the older Japanese bikes use #3 on the engine side covers, (see previous picture from a 1981 Honda CT90), also the carbs on the 4 cylinder bikes are racked together with #3 screws, so quite often.

Those screws are often damaged from PO's using the wrong driver, probably a #2 Phillips screwdriver.

I have disassembled many engines and the OEM JIS screws still look pristine after using the Vessel screwdrivers, no need to change them out to Allen Head Cap screws as many do because they think the "Phillips" screws are junk, which is certainly not the case.

I even found a way to restore damaged JIS screws, when I need to get something back together and didn't order the right length screws, they can also get expensive when you have dozens to replace on a bike, so restoring them makes sense at times.

nqNWnPN2_o.jpg


After some hammering and a light pass on the buffing machine, still needs a little work but you can see the progress here.

0GUiSnfr_o.jpg


Here's the other screw.

wKtChzgV_o.jpg


David.
 
Last edited:
OP
Z

zmotorsports

ALLIANCE MEMBER
Joined
Oct 20, 2009
Messages
21,450
Location
Northern Utah
Mike, nice to see you using Vessel Screwdrivers, I bought a #2 & #3 PH with the 150mm (6") shank and they saved many screws on my older Suzuki's that I restored, I recently bought the same sizes in the Impactor model, they are excellent drivers and I love using them.

Excellent for carb work.


David

Thanks David. I like these Vessel screwdrivers. I had an older #2 and #3 but gave them to my son when he took my work toolbox home and I ordered this new set a couple of years ago to replace them.

My old ones saw many, many motorcycles and ATV's but so far these are still pretty new and virgin since I don't work on many powersports equipment these days. In some ways I miss working on the ATV's and snowmobiles and in other ways not so much.:lol_hitti

Thanks for stopping by David.
 

C_F

ALLIANCE MEMBER
Joined
Jan 21, 2005
Messages
9,675
Location
Utah...SNOW BLOWS!
Tonight I arrived home from work and before mowing the lawns I thought I’d add the ball valve and elbow to my natural gas line on my deck in preparation for the arrival of my new grill this week.

Added the elbow, 1/2” ball valve and 1/2” to 3/8” reducer. I angled it downward because I want to run the line down and under the deck to the grill.

After installation I wiped everything down with acetone, masked and painted to match the railing.
6d0a537fb3ab465c4df2764728ed5b80.jpg

1a553b52176f57f80421f12eb90b2b27.jpg
Man, the idea of not having to refill a propane tank for the grill ever again sounds very appealing! I think I'm gonna need to borrow this idea of yours. :) Thanks for posting!
 

Attachments

  • 6d0a537fb3ab465c4df2764728ed5b80.jpg
    6d0a537fb3ab465c4df2764728ed5b80.jpg
    87.4 KB · Views: 0
  • 1a553b52176f57f80421f12eb90b2b27.jpg
    1a553b52176f57f80421f12eb90b2b27.jpg
    208.5 KB · Views: 0

shortykorte

Well-known member
Joined
Sep 1, 2014
Messages
8,039
Location
Tallahassee, Fl
Ummm, I wonder where I can get some replacement screws if needed for my brake.


On the #3 driver, I use a #3 once a year probably. Definitely one of those right tool moments.


Shorty Korte
Always remember quality in QST

Sent from my iPhone using Garage Journal
 
OP
Z

zmotorsports

ALLIANCE MEMBER
Joined
Oct 20, 2009
Messages
21,450
Location
Northern Utah
Man, the idea of not having to refill a propane tank for the grill ever again sounds very appealing! I think I'm gonna need to borrow this idea of yours. :) Thanks for posting!

Yeah, that was definitely an appealing aspect of going to natural gas. Still can't figure out why the NG grill was about $50 more than the propane one. The propane grill requires a large regulator as well as a slide out tray and other components for tank storage where this one does not.:headscrat

Thanks for checking in and checking out the projects.
 
OP
Z

zmotorsports

ALLIANCE MEMBER
Joined
Oct 20, 2009
Messages
21,450
Location
Northern Utah
Ummm, I wonder where I can get some replacement screws if needed for my brake.


On the #3 driver, I use a #3 once a year probably. Definitely one of those right tool moments.


Shorty Korte
Always remember quality in QST

Sent from my iPhone using Garage Journal

Gee Shorty, I don't know where you could get those.:lol_hitti

And to answer Cam's question about the #3, I used mine quite a bit back when I was doing a lot of motorcycle, ATV and snowmobile work but nowadays maybe a couple times a year is all I use it. Another place the #3 was common was on ignition timing plates. Those are usually a bit larger head screws.

Thanks for stopping by Shorty.
 

Finallygotit

ALLIANCE MEMBER
Joined
Jul 6, 2013
Messages
4,097
Location
Tucson, AZ
Yeah, that was definitely an appealing aspect of going to natural gas. Still can't figure out why the NG grill was about $50 more than the propane one. The propane grill requires a large regulator as well as a slide out tray and other components for tank storage where this one does not.:headscrat

Thanks for checking in and checking out the projects.


Supply and demand there Mike. They probably sell way more propane set-ups than NG.


:beer:
 
OP
Z

zmotorsports

ALLIANCE MEMBER
Joined
Oct 20, 2009
Messages
21,450
Location
Northern Utah
After work tonight I racked the Jeep to perform a LOF service and tire rotation.

7e12d9e9c1a93115c4e288089074c908.jpg

1aeec662673127aa83abfbbf51bcbf94.jpg

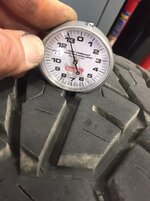
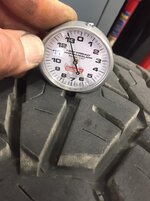
These 37” Nitto’s are wearing quite well. I’m impressed so far. I have 19,800 miles on them and still have between 12 and 13/32”.
3665313ef66f072cc51e5582626b705d.jpg

c3c915f82a5a3fdd803e893fb83a7bf4.jpg

09cdaa281144fd544bee6a9765b24514.jpg

2fb7157c6eaa2ad342c92ac1f635b2f3.jpg

I hope we're going to be able to get this thing off-road soon or I'm going to go out of my freaking mind. The most off-road it's seen in the past almost 7 months is the street in front of our subdivision being torn up.
 

Attachments

  • 2fb7157c6eaa2ad342c92ac1f635b2f3.jpg
    2fb7157c6eaa2ad342c92ac1f635b2f3.jpg
    73.7 KB · Views: 0
  • 7e12d9e9c1a93115c4e288089074c908.jpg
    7e12d9e9c1a93115c4e288089074c908.jpg
    74.3 KB · Views: 0
  • 09cdaa281144fd544bee6a9765b24514.jpg
    09cdaa281144fd544bee6a9765b24514.jpg
    81.1 KB · Views: 0
  • c3c915f82a5a3fdd803e893fb83a7bf4.jpg
    c3c915f82a5a3fdd803e893fb83a7bf4.jpg
    83.2 KB · Views: 0
  • 3665313ef66f072cc51e5582626b705d.jpg
    3665313ef66f072cc51e5582626b705d.jpg
    78.3 KB · Views: 0
  • 1aeec662673127aa83abfbbf51bcbf94.jpg
    1aeec662673127aa83abfbbf51bcbf94.jpg
    78 KB · Views: 0
Last edited:

OutlawDrifter

Well-known member
Joined
Jan 20, 2015
Messages
3,895
Location
KS
Yeah that’s true Dan, but still from a materials perspective it doesn’t add up.

Mike, in a past life, I was a Parts Manager at a John Deere dealership.

Certain things like rasp bars on a combine had a different price for right and left side...mirror images of one another mind you...but one was always MORE. Why? Cause they had to be replaced in pairs, captive market.

I think there are a lot of things like that in life! :lol_hitti
 

C_F

ALLIANCE MEMBER
Joined
Jan 21, 2005
Messages
9,675
Location
Utah...SNOW BLOWS!
Yeah, that was definitely an appealing aspect of going to natural gas. Still can't figure out why the NG grill was about $50 more than the propane one. The propane grill requires a large regulator as well as a slide out tray and other components for tank storage where this one does not.:headscrat

Thanks for checking in and checking out the projects.

Huh, I figured it would only be a size change of the burner nozzles, to go from propane to NG. I didn't take into consideration a change in regulator too.

Funny story, if you don't mind. :) One winter back around '88 or so, when my EX & I were just starting out, we got behind in payments with Mountain fuel co. and they shut us off! I couldn't come up with the money to pay them to turn the gas back on, but I could afford to fill up a tall (I think 20 gallon) propane tank I had. :D So I filled that up, and hooked up to our furnace. That was back when the propane tanks had a smaller valve fitting than they do today.
It worked great! After about 60 days of us not paying our bill & not begging them for forgiveness to turn the gas back on in freezing temps, they figured something was up & threatened to take us to court. By then, I had enough to pay our bill off, so OKAY, here's your money! :lol:
Actually, I was kinda glad, I had to fill that tank up every week, and it was getting old. But the rebel in me sure had fun for a while. :thumbup:
 
Last edited:
To avoid these ads, REGISTER NOW!
Top Bottom